VdBench使用手册
- 格式:docx
- 大小:770.83 KB
- 文档页数:11
Webench使用指南简介Webench是一款用于电源和功率管理产品设计的在线工具。
它提供了一系列的工具和资源,帮助工程师们快速设计、评估和优化电源系统。
本篇文章将为您介绍Webench的基本功能和使用指南,帮助您更好地利用这个强大的工具。
功能特点Webench具有以下几个主要功能特点:1.电源设计工具:Webench提供了一系列的电源设计工具,包括DC/DC转换器、线性稳压器、LED驱动器等。
这些工具可以帮助您快速选择合适的器件和设计电路,大大缩短了设计周期。
2.性能评估和仿真:Webench可以对设计的电源系统进行性能评估和仿真。
您可以通过输入电源系统的参数,Webench会自动生成性能指标和波形图,帮助您评估设计的准确性和稳定性。
3.器件库和参数搜索:Webench内置了大量的电源器件库,包括各种型号的电感器、电容器、二极管等。
您可以通过参数搜索功能,快速查找符合要求的器件,并进行比较和选择。
4.设计报告和文档:Webench可以生成详细的设计报告和文档。
您可以将设计参数、性能指标、电路图等信息导出为PDF格式,方便与团队成员共享和交流。
使用步骤下面是使用Webench的基本步骤:1.注册账号:首先,您需要注册一个Webench账号。
在Webench的官方网站上,点击注册按钮,填写必要的信息,完成账号注册。
2.选择器件类型:登录Webench后,您可以选择需要设计的器件类型。
Webench提供了多种类型的电源设计工具,您可以根据需要选择DC/DC转换器、线性稳压器、LED驱动器等。
3.输入设计参数:在选择器件类型后,您需要输入设计的参数。
这些参数包括输入电压、输出电压、负载电流等。
Webench会根据这些参数,自动生成合适的器件和电路方案。
4.选择器件和设计方案:Webench会根据您输入的参数,从内置的器件库中筛选出符合要求的器件。
您可以根据性能指标、价格等因素,选择最适合的器件和设计方案。
vdbench data validation error -回复关于[vdbench数据验证错误]的问题,我将为你解答相关内容。
首先,我们需要了解什么是[vdbench]以及数据验证错误的含义。
[vdbench]是一个用于测试存储系统性能的工具,它能够模拟真实的工作负载并评估系统在不同条件下的性能表现。
数据验证错误是指在使用[vdbench]工具时,发现测试结果与预期不符的情况。
可能出现数据验证错误的原因有很多,下面我将逐步解释。
1. 配置错误:在使用[vdbench]工具时,系统的配置可能存在错误。
这包括存储系统的配置、网络配置、磁盘配置等。
如果其中任何一项配置存在问题,就有可能导致数据验证错误的发生。
2. 负载压力过大:当测试环境中的负载压力过大时,很容易出现数据验证错误。
这是因为系统无法承受太大的压力而导致错误的结果产生。
3. 系统资源限制:某些情况下,系统资源可能受到限制,例如内存、CPU、磁盘空间等。
如果系统资源不足,也有可能导致数据验证错误的出现。
4. 软件bug:[vdbench]作为一个复杂的工具,也有可能存在一些软件bug。
这些bug 可能会导致数据验证错误的发生,尤其是在旧版本的软件中。
解决[vdbench数据验证错误]的步骤如下:1. 检查系统配置:首先,确保系统的所有配置都正确。
查看存储系统、网络和磁盘的配置是否符合要求。
如果有错误,及时进行修正。
2. 分析测试结果:对于发生数据验证错误的测试结果,需要进行详细的分析。
查看错误信息、日志和报告,找出导致错误的原因。
3. 重新测试:如果可能的话,重新进行测试以验证数据验证错误。
确保在测试时使用正确的参数和负载配置,以保证可靠性和准确性。
4. 检查系统资源:检查系统资源是否受到限制。
如果系统资源不足,可能需要优化配置或增加资源。
5. 更新软件版本:如果发现[vdbench]存在已知的bug,建议更新为最新版本的工具。
新版本通常会修复一些已知的问题。
geekbench使用手册
以下是geekbench的使用手册:
1. 下载并安装geekbench:访问geekbench的官方网站,下载并安装最新版本的geekbench。
2. 启动geekbench:安装完成后,打开geekbench应用程序。
3. 选择测试项目:在主界面上,你可以选择不同的测试项目,包括CPU、GPU等。
根据你的需求选择相应的测试项目。
4. 开始测试:点击“运行”按钮开始测试。
测试过程可能需要一些时间,请耐心等待。
5. 查看测试结果:测试完成后,geekbench将显示测试结果。
你可以查看各种性能指标,如单核性能、多核性能、内存带宽等。
6. 比较不同设备:如果你有多台设备,可以使用geekbench来比较它们的性能。
将测试结果保存并上传到geekbench的在线数据库中,与其他设备进行比较。
7. 更新版本:随着时间的推移,geekbench可能会发布新版本。
定期检查并更新到最新版本,以确保获得最新的功能和性能改进。
8. 退出geekbench:完成测试后,点击“退出”按钮关闭geekbench应用程序。
以上是geekbench的使用手册,希望对您有所帮助。
如果您有任何其他问题或需要进一步的帮助,请随时联系我。
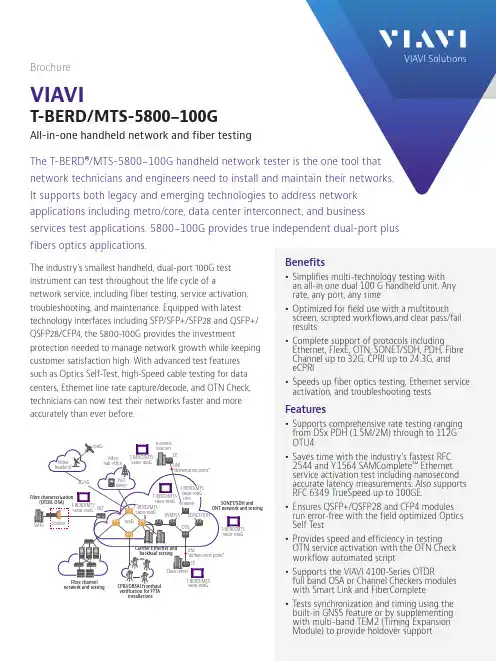
BrochureVIAVIT-BERD/MTS-5800-100GAll-in-one handheld network and fiber testingThe T-BERD®/MTS-5800-100G handheld network tester is the one tool that network technicians and engineers need to install and maintain their networks. It supports both legacy and emerging technologies to address network applications including metro/core, data center interconnect, and business services test applications. 5800-100G provides true independent dual-port plusAll-in-One Handheld ToolThe configurable T-BERD/MTS-5800-100G is the industry’s smallest dual-port 100G handheld test instrument. It can test a wide range of interfaces such as Ethernet, SONET/SDH, OTN, PDH, Fibre Channel, OBSAI, and CPRI.y Compact form factor for easy portability:7 x 9.5 x 3.2 in (17.8 x 24.1 x 8 cm)y Large 7 in multi-touch displayy T ablet-like interface for easy navigation through test information and advanced workflowsy Support of SmartAccess Anywhere providing an easy interface from an Android device or PCy Support of cloud based StrataSync™ for assetmanagement and result-data management Compatible with VIAVI SolutionsFiber Test ToolsMetro/longhaul, business services, and data center technicians can test virtually any interface in a network as well as qualifying fiber plants with one handheld instrument. The T-BERD/MTS-5800-100G is compatible with:y The FiberChek Pro and P5000i microscopes for connector end-face inspection and analysisy MP-Series optical power meters for optical power and loss measurementsy OTDR modules for fiber link characterization and fault finding Smart Link Mapper optical analysis software that displays OTDR results in a simple, icon-based map view for clear diagnostics of detected issues. Also support of FiberComplete for IL, ORL, andbi-directional OTDR tests.y COSA, a CWDM Optical Spectrum Analyzer Optimized for Easy Field Usey Fixed test interfaces eliminate loosepluggable modulesy LEDs indicate plug-ins for testsy A streamlined user interface provides simplepass/fail, green/red resultsy Extended battery life enables longer test timesand offload resultsy Boots up rapidly from power-on to test starty Dual-port operation runs two tests simultaneously, including two 100 G high-speed testsy Expandable with support for additional modules such as the TEM (Timing Expansion Module) for network synchronization and timing Troubleshooting with Optics Self-Test/Cable TestOptics Self-T est is a workflow tool to verify and troubleshoot performance issues related to high-speed optics. It is especially well suited to field environments and helps isolate pluggable optics issues. This easy-to-use test integrates items such as a bit error theory algorithm, clock offset verification, and per-lambda power monitoring. Coupled with RS-FEC, it offerspre-FEC and post-FEC testing.Mini-BNCT3/STS-1eE3/E4RJ48cT1/E1RJ4510/100/10002x SFP28 /SFP+Up to 32G2x QSFP28 / QSFP+40GE/100GEOTU4 / OTU31x CFP4100GE/OTU41 PPS Ref In2x SFP+/SFP281-10-25G Ethernet LAN/WANOTN 1-1e/2/2eSTM-1-64 & OC3-192Fibre Channel: 1,2,4,8,10,16G, 32G FCCPRI 614M – 10.1, 24.3G5800-100G hardware supports multipleindependent concurrent applicationsAOC/DAC/Breakout Cable TestCable T est is tailormade to test high-speed Active Optical Cables (AOC), Direct Attach Copper (DAC), and breakout cables inside the data center. Such cables may be the cause of errors due to defects such as reversed polarities or squeezed fibers. Errors can be identified before cables are laid avoiding extra effort to replace the cable. The 5800-100G provides a slick built-in script with test report which captures the cable serial number and can test multiple cables in succession withjob manager.y TrueSpeed™ — an automated, RFC 6349-based TCP test that can save up to 25% on OpEx and reveals the causes of service degradation such as slow file downloads; this test suite especially helps eliminate finger pointingy Loop protection mode in all functions. Especially suitable when testing against a centralized rackmounted MAP-2100 unit.More Ethernet Testing5800-100G provides further depth to test Ethernet with additional functionality:y RS-FEC testing for interfaces such as IEEE 802.3 SR4 and 25GE, PSM4, CWDM4 and KP4 FEC for 50GE. Required for data center and short reach testingy Capture and decode — available at all Ethernet rates; includes decodes with integrated Wireshark and the VIAVI built-in J-Mentor troubleshooting tool providing post-analysis problem identificationy IPv4 and IPv6 support including RFC 2544 and Y.1564 SAMCompletey16 streams of traffic and 16,000-byte frame supporty Layer 2 transparency testing with J-Proof — confirms end-to-end transparency between two endpoints anywhere in a network using control plane protocol data unit (PDU) information; examples include messages such as STP, GARP, and Cisco® CDPy Operator lab evaluation tools — includes functionality such as skew injection, and per-lane alarms/errors injection, and reportingy Ethernet Service Disruption with pass/fail results and with multi-tier triggers and detailed logsy Service OAM and layer 4 testing up to 100GbpsTime-Saving Ethernet Service ActivationT est more quickly and efficiently using automatedtests combined into one integrated module coveringelectrical, Gigabit optical, 10 Gbps, 25Gbps, 40 Gbps,50 Gbps, and 100 Gbps Ethernet:y QuickCheck — a fast, automated test that validatesend-to-end configurations; runs as a pre-check testbefore RFC 2544 or Y.1564 or as a stand-alone testy Enhanced RFC 2544 — an automated turn-up testwith built-in time efficiency for validating keyperformance indicators (KPIs), concurrently measuringthroughput, frame delay, and frame delay variation inaddition to frame loss and committed burst size (CBS)y Y.1564 SAMComplete™ — An automated serviceverification test that speeds the verification ofmultiple classes of service (COS) or connections basedon SLAsy High-accuracy latency — integrated into RFC 2544and Y.1564 SAMComplete; CSAM provides 10 nsresolution and an accuracy of ±65 ns or better at100 GE and offload resultsNo CP or user experienceY.1564 SAMCompleteEnhanced RFC 2544 RFC 6349-based TrueSpeed™Per-lane ResultsOTN Service Activation with OTN CheckThe unique VIAVI OTN Check tool provides greatefficiencies in testing OTN services. This workflowtool automates the process of turning up a new OTNservice by integrating key tests that include OTNpayload verification, round-trip delay, and overheadtransparency testing including encryption testing.It is offered at all OTN line rates. OTN Check greatlysimplifies the process for users and generates a reportwith pass/fail results. Functionality includesthe following:y RFC 2544 for Ethernet clients in OTNy Complete ODU multiplexing mappings with nestedODU functionality including ODU0, ODU1, ODU2/2e,ODU3, and ODUFLEX.y FEC testing for correctable and uncorrectable errorsy All 6 TCMs concurrentlyOTN service disruptionStrataSync — Empower Y our AssetsStrataSync is a hosted, cloud-enabled solution for managing assets, configurations, and test data on VIAVI instruments. It ensures that all instrument software is current and the latest options are installed. StrataSync enables inventory management, test result consolidation, and performance data distribution anywhere with browser-based ease. It also improves technician and instrument efficiency. StrataSync manages and tracks test instruments, collects and analyzes results from the entire network, and helps train and inform the workforce.Complete Fiber Channel TestingT-BERD/MTS-5800-100G supports all fibre channel rates across dual ports. This includes 32GFC at 28.05Gbps. Support includes:y Line rate traffic generation with buffer-to-buffer credit flow controly RFC 2544 adapted for Fibre Channel y Bit Error Rate, frame loss, and latency testingMobility Transport TestingA suite of CPRI, at all rates up to CPRI 10 running at 24.3Gbps, OBSAI, and eCPRI is available on the 5800-100G.Support and testing of eCPRI, SyncE, and 1588/PTP up to 25GE.Part of the Leading T-BERD/MTS Test PortfolioStrataSyncCommon application base - same user interface + same results+ same methods and procedures© 2021 VIAVI Solutions Inc.Product specifications and descriptions in this document are subject to change without notice.Patented as described at /patentstberd-mts5800100g-gov-br-tfs-tm-ae 30191127 907 1121Contact Us+1 844 GO VIAVI (+1 844 468 4284)To reach the VIAVI office nearest you, visit /contactVIAVI Solutions。
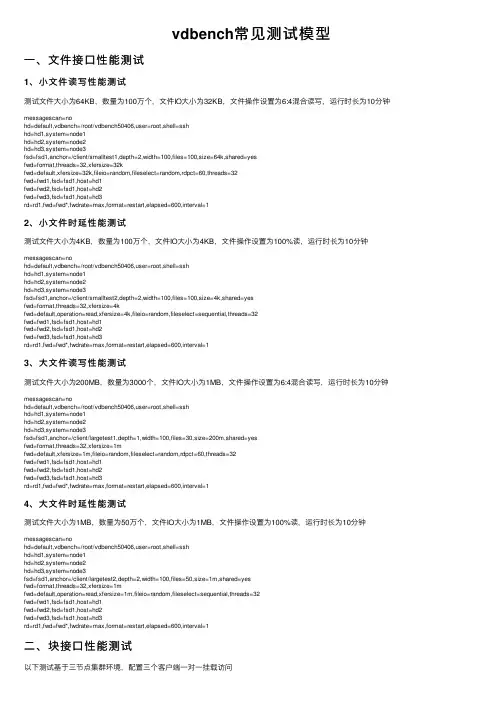
VTUNE使用说明201203061.运行环境Windows或Linux,下载不同版本2.运行方式主要介绍Linux下执行方式,主要有两种命令:amplxe-cl –collect hotspots ./test //启动程序并采样amplxe-cl -collect hotspots -duration 60 //启动程序后,对全系统采样60秒说明:1.amplxe-cl (vtune command line 命令)2.–collect表示采集信息,3.hotspots为选项可更改,表示要采集的事件集合名称,经常使用的有hotspots和general。
可以使用其他名称,也可以自己配置事件并命名。
详详细选项执行amplxe-cl –collect-list查询3.运行结果在命令运行的目录下生成一个r00*****文件如下图所示,采集后的数据自动保存在该文件中,并按生成先后顺序自动命名排放3.查看方式可以在windows下用windows版图形界面查看,将上述的结果文件从服务器拷贝到本机还可以在linux下执行amplxe-gui启动图形界面查看,两种方法大同小异。
下面介绍一种4.查看结果1)运行amplxe-gui服务器上启动图形界面如下图启动时界面2)File->open->result3)选择之前运行的结果结果文件夹中的*.amplxe为可读图形数据,打开3)显示结果界面如图各选项意义见help5.高级配置功能1)运行amplxe-gui,新建工程2)建一个分析的工程,打开如图3)此时三角符号enable如图点中三角4)进入分析类型界面选择analysis type下方第二个按钮,基于light weights hotspots新建一个分析类型配置采样事件5)新建类型显示在custom analysis中选择add event 配置想要的硬件事件,并给个合适的命名。
6)保存关闭,可用amplxe-cl –collect-list查看自己定义的类型,使用与hotspots等类型相同。

Cadence 使用参考手册邓海飞微电子学研究所设计室2000年7月目录概述 (1)1.1 Cadence概述 (1)1.2 ASIC设计流程 (1)第一章Cadence 使用基础 (5)2.1 Cadence 软件的环境设置 (5)2.2 Cadence软件的启动方法 (10)2.3库文件的管理 (12)2.4文件格式的转化 (13)2.5 怎样使用在线帮助 (13)2.6 本手册的组成 (14)第二章Verilog-XL 的介绍 (15)3. 1 环境设置 (15)3.2 Verilog-XL的启动 (15)3.3 Verilog-XL的界面 (17)3.4 Verilog-XL的使用示例 (18)3.5 Verilog-XL的有关帮助文件 (19)第四章电路图设计及电路模拟 (21)4.1 电路图设计工具Composer (21)4.1.1 设置 (21)4.1.2 启动 (22)4.1.3 用户界面及使用方法 (22)4.1.4 使用示例 (24)4.1.5 相关在线帮助文档 (24)4.2 电路模拟工具Analog Artist (24)4.2.1 设置 (24)4.2.2 启动 (25)4.2.3 用户界面及使用方法 (25)4.2.5 相关在线帮助文档 (25)第五章自动布局布线 (27)5.1 Cadence中的自动布局布线流程 (27)5.2 用AutoAbgen进行自动布局布线库设计 (28)第六章版图设计及其验证 (30)6.1 版图设计大师Virtuoso Layout Editor (30)6.1.1 设置 (30)6.1.2 启动 (30)6.1.3 用户界面及使用方法 (31)6.1.4 使用示例 (31)6.1.5 相关在线帮助文档 (32)6.2 版图验证工具Dracula (32)6.2.1 Dracula使用介绍 (32)6.2.2 相关在线帮助文档 (33)第七章skill语言程序设计 (34)7.1 skill语言概述 (34)7.2 skill语言的基本语法 (34)7.3 Skill语言的编程环境 (34)7.4面向工具的skill语言编程 (35)附录1 技术文件及显示文件示例 (60)附录2 Verilog-XL实例文件 (72)1.Test_memory.v (72)2.SRAM256X8.v (73)3.ram_sy1s_8052 (79)4.TSMC库文件 (84)附录3 Dracula 命令文件 (359)概述作为流行的EDA工具之一,Cadence一直以来都受到了广大EDA工程师的青睐。
vdbench常见测试模型⼀、⽂件接⼝性能测试1、⼩⽂件读写性能测试测试⽂件⼤⼩为64KB,数量为100万个,⽂件IO⼤⼩为32KB,⽂件操作设置为6:4混合读写,运⾏时长为10分钟messagescan=nohd=default,vdbench=/root/vdbench50406,user=root,shell=sshhd=hd1,system=node1hd=hd2,system=node2hd=hd3,system=node3fsd=fsd1,anchor=/client/smalltest1,depth=2,width=100,files=100,size=64k,shared=yesfwd=format,threads=32,xfersize=32kfwd=default,xfersize=32k,fileio=random,fileselect=random,rdpct=60,threads=32fwd=fwd1,fsd=fsd1,host=hd1fwd=fwd2,fsd=fsd1,host=hd2fwd=fwd3,fsd=fsd1,host=hd3rd=rd1,fwd=fwd*,fwdrate=max,format=restart,elapsed=600,interval=12、⼩⽂件时延性能测试测试⽂件⼤⼩为4KB,数量为100万个,⽂件IO⼤⼩为4KB,⽂件操作设置为100%读,运⾏时长为10分钟messagescan=nohd=default,vdbench=/root/vdbench50406,user=root,shell=sshhd=hd1,system=node1hd=hd2,system=node2hd=hd3,system=node3fsd=fsd1,anchor=/client/smalltest2,depth=2,width=100,files=100,size=4k,shared=yesfwd=format,threads=32,xfersize=4kfwd=default,operation=read,xfersize=4k,fileio=random,fileselect=sequential,threads=32fwd=fwd1,fsd=fsd1,host=hd1fwd=fwd2,fsd=fsd1,host=hd2fwd=fwd3,fsd=fsd1,host=hd3rd=rd1,fwd=fwd*,fwdrate=max,format=restart,elapsed=600,interval=13、⼤⽂件读写性能测试测试⽂件⼤⼩为200MB,数量为3000个,⽂件IO⼤⼩为1MB,⽂件操作设置为6:4混合读写,运⾏时长为10分钟messagescan=nohd=default,vdbench=/root/vdbench50406,user=root,shell=sshhd=hd1,system=node1hd=hd2,system=node2hd=hd3,system=node3fsd=fsd1,anchor=/client/largetest1,depth=1,width=100,files=30,size=200m,shared=yesfwd=format,threads=32,xfersize=1mfwd=default,xfersize=1m,fileio=random,fileselect=random,rdpct=60,threads=32fwd=fwd1,fsd=fsd1,host=hd1fwd=fwd2,fsd=fsd1,host=hd2fwd=fwd3,fsd=fsd1,host=hd3rd=rd1,fwd=fwd*,fwdrate=max,format=restart,elapsed=600,interval=14、⼤⽂件时延性能测试测试⽂件⼤⼩为1MB,数量为50万个,⽂件IO⼤⼩为1MB,⽂件操作设置为100%读,运⾏时长为10分钟messagescan=nohd=default,vdbench=/root/vdbench50406,user=root,shell=sshhd=hd1,system=node1hd=hd2,system=node2hd=hd3,system=node3fsd=fsd1,anchor=/client/largetest2,depth=2,width=100,files=50,size=1m,shared=yesfwd=format,threads=32,xfersize=1mfwd=default,operation=read,xfersize=1m,fileio=random,fileselect=sequential,threads=32fwd=fwd1,fsd=fsd1,host=hd1fwd=fwd2,fsd=fsd1,host=hd2fwd=fwd3,fsd=fsd1,host=hd3rd=rd1,fwd=fwd*,fwdrate=max,format=restart,elapsed=600,interval=1⼆、块接⼝性能测试以下测试基于三节点集群环境,配置三个客户端⼀对⼀挂载访问1. 存储系统以4T划分所有可⽤存储空间的50%,不⾜4T的空间按实际⼤⼩划分卷,存储系统中所有已划分空间按1024k块⼤⼩写满注:单个硬盘⼤⼩为3800000MB,当前集群容量为124TB,集群可⽤容量为62,当前可⽤存储空间的50%⼤⼩为31TB2. 划分7个4TB的LUN,1个3TB的LUN,三个集群节点各出⼀个target,平分这8个LUN,客户端⼀对⼀进⾏target连接访问,各客户端节点使⽤下⾯的fio测试命令进⾏数据写⼊3. 在性能测试的时候,进⾏存储定义SD的时候,三个客户端按照2个4TB、2个4TB&1个3TB、3个4TBLUN数量⽐例进⾏LUN挂载,进⾏预填充数据之后,对这部分已挂载LUN重新进⾏性能数据测试进⾏⼯作负载定义WD的时候,对于每个⼯作负载定义中sd的定义,则写sd*即可,届时测试的时候,vdbench会根据之前存储定义部分的LUN进⾏测试#fio预填充数据使⽤以下命令[global]ioengine=aioinvalidate=0 # mandatoryrw=writedirect=1bs=1024kgroup_reporting[test1]iodepth=32size=4096gfilename=/dev/sdb[test2]iodepth=32size=4096gfilename=/dev/sdc1、8k数据块随机读写性能测试8K块⼤⼩随机读写,读写⽐例为7:3,测试数据量为400Gmessagescan=nohd=default,vdbench=/root/vdbench50406,user=root,shell=sshhd=hd1,system=node112hd=hd2,system=node113hd=hd3,system=node114sd=sd1,hd=hd1,lun=/dev/sdb,openflags=o_direct,threads=6sd=sd2,hd=hd1,lun=/dev/sdc,openflags=o_direct,threads=6sd=sd3,hd=hd2,lun=/dev/sdb,openflags=o_direct,threads=6sd=sd4,hd=hd2,lun=/dev/sdc,openflags=o_direct,threads=6sd=sd5,hd=hd2,lun=/dev/sdd,openflags=o_direct,threads=6sd=sd6,hd=hd3,lun=/dev/sdb,openflags=o_direct,threads=6sd=sd7,hd=hd3,lun=/dev/sdc,openflags=o_direct,threads=6sd=sd8,hd=hd3,lun=/dev/sdd,openflags=o_direct,threads=6wd=wd1,sd=sd*,seekpct=100,rdpct=70,xfersize=8krd=rd1,wd=wd1,iorate=max,elapse=604800,maxdata=400GB,interval=5,warmup=302、1024k数据块顺序读写性能测试1M块⼤⼩随机读写,读写⽐例为7:3,测试数据量为400Gmessagescan=nohd=default,vdbench=/root/vdbench50406,user=root,shell=sshhd=hd1,system=node112hd=hd2,system=node113hd=hd3,system=node114sd=sd1,hd=hd1,lun=/dev/sdb,openflags=o_direct,threads=6sd=sd2,hd=hd1,lun=/dev/sdc,openflags=o_direct,threads=6sd=sd3,hd=hd2,lun=/dev/sdb,openflags=o_direct,threads=6sd=sd4,hd=hd2,lun=/dev/sdc,openflags=o_direct,threads=6sd=sd5,hd=hd2,lun=/dev/sdd,openflags=o_direct,threads=6sd=sd6,hd=hd3,lun=/dev/sdb,openflags=o_direct,threads=6sd=sd7,hd=hd3,lun=/dev/sdc,openflags=o_direct,threads=6sd=sd8,hd=hd3,lun=/dev/sdd,openflags=o_direct,threads=6wd=wd1,sd=sd*,seekpct=0,rdpct=70,xfersize=1024krd=rd1,wd=wd1,iorate=max,elapse=604800,maxdata=400GB,interval=5,warmup=303、综合模型读写性能测试messagescan=nohd=default,vdbench=/root/vdbench50406,user=root,shell=sshhd=hd1,system=node112hd=hd2,system=node113hd=hd3,system=node114sd=sd1,hd=hd1,lun=/dev/sdb,openflags=o_direct,threads=6sd=sd2,hd=hd1,lun=/dev/sdc,openflags=o_direct,threads=6sd=sd3,hd=hd2,lun=/dev/sdb,openflags=o_direct,threads=6sd=sd4,hd=hd2,lun=/dev/sdc,openflags=o_direct,threads=6sd=sd5,hd=hd2,lun=/dev/sdd,openflags=o_direct,threads=6sd=sd6,hd=hd3,lun=/dev/sdb,openflags=o_direct,threads=6sd=sd7,hd=hd3,lun=/dev/sdc,openflags=o_direct,threads=6sd=sd8,hd=hd3,lun=/dev/sdd,openflags=o_direct,threads=6wd=wd1,sd=sd*,seekpct=100,rdpct=100,xfersize=8k,skew=40wd=wd2,sd=sd*,seekpct=100,rdpct=0,xfersize=8k,skew=10wd=wd3,sd=sd*,seekpct=100,rdpct=100,xfersize=1024k,skew=40wd=wd4,sd=sd*,seekpct=100,rdpct=0,xfersize=1024k,skew=10rd=rd1,wd=wd*,iorate=max,elapse=604800,maxdata=400GB,interval=5,warmup=304、OLTP模型读写性能测试messagescan=nohd=default,vdbench=/root/vdbench50406,user=root,shell=sshhd=hd1,system=node112hd=hd2,system=node113hd=hd3,system=node114sd=sd1,hd=hd1,lun=/dev/sdb,openflags=o_direct,threads=6sd=sd2,hd=hd1,lun=/dev/sdc,openflags=o_direct,threads=6sd=sd3,hd=hd2,lun=/dev/sdb,openflags=o_direct,threads=6sd=sd4,hd=hd2,lun=/dev/sdc,openflags=o_direct,threads=6sd=sd5,hd=hd2,lun=/dev/sdd,openflags=o_direct,threads=6sd=sd6,hd=hd3,lun=/dev/sdb,openflags=o_direct,threads=6sd=sd7,hd=hd3,lun=/dev/sdc,openflags=o_direct,threads=6sd=sd8,hd=hd3,lun=/dev/sdd,openflags=o_direct,threads=6wd=wd1,sd=sd*,seekpct=100,rdpct=100,xfersize=8k,skew=20wd=wd2,sd=sd*,seekpct=100,rdpct=100,xfersize=4k,skew=45wd=wd3,sd=sd*,seekpct=100,rdpct=0,xfersize=8k,skew=15wd=wd4,sd=sd*,seekpct=0,rdpct=100,xfersize=64k,skew=10wd=wd5,sd=sd*,seekpct=0,rdpct=0,xfersize=64k,skew=10rd=rd1,wd=wd*,iorate=max,elapse=604800,maxdata=400GB,interval=5,warmup=305、OLAP模型读写性能测试messagescan=nohd=default,vdbench=/root/vdbench50406,user=root,shell=sshhd=hd1,system=node112hd=hd2,system=node113hd=hd3,system=node114sd=sd1,hd=hd1,lun=/dev/sdb,openflags=o_direct,threads=6sd=sd2,hd=hd1,lun=/dev/sdc,openflags=o_direct,threads=6sd=sd3,hd=hd2,lun=/dev/sdb,openflags=o_direct,threads=6sd=sd4,hd=hd2,lun=/dev/sdc,openflags=o_direct,threads=6sd=sd5,hd=hd2,lun=/dev/sdd,openflags=o_direct,threads=6sd=sd6,hd=hd3,lun=/dev/sdb,openflags=o_direct,threads=6sd=sd7,hd=hd3,lun=/dev/sdc,openflags=o_direct,threads=6sd=sd8,hd=hd3,lun=/dev/sdd,openflags=o_direct,threads=6wd=wd1,sd=sd*,seekpct=100,rdpct=100,xfersize=4k,skew=15wd=wd2,sd=sd*,seekpct=100,rdpct=0,xfersize=4k,skew=5wd=wd3,sd=sd*,seekpct=0,rdpct=100,xfersize=64k,skew=70wd=wd4,sd=sd*,seekpct=0,rdpct=0,xfersize=64k,skew=10rd=rd1,wd=wd*,iorate=max,elapse=604800,maxdata=400GB,interval=5,warmup=306、8k数据块随机读写时延测试messagescan=nohd=default,vdbench=/root/vdbench50406,user=root,shell=sshhd=hd1,system=node112hd=hd2,system=node113hd=hd3,system=node114sd=sd1,hd=hd1,lun=/dev/sdb,openflags=o_direct,threads=6sd=sd2,hd=hd1,lun=/dev/sdc,openflags=o_direct,threads=6sd=sd3,hd=hd2,lun=/dev/sdb,openflags=o_direct,threads=6sd=sd4,hd=hd2,lun=/dev/sdc,openflags=o_direct,threads=6sd=sd5,hd=hd2,lun=/dev/sdd,openflags=o_direct,threads=6sd=sd6,hd=hd3,lun=/dev/sdb,openflags=o_direct,threads=6sd=sd7,hd=hd3,lun=/dev/sdc,openflags=o_direct,threads=6sd=sd8,hd=hd3,lun=/dev/sdd,openflags=o_direct,threads=6wd=wd1,sd=sd*,seekpct=100,rdpct=70,xfersize=8krd=rd1,wd=wd1,iorate=max{可⾃⾏调整},elapse=604800,maxdata=400GB,interval=5,warmup=30三、系统测试1、【⽂件】4K随机读写测试1.1、4K随机写测试⽂件⼤⼩为64KB,数量为144万个,⽂件IO⼤⼩为4KB,⽂件操作设置为100%写,运⾏时长为10分钟messagescan=nohd=default,vdbench=/root/vdbench50406,user=root,shell=sshhd=hd1,system=node1hd=hd2,system=node2hd=hd3,system=node3fsd=fsd1,anchor=/client/smalltest01,depth=2,width=120,files=100,size=64k,shared=yesfwd=format,threads=32,xfersize=4kfwd=default,operation=write,xfersize=4k,fileio=random,fileselect=random,threads=32fwd=fwd1,fsd=fsd1,host=hd1fwd=fwd2,fsd=fsd1,host=hd2fwd=fwd3,fsd=fsd1,host=hd3rd=rd1,fwd=fwd*,fwdrate=max,format=restart,elapsed=600,interval=11.2、4K随机读测试⽂件⼤⼩为64KB,数量为144万个,⽂件IO⼤⼩为4KB,⽂件操作设置为100%读,运⾏时长为10分钟messagescan=nohd=default,vdbench=/root/vdbench50406,user=root,shell=sshhd=hd1,system=node1hd=hd2,system=node2hd=hd3,system=node3fsd=fsd1,anchor=/client/smalltest02,depth=2,width=120,files=100,size=64k,shared=yesfwd=format,threads=32,xfersize=4kfwd=default,operation=read,xfersize=4k,fileio=random,fileselect=random,threads=32fwd=fwd1,fsd=fsd1,host=hd1fwd=fwd2,fsd=fsd1,host=hd2fwd=fwd3,fsd=fsd1,host=hd3rd=rd1,fwd=fwd*,fwdrate=max,format=restart,elapsed=600,interval=11.3、4K顺序混合读写测试⽂件⼤⼩为4KB,数量为2048个,数据量1T,⽂件IO⼤⼩为4KB,⽂件操作设置为70%读,运⾏时长为5分钟messagescan=nohd=default,vdbench=/root/vdbench/vdbench50406,user=root,shell=sshhd=hd1,system=node13hd=hd2,system=node14hd=hd3,system=node15hd=hd4,system=node16hd=hd5,system=node17hd=hd6,system=node18hd=hd7,system=node19hd=hd8,system=node20fsd=default,openflags=directio,depth=1,width=1,files=2048,size=512MB,shared=yesfsd=fsd1,anchor=/client/4ksrfwd=format,threads=64,xfersize=4kfwd=default,xfersize=4k,fileio=sequential,fileselect=sequential,threads=64fwd=fwd1,fsd=fsd1,host=hd1fwd=fwd2,fsd=fsd1,host=hd2fwd=fwd3,fsd=fsd1,host=hd3fwd=fwd4,fsd=fsd1,host=hd4fwd=fwd5,fsd=fsd1,host=hd5fwd=fwd6,fsd=fsd1,host=hd6fwd=fwd7,fsd=fsd1,host=hd7fwd=fwd8,fsd=fsd1,host=hd8rd=rd1,fwd=fwd*,operation=read,forrdpct=70,fwdrate=max,format=restart,warmup=30,elapsed=300,interval=101.4、4K随机混合读写测试⽂件⼤⼩为4KB,数量为2048个,数据量1T,⽂件IO⼤⼩为4KB,⽂件操作设置为70%读,运⾏时长为5分钟messagescan=nohd=default,vdbench=/root/vdbench/vdbench50406,user=root,shell=sshhd=hd1,system=node13hd=hd2,system=node14hd=hd3,system=node15hd=hd4,system=node16hd=hd5,system=node17hd=hd6,system=node18hd=hd7,system=node19hd=hd8,system=node20fsd=fsd1,anchor=/client/4ksr,depth=1,width=1,files=2048,size=512MB,openflags=directio,shared=yesfwd=format,threads=64,xfersize=4kfwd=default,operation=read,rdpct=70,xfersize=4k,fileio=random,fileselect=random,threads=64fwd=fwd1,fsd=fsd1,host=hd1fwd=fwd2,fsd=fsd1,host=hd2fwd=fwd3,fsd=fsd1,host=hd3fwd=fwd4,fsd=fsd1,host=hd4fwd=fwd5,fsd=fsd1,host=hd5fwd=fwd6,fsd=fsd1,host=hd6fwd=fwd7,fsd=fsd1,host=hd7fwd=fwd8,fsd=fsd1,host=hd8rd=rd1,fwd=fwd*,fwdrate=max,format=restart,warmup=30,elapsed=300,interval=102、【⽂件】1M顺序读写测试2.1、1M顺序写测试⽂件⼤⼩为200MB,数量为3000个,⽂件IO⼤⼩为1MB,⽂件操作设置为100%写,运⾏时长为10分钟messagescan=nohd=default,vdbench=/root/vdbench50406,user=root,shell=sshhd=hd1,system=node1hd=hd2,system=node2hd=hd3,system=node3fsd=fsd1,anchor=/client/largetest01,depth=1,width=100,files=30,size=200m,shared=yesfwd=format,threads=32,xfersize=1mfwd=default,operation=write,xfersize=1m,fileio=sequential,fileselect=sequential,threads=32fwd=fwd1,fsd=fsd1,host=hd1fwd=fwd2,fsd=fsd1,host=hd2fwd=fwd3,fsd=fsd1,host=hd3rd=rd1,fwd=fwd*,fwdrate=max,format=restart,elapsed=600,interval=12.2、1M顺序读测试⽂件⼤⼩为200MB,数量为3000个,⽂件IO⼤⼩为1MB,⽂件操作设置为100%读,运⾏时长为10分钟messagescan=nohd=default,vdbench=/root/vdbench50406,user=root,shell=sshhd=hd1,system=node1hd=hd2,system=node2hd=hd3,system=node3fsd=fsd1,anchor=/client/largetest02,depth=1,width=100,files=30,size=200m,shared=yesfwd=format,threads=32,xfersize=1mfwd=default,operation=read,xfersize=1m,fileio=sequential,fileselect=sequential,threads=32fwd=fwd1,fsd=fsd1,host=hd1fwd=fwd2,fsd=fsd1,host=hd2fwd=fwd3,fsd=fsd1,host=hd3rd=rd1,fwd=fwd*,fwdrate=max,format=restart,elapsed=600,interval=1==========块测试数据预填步骤:以下测试基于三节点集群环境,配置三个客户端⼀对⼀挂载访问1. 存储系统以4T划分所有可⽤存储空间的50%,不⾜4T的空间按实际⼤⼩划分卷,存储系统中所有已划分空间按1024k块⼤⼩写满注:单个硬盘⼤⼩为5.4T,当前集群容量为194TB,集群可⽤容量为97TB,当前可⽤存储空间的50%⼤⼩为48TB2. 划分12个4TB的LUN,三个集群节点各出⼀个target,平分这12个LUN,客户端⼀对⼀进⾏target连接访问,各客户端节点使⽤下⾯的fio测试命令进⾏数据写⼊3. 在性能测试的时候,进⾏存储定义SD的时候,三个客户端按照单客户端4个4TLUN的数量⽐例进⾏LUN挂载,进⾏预填充数据之后,对这部分已挂载LUN重新进⾏性能数据测试进⾏⼯作负载定义WD的时候,对于每个⼯作负载定义中sd的定义,则写sd*即可,届时测试的时候,vdbench会根据之前存储定义部分的LUN进⾏测试#fio预填充数据使⽤以下命令[global]ioengine=aioinvalidate=0 # mandatoryrw=writedirect=1bs=1024kgroup_reporting[test1]iodepth=32size=4096gfilename=/dev/sdd[test2]iodepth=32size=4096gfilename=/dev/sde[test3]iodepth=32size=4096gfilename=/dev/sdf[test4]iodepth=32size=4096gfilename=/dev/sdg3、【块】4K随机读写测试3.1、4K随机写messagescan=nohd=default,vdbench=/root/vdbench50406,user=root,shell=sshhd=hd1,system=node1hd=hd2,system=node2hd=hd3,system=node3sd=sd1,hd=hd1,lun=/dev/sdd,openflags=o_direct,threads=8sd=sd2,hd=hd1,lun=/dev/sde,openflags=o_direct,threads=8sd=sd3,hd=hd1,lun=/dev/sdf,openflags=o_direct,threads=8sd=sd4,hd=hd1,lun=/dev/sdg,openflags=o_direct,threads=8sd=sd5,hd=hd2,lun=/dev/sdd,openflags=o_direct,threads=8sd=sd6,hd=hd2,lun=/dev/sde,openflags=o_direct,threads=8sd=sd7,hd=hd2,lun=/dev/sdf,openflags=o_direct,threads=8sd=sd8,hd=hd2,lun=/dev/sdg,openflags=o_direct,threads=8sd=sd9,hd=hd3,lun=/dev/sdd,openflags=o_direct,threads=8sd=sd10,hd=hd3,lun=/dev/sde,openflags=o_direct,threads=8sd=sd11,hd=hd3,lun=/dev/sdf,openflags=o_direct,threads=8sd=sd12,hd=hd3,lun=/dev/sdg,openflags=o_direct,threads=8wd=wd1,sd=sd*,seekpct=100,rdpct=0,xfersize=4krd=rd1,wd=wd1,iorate=max,elapse=604800,maxdata=200GB,interval=5,warmup=30 3.2、4K随机读messagescan=nohd=default,vdbench=/root/vdbench50406,user=root,shell=sshhd=hd1,system=node1hd=hd2,system=node2hd=hd3,system=node3sd=sd1,hd=hd1,lun=/dev/sdd,openflags=o_direct,threads=8sd=sd2,hd=hd1,lun=/dev/sde,openflags=o_direct,threads=8sd=sd3,hd=hd1,lun=/dev/sdf,openflags=o_direct,threads=8sd=sd4,hd=hd1,lun=/dev/sdg,openflags=o_direct,threads=8sd=sd5,hd=hd2,lun=/dev/sdd,openflags=o_direct,threads=8sd=sd6,hd=hd2,lun=/dev/sde,openflags=o_direct,threads=8sd=sd7,hd=hd2,lun=/dev/sdf,openflags=o_direct,threads=8sd=sd8,hd=hd2,lun=/dev/sdg,openflags=o_direct,threads=8sd=sd9,hd=hd3,lun=/dev/sdd,openflags=o_direct,threads=8sd=sd10,hd=hd3,lun=/dev/sde,openflags=o_direct,threads=8sd=sd11,hd=hd3,lun=/dev/sdf,openflags=o_direct,threads=8sd=sd12,hd=hd3,lun=/dev/sdg,openflags=o_direct,threads=8wd=wd1,sd=sd*,seekpct=100,rdpct=100,xfersize=4krd=rd1,wd=wd1,iorate=max,elapse=604800,maxdata=200GB,interval=5,warmup=30 4、【块】1M顺序读写测试4.1、1M顺序写messagescan=nohd=default,vdbench=/root/vdbench50406,user=root,shell=sshhd=hd1,system=node1hd=hd2,system=node2hd=hd3,system=node3sd=sd1,hd=hd1,lun=/dev/sdd,openflags=o_direct,threads=8sd=sd2,hd=hd1,lun=/dev/sde,openflags=o_direct,threads=8sd=sd3,hd=hd1,lun=/dev/sdf,openflags=o_direct,threads=8sd=sd4,hd=hd1,lun=/dev/sdg,openflags=o_direct,threads=8sd=sd5,hd=hd2,lun=/dev/sdd,openflags=o_direct,threads=8sd=sd6,hd=hd2,lun=/dev/sde,openflags=o_direct,threads=8sd=sd7,hd=hd2,lun=/dev/sdf,openflags=o_direct,threads=8sd=sd8,hd=hd2,lun=/dev/sdg,openflags=o_direct,threads=8sd=sd9,hd=hd3,lun=/dev/sdd,openflags=o_direct,threads=8sd=sd10,hd=hd3,lun=/dev/sde,openflags=o_direct,threads=8sd=sd11,hd=hd3,lun=/dev/sdf,openflags=o_direct,threads=8sd=sd12,hd=hd3,lun=/dev/sdg,openflags=o_direct,threads=8wd=wd1,sd=sd*,seekpct=0,rdpct=0,xfersize=1Mrd=rd1,wd=wd1,iorate=max,elapse=604800,maxdata=200GB,interval=5,warmup=30 4.2、1M顺序读messagescan=nohd=default,vdbench=/root/vdbench50406,user=root,shell=sshhd=hd1,system=node1hd=hd2,system=node2hd=hd3,system=node3sd=sd1,hd=hd1,lun=/dev/sdd,openflags=o_direct,threads=8sd=sd2,hd=hd1,lun=/dev/sde,openflags=o_direct,threads=8sd=sd3,hd=hd1,lun=/dev/sdf,openflags=o_direct,threads=8sd=sd4,hd=hd1,lun=/dev/sdg,openflags=o_direct,threads=8sd=sd5,hd=hd2,lun=/dev/sdd,openflags=o_direct,threads=8sd=sd6,hd=hd2,lun=/dev/sde,openflags=o_direct,threads=8sd=sd7,hd=hd2,lun=/dev/sdf,openflags=o_direct,threads=8sd=sd8,hd=hd2,lun=/dev/sdg,openflags=o_direct,threads=8sd=sd9,hd=hd3,lun=/dev/sdd,openflags=o_direct,threads=8sd=sd10,hd=hd3,lun=/dev/sde,openflags=o_direct,threads=8sd=sd11,hd=hd3,lun=/dev/sdf,openflags=o_direct,threads=8sd=sd12,hd=hd3,lun=/dev/sdg,openflags=o_direct,threads=8wd=wd1,sd=sd*,seekpct=0,rdpct=100,xfersize=1Mrd=rd1,wd=wd1,iorate=max,elapse=604800,maxdata=200GB,interval=5,warmup=305、⼤⽂件稳定性测试5.1、集采稳定性测试7x24⼩时写⼊过程集群未出现写⼊异常,且未出现低于平均写⼊速度50%的情况messagescan=nohd=default,vdbench=/root/vd,user=root,shell=sshhd=hd1,system=node1hd=hd2,system=node2hd=hd3,system=node3fsd=default,depth=1,width=10,files=128,size=512M,shared=no,openflag=o_directfsd=fsd1,anchor=/mnt/client1fsd=fsd2,anchor=/mnt/client2fsd=fsd3,anchor=/mnt/client3fwd=default,rdpct=60,xfersizes=2M,fileio=random,fileselect=random,threads=32fwd=fwd1,fsd=fsd1,host=hd1fwd=fwd2,fsd=fsd2,host=hd2fwd=fwd3,fsd=fsd3,host=hd3rd=rd1,fwd=fwd*,fwdrate=max,format=yes,warmup=600,elapsed=604800,interval=105.2、版本稳定性测试messagescan=nohd=default,vdbench=/root/vd,user=root,shell=sshhd=hd1,system=node1hd=hd2,system=node2hd=hd3,system=node3fsd=default,depth=1,width=100,files=10000,size=4M,shared=no,openflag=o_directfsd=fsd1,anchor=/mnt/client1fsd=fsd2,anchor=/mnt/client2fsd=fsd3,anchor=/mnt/client3fwd=default,rdpct=30,xfersizes=1M,fileio=random,fileselect=random,threads=20fwd=fwd1,fsd=fsd1,host=hd1fwd=fwd2,fsd=fsd2,host=hd2fwd=fwd3,fsd=fsd3,host=hd3rd=rd1,fwd=fwd*,fwdrate=max,format=yes,warmup=600,elapsed=604800,interval=10。
webench使用指南(原创实用版)目录1.Webench 简介2.Webench 的功能3.Webench 的使用方法4.Webench 的优点与不足5.Webench 的未来发展正文【Webench 简介】Webench 是一个在线的 Web 性能测试工具,它可以帮助网站管理员和开发者测试网站的性能,以确保网站在各种情况下都能正常运行。
Webench 可以模拟各种网络条件和用户行为,以评估网站的响应时间、吞吐量和可用性。
【Webench 的功能】Webench 具有以下主要功能:1.模拟真实用户访问:Webench 可以模拟真实用户的访问行为,包括浏览器类型、操作系统、地理位置等。
2.测试网站响应时间:Webench 可以测试网站在不同网络条件下的响应时间,帮助管理员和开发者了解网站在不同地区和网络环境下的性能。
3.测试网站吞吐量:Webench 可以通过模拟大量用户同时访问网站来测试网站的吞吐量,以评估网站在高流量情况下的性能。
4.测试网站可用性:Webench 可以测试网站的可用性,确保网站在各种情况下都能正常运行。
5.提供详细的测试报告:Webench 可以提供详细的测试报告,包括网站响应时间、吞吐量、可用性等指标,以及针对不同问题的建议和解决方案。
【Webench 的使用方法】要使用 Webench,您需要首先访问 Webench 的官方网站,然后按照以下步骤进行操作:1.注册并登录:在 Webench 官方网站上注册一个账户并登录。
2.添加要测试的网站:在 Webench 的账户页面,添加您要测试的网站。
3.配置测试任务:在 Webench 的账户页面,创建一个新的测试任务,并配置测试任务的各种参数,包括测试的地理位置、浏览器类型、操作系统等。
4.开始测试:在 Webench 的账户页面,启动测试任务,Webench 将开始对您的网站进行性能测试。
5.查看测试报告:测试完成后,您可以在 Webench 的账户页面查看详细的测试报告。
vdbench测试原理
vdbench是一个常用的性能测试工具,它可以模拟不同类型的负载,并收集系统的性能指标。
vdbench测试的原理可以分为以下几个方面:
1. 测试目标的定义:vdbench测试需要明确测试的是哪些目标,如磁盘性能、网络性能等。
在定义测试目标时,还需要确定测试负载的类型和大小。
2. 测试配置的设置:在进行vdbench测试之前,需要设置好测试配置,包括测试文件的大小、数量和位置等。
此外,还需要指定测试的时间和并发用户数等参数。
3. 测试场景的执行:vdbench测试会根据设置的测试场景执行相关的测试操作。
例如,如果测试目标是磁盘性能,那么vdbench会模拟随机读写、顺序读写等负载类型,然后记录相应的性能指标。
4. 测试结果的分析:vdbench测试完成后,需要对测试结果进行分析。
分析结果可以帮助找出系统的性能瓶颈和优化空间。
常用的分析指标包括吞吐量、延迟、响应时间等。
总的来说,vdbench测试的原理是通过模拟负载来测量系统的性能指标,并根据测试结果来优化系统的性能。
- 1 -。
VxWorks Workbench System Viewer使用指南(Workbench3.0)A. 配置VxWorks系统映像Kernel Configuration中需要包含以下选项。
1. include "development tool components -> Windview components"。
2. include "development tool components -> WDB agent components -> WDB agent services -> WDB target server file system"。
若要使View Graph的Timeline刻度为时间坐标(seconds),而不是缺省的sequence numbers坐标,还需如下配置(需BSP和硬件支持)。
3. include "hardware -> peripherals -> clocks -> high resolution timestamping"。
4. 检查"development tool components -> Windview components -> select timestamping" 选项修改为"sequential timestamping" to "system-defined timestamping"。
至此Kernel Configuration已经配置完成。
5. 修改好Image工程后,编译工程生成映像文件并保存,为以下步骤做准备。
B. 配置System Viewer1. 新建Remote Systems Connection连接,选择Simulator Connection连接,点击Next。
vdbench data validation error -回复vdbench数据验证错误是一种常见的问题,可能会导致数据的不一致性和不可靠性。
本文将逐步解释vdbench数据验证错误的原因,以及如何诊断和解决这些错误。
第一步:了解vdbench数据验证错误的定义和原因(200字)vdbench是一种用于性能测试的工具,广泛用于存储设备和系统的评估。
然而,在进行数据验证时,可能会出现一些错误。
vdbench数据验证错误是指在读取或写入数据时发现的不一致性或异常,可能是由多种原因引起的。
常见的vdbench数据验证错误包括数据丢失、数据损坏、数据重复等。
这些错误可能是由于硬件故障、软件问题、网络问题、配置错误等引起的。
了解这些错误的原因是解决它们的第一步。
第二步:诊断vdbench数据验证错误的方法(500字)要诊断vdbench数据验证错误,您可以执行以下步骤:1. 检查vdbench日志文件:vdbench生成详细的日志文件,其中包含了读取和写入数据的详细信息。
通过仔细检查日志文件,您可以查找任何异常或错误消息。
这些错误消息往往会提供有关发生错误的详细信息,如错误的块号、错误的校验和等。
2. 运行完整性检查工具:vdbench提供了一些工具来检查数据的完整性。
这些工具可以用于验证数据的一致性、完整性和正确性。
您可以通过运行这些工具来识别任何异常或错误。
3. 检查硬件:硬件故障可能导致数据验证错误。
检查存储设备、网络连接和主机硬件,确保它们正常工作。
您可以尝试更换存储设备或网络连接来确定是否存在硬件故障。
4. 检查软件和驱动程序:确保您的软件和驱动程序是最新版本,并且已经正确安装和配置。
过时的软件和驱动程序可能导致数据验证错误。
5. 检查配置:检查vdbench的配置文件,确保所有参数和选项正确设置。
配置错误可能导致数据验证错误。
例如,检查读写比例、块大小、并发数等。
6. 分析性能指标:通过监视系统的性能指标,如IOPS(每秒输入/输出操作数)、带宽等,可以识别性能瓶颈或资源限制。
Quick CardT-BERD®/MTS-5800 Network TesterOne Way Delay (OWD) MeasurementThis document outlines how to set T-BERD/MTS 5800’s to measure One Way Delay on Ethernet datalinks at rates up to 100Gbps.Equipment Requirements:•Two T-BERD/MTS-5800’s equipped withthe following:o BERT software release V27.0 or greatero Test options:▪Ethernet and One Way Delay:▪C510M1GE and C5OWD for 1Gigabitor less▪C510GELAN and C5OWD for 10Gig▪C525GE and C5100GOWD for 25Gig▪C540GE and C5100GOWD for 40Gig▪C5100GE and C5100GOWD for100Gigabit Ethernet▪GNSS/GPS (VIAVI Part# C5GNSS)•GNSS Antenna (Taoglas AA.171,VIAVI Part# C5ANTENNA)•SFP, QSFP, or CFP4 optical transceiver tomatch the line under test•Jumper Cables to match the opticalFigure 1: Equipment Requirements transceiver and the line under test•Fiber optic inspection microscope(VIAVI P5000i or FiberChek Probe)•Fiber Optic Cleaning suppliesThe following information is required to configure the test:•Physical Interface (10/100/1000BASE-T, 1000BASE-LX, 10GBASE-LR, 100GBASE-LR4, etc.) •Auto Negotiation settings of the port under test•VLAN ID (if encapsulation = VLAN)Fiber Inspection Guidelines:•Use the VIAVI P5000i or FiberChek Probemicroscope to inspect the jumper cableor loopback plug before connection tothe optical transceiver.•Focus the fiber on the screen. If dirty,clean the connector.•If it appears clean, run inspection test.•If it fails, clean the fiber and re-runFigure 2: Inspect Before You Connect inspection test.•Repeat until it passes.Connect Each T-BERD to Port Under Test: 1.For copper 10/100/1000BASE-T interfacetesting with the T-BERD/MTS 5800v2 or T-BERD/MTS 5882, connect the Port 110/100/1000 RJ-45 jack to the port under test using CAT 5E or better cable.2.For copper 10/100/1000BASE-T interfacetesting with the T-BERD/MTS 5800-100G,insert a copper SFP into the Port 1SFP+/SFP28 slot and connect to the portunder test using CAT 5E or better cable. 3.For optical interfaces:•Insert desired SFP, QSFP, or CFP4 into the Port 1 slot on the top of theT-BERD/MTS.•Inspect and, if necessary, clean all SFPs, fibers, and bulkheads, as described onpage 1.4.Connect the SFP, QSFP, or CFP4 to the portunder test using a Single Mode orMultimode jumper cable compatible withthe interface under test.Figure 3: T-BERD 5800v2Figure 4: T-BERD 5882 Figure 5: T-BERD 5800-100GLaunch and Configure Tests:1.Press the Power button to turn on thetest set.2.Enable the Timing Expansion Module (TEM)or Internal GNSS Receiver and complete asurvey, as documented in “T-BERD®/MTS-5800 Network Tester, Enabling the GNSS/GPSReceiver for Sky Plot, One-Way Delay, andSy nc Measurements” Quick Card.ing the Select Test menu, Quick Launchmenu, or Job Manager, launch anEthernet, Layer 2 Traffic, Terminate test onport 1 for the desire physical interface. Forexample: Ethernet►10/100/1000►Layer 2 Traffic►P1 Terminate.4.If the test is not in the default settings, tapthe Tools icon , and select.Press to continue.Figure 6: T-BERD 5882/T-BERD 5800-100G Internal GNSSFigure 7: Ethernet Layer 2 Traffic Test5.Verify that the ToD Sync and 1 PPS SyncLEDs are both green. If they are not green,check your TEM or GNSS Receiver Setup.6.Press the Setup Soft Key, to displaythe Interface settings tab.Figure 8: Time Source LEDs 7.If you are testing a 10/100/1000 Electricalor 1GigE Optical tests with auto negotiationdisabled, select the Physical Layer tab andconfigure settings to match the Ethernetport under test.8.Select the GPS/CDMA tab and tap (check)the checkbox to Enable GPS Receiver.Figure 9: GPS/CDMA Receiver Setup 9.Select the Ethernet tab to configureEthernet settings.•Tap [ DA ] to display the DestinationMAC Address. Enter the MAC Addressof the T-BERD/MTS at the far end of theline under test.•Tap [ SA ] to display the factorydefault Source MAC Address of yourT-BERD/MTS. Provide this address tothe operator of the other T-BERD/MTS,upon request.Figure 10: Ethernet Setup •If you are testing a port that requiresVLAN encapsulation, set Encapsulationto VLAN, tap [ VLAN ] and enter yourVLAN ID.•If you wish to measure Bit Error Rate,tap [ Data ] and set ActernaPayload to BERT.Contact Us +1 844 GO VIAVI(+1 844 468 4284)To reach the VIAVI office nearest you,visit /contacts.© 2018 VIAVI Solutions Inc.Product specifications and descriptions in thisdocument are subject to change without notice.10.Select the Traffic tab to configure Trafficsettings.•Set Load Unit to Bit Rate.•Set Load to the desired traffic rate orCommitted Information Rate (CIR).11.Press the Results Soft Key, , to viewthe Results screen.Figure 11: Traffic Setup 12.For 1GigE to 100GigE optical tests, selectthe Laser tab in the Action panel,and press. The button will turn yellow and berelabeled .13.A green Signal Present LED ● indicates theT-BERD/MTS is receiving an optical signalfrom the port under test. Green SyncAcquired and Link Active LEDs indicate theT-BERD/MTS has successfully connected tothe port under test and the link is active.Figure 12: Results 14.Tap the Actions tab and tap the Start Trafficbutton . The button will turn yellowand be relabeled .15.Instruct the operator of the otherT-BERD/MTS to also Start Traffic.16.Press the Restart Soft Key on the rightside of the screen. Verify that:•The Right Results window shows “RxMbps, L1” is approximately equal tothe CIR.•The Right Results window shows LostFrames = 0.17.Allow the Test to run for the desiredduration. Verify that the Left Resultwindow displays “ALL SUMMARY RESULTSOK” throughout the test.18.Swipe up or scroll down in the Right ResultsDisplay to display One Way Delay results.Figure 13: Start TrafficFigure 14: One Way Delay results。
Vi DANTE TM Card User & Setup GuideThe Soundcraft® Vi DANTE™ card is a 64 x 64 interface between a Viseries console and any Dante compatible device from Harman or other 3rd party manufacturer. The card is available in two versions: Local Rack/CSB (D21m 3U format) and Vi Stagebox (6U format). Note that the Stagebox version is an IO card only and does not allow you to connect a Stagebox to the console using Dante instead of MADI.Dante provides a digital audio network that uses standard Internet Protocols over both 100Mbps and 1 Gigabit Ethernet. Dante uses audio independent, high accuracy network synchronization standards to ensure all Dante devices are synchronized at all times. Dante runs on standard computer networking hardware, and does not require dedicated network infrastructure.The Audinate Dante Virtual Soundcard software allows connection of a PC/Mac to a Dante audio network. This system allows the computer to record from and playback to the Dante network using most common DAW packages. Dante Virtual Soundcard uses the Ethernet port on the computer to communicate with the Dante network; no special hardware is required other than installing Dante Virtual Soundcard software. One DVS license token is provided FOC with the card, this license can only be installed on one specific computer.Additional information about the DANTE system including the latest software set‐up and tools may be found on the Audinate® web site /Configuring The Dante CardIn a manner similar to CobraNet™, patching on the console makes a connection between console I/Oslot channels and up to 64 channels on the Dante card. Connections between the Dante cards are set using a tool, in this case the Dante Controller software from Audinate®. As communication across the Dante network is essentially between named cards and channels the configuration must be correctto ensure cards talk and listen to the correct/desired channels on the Dante network.This user guide summarises the process and provides a simple worked example; full setup details and configuration tools are downloadable from the Audinate web site .In addition it is necessary to set the clock status of the Dante card both within the network and inrelation to the console hardware. This is described below.Channel Count SetupThe Dante card uses 64 in and 64 out channels by default, but can be restricted to use less input or output channels if required. This may be necessary on Vi consoles in order to avoid exceeding the192in/192out channel limit of the local rack (or the 64in/64out channel limit if fitted in a Vi or Compact Stagebox). For example, if only output channels are required on the Dante card, the input channels can be set to 0, to maximise the number of input channels available for other cards.The DIP switch S1 on the Dante card main PCB is used to set the input and output channel count, in steps of 8chs from 0‐64 channels. Refer to the diagram on the next page which shows the location ofthe channel count DIP switch S1 and the factory default setup of 64 in/64 out. To create other channel count settings that are not marked on the switch, add any two or 3 switch settings together,ie to select 48chs, the 32 and 16 switches should be moved down to the selected position. Note the maximum channel count (input or output) is 64 and minimum is zero.Sync SetupThe Dante card can act as either a main clock source for the Dante network, or as a synchronised clock. If there is only one console on the network, this will generally be set as the main clock source for the network, but in cases with more than one console, or where another device acts asthe main source clock, it will be necessary to set the console's Dante card to be a synchronised clock.The Dante clock sync status is set up using Dante Controller software (see later in this guide), but in addition to the Dante clock setup, the card's clock status within the console has to be set. This is done using a DIP switch S2 on the Dante card main PCB. Refer to the diagram on the next page for the location and setting of this switch.MIX: Select this position to make the Dante module lock to the console's internal Wordclock, onlyto be used when the Dante card is set as the Preferred Master for the Dante network. This setting is the factory default.CARD: Select this position to make the console lock to the Dante network clock, to be used whenthe Dante card is synchronised to the network. Note: In this case, a BNC wordclock cable must also be connected from the Wordclock Out BNC connector on the Dante card, to the console's Wordclock IN.Note that it is also necessary to set up the clocking scheme of the Dante network correctly, to avoidaudio clicks and dropouts, please refer to the section titled Device Status and Clock Status in thefollowing pages.DIP switches S1 & S2 Location DiagramRefer to the previous page for information on the function of these switches.Setting up the Dante card for operation on the networkAs mentioned earlier, it is necessary to use a software tool connected externally to the card, in order to route audio from the card to/from another Dante‐enabled device.1.Download & install the latest software for the Vi consoles from .(Software Version must be 4.7.5.205 or later). With earlier versions of the console software, the Dante card will not be recognised by the console and will not appear in the patch.2.Download and install latest Dante Controller software from .3.Connect a Mac/PC to the Dante card, this may be via a switch/router or direct to either thePRIMARY or SECONDARY ports. The LINK indicator on the card will begin to flash indicating an active connection.NOTE: A crossover cable is not required as the network ports on the Dante card will automatically sort out the transmit and receive connections to the other device.NOTE: Ensure any firewall operating on the network port of the computer is switched off.4.Start the Dante Controller application, after a few moments a screen similar to the onebelow will appear:Using DanteThe following sections cover basic setup and use of the Vi Dante cards. For detailed information regarding Dante please refer to information on Audinate’s web site .Network ViewRouting – Matrix view of routing (click on a‘+’ symbol to expand the matrix view).Device Status – Displays information about discovered Dante devices; double click a device name to enable its configuration.Clock Status – View and edit Dante Network clock configuration.Clock Role column:Setting a single ‘Preferred Master’ will ensure that device is selected as the main clock source, if two or more devices are set for ‘Preferred Master’ the main clock source will be elected by the Dante system. NOTE: Clock Status settings apply to the clocking of the Dante network, therefore attached devices such a s c onsoles m ust b e c locked t o/from t he D ante n etwork a s a ppropriate o r required in any given system.It is suggested that in most simple cases with one console connecting to peripheral equipment (eg a computer recording device) via Dante that the console is set as preferred master, which means thatthe item ‘Sync to External Word Clock’ must also be checked’. If there are two or more consoles connected together then obviously only one should be set as preferred master.‘Sync to External Word Clock’:When checked the Dante card will clock from the console internal word clock, if not checked the console must be clocked to the Dante card or system word clock as appropriate or required in the given system. Normally this is achieved by connecting a short BNC jumper cable from the wordclock OUT of the Dante card, to the wordclock IN of the console.Note on Clock status when connecting the Dante card to a Vi3000 console’s Dante interfaceThe Vi3000 console includes a built‐in Dante interface, and as such has the capability for the consoleto automatically sync to the internal Dante card’s clock, when the Vi3000’s Dante interface is set to‘sync’ clock status (ie another device is set as Preferred Master), and the setting ‘S ync to External wordclock’ is NOT checked (ie console synchroni sed to Dante network clock). Therefore with the Vi3000, an external BNC jumper cable is not required and the console will automaticallyswitch to indicate ‘Dante’ as the clock source (viewable in the Menu‐Sync page of the Vi3000).Failure to set up the clocking scheme of the network correctly is likely to result in audio clicks during operation.Device ViewThe Device View allows viewing and editing of aselected Dante device.Receive – This tab presents information about allchannels being received, and channels availableto the current device. The tab is arranged intotwo areas:Receive Channels: Lists the Rx channels in the leftpane of the window. It shows whether or not they areconnected and, if connected, the channel they areconnected to and the status of that connection.Available Channels: On the right pane of the window, lists the Tx channels from other devices that are available for subscription by the current device. You may drag and drop Available Channels to Receive Channels.Transmit: This tab is used to view and edit thetransmit configuration of a device.Transmit Channels: The area on the left pane of thetab shows the Tx channels for the device, and anyuser‐defined channel label. It allows the user tocreate labels for transmit channels. Input to thetable is filtered to prevent illegal characters frombeing used in channel labels. To change a Txchannel label double click on the label and type in anew one. Tx channel labels must be unique on asingle device.Status: The Status tab is used to view informationabout a Dante device, this information may berequired for trouble shooting and checking software /firmware is up‐to‐date.Device Config: This tab on the device view allowsviewing and editing of the following device specificparameters.Rename Device: Allows renaming of the Dante device.Sample Rate: 48K – this is fixed and cannot be edited.Latency: Allows selection of an appropriate latency.NOTE: The 0.15 msec setting is unavailable on ViDante cards as these include an internal switch. Factory Reset: Allows remote reboot of the Dante interface and to reapply factory settings. Following a reboot it is recommended to power‐cycle the console including disconnection of the AC powercord. Factory Reset wipes the following device configuration settings:∙User‐defined device name∙User‐defined channel labels∙Clock configuration (clock master / external clock master setting)∙Static IP addresses∙Redundancy configuration∙Sample rate setting (including pull‐up/down)∙Latency setting∙Any existing audio routesNetwork Config: This tab enables viewing andediting of Dante Redundancy mode.Switched Mode ‐ When set to Switched, thesecondary Ethernet port will behave as astandard switch port, allowing daisy‐chainingthrough the device.Redundant Mode ‐ When set to Redundant,the device will duplicate Dante audio trafficto both Ethernet ports, allowing theimplementation of a redundant network viathe secondary port. In this case care must betaken to avoid accidently making anyconnection between the two parallelnetworks.Note: All devices on a Dante network MUSTbe set to the same Mode (Switched orRedundant), otherwise the network will notfunction reliably.Dante PresetsAlthough patching to and from the Dante card in the console is stored as part of a show or part of a cue the configuration and routing of the Dante cards and Dante audio streams is not.In the event a Dante card is replaced orsimilar, the ‘new’ card will requireconfiguring, this may be done manually or byloading a previously stored preset from the‘File’ menu of the Dante Controller softwareConnecting Dante DevicesThe following example illustrates two Vi1 consoles ‘House’ and ‘Monitor’.Audio inputs are sent to the monitor console, these can be connected directly to the console or via a stagebox attached via a MADI card to the monitor console.A direct output from each input of the monitor console feeds the FOH console which is patched to receive audio from the Dante option card.The FOH console mix is returned to two spare channels of the monitor console and the direct outputs of those inputs are in turn patched to the system outputs; once again these can be directly on the console or attached via a MADI card to the monitor console.The link between the Dante cards may be via a switch as shown with a solid green line or direct from card to card as shown by the dotted green line.NOTE: Once configured the PC is not required.NOTE: Dante may operate in redundant mode, this is not shown for simplicity.Alternative OptionsOnce audio is in the Dante domain the possibilities become near endless, in this alternative system: ∙All system outputs leave via a Dante enabled processor such as the BSS BLU 806∙An additional console does a live stereo mix‐down for web streaming or similar∙A laptop running the Audinate Virtual Soundcard makes a multi‐track recording。
VD操作手册VD操作手册1:简介1.1 概述1.2 目标受众1.3 术语定义2:安装和配置2.1 硬件要求2.2 软件要求2.3 安装步骤2.4 配置设置3:虚拟机的创建与管理3.1 创建虚拟机3.1.1 设置虚拟机名称3.1.2 选择操作系统类型3.1.3 分配系统资源3.1.4 配置网络设置3.1.5 设置存储设备3.2 导入/导出虚拟机3.3 克隆虚拟机3.4 快照管理4:虚拟设备管理4.1 添加和删除硬盘4.2 添加和删除网络适配器 4.3 添加和删除USB设备 4.4 添加和删除光驱设备 4.5 添加和删除其他设备5:虚拟机设置5.1 修改虚拟机配置5.2 配置启动顺序5.3 配置共享文件夹5.4 配置剪贴板共享5.5 配置拖放功能6:网络设置6.1 NAT网络6.2 桥接网络6.3 仅主机网络6.4 虚拟网络编辑器7:远程访问7.1 使用RDP访问虚拟机 7.2 使用VNC访问虚拟机 7.3 使用SSH访问虚拟机8:故障排除和常见问题解决 8.1 虚拟机无法启动8.2 网络连接问题8.3 设备无法正常工作8.4 性能问题及调优建议9:附录9.1 附件一、操作截图9.2 附件二、示例配置文件9.3 附件三、常用命令列表法律名词及注释:1:虚拟机(Virtual Machine,简称VM):一种软件模拟的计算机环境,可以在一个物理计算机上运行多个独立的操作系统实例。
2:克隆(Clone):将一个现有的虚拟机制作成一个完全相同的副本。
3:快照(Snapshot):虚拟机的快照是当前虚拟机状态的一个副本,包括所有虚拟磁盘和内存的数据。
可以通过恢复快照来还原虚拟机到某个特定状态。
4: NAT网络(Network Address Translation):一种网络地址转换技术,通过为多台虚拟机提供共享的IP地址来实现它们访问外部网络。
5:桥接网络(Bridge Networking):将虚拟机的网络适配器直接连接到宿主机所在的物理网络中,使虚拟机可以和局域网中的其他设备进行通信。
VdBench测试指导手册目录1 VdBench介绍 (1)1.1 简介 (1)2 IOmeter安装 (2)2.1 Windows下的安装 (2)2.2 Linux下的安装 (3)3 VdBench使用 (4)3.1 Vdbench运行及结果查看 (4)3.2 编写一个parmfile (4)3.2.1 块设备 (4)3.2.2 文件系统 (5)3.3 结果查看 (6)3.4 单客户运行vdbench (7)3.5 Linux下联机运行 (8)3.6 windows下联机运行 (9)4 官方手册 .......................................................................................................................... 错误!未定义书签。
1 VdBench介绍1.1 简介Vdbench 是一个命令行实用程序,旨在帮助工程师和客户生成用于验证存储性能和存储数据完整性的磁盘I/O 负载。
还可通过输入文本文件指定Vdbench 执行参数。
它是一个免费的工具,容易使用,而且常常用于测试和基准测试。
2 IOmeter安装2.1 Windows下的安装1.打开/technetwork/cn/server-storage/vdbench-downloads-1901681-zhs.html并下载该工具。
2.安装32位的JDK或JRE环境,并且设置环境变量,如下图所示。
3.解压缩VdBench.zip,用命令行转到VdBench的目录,执行vdbench -t进行测试。
如下图,即为成功:2.2 Linux下的安装以下是下载和在Linux下安装vdbench。
1.打开/technetwork/cn/server-storage/vdbench-downloads-1901681-zhs.html并下载该工具。
2.使用WinSCP 工具将它传输到Linux主机。
将它解压到Linux /var/www/html 目录。
清单3. 解压WinSCP3 VdBench使用3.1 Vdbench运行及结果查看./vdbench -f parafileparafiile为配置文件,如果需要校验文件一致性可以可以指定-v参数,./vdbench -vf parafile。
在vdbench安装目录下面有output目录,可以查看运行及输出结果,适用于windows及linux。
3.2 编写一个parmfile要更详细地控制工具参数,编写一个parmfile,您可在其中指定不同的选项。
3.2.1 块设备对于一个块设备,配置以下参数:HD:主机定义•如果您希望展示当前主机,则设置hd= localhost。
如果希望指定一个远程主机,hd= label。
•system= IP 地址或网络名称。
•clients= 用于模拟服务器的正在运行的客户端数量。
SD:存储定义•sd= 标识存储的名称。
•host= 存储所在的主机的ID。
•lun= 原始磁盘、磁带或文件系统的名称。
vdbench 也可为您创建一个磁盘。
•threads= 对SD 的最大并发I/O 请求数量。
默认为8。
•hitarea= 调整读取命中百分比的大小。
默认为1m。
•openflags= 用于打开一个lun 或一个文件的flag_list。
WD:工作负载定义•wd= 标识工作负载的名称。
•sd= 要使用的存储定义的ID。
•host= 要运行此工作负载的主机的ID。
默认设置为localhost。
•rdpct= 读取请求占请求总数的百分比。
•rhpct= 读取命中百分比。
默认设置为0。
•whpct= 写入命中百分比。
默认设置为0。
•xfersize= 要传输的数据大小。
默认设置为4k。
•seekpct= 随机寻道的百分比。
可为随机值。
•openflags= 用于打开一个lun 或一个文件的flag_list。
•iorate= 此工作负载的固定I/O 速率。
RD:运行定义•rd= 标识运行的名称。
•wd= 用于此运行的工作负载的ID。
•iorate= (#,#,...) 一个或多个I/O 速率。
•curve:性能曲线(待定义)。
•max:不受控制的工作负载。
•elapsed= time:以秒为单位的运行持续时间。
默认设置为30。
•warmup= time:加热期,最终会被忽略。
•distribution= I/O 请求的分布:指数、统一或确定性。
•pause= 在下一次运行之前休眠的时间,以秒为单位。
•openflags= 用于打开一个lun 或一个文件的flag_list。
3.2.2 文件系统对于一个文件系统,配置以下参数:HD:主机定义。
与虚拟块设备相同。
FSD:文件系统定义•fsd= 标识文件系统定义的名称•anchor= 将在其中创建目录结构的目录•width= 要在定位符下创建的目录数•depth= 要在定位符下创建的级别数•files= 要在最低级别创建的文件数•sizes= (size,size,...) 将创建的文件大小•distribution= bottom(如果希望仅在最低级别创建文件)和all(如果希望在所有目录中创建文件)•openflags= 用于打开一个文件系统(Solaris) 的flag_listFWD:文件系统工作负载定义•fwd= 标识文件系统工作负载定义的名称。
•fsd= 要使用的文件系统定义的ID。
•host= 要用于此工作负载的主机的ID。
•fileio= random 或sequential,表示文件I/O 将执行的方式。
•fileselect= random 或sequential,标识选择文件或目录的方式。
•xfersizes= 数据传输(读取和写入操作)处理的数据大小。
•operation= mkdir、rmdir、create、delete、open、close、read、write、getattr 和setattr。
选择要执行的单个文件操作。
•rdpct= (仅)读取和写入操作的百分比。
•threads= 此工作负载的并发线程数量。
每个线程需要至少1 个文件。
RD:运行定义•fwd= 要使用的文件系统工作负载定义的ID。
•fwdrate= 每秒执行的文件系统操作数量。
•format= yes / no / only / restart / clean / directories。
在开始运行之前要执行的操作。
•operations= 覆盖fwd 操作。
选项相同。
3.3 结果查看运行之后的输出文件夹文件每次运行后,vdbench 会创建一个包含以下文件的输出文件夹:errorlog.html当为测试启用了数据验证时,它可包含一些数据块中的错误的相关信息:•无效的密钥读取•无效的lba 读取(一个扇区的逻辑字节地址)•无效的SD 或FSD 名称读取•数据损坏,即使在使用错误的lba 或密钥时•数据损坏•坏扇区flatfile.html包含vdbench 生成的一种逐列的ASCII 格式的信息。
histogram.html一种包含报告柱状图的响应时间、文本格式的文件。
logfile.html包含Java 代码写入控制台窗口的每行信息的副本。
logfile.html 主要用于调试用途parmfile.html显示已包含用于测试的每项内容的最终结果resourceN-M.html、resourceN.html、resourceN.var_adm_msgs.html•摘要报告•stdout/stderr 报告•主机N 的摘要报告•最后“nn”行文件/var/adm/messages 和/var/adm/messages。
每个M 个JVM/Slave 的目标主机N 和主机N 上为0。
sdN.histogram.html、sdN.html每个N 存储定义的柱状图和存储定义“N”报告。
summary.html主要报告文件,显示为在每个报告间隔的每次运行生成的总工作负载,以及除第一个间隔外的所有间隔的加权平均值。
•interval:报告间隔序号•I/O rate:每秒观察到的平均I/O 速率•MB sec:传输的数据的平均MB 数•bytes I/O:平均数据传输大小•read pct:平均读取百分比•resp time:以读/写请求持续时间度量的平均响应时间。
所有vdbench 时间都以毫秒为单位。
•resp max:在此间隔中观察到的最大响应时间。
最后一行包含最大值总数。
•resp stddev:响应时间的标准偏差•cpu% sys+usr:处理器繁忙= 100(系统+ 用户时间)(Solaris、Windows、Linux)•cpu% sys:处理器利用率:系统时间swat_mon.txt,swat_mon_total.txt•vdbench 与Sun StorageTekTM Workload Analysis Tool (Swat) Trace Facility (STF) 相结合,支持您重放使用Swat 创建的一个轨迹的I/O 工作负载。
•Swat 使用Create Replay File 选项创建和处理的轨迹文件会创建文件flatfile.bin(flatfile.bin.gz 用于vdbench403 和更高版本),其中包含Swat 所识别的每个I/O 操作的一条记录。
•这些文件包含一个格式化的报告,可将该报告导入Swat Performance Monitor (SPM) 中来创建性能图表。
3.4 单客户运行vdbench单客户的配置文件:fsd=fsd1,anchor=/tmp/yht,depth=1,width=100,files=100,size=200Mfwd=fwd1,fsd=fsd1,operation=write,xfersize=1024k,fileio=sequantial,fileselect=sequantial,threads=32 rd=rd1,fwd=fwd1,fwdrate=max,format=restart,elspsed=600,interval=10解读:第一行:文件系统存储定义。
指定目录结构,anchor是挂载点,/tmp/yht为linux客户端,如果是windows客户端需要改为c:\\yht,其他部分相同。
depth是目录结构的深度,width是每一层目录的数量,files是每个目录下面文件的数量,size是文件大小,size=(100M,30,200M,30,1G,40)指定100M文件占30%,200M文件占30%,1G文件占40%。