麦哨(全新版本)
- 格式:ppt
- 大小:5.19 MB
- 文档页数:28
活动名称:《好玩的麦秆》——麦哨活动参与者:中班幼儿活动组织者:周牡丹(一)设计思路:在农村现在的很多孩子玩的玩具都是在店里买的,而自己动手做的很少了。
为了让孩子们能够体验到我们小时候利用身边事物自制玩具,玩玩具的快乐,我班开展了《好玩的麦秆》这一方案活动。
希望孩子们通过玩耍能拥有一个真正快乐的童年!麦哨是民间游戏之一,它只需要我们准备一跟麦杆,可以开始游戏。
刚开始我们开展了《采集麦杆》《麦秆儿歌》《编麦秆图案》《麦秆画画》等的活动,通过一次又一次的活动,幼儿对麦秆也有了很深的认识。
(二)预设活动目标:1、观看教师制作麦哨,体验麦秆的神奇功能。
2、尝试自制麦哨,并吹麦哨,力求能将麦哨吹响。
(三)活动准备:麦秆若干、剪刀、牙签(符合幼儿人数)(四)预设活动过程:一、哨声激趣导入1、吹麦哨。
教师,今天,我们班来了一位新朋友,它是谁呢?(师转身,吹响麦哨)生猜,是谁?2、引出麦哨教师拿出麦哨,并吹响它。
想想看:这个麦哨是由什么材料做的。
二、观看老师做麦哨1、给幼儿看看已经做好的麦哨,然后说说是怎么做的?需要用到什么工具。
2、小结幼儿所说的做法。
3、请幼儿观看老师做麦哨,教师要边做边讲解方法。
先将麦秆剪断,取中间空的一截,然后牙签从这节麦秆的一端划到另一端,这样麦秆上的一条缝就出来了,然后把牙签和剪刀放到指定的篮子里。
4、教师将做好的麦哨吹一吹,并告诉幼儿吹的技巧(往里吸,不能往外吹),如果麦哨吹不响,可以用牙签在去将刚才划的缝再划一边。
也可以尝试再制作一个新的。
三、幼儿尝试做麦哨1、分组尝试自制麦哨,教师相机指导。
2、尝试吹麦哨(1)鼓励幼儿大胆吹响自己的麦哨。
(2)引导幼儿有节奏的吹响麦哨3、游戏吹麦哨老师说男孩,男孩就吹麦哨,说女孩,女孩子就吹麦哨,这样反复练习数次。
四、结束活动。
今天,我们学习如何制作麦哨这一玩具,而且我们还能将麦哨吹响了,真的好棒哦!请小朋友回家去,再做几个麦哨送给你们的爸爸妈妈,让他们也来和你一起吹麦哨,好不好?现在我们拿起自己的麦哨,到外面的活动场地去吹给大家听听吧!。

Domino Pro无线个人听力辅助系统(专业版)数字信号处理。
Domino Pro 采用先进的数字信号处理技术,就算是在最糟糕的听力环境下,也可以非常清晰地传递自然真实的声音。
无忧无虑地交谈。
Domino Pro 采用2.4GHz 全球标准传输频率。
这意味着,您可以在全球范围内使用Domino Pro 系统。
Domino Pro 系统采用128位数字加密技术,完全避免了被偷听的可能定向麦克风。
发射器和接收器都内置有全向和定向麦克风。
您可以使用定向麦克风“指向”收听说话人的声音,减少周围的噪音。
操作简易。
Domino Pro 便。
每项功能对应一个按键,没有复杂的使用说明。
的操作非常方Domino Pro 是一套无线个人听力辅助系统,不管您是助听器用户,还是偶尔有听力障碍,它都可以帮助您在日常生活中听得更好。
小巧轻便。
Domino Pro 巧,约74放进口袋里,也不觉得沉重。
就像手机一样小克重。
这样就能将它们隐蔽地电源持久。
Domino Pro 池,就像手机一样,您不用担心要经常购买新电池。
使用可充电锂电享受看电视的乐趣。
把的发射器连接到电视或音响,您就可以听到无线宽频的立体声音质,而且自由调节音量。
Domino Pro 电视、MP3、音响无线加密传输耳塞讲话发射器接收器讲话输入输出技术规格尺寸和重量高:3.9英寸(99毫米)宽:1.9英寸(48米)厚:0.9英寸(22米)重量:2.5 盎司74 克毫毫()产品包装包含您通常情况下使用BE8005 Domino Pro所需的配件,都包含在这个包装盒里BE2210接收器和BE2230发射器BE9142 USB通用充电器,包括4个主要插头BE9135 有安全扣的挂颈绳BE9124 入耳式立体声耳塞BE9141 精美旅行包BE9136领夹麦克风BE9137 音频转换线,1.2米,带3.5mm接口转换头和电视莲花头转换头使用说明书和快速操作指引也可选配BE9159 电感颈圈(配合助听器T档使用)接收器按键和调控音调音量内置麦克风选择开关麦克风耳机输出选择发射器音量、音调指示灯充电接口发射器按键和调控与接收器配对LED指示灯麦克风音频线接口开关充电接口满足所有需求的配件BE2210接收器BE9122立体声耳机BE9124立体声耳塞BE9125下挂式耳塞BE9136领夹麦克风BE9137音频转换线,1.2米,带3.5mm接口转换头和电视莲花头转换头B E9159电感颈圈输入信号麦克风:发射器和接收器都内置有全向及定向外部声源接入:2.5mm立体声插头信号0 dBV(最大输入)输出信号耳机接口:3.5mm立体声接口失真:0.05% THD电子频率:40 - 10 000赫兹音调控制:9级音量控制:9,截至频率1.6 kHz输出功率:100mW (16 Ω 负载)()级电源和电池接收器和发射器都内置可充电锂电池工作时间:8-12小时 (标准电池)充电时间:2.5小时(标准电池)无线电传输传输频率:2.4GHz,3频道传输距离:室内25米(直线距离),室外100米()特点:加密传输自动搜索频道可与其它无线电发射器共存使用2.4 GHz频率传输直线距离声学规格使用BE9124耳塞最大输出:132dB SPL使用BE9124耳塞最大增量(60 dB SPL 输入信号):57,5 dB @ 1kHz 56 dB HFA失真:使用BE9124:0.08 % THD使用BE9122:0.6 % THD操作环境需求环境温度:32 ° - 95 °华氏度(0° 到35 °摄氏度相对湿度:5% - 95% (非冷凝))监管认证产品已通过以下认证:CE, FCC, RoHS, WEEE, C-Tick UL, NCC,0.9英寸(22毫米)1.9英寸(48毫米)1.9英寸(48毫米)3.9英寸(99毫米)Bellman 和 Bellman & Symfon 是注册商标,由Bellman &Symfon AB所拥有并保留所有权利。

5.8GHz Wireless Microphone System VmicLink5StatementPlease read this manual carefully before using and strictly operate and store in accordance with the instructions. Please save it for your future reference.If the user manual can not help you to solve certain problems, please ask your retailer for help or email us: info@saramonic. com.Cautions1. Do not use the unit under water, don't expose it to rain.Please store it in a cool, dry place.2. Please use and store it in normal temperature. Do not moveit from overheated to supercooled condition frequently as well as keep away from heat sources such as heater andoven.3. When using and storing, please pay attention to dust andmoisture.4. Be careful to violent collision.5. To avoid acoustical feed-back, do not hold the microphoneclose to the loudspeakers.6. For the best sound pick-up pattern do not hold your handagainst the microphone head.7. Remove the batteries from the battery compartment whenthe device is not used for a long time.ContentsGeneral Introduction 2Highlights 2Portable Receiver VmicLink5-RX 2 Product Structure 2 Attaching Accessories 3 LCD Display Operation Guide 3Body-pack Transmitter VmicLink5-TX 5 Product Structure 5 Attaching Accessories6 LCD Display Operation Guide 6Battery Charger 8 pecifications 8 Packing List 9 Package 91 General IntroductionThe Saramonic VmicLink5 wireless microphone s ystem utilizes the new 5.8GHz transmission technology t o transfer high quality audio.One receiver can work with up to three transmitters s imultaneously, which is very useful and flexible for a udio recording in DSLR video, field recording, f ilmmaking, broadcast & TV, electric news gathering (ENG), on-the-spot interviews, sound design and more.2 Highlights• The 5.8GHz provides high quality audio.• Record audio up to 30 meters away with no obstacle.• Automatic channel switch programme to avoid interference from multiple systems inthe same environment.• With three discrete channel groups.• One receiver can work with up to three transmitters simultanously.• Line & Mic inputs provide wide range of input options.• Real-time headphone monitor jack.• Detachable and flexible antenna can be rotated 360°accordingly for best sound.• Rechargeable li-ion battery (included).3 Portable Receiver VmicLink5-RXThe Saramonic VmicLink5-RX is a camera-mountable integrated wireless receiver. It features an easy-to-read LCD display and DigRF synchronization between transmitter and receiver.The selectable output mode allows you to choose the output signal to be mono or stereo. 3.1 Product Structure① AntennasScrew clockwise to install.Screw counterclockwise to dismantle.Adjust the antennas accordingly to get the best sound reception.② Power / Mute buttonLong press to turn on/off.Short press to turn on/off the MUTE function.③ SET buttonLong press the SET button to enter the displayed menu.Then, short press the SET button to confirm your option or long press again to exit without saving.④ + or – buttonSelect functions or values shown on the display.⑤ LCD displayDisplay menus, please refer to "1.3.3 LCD Display Operation Guide" (page 3) for more details.⑥ Battery compartmentInstall battery:Slide the switch on the battery compartmentcover according to the indicating arrow to open the battery compartment.Install a battery properly and the battery will be locked automatically. Slide the switch to close the battery compartment.Remove a battery:Slide the switch on the battery compartment cover according to the indicating arrow to open the battery compartment. Slide the battery locking unit to release the battery.⑦ PHONE jack3.5mm stereo mini headphone jack.Connect a headphone to monitor the audio output.⑧ LINE out jackConnect the RX to a video camera, camcorder, mixer or amplifier with the supplied output cable.⑨ Standard mount cold shoe⑩ Belt clip3.2 Attaching AccessoriesConnect the supplied cable to the Line out Plug the supplied 3.5mm cable into the LINE OUT. For a secure connection, rotate clockwise to lock the connector.① Attach the shoe mount adapterPlease attach the belt clip upside-down beforeattaching the shoe mount adapter.② Push the bottom of the belt clip to make some space between the belt clip and thereceiver.③ Align the belt clip with the two vertical grooves on the shoe mount adapter and insert the adapter in the direction of the arrow. Push the shoe mount adapter in fully until the belt clip fits into the horizontal groove on the adapter holds.3.3 LCD Display Operation GuideHome screenIf no operation is performed for 20 seconds on the other screens, the display will automatically return to the home screen.① RX & TX connecting indicator"———": The RX hasn't been matched with a TX in this group."A"or"B"or"C" flashing: The RX has been matched but hasn't been connected with the TX in this group.When the output mode is mono, the audio from left and right channel will be mixed. When it is stereo, the left and right audio channel output will be separated.In Stereo mode, the audio of group A & C will be output to left channel, the audio of Group B will be output to right channel. • Default is "mono."Power locked / unlockedLong press the SET button to enter the menu. Use the"+" and "-" to set unlocked or locked the power key. Lock the power key to prevent the receiver being turned off unwittingly while using.• Unlocked: Long press the power key to turn on/off the receiver (System default).• Locked: The receiver will not be turned off even after pressing the power key.Mute key enable / disableLong press the SET button to enable / disable Mute function.• Enable: Press power button to turn Mute On / Off.• Disable: The audio will not be muted during using.• Default is "enable ."Match with TXLong press the SET button to enter "Match with TX". Then, short press to start "Match with TX" in the RX and "Match with RX" in the TX simultaneously to match the TX with RX.The RX can't match with two or three TXssimultaneously, please match the RX with TX(s) one by one.According to the chronological order ofmatching, the group number of each TX(s) will be A, B, C by turns."A "or"B "or"C " solid: The RX has been matched with the TX successfully in this group.NOTE: Details please refer to "Match with TX" & "Match with RX" (page 4/7).② Volume indicatorIndicates the volume of audio output.③ Mute indicatorMUTE ON MUTE OFFNOTE: MUTE on RX will mute the output audio. ④ Battery level indicatorDisplays the battery level. Please replace both batteries immediately when the indicator starts flashing.NOTE: Low battery might cause an unstable transmission of audio signal.⑤ Current channelDisplays the current channel number.NOTE: The channel can only be changed manually in the RX.Once the RX is matched with the TX(s), the channel number of TX(s) will be changed with RX synchronously all the time.Set output volumeLong press the SET button to enter the menu. Use the"+" and "-" to set the volume of output audio within the range 0 to 31, short press for exit with saving. The setting is retained even after the power is turned off. • Default is "25."Output modeThe output mode can be selected to mono or stereo.NOTE: Please match the TX and RX if they haven't been matched before.Once RX and TX have been matched successfully, the setting is retained even after the power is turned off.The RX and TX will automatically match with each other everytime after powered on.If use another TX, please match the RX with the new TX.When need to relieve TX and RX connection, select and confirm "Restore default" menu.Set backlightSelect ON, OFF or Delay 10 / 30 /60 seconds. Default is "Delay 10s."Restore settingsConfirm it then the parameters of RX are restored to their factory default settings. NOTE: The matching setting will also be cleared after restoring.Version of the RXSerial number 4 Body-pack Transmitter VmicLink5-TX The VmicLink5-TX is a compact transmitter thatemploys a crystal-controlled PLL synthesizer. It is equipped with a muting function and lock-type Mic and Line input connectors.4.1 Product Structure① AntennasScrew clockwise to install.Screw counterclockwise to dismantle.Adjust the antennas accordingly to deliver the best transmission.② Power / Mute buttonFunction OperationPower ON Press button for one second or longer Power OFF Press button until it turns offMute ONShort press buttonMute OFF③ SET buttonLong press the SET button to enter the displayed menu.Then, short press the SET button to confirm youroption or long press again to exit without saving.④ + or – buttonSelect functions or values shown on the display.⑤ L CD displayDisplay menus, please refer to "1.4.3 LCD Display Operation Guide" for more details.⑥ Battery compartment Install and remove the battery instructions are the same as receiver.⑦ Mic input jackConnect to the supplied lavalier microphone.⑧ Line input jack Connect to audio devices with line output.⑨ Belt clip4.2 Attaching AccessoriesAttach a belt clipInsert one end of the belt clip into one of two holes on either side of the transmitter, and then insert the other end into the hole on the otherside.• Connect the microphone / audio device.• For a secure connection, turn to lock the connector.NOTE: Please turn off the transmitter before attaching or removing the microphone / audio device.4.3 LCD Display Operation GuideHome screenIf no operation is performed for 20 seconds on the other screens, the display will automatically return to the home screen.① RX & TX connecting indicator"A or B or C ": The TX has been matched with the RX successfully."○" & "●" flashing : The TX hasn't been matched with the RX.NOTE: Details please refer to "Match with TX" & "Match with RX" (page 4/7).② RF level indicatorIndicates the current transmission level.③ Volume indicatorIndicates the volume of audio output.④ Mute indicatorMUTE ON MUTE OFFNote: If turn on Mute of the TX, only this TX will be muted.⑤ Battery level indicatorDisplays the battery level. Please replace the battery immediately when the indicator starts flashing.NOTE: Low battery might cause an unstable transmission of audio signal.⑥ Current channelDisplays the current channel number.NOTE: The channel can only be changed manually in the RX.Once the RX is matched with the TX(s), the channel number of TX(s) will be changed with RX synchronously all the time.Volume settingLong press the SET button to enter the menu. Use the"+" and "-" to set the volume of output audio within the range 0 to 31, short press for exit with saving. The setting is retained even after the power is turned off.• Default is "25."Power locked/ unlockedLong press the SET button to enter the menu. Use the"+" and "-" to set unlocked or locked the power key. Lock the power key to prevent the receiver being turned off unwittingly while using.• Unlocked: Long press the power key to turn on/off the receiver (System default).• Locked: The receiver will not be turned off even after pressing the power key.Mute key enable / disableLong press the SET button to enable / disable Mute function.• Enable: Press power button to turn Mute On / Off.• Disable: The audio will not be muted during using.• Default is "enable."Match with RX• Long press the SET button to enter "Match with RX". Then, short press to start "Match with TX" in the RX and "Match with RX" in the TX simultaneously to match the TX with RX.• The RX can't match with two or three TXs simultaneously, please match the RX with TX(s) one by one.• According to the chronological order of matching, the group number of each TX(s) will be A, B, C by turns.NOTE: Please match the TX and RX if they haven’t been matched before• Once RX and TX has been matched successfully, the setting is retained even after the power is turned off.The RX and TX will automatically match with each other everytime after powered on.• If use another TX, please match the RX with the new TX.• When need to relieve TX and RX connection, select and confirm "Restore default" menu. Set backlightSet the backgroud LED light to ON or Delay60/30/10 seconds or OFF. Default is "Delay 10s."Restore default settingRestore all settings of the TX to default settings. NOTE: The matching setting will also be cleared after restoring.Version of the TXSerial number5 Battery ChargerUse the battery charger to recharge the battery of VmicLink5 system.The indicator turns red while the battery is charging.The indicator turns green while the battery has been fully charged.6 SpecificationsVmicLink5 SystemRF power15dBm(30mW)RF frequence5725-5875MHzChannel3CH, RX channel changeable, TX followwith RXTransmission distance30m with no obstacleInterface Transmitter Mic in: Max 160mV/-13dBu, 1.8V phantom powerTransmitter Line in: Max 2V/8dBu, 50V DC isolationReceiver Phone out: Max 70mW/32Ω, 10V DC isolationReceiver Line out: 4 times mic in gain, 50V DC isolationReceive sensitivity98dB THD+N-92dB Sample rate48K/16bit Audio frequenceresponse40Hz-18KHz/±1dBVoice delay18msPower consumptionRX: 180mA/6VTX: 140mA/6VAntenna gain3dBiWeight810gBattery7.2V/1000mAh Li-ionBattery type LP-E17(CANON EOS M3/750D/760D) DimensionsRX: 113x64x28mmTX: 113x64x28mmOperatingtemperature0°C-50°CStorage temperature-20°C-55°C9RX• Portable receiver: VmicLink5-RX • Shoe mount adapter • Belt clip • Antenna• Rechargeable Li-ion battery• XLR to 3.5mm locking-type plug audio output cable• 3.5mm locking-type plug audio cable • Battery chargerTX• Body-pack transmitter: Vmic Link5-TX • Belt clip • Antenna• Rechargeable Li-ion battery • Microphone holder clip• Omni-directional lavalier microphone• Warranty card • User manual7 Packing List 8 PackageVmicLink5 RX+TXThis package includes one receiver RX and one transmitter TX.VmicLink5 RX+TX+TXThis package includes one receiver RX and two transmitters TX.VmicLink5 RX+TX+TXThis package includes one receiver RX and three transmitters TX.NOTE: Any package RX and TX can be used in combination.The Saramonic logo is trademark which is registered and owned by Saramonic International. COPYRIGHT 2011-2021 SARAMONIC INTERNATIONAL ( A brand of DSQN )Email:*****************m。


多媒體使用者手冊© Copyright 2007 Hewlett-Packard Development Company, L.P.Windows 是 Microsoft Corporation 在美國的註冊商標。
本文件包含的資訊可能有所變更,恕不另行通知。
HP 產品與服務的保固僅列於隨產品及服務隨附的明確保固聲明中。
本文件的任何部份都不可構成任何額外的保固。
HP 不負責本文件在技術上或編輯上的錯誤或疏失。
第 1 版:2007 年 11 月文件編號:460854-AB1產品聲明本使用者指南說明的功能適用於大部分機型。
部分功能可能不適用於您的電腦。
iiiiv產品聲明目錄1 使用多媒體硬體使用音效功能 (1)重要的音訊設定 (2)使用音效輸入(麥克風)接頭 (3)使用音效輸出(耳機)接頭 (3)調整音量 (4)使用快速啟動按鈕 (5)使用視訊功能 (6)使用外接式顯示器埠 (6)使用 S-Video 輸出接頭(僅限特定機型) (7)使用 Webcam(僅限特定機型) (8)調整 Webcam 內容 (9)使用光碟機 (10)識別已安裝的光碟機 (10)插入光碟(CD 或 DVD) (10)以電池或外部電源執行時取出光碟 (11)電腦未連接電源時取出光碟 (12)使用媒體活動功能 (13)使用媒體活動快速鍵 (13)使用 Media Activity 按鈕(僅限特定機型) (14)上一個/倒帶按鈕 (14)播放/暫停按鈕 (14)下一個/向前快轉按鈕 (15)停止按鈕 (15)2 使用多媒體軟體開啟預先安裝的多媒體軟體 (17)從光碟安裝多媒體軟體 (17)使用多媒體軟體 (18)防止播放中斷 (19)變更 DVD 地區設定 (20)遵守版權警告 (20)索引 (21)vvi1使用多媒體硬體使用音效功能下圖和表格說明電腦的音效功能。
附註:您電腦的外觀可能會與本節中圖例有些不同。
組件說明(1)內建麥克風 (2)(僅限特定機型)錄製音效。
The information in this document is subject to change without notice and does not represent a commitment on the part of Native Instruments GmbH. The software described by this docu-ment is subject to a License Agreement and may not be copied to other media. No part of this publication may be copied, reproduced or otherwise transmitted or recorded, for any purpose, without prior written permission by Native Instruments GmbH, hereinafter referred to as Native Instruments.“Native Instruments”, “NI” and associated logos are (registered) trademarks of Native Instru-ments GmbH.ASIO, VST, HALion and Cubase are registered trademarks of Steinberg Media Technologies GmbH.All other product and company names are trademarks™ or registered® trademarks of their re-spective holders. Use of them does not imply any affiliation with or endorsement by them.Document authored by: David Gover and Nico Sidi.Software version: 2.8 (02/2019)Hardware version: MASCHINE MIKRO MK3Special thanks to the Beta Test Team, who were invaluable not just in tracking down bugs, but in making this a better product.NATIVE INSTRUMENTS GmbH Schlesische Str. 29-30D-10997 Berlin Germanywww.native-instruments.de NATIVE INSTRUMENTS North America, Inc. 6725 Sunset Boulevard5th FloorLos Angeles, CA 90028USANATIVE INSTRUMENTS K.K.YO Building 3FJingumae 6-7-15, Shibuya-ku, Tokyo 150-0001Japanwww.native-instruments.co.jp NATIVE INSTRUMENTS UK Limited 18 Phipp StreetLondon EC2A 4NUUKNATIVE INSTRUMENTS FRANCE SARL 113 Rue Saint-Maur75011 ParisFrance SHENZHEN NATIVE INSTRUMENTS COMPANY Limited 5F, Shenzhen Zimao Center111 Taizi Road, Nanshan District, Shenzhen, GuangdongChina© NATIVE INSTRUMENTS GmbH, 2019. All rights reserved.Table of Contents1Welcome to MASCHINE (23)1.1MASCHINE Documentation (24)1.2Document Conventions (25)1.3New Features in MASCHINE 2.8 (26)1.4New Features in MASCHINE 2.7.10 (28)1.5New Features in MASCHINE 2.7.8 (29)1.6New Features in MASCHINE 2.7.7 (29)1.7New Features in MASCHINE 2.7.4 (31)1.8New Features in MASCHINE 2.7.3 (33)2Quick Reference (35)2.1MASCHINE Project Overview (35)2.1.1Sound Content (35)2.1.2Arrangement (37)2.2MASCHINE Hardware Overview (40)2.2.1MASCHINE MIKRO Hardware Overview (40)2.2.1.1Browser Section (41)2.2.1.2Edit Section (42)2.2.1.3Performance Section (43)2.2.1.4Transport Section (45)2.2.1.5Pad Section (46)2.2.1.6Rear Panel (50)2.3MASCHINE Software Overview (51)2.3.1Header (52)2.3.2Browser (54)2.3.3Arranger (56)2.3.4Control Area (59)2.3.5Pattern Editor (60)3Basic Concepts (62)3.1Important Names and Concepts (62)3.2Adjusting the MASCHINE User Interface (65)3.2.1Adjusting the Size of the Interface (65)3.2.2Switching between Ideas View and Song View (66)3.2.3Showing/Hiding the Browser (67)3.2.4Showing/Hiding the Control Lane (67)3.3Common Operations (68)3.3.1Adjusting Volume, Swing, and Tempo (68)3.3.2Undo/Redo (71)3.3.3Focusing on a Group or a Sound (73)3.3.4Switching Between the Master, Group, and Sound Level (77)3.3.5Navigating Channel Properties, Plug-ins, and Parameter Pages in the Control Area.773.3.6Navigating the Software Using the Controller (82)3.3.7Using Two or More Hardware Controllers (82)3.3.8Loading a Recent Project from the Controller (84)3.4Native Kontrol Standard (85)3.5Stand-Alone and Plug-in Mode (86)3.5.1Differences between Stand-Alone and Plug-in Mode (86)3.5.2Switching Instances (88)3.6Preferences (88)3.6.1Preferences – General Page (89)3.6.2Preferences – Audio Page (93)3.6.3Preferences – MIDI Page (95)3.6.4Preferences – Default Page (97)3.6.5Preferences – Library Page (101)3.6.6Preferences – Plug-ins Page (109)3.6.7Preferences – Hardware Page (114)3.6.8Preferences – Colors Page (114)3.7Integrating MASCHINE into a MIDI Setup (117)3.7.1Connecting External MIDI Equipment (117)3.7.2Sync to External MIDI Clock (117)3.7.3Send MIDI Clock (118)3.7.4Using MIDI Mode (119)3.8Syncing MASCHINE using Ableton Link (120)3.8.1Connecting to a Network (121)3.8.2Joining and Leaving a Link Session (121)4Browser (123)4.1Browser Basics (123)4.1.1The MASCHINE Library (123)4.1.2Browsing the Library vs. Browsing Your Hard Disks (124)4.2Searching and Loading Files from the Library (125)4.2.1Overview of the Library Pane (125)4.2.2Selecting or Loading a Product and Selecting a Bank from the Browser (128)4.2.3Selecting a Product Category, a Product, a Bank, and a Sub-Bank (133)4.2.3.1Selecting a Product Category, a Product, a Bank, and a Sub-Bank on theController (137)4.2.4Selecting a File Type (137)4.2.5Choosing Between Factory and User Content (138)4.2.6Selecting Type and Character Tags (138)4.2.7Performing a Text Search (142)4.2.8Loading a File from the Result List (143)4.3Additional Browsing Tools (148)4.3.1Loading the Selected Files Automatically (148)4.3.2Auditioning Instrument Presets (149)4.3.3Auditioning Samples (150)4.3.4Loading Groups with Patterns (150)4.3.5Loading Groups with Routing (151)4.3.6Displaying File Information (151)4.4Using Favorites in the Browser (152)4.5Editing the Files’ Tags and Properties (155)4.5.1Attribute Editor Basics (155)4.5.2The Bank Page (157)4.5.3The Types and Characters Pages (157)4.5.4The Properties Page (160)4.6Loading and Importing Files from Your File System (161)4.6.1Overview of the FILES Pane (161)4.6.2Using Favorites (163)4.6.3Using the Location Bar (164)4.6.4Navigating to Recent Locations (165)4.6.5Using the Result List (166)4.6.6Importing Files to the MASCHINE Library (169)4.7Locating Missing Samples (171)4.8Using Quick Browse (173)5Managing Sounds, Groups, and Your Project (175)5.1Overview of the Sounds, Groups, and Master (175)5.1.1The Sound, Group, and Master Channels (176)5.1.2Similarities and Differences in Handling Sounds and Groups (177)5.1.3Selecting Multiple Sounds or Groups (178)5.2Managing Sounds (181)5.2.1Loading Sounds (183)5.2.2Pre-listening to Sounds (184)5.2.3Renaming Sound Slots (185)5.2.4Changing the Sound’s Color (186)5.2.5Saving Sounds (187)5.2.6Copying and Pasting Sounds (189)5.2.7Moving Sounds (192)5.2.8Resetting Sound Slots (193)5.3Managing Groups (194)5.3.1Creating Groups (196)5.3.2Loading Groups (197)5.3.3Renaming Groups (198)5.3.4Changing the Group’s Color (199)5.3.5Saving Groups (200)5.3.6Copying and Pasting Groups (202)5.3.7Reordering Groups (206)5.3.8Deleting Groups (207)5.4Exporting MASCHINE Objects and Audio (208)5.4.1Saving a Group with its Samples (208)5.4.2Saving a Project with its Samples (210)5.4.3Exporting Audio (212)5.5Importing Third-Party File Formats (218)5.5.1Loading REX Files into Sound Slots (218)5.5.2Importing MPC Programs to Groups (219)6Playing on the Controller (223)6.1Adjusting the Pads (223)6.1.1The Pad View in the Software (223)6.1.2Choosing a Pad Input Mode (225)6.1.3Adjusting the Base Key (226)6.2Adjusting the Key, Choke, and Link Parameters for Multiple Sounds (227)6.3Playing Tools (229)6.3.1Mute and Solo (229)6.3.2Choke All Notes (233)6.3.3Groove (233)6.3.4Level, Tempo, Tune, and Groove Shortcuts on Your Controller (235)6.3.5Tap Tempo (235)6.4Performance Features (236)6.4.1Overview of the Perform Features (236)6.4.2Selecting a Scale and Creating Chords (239)6.4.3Scale and Chord Parameters (240)6.4.4Creating Arpeggios and Repeated Notes (253)6.4.5Swing on Note Repeat / Arp Output (257)6.5Using Lock Snapshots (257)6.5.1Creating a Lock Snapshot (257)7Working with Plug-ins (259)7.1Plug-in Overview (259)7.1.1Plug-in Basics (259)7.1.2First Plug-in Slot of Sounds: Choosing the Sound’s Role (263)7.1.3Loading, Removing, and Replacing a Plug-in (264)7.1.4Adjusting the Plug-in Parameters (270)7.1.5Bypassing Plug-in Slots (270)7.1.6Using Side-Chain (272)7.1.7Moving Plug-ins (272)7.1.8Alternative: the Plug-in Strip (273)7.1.9Saving and Recalling Plug-in Presets (273)7.1.9.1Saving Plug-in Presets (274)7.1.9.2Recalling Plug-in Presets (275)7.1.9.3Removing a Default Plug-in Preset (276)7.2The Sampler Plug-in (277)7.2.1Page 1: Voice Settings / Engine (279)7.2.2Page 2: Pitch / Envelope (281)7.2.3Page 3: FX / Filter (283)7.2.4Page 4: Modulation (285)7.2.5Page 5: LFO (286)7.2.6Page 6: Velocity / Modwheel (288)7.3Using Native Instruments and External Plug-ins (289)7.3.1Opening/Closing Plug-in Windows (289)7.3.2Using the VST/AU Plug-in Parameters (292)7.3.3Setting Up Your Own Parameter Pages (293)7.3.4Using VST/AU Plug-in Presets (298)7.3.5Multiple-Output Plug-ins and Multitimbral Plug-ins (300)8Using the Audio Plug-in (302)8.1Loading a Loop into the Audio Plug-in (306)8.2Editing Audio in the Audio Plug-in (307)8.3Using Loop Mode (308)8.4Using Gate Mode (310)9Using the Drumsynths (312)9.1Drumsynths – General Handling (313)9.1.1Engines: Many Different Drums per Drumsynth (313)9.1.2Common Parameter Organization (313)9.1.3Shared Parameters (316)9.1.4Various Velocity Responses (316)9.1.5Pitch Range, Tuning, and MIDI Notes (316)9.2The Kicks (317)9.2.1Kick – Sub (319)9.2.2Kick – Tronic (321)9.2.3Kick – Dusty (324)9.2.4Kick – Grit (325)9.2.5Kick – Rasper (328)9.2.6Kick – Snappy (329)9.2.7Kick – Bold (331)9.2.8Kick – Maple (333)9.2.9Kick – Push (334)9.3The Snares (336)9.3.1Snare – Volt (338)9.3.2Snare – Bit (340)9.3.3Snare – Pow (342)9.3.4Snare – Sharp (343)9.3.5Snare – Airy (345)9.3.6Snare – Vintage (347)9.3.7Snare – Chrome (349)9.3.8Snare – Iron (351)9.3.9Snare – Clap (353)9.3.10Snare – Breaker (355)9.4The Hi-hats (357)9.4.1Hi-hat – Silver (358)9.4.2Hi-hat – Circuit (360)9.4.3Hi-hat – Memory (362)9.4.4Hi-hat – Hybrid (364)9.4.5Creating a Pattern with Closed and Open Hi-hats (366)9.5The Toms (367)9.5.1Tom – Tronic (369)9.5.2Tom – Fractal (371)9.5.3Tom – Floor (375)9.5.4Tom – High (377)9.6The Percussions (378)9.6.1Percussion – Fractal (380)9.6.2Percussion – Kettle (383)9.6.3Percussion – Shaker (385)9.7The Cymbals (389)9.7.1Cymbal – Crash (391)9.7.2Cymbal – Ride (393)10Using the Bass Synth (396)10.1Bass Synth – General Handling (397)10.1.1Parameter Organization (397)10.1.2Bass Synth Parameters (399)11Working with Patterns (401)11.1Pattern Basics (401)11.1.1Pattern Editor Overview (402)11.1.2Navigating the Event Area (404)11.1.3Following the Playback Position in the Pattern (406)11.1.4Jumping to Another Playback Position in the Pattern (407)11.1.5Group View and Keyboard View (408)11.1.6Adjusting the Arrange Grid and the Pattern Length (410)11.1.7Adjusting the Step Grid and the Nudge Grid (413)11.2Recording Patterns in Real Time (416)11.2.1Recording Your Patterns Live (417)11.2.2Using the Metronome (419)11.2.3Recording with Count-in (420)11.3Recording Patterns with the Step Sequencer (422)11.3.1Step Mode Basics (422)11.3.2Editing Events in Step Mode (424)11.4Editing Events (425)11.4.1Editing Events with the Mouse: an Overview (425)11.4.2Creating Events/Notes (428)11.4.3Selecting Events/Notes (429)11.4.4Editing Selected Events/Notes (431)11.4.5Deleting Events/Notes (434)11.4.6Cut, Copy, and Paste Events/Notes (436)11.4.7Quantizing Events/Notes (439)11.4.8Quantization While Playing (441)11.4.9Doubling a Pattern (442)11.4.10Adding Variation to Patterns (442)11.5Recording and Editing Modulation (443)11.5.1Which Parameters Are Modulatable? (444)11.5.2Recording Modulation (446)11.5.3Creating and Editing Modulation in the Control Lane (447)11.6Creating MIDI Tracks from Scratch in MASCHINE (452)11.7Managing Patterns (454)11.7.1The Pattern Manager and Pattern Mode (455)11.7.2Selecting Patterns and Pattern Banks (456)11.7.3Creating Patterns (459)11.7.4Deleting Patterns (460)11.7.5Creating and Deleting Pattern Banks (461)11.7.6Naming Patterns (463)11.7.7Changing the Pattern’s Color (465)11.7.8Duplicating, Copying, and Pasting Patterns (466)11.7.9Moving Patterns (469)11.8Importing/Exporting Audio and MIDI to/from Patterns (470)11.8.1Exporting Audio from Patterns (470)11.8.2Exporting MIDI from Patterns (472)11.8.3Importing MIDI to Patterns (474)12Audio Routing, Remote Control, and Macro Controls (483)12.1Audio Routing in MASCHINE (484)12.1.1Sending External Audio to Sounds (485)12.1.2Configuring the Main Output of Sounds and Groups (489)12.1.3Setting Up Auxiliary Outputs for Sounds and Groups (494)12.1.4Configuring the Master and Cue Outputs of MASCHINE (497)12.1.5Mono Audio Inputs (502)12.1.5.1Configuring External Inputs for Sounds in Mix View (503)12.2Using MIDI Control and Host Automation (506)12.2.1Triggering Sounds via MIDI Notes (507)12.2.2Triggering Scenes via MIDI (513)12.2.3Controlling Parameters via MIDI and Host Automation (514)12.2.4Selecting VST/AU Plug-in Presets via MIDI Program Change (522)12.2.5Sending MIDI from Sounds (523)12.3Creating Custom Sets of Parameters with the Macro Controls (527)12.3.1Macro Control Overview (527)12.3.2Assigning Macro Controls Using the Software (528)13Controlling Your Mix (535)13.1Mix View Basics (535)13.1.1Switching between Arrange View and Mix View (535)13.1.2Mix View Elements (536)13.2The Mixer (537)13.2.1Displaying Groups vs. Displaying Sounds (539)13.2.2Adjusting the Mixer Layout (541)13.2.3Selecting Channel Strips (542)13.2.4Managing Your Channels in the Mixer (543)13.2.5Adjusting Settings in the Channel Strips (545)13.2.6Using the Cue Bus (549)13.3The Plug-in Chain (551)13.4The Plug-in Strip (552)13.4.1The Plug-in Header (554)13.4.2Panels for Drumsynths and Internal Effects (556)13.4.3Panel for the Sampler (557)13.4.4Custom Panels for Native Instruments Plug-ins (560)13.4.5Undocking a Plug-in Panel (Native Instruments and External Plug-ins Only) (564)14Using Effects (567)14.1Applying Effects to a Sound, a Group or the Master (567)14.1.1Adding an Effect (567)14.1.2Other Operations on Effects (574)14.1.3Using the Side-Chain Input (575)14.2Applying Effects to External Audio (578)14.2.1Step 1: Configure MASCHINE Audio Inputs (578)14.2.2Step 2: Set up a Sound to Receive the External Input (579)14.2.3Step 3: Load an Effect to Process an Input (579)14.3Creating a Send Effect (580)14.3.1Step 1: Set Up a Sound or Group as Send Effect (581)14.3.2Step 2: Route Audio to the Send Effect (583)14.3.3 A Few Notes on Send Effects (583)14.4Creating Multi-Effects (584)15Effect Reference (587)15.1Dynamics (588)15.1.1Compressor (588)15.1.2Gate (591)15.1.3Transient Master (594)15.1.4Limiter (596)15.1.5Maximizer (600)15.2Filtering Effects (603)15.2.1EQ (603)15.2.2Filter (605)15.2.3Cabinet (609)15.3Modulation Effects (611)15.3.1Chorus (611)15.3.2Flanger (612)15.3.3FM (613)15.3.4Freq Shifter (615)15.3.5Phaser (616)15.4Spatial and Reverb Effects (617)15.4.1Ice (617)15.4.2Metaverb (619)15.4.3Reflex (620)15.4.4Reverb (Legacy) (621)15.4.5Reverb (623)15.4.5.1Reverb Room (623)15.4.5.2Reverb Hall (626)15.4.5.3Plate Reverb (629)15.5Delays (630)15.5.1Beat Delay (630)15.5.2Grain Delay (632)15.5.3Grain Stretch (634)15.5.4Resochord (636)15.6Distortion Effects (638)15.6.1Distortion (638)15.6.2Lofi (640)15.6.3Saturator (641)15.7Perform FX (645)15.7.1Filter (646)15.7.2Flanger (648)15.7.3Burst Echo (650)15.7.4Reso Echo (653)15.7.5Ring (656)15.7.6Stutter (658)15.7.7Tremolo (661)15.7.8Scratcher (664)16Working with the Arranger (667)16.1Arranger Basics (667)16.1.1Navigating Song View (670)16.1.2Following the Playback Position in Your Project (672)16.1.3Performing with Scenes and Sections using the Pads (673)16.2Using Ideas View (677)16.2.1Scene Overview (677)16.2.2Creating Scenes (679)16.2.3Assigning and Removing Patterns (679)16.2.4Selecting Scenes (682)16.2.5Deleting Scenes (684)16.2.6Creating and Deleting Scene Banks (685)16.2.7Clearing Scenes (685)16.2.8Duplicating Scenes (685)16.2.9Reordering Scenes (687)16.2.10Making Scenes Unique (688)16.2.11Appending Scenes to Arrangement (689)16.2.12Naming Scenes (689)16.2.13Changing the Color of a Scene (690)16.3Using Song View (692)16.3.1Section Management Overview (692)16.3.2Creating Sections (694)16.3.3Assigning a Scene to a Section (695)16.3.4Selecting Sections and Section Banks (696)16.3.5Reorganizing Sections (700)16.3.6Adjusting the Length of a Section (702)16.3.6.1Adjusting the Length of a Section Using the Software (703)16.3.6.2Adjusting the Length of a Section Using the Controller (705)16.3.7Clearing a Pattern in Song View (705)16.3.8Duplicating Sections (705)16.3.8.1Making Sections Unique (707)16.3.9Removing Sections (707)16.3.10Renaming Scenes (708)16.3.11Clearing Sections (710)16.3.12Creating and Deleting Section Banks (710)16.3.13Working with Patterns in Song view (710)16.3.13.1Creating a Pattern in Song View (711)16.3.13.2Selecting a Pattern in Song View (711)16.3.13.3Clearing a Pattern in Song View (711)16.3.13.4Renaming a Pattern in Song View (711)16.3.13.5Coloring a Pattern in Song View (712)16.3.13.6Removing a Pattern in Song View (712)16.3.13.7Duplicating a Pattern in Song View (712)16.3.14Enabling Auto Length (713)16.3.15Looping (714)16.3.15.1Setting the Loop Range in the Software (714)16.3.15.2Activating or Deactivating a Loop Using the Controller (715)16.4Playing with Sections (715)16.4.1Jumping to another Playback Position in Your Project (716)16.5Triggering Sections or Scenes via MIDI (717)16.6The Arrange Grid (719)16.7Quick Grid (720)17Sampling and Sample Mapping (722)17.1Opening the Sample Editor (722)17.2Recording Audio (724)17.2.1Opening the Record Page (724)17.2.2Selecting the Source and the Recording Mode (725)17.2.3Arming, Starting, and Stopping the Recording (729)17.2.5Checking Your Recordings (731)17.2.6Location and Name of Your Recorded Samples (734)17.3Editing a Sample (735)17.3.1Using the Edit Page (735)17.3.2Audio Editing Functions (739)17.4Slicing a Sample (743)17.4.1Opening the Slice Page (743)17.4.2Adjusting the Slicing Settings (744)17.4.3Manually Adjusting Your Slices (746)17.4.4Applying the Slicing (750)17.5Mapping Samples to Zones (754)17.5.1Opening the Zone Page (754)17.5.2Zone Page Overview (755)17.5.3Selecting and Managing Zones in the Zone List (756)17.5.4Selecting and Editing Zones in the Map View (761)17.5.5Editing Zones in the Sample View (765)17.5.6Adjusting the Zone Settings (767)17.5.7Adding Samples to the Sample Map (770)18Appendix: Tips for Playing Live (772)18.1Preparations (772)18.1.1Focus on the Hardware (772)18.1.2Customize the Pads of the Hardware (772)18.1.3Check Your CPU Power Before Playing (772)18.1.4Name and Color Your Groups, Patterns, Sounds and Scenes (773)18.1.5Consider Using a Limiter on Your Master (773)18.1.6Hook Up Your Other Gear and Sync It with MIDI Clock (773)18.1.7Improvise (773)18.2Basic Techniques (773)18.2.1Use Mute and Solo (773)18.2.2Create Variations of Your Drum Patterns in the Step Sequencer (774)18.2.3Use Note Repeat (774)18.2.4Set Up Your Own Multi-effect Groups and Automate Them (774)18.3Special Tricks (774)18.3.1Changing Pattern Length for Variation (774)18.3.2Using Loops to Cycle Through Samples (775)18.3.3Load Long Audio Files and Play with the Start Point (775)19Troubleshooting (776)19.1Knowledge Base (776)19.2Technical Support (776)19.3Registration Support (777)19.4User Forum (777)20Glossary (778)Index (786)1Welcome to MASCHINEThank you for buying MASCHINE!MASCHINE is a groove production studio that implements the familiar working style of classi-cal groove boxes along with the advantages of a computer based system. MASCHINE is ideal for making music live, as well as in the studio. It’s the hands-on aspect of a dedicated instru-ment, the MASCHINE hardware controller, united with the advanced editing features of the MASCHINE software.Creating beats is often not very intuitive with a computer, but using the MASCHINE hardware controller to do it makes it easy and fun. You can tap in freely with the pads or use Note Re-peat to jam along. Alternatively, build your beats using the step sequencer just as in classic drum machines.Patterns can be intuitively combined and rearranged on the fly to form larger ideas. You can try out several different versions of a song without ever having to stop the music.Since you can integrate it into any sequencer that supports VST, AU, or AAX plug-ins, you can reap the benefits in almost any software setup, or use it as a stand-alone application. You can sample your own material, slice loops and rearrange them easily.However, MASCHINE is a lot more than an ordinary groovebox or sampler: it comes with an inspiring 7-gigabyte library, and a sophisticated, yet easy to use tag-based Browser to give you instant access to the sounds you are looking for.What’s more, MASCHINE provides lots of options for manipulating your sounds via internal ef-fects and other sound-shaping possibilities. You can also control external MIDI hardware and 3rd-party software with the MASCHINE hardware controller, while customizing the functions of the pads, knobs and buttons according to your needs utilizing the included Controller Editor application. We hope you enjoy this fantastic instrument as much as we do. Now let’s get go-ing!—The MASCHINE team at Native Instruments.MASCHINE Documentation1.1MASCHINE DocumentationNative Instruments provide many information sources regarding MASCHINE. The main docu-ments should be read in the following sequence:1.MASCHINE MIKRO Quick Start Guide: This animated online guide provides a practical ap-proach to help you learn the basic of MASCHINE MIKRO. The guide is available from theNative Instruments website: https:///maschine-mikro-quick-start/2.MASCHINE Manual (this document): The MASCHINE Manual provides you with a compre-hensive description of all MASCHINE software and hardware features.Additional documentation sources provide you with details on more specific topics:►Online Support Videos: You can find a number of support videos on The Official Native In-struments Support Channel under the following URL: https:///NIsupport-EN. We recommend that you follow along with these instructions while the respective ap-plication is running on your computer.Other Online Resources:If you are experiencing problems related to your Native Instruments product that the supplied documentation does not cover, there are several ways of getting help:▪Knowledge Base▪User Forum▪Technical Support▪Registration SupportYou will find more information on these subjects in the chapter Troubleshooting.Document Conventions1.2Document ConventionsThis section introduces you to the signage and text highlighting used in this manual. This man-ual uses particular formatting to point out special facts and to warn you of potential issues.The icons introducing these notes let you see what kind of information is to be expected:This document uses particular formatting to point out special facts and to warn you of poten-tial issues. The icons introducing the following notes let you see what kind of information canbe expected:Furthermore, the following formatting is used:▪Text appearing in (drop-down) menus (such as Open…, Save as… etc.) in the software andpaths to locations on your hard disk or other storage devices is printed in italics.▪Text appearing elsewhere (labels of buttons, controls, text next to checkboxes etc.) in thesoftware is printed in blue. Whenever you see this formatting applied, you will find thesame text appearing somewhere on the screen.▪Text appearing on the displays of the controller is printed in light grey. Whenever you seethis formatting applied, you will find the same text on a controller display.▪Text appearing on labels of the hardware controller is printed in orange. Whenever you seethis formatting applied, you will find the same text on the controller.▪Important names and concepts are printed in bold.▪References to keys on your computer’s keyboard you’ll find put in square brackets (e.g.,“Press [Shift] + [Enter]”).►Single instructions are introduced by this play button type arrow.→Results of actions are introduced by this smaller arrow.Naming ConventionThroughout the documentation we will refer to MASCHINE controller (or just controller) as the hardware controller and MASCHINE software as the software installed on your computer.The term “effect” will sometimes be abbreviated as “FX” when referring to elements in the MA-SCHINE software and hardware. These terms have the same meaning.Button Combinations and Shortcuts on Your ControllerMost instructions will use the “+” sign to indicate buttons (or buttons and pads) that must be pressed simultaneously, starting with the button indicated first. E.g., an instruction such as:“Press SHIFT + PLAY”means:1.Press and hold SHIFT.2.While holding SHIFT, press PLAY and release it.3.Release SHIFT.1.3New Features in MASCHINE2.8The following new features have been added to MASCHINE: Integration▪Browse on , create your own collections of loops and one-shots and send them directly to the MASCHINE browser.Improvements to the Browser▪Samples are now cataloged in separate Loops and One-shots tabs in the Browser.▪Previews of loops selected in the Browser will be played in sync with the current project.When a loop is selected with Prehear turned on, it will begin playing immediately in-sync with the project if transport is running. If a loop preview starts part-way through the loop, the loop will play once more for its full length to ensure you get to hear the entire loop once in context with your project.▪Filters and product selections will be remembered when switching between content types and Factory/User Libraries in the Browser.▪Browser content synchronization between multiple running instances. When running multi-ple instances of MASCHINE, either as Standalone and/or as a plug-in, updates to the Li-brary will be synced across the instances. For example, if you delete a sample from your User Library in one instance, the sample will no longer be present in the other instances.Similarly, if you save a preset in one instance, that preset will then be available in the oth-er instances, too.▪Edits made to samples in the Factory Libraries will be saved to the Standard User Directo-ry.For more information on these new features, refer to the following chapter ↑4, Browser. Improvements to the MASCHINE MIKRO MK3 Controller▪You can now set sample Start and End points using the controller. For more information refer to ↑17.3.1, Using the Edit Page.Improved Support for A-Series Keyboards▪When Browsing with A-Series keyboards, you can now jump quickly to the results list by holding SHIFT and pushing right on the 4D Encoder.▪When Browsing with A-Series keyboards, you can fast scroll through the Browser results list by holding SHIFT and twisting the 4D Encoder.▪Mute and Solo Sounds and Groups from A-Series keyboards. Sounds are muted in TRACK mode while Groups are muted in IDEAS.。

AWK-3251A-RCC SeriesWi-Fi5railway wireless access points/clientsFeatures and Benefits•IEEE802.11a/b/g/n/ac Wave2AP/client•Concurrent dual-band Wi-Fi with aggregated data rates up to1.267Gbps•Latest WPA3encryption for enhanced wireless network security•Designed specifically for rail carriage-to-carriage communication•Millisecond-level Client-based Turbo Roaming1•Built-in2.4GHz and5GHz band pass filter for more reliable wirelessconnections•-40to75°C wide operating temperature range(-T models)CertificationsIntroductionThe AWK-3251A-RCC Series industrial wireless AP/client is designed to meet the growing need for faster data transmission speeds through IEEE 802.11ac technology.The Auto Carriage Connection(ACC)feature enables easy deployment of wireless devices and increases the reliability of wireless carriage backbone networks.The AWK-3251A-RCC Series is also optimized for passenger Wi-Fi services and supports up to120client connections.The AWK-3251A-RCC Series complies with sections of the EN50155standard specifications covering operating temperature,power input voltage,surge,ESD,and vibration,making the product suitable for a variety of industrial applications.The AWK-3251A-RCC Series can be powered via PoE to facilitate flexible deployment and can operate concurrently on both the2.4and5GHz bands in AP mode.Advanced802.11ac Industrial Wireless Solution•802.11a/b/g/n/ac compliant railway dual-band access point with aggregated data rates of up to1.267Gbps•WPA3encryption for enhanced wireless network security•Supports ACC technology for wireless inter-carriage connections•Supports up to120device connections and client isolationAdvanced Wireless Technology•Seamless roaming with client-based Turbo Roaming1for<150ms roaming recovery time between APs(Client Mode)Industrial Ruggedness•Integrated antenna isolation designed to provide protection against external electrical interference•-40to75°C wide operating temperature models(-T)for smooth wireless communication in harsh environmentsSpecificationsWLAN InterfaceWLAN Standards 2.4GHz:802.11b/g/n with256QAM support5GHz:802.11a/n/ac Wave2with256QAM supportFrequency Band for US(20MHz operating channels)AWK-3251A-RCC US Models Only:2.412to2.462GHz(11channels)5.180to5.240GHz(4channels)5.260to5.320GHz(4channels)25.500to5.700GHz(11channels)25.745to5.825GHz(5channels)1.The Turbo Roaming recovery time indicated herein is an average of test results documented,in optimized conditions,across APs configured with interference-free20-MHz RF channels,WPA2-PSK security,and default Turbo Roaming parameters.The clients are configured with3-channel roaming at100Kbps traffic load.Other conditions may also impact roaming performance.For more information about Turbo Roaming parameter settings,refer to the product manual.Frequency Band for UN(20MHz operating channels)AWK-3251A-RCC UN Models Only:2.412to2.472GHz(13channels)5.180to5.240GHz(4channels)5.260to5.320GHz(4channels)35.500to5.700GHz(11channels)35.745to5.825GHz(5channels)Available channels change depending on the selected country or region code. Wireless Security WEP encryption(64-bit and128-bit)WPA/WPA2/WPA3-Enterprise(IEEE802.1X/RADIUS,TKIP,AES)WPA/WPA2/WPA3-PersonalTransmission Rate 2.4GHz:802.11b:1to11Mbps802.11g:6to54Mbps802.11n:6.5to300Mbps802.11ac:6.5to400Mbps5GHz:802.11a:6to54Mbps802.11n:6.5to300Mbps802.11ac:6.5to867MbpsTransmitter Power for802.11a22±1.5dBm@6Mbps22±1.5dBm@9Mbps22±1.5dBm@12Mbps20.5±1.5dBm@18Mbps20.5±1.5dBm@24Mbps20.5±1.5dBm@36Mbps20±1.5dBm@48Mbps20±1.5dBm@54MbpsTransmitter Power for802.11n(5GHz)22±1.5dBm@MCS020MHz22±1.5dBm@MCS120MHz22±1.5dBm@MCS220MHz20±1.5dBm@MCS320MHz19.5±1.5dBm@MCS420MHz19.5±1.5dBm@MCS520MHz19.5±1.5dBm@MCS620MHz19±1.5dBm@MCS720MHz22±1.5dBm@MCS820MHz22±1.5dBm@MCS920MHz22±1.5dBm@MCS1020MHz20±1.5dBm@MCS1120MHz19.5±1.5dBm@MCS1220MHz19.5±1.5dBm@MCS1320MHz19.5±1.5dBm@MCS1420MHz19±1.5dBm@MCS1520MHz21±1.5dBm@MCS040MHz21±1.5dBm@MCS140MHz21±1.5dBm@MCS240MHz19.5±1.5dBm@MCS340MHz19±1.5dBm@MCS440MHz19±1.5dBm@MCS540MHz19.5±1.5dBm@MCS640MHz19±1.5dBm@MCS740MHz21±1.5dBm@MCS840MHz21±1.5dBm@MCS940MHz21±1.5dBm@MCS1040MHz19.5±1.5dBm@MCS1140MHz19±1.5dBm@MCS1240MHz19±1.5dBm@MCS1340MHz19±1.5dBm@MCS1440MHz19±1.5dBm@MCS1540MHzTransmitter Power for802.11ac(5GHz,Dual Chain)21.5±1.5dBm@MCS020MHz21.5±1.5dBm@MCS120MHz21±1.5dBm@MCS220MHz20±1.5dBm@MCS320MHz19.5±1.5dBm@MCS420MHz19.5±1.5dBm@MCS520MHz19.5±1.5dBm@MCS620MHz19±1.5dBm@MCS720MHz19±1.5dBm@MCS820MHz21±1.5dBm@MCS040MHz21±1.5dBm@MCS140MHz21±1.5dBm@MCS240MHz19.5±1.5dBm@MCS340MHz19±1.5dBm@MCS440MHz19±1.5dBm@MCS540MHz19±1.5dBm@MCS640MHz19±1.5dBm@MCS740MHz18.5±1.5dBm@MCS840MHz18±1.5dBm@MCS940MHz20±1.5dBm@MCS080MHz20±1.5dBm@MCS180MHz20±1.5dBm@MCS280MHz17±1.5dBm@MCS380MHz17±1.5dBm@MCS480MHz17±1.5dBm@MCS580MHz17±1.5dBm@MCS680MHz17±1.5dBm@MCS780MHz17±1.5dBm@MCS880MHz17±1.5dBm@MCS980MHz Transmitter Power for802.11b25.5±1.5dBm@1Mbps25.5±1.5dBm@2Mbps26±1.5dBm@5.5Mbps26±1.5dBm@11Mbps Transmitter Power for802.11g26±1.5dBm@6Mbps26±1.5dBm@9Mbps26±1.5dBm@12Mbps25±1.5dBm@18Mbps25±1.5dBm@24Mbps24.5±1.5dBm@36Mbps23.5±1.5dBm@48Mbps23±1.5dBm@54Mbps Transmitter Power for802.11n(2.4GHz)24.5±1.5dBm@MCS020MHz24.5±1.5dBm@MCS120MHz24±1.5dBm@MCS220MHz24±1.5dBm@MCS320MHz23.5±1.5dBm@MCS420MHz23.5±1.5dBm@MCS520MHz22.5±1.5dBm@MCS620MHz22±1.5dBm@MCS720MHz24±1.5dBm@MCS820MHz24.5±1.5dBm@MCS920MHz24±1.5dBm@MCS1020MHz24±1.5dBm@MCS1120MHz23.5±1.5dBm@MCS1220MHz23±1.5dBm@MCS1320MHz22±1.5dBm@MCS1420MHz21.5±1.5dBm@MCS1520MHz24±1.5dBm@MCS040MHz24±1.5dBm@MCS140MHz24±1.5dBm@MCS240MHz24±1.5dBm@MCS340MHz23.5±1.5dBm@MCS440MHz23.5±1.5dBm@MCS540MHz22.5±1.5dBm@MCS640MHz22±1.5dBm@MCS740MHz24±1.5dBm@MCS840MHz24±1.5dBm@MCS940MHz24±1.5dBm@MCS1040MHz24±1.5dBm@MCS1140MHz23.5±1.5dBm@MCS1240MHz23±1.5dBm@MCS1340MHz22.5±1.5dBm@MCS1440MHz21.5±1.5dBm@MCS1540MHzTransmitter Power for802.11ac(2.4GHz,Dual Chain)25±1.5dBm@MCS020MHz 25±1.5dBm@MCS120MHz 25±1.5dBm@MCS220MHz 25±1.5dBm@MCS320MHz 24±1.5dBm@MCS420MHz 23.5±1.5dBm@MCS520MHz 22.5±1.5dBm@MCS620MHz 22±1.5dBm@MCS720MHz 21.5±1.5dBm@MCS820MHz 25±1.5dBm@MCS040MHz 25±1.5dBm@MCS140MHz 25±1.5dBm@MCS240MHz 25±1.5dBm@MCS340MHz 24±1.5dBm@MCS440MHz 23.5±1.5dBm@MCS540MHz 22.5±1.5dBm@MCS640MHz 22±1.5dBm@MCS740MHz 21.5±1.5dBm@MCS840MHz 21±1.5dBm@MCS940MHzReceiver Sensitivity for802.11a(measured at5.680 GHz)Typ.-88@6Mbps Typ.-88@9Mbps Typ.-85@12Mbps Typ.-84@18Mbps Typ.-81@24Mbps Typ.-77@36Mbps Typ.-74@48Mbps Typ.-72@54MbpsReceiver Sensitivity for802.11n(5GHz;measured at 5.680GHz)Typ.-88dBm@MCS020MHz Typ.-84dBm@MCS120MHz Typ.-83dBm@MCS220MHz Typ.-80dBm@MCS320MHz Typ.-76dBm@MCS420MHz Typ.-72dBm@MCS520MHz Typ.-70dBm@MCS620MHz Typ.-68dBm@MCS720MHz Typ.-89dBm@MCS820MHz Typ.-87dBm@MCS920MHz Typ.-85dBm@MCS1020MHz Typ.-81dBm@MCS1120MHz Typ.-78dBm@MCS1220MHz Typ.-74dBm@MCS1320MHz Typ.-73dBm@MCS1420MHz Typ.-71dBm@MCS1520MHz Typ.-85dBm@MCS040MHz Typ.-82dBm@MCS140MHz Typ.-79dBm@MCS240MHz Typ.-77dBm@MCS340MHz Typ.-73dBm@MCS440MHz Typ.-69dBm@MCS540MHz Typ.-68dBm@MCS640MHz Typ.-66dBm@MCS740MHz Typ.-87dBm@MCS840MHz Typ.-84dBm@MCS940MHz Typ.-82dBm@MCS1040MHz Typ.-79dBm@MCS1140MHz Typ.-75dBm@MCS1240MHz Typ.-72dBm@MCS1340MHz Typ.-70dBm@MCS1440MHz Typ.-69dBm@MCS1540MHzReceiver Sensitivity for802.11ac(5GHz,Dual Chain)Typ.-89dBm@MCS020MHzTyp.-86dBm@MCS120MHzTyp.-84dBm@MCS220MHzTyp.-81dBm@MCS320MHzTyp.-78dBm@MCS420MHzTyp.-74dBm@MCS520MHzTyp.-72dBm@MCS620MHzTyp.-71dBm@MCS720MHzTyp.-67dBm@MCS820MHzTyp.-86dBm@MCS040MHzTyp.-70dBm@MCS640MHz Typ.-69dBm@MCS740MHz Typ.-64dBm@MCS840MHz Typ.-63dBm@MCS940MHz Typ.-84dBm@MCS080MHz Typ.-81dBm@MCS180MHz Typ.-79dBm@MCS280MHz Typ.-76dBm@MCS380MHz Typ.-73dBm@MCS480MHz Typ.-69dBm@MCS580MHz Typ.-67dBm@MCS680MHz Typ.-65dBm@MCS780MHz Typ.-61dBm@MCS880MHz Typ.-60dBm@MCS980MHzReceiver Sensitivity for802.11b(measured at2.437 GHz)Typ.-96dBm@1Mbps Typ.-92dBm@2Mbps Typ.-91dBm@5.5Mbps Typ.-88dBm@11MbpsReceiver Sensitivity for802.11g(measured at2.437 GHz)Typ.-90dBm@6Mbps Typ.-89dBm@9Mbps Typ.-88dBm@12Mbps Typ.-86dBm@18Mbps Typ.-82dBm@24Mbps Typ.-79dBm@36Mbps Typ.-75dBm@48Mbps Typ.-73dBm@54MbpsReceiver Sensitivity for802.11n(2.4GHz;measured at2.437GHz)Typ.-89dBm@MCS020MHz Typ.-86dBm@MCS120MHz Typ.-84dBm@MCS220MHz Typ.-81dBm@MCS320MHz Typ.-77dBm@MCS420MHz Typ.-73dBm@MCS520MHz Typ.-72dBm@MCS620MHz Typ.70dBm@MCS720MHz Typ.-91dBm@MCS820MHz Typ.-88dBm@MCS920MHz Typ.-86dBm@MCS1020MHz Typ.-82dBm@MCS1120MHz Typ.-80dBm@MCS1220MHz Typ.-75dBm@MCS1320MHz Typ.-74dBm@MCS1420MHz Typ.-73dBm@MCS1520MHz Typ.-87dBm@MCS040MHz Typ.-84dBm@MCS140MHz Typ.-82dBm@MCS240MHz Typ.-78dBm@MCS340MHz Typ.-75dBm@MCS440MHz Typ.-71dBm@MCS540MHz Typ.-70dBm@MCS640MHz Typ.-68dBm@MCS740MHz Typ.-88dBm@MCS840MHz Typ.-85dBm@MCS940MHz Typ.-83dBm@MCS1040MHz Typ.-80dBm@MCS1140MHz Typ.-77dBm@MCS1240MHz Typ.-73dBm@MCS1340MHz Typ.-71dBm@MCS1440MHz Typ.-70dBm@MCS1540MHzReceiver Sensitivity for802.11ac(2.4GHz,Dual Chain)Typ.-90dBm@MCS020MHz Typ.-87dBm@MCS120MHz Typ.-85dBm@MCS220MHz Typ.-82dBm@MCS320MHz Typ.-79dBm@MCS420MHz Typ.-75dBm@MCS520MHzTyp.-83dBm@MCS240MHzTyp.-80dBm@MCS340MHzTyp.-77dBm@MCS440MHzTyp.-72dBm@MCS540MHzTyp.-71dBm@MCS640MHzTyp.-70dBm@MCS740MHzTyp.-66dBm@MCS840MHzTyp.-64dBm@MCS940MHz WLAN Operation Mode Access pointClientClient-RouterMasterSlaveSnifferACCAntenna Connectors QMAEthernet InterfaceStandards IEEE802.3for10BaseTIEEE802.3u for100BaseT(X)IEEE802.3ab for1000BaseT(X)IEEE802.3at for PoEIEEE802.1Q for VLAN TaggingIEEE802.1X for authentication10/100/1000BaseT(X)Ports(M12X-coded8-pin female connector)1Supports IEEE802.3at PoEEthernet Software FeaturesManagement DHCP Server/ClientDNSHTTPIPv4LLDPSMTPSNMPv1/v2c/v3SyslogTCP/IPTelnetUDPVLANMXconfigSecurity HTTPS/SSLRADIUSSSHTime Management SNTP Client FirewallFilter ICMPMAC addressIP protocolPort-basedSerial InterfaceConsole Port RS-2328-pin RJ45LED InterfaceInput/Output InterfaceDigital Inputs2Max.input current:8mA+13to+30V for state1+3to-30V for state0Alarm Contact Channels Relay output with current carrying capacity of1A@24VDCButtons Reset buttonPhysical CharacteristicsHousing MetalIP Rating IP30Dimensions45x130x118mm(1.77x5.12x4.65in)Weight800g(1.76lb)Installation DIN-rail mountingWall mounting(with optional kit)Power ParametersInput Current12-48VDC,2.01-0.5AInput Voltage12to48VDCRedundant dual inputs48VDC Power-over-EthernetPower Connector1removable10-contact terminal block(s)Power Consumption24.12W(max.)Environmental LimitsOperating Temperature Standard Models:-25to60°C(-13to140°F)Wide Temp.Models:-40to75°C(-40to167°F)Storage Temperature(package included)-40to85°C(-40to185°F)Ambient Relative Humidity5to95%(non-condensing)Standards and CertificationsEMC EN55032/35EMI CISPR32,FCC Part15B Class AEMS IEC61000-4-2ESD:Contact:8kV;Air:15kVIEC61000-4-3RS:80MHz to1GHz:20V/mIEC61000-4-4EFT:Power:2kV;Signal:2kVIEC61000-4-5Surge:Power:2kV;Signal:2kVIEC61000-4-6CS:10V/mIEC61000-4-8PFMF:30A/mSafety IEC60950-1IEC62368-1UL62368-1Railway EN50121-4EN50155Railway Fire Protection EN45545-2Radio EN300328,EN301489-1/17,EN301893,FCC,MIC,TELEC,NCC,RCM,SRRC,ICMTBFTime838,684hrsStandards Telcordia SR332WarrantyWarranty Period5yearsDetails See /warrantyPackage ContentsDevice1x AWK-3251A-RCC Series wireless AP/clientInstallation Kit1x cap,for RJ45console port1x cap,for M12Ethernet port1x cable holder with screw1x DIN-rail kitDocumentation1x quick installation guide1x warranty cardDimensionsOrdering InformationModel Name Band Operating Temp.Conformal Coating AWK-3251A-M12-RCC-US US-25to60°C–AWK-3251A-M12-RCC-US-T US-40to75°C–AWK-3251A-M12-RCC-US-CT-T US-40to75°C✓AWK-3251A-M12-RCC-UN-T UN-40to75°C–AWK-3251A-M12-RCC-UN-CT-T UN-40to75°C✓Accessories(sold separately)Wall-Mounting KitsWK-35-01Wall-mounting kit with2plates(35x44x2.5mm)and6screws©Moxa Inc.All rights reserved.Updated Aug15,2023.This document and any portion thereof may not be reproduced or used in any manner whatsoever without the express written permission of Moxa Inc.Product specifications subject to change without notice.Visit our website for the most up-to-date product information.。
“千课万人”活动学后感杭州“千课万人”活动执教老师课堂语言不完全记录教学语言凸显教学理念,教学语言展示引领技巧。
12月7日――10日,我们一行四人参加了在浙大华家池校区逸夫体育馆举行的“千课万人”活动,本次活动的主题是“实效新课堂”。
出现频率最高的词语是“语用”,就是语言文字运用。
执教的特级教师、名师展现了自己的最新教学思考,也许这能从老师的教学语言上窥见一斑。
现摘录部分教学语言如下,与大家共享,个中滋味,教师们自有体会。
一、魏星(江苏省特级教师)执教《清平乐・村居》(一)师:什么叫“剥(bāo)”?生:把皮去了。
师:把莲蓬的皮去了叫―― 生:剥莲蓬师:把花生的皮去了叫―― 生:剥花生师:把香蕉的皮去了叫―― 生:剥香蕉师:把苹果的皮去了叫―― 生:剥苹果(笑声)师:叫什么?生:削(xuē)苹果师:(板书“削”)用手去皮叫剥,用器物去皮叫削。
白白的占有就叫剥削,读剥削。
生:(读剥削)(二)师:读词抓―― 生:词眼师:读诗抓―― 生:诗眼师:读文章抓―― 生:文眼师:读报纸抓―― 生:报眼(笑声)二、张祖庆(浙江省特级教师)执教《穷人》(一)师:五分钟自读,两分钟小组交流,可以互相聆听,相互补充,相互质疑。
师:把你的发现告诉他,把我的发现告诉你,这就是学习!肯定还有新发现。
师:读到只剩下词语,词语又回到了文中。
师:体会到了不一定要说出来。
(二)师:下面进行新挑战,接受的请举手。
生:(有不少举手)师:真勇敢!还不清楚什么挑战就举手了(笑声)新的挑战就是你们来当老师。
生:(还是有不是少举手)师:(请了一名学生)你贵姓?生:(回答了姓名)师:应该说“免贵姓徐”。
你贵姓?生:免贵姓徐(笑声)师:徐老师好!我姓张,等下可以叫我张同学。
(笑声更响)三、贾志敏(全国著名特级教师)执教《普罗米修斯》(一)课前与参会老师说1、11月19日,我在这儿上了相同的课,还好。
但我总觉得不满意,回到上海,一宿没睡,早晨6点,我到电话给(),说要借班上课。
小学语文课文朗读篇目推荐(人教版)二年级上册
《黄山奇石》《一株紫丁香》《我要的是葫芦》《小柳树和小枣树》《酸的和甜的》
《纸船和风筝》《从现在开始》《小鸟和牵牛花》
二年级下册
《找春天》《笋芽儿》《泉水》《数星星的孩子》《春的消息》
三年级上册
《我们的民族小学》《金色的草地》《槐乡的孩子》《风筝》《秋天的雨》《听听,秋的声音》
《花钟》《找骆驼》《富饶的西沙群岛》《美丽的小兴安岭》《掌声》《五花山》
三年级下册
《燕子》《荷花》《珍珠泉》《翠鸟》《和时间赛跑》《太阳是大家的》《卖木雕的少年》
《我爱故乡的杨梅》
四年级上册
《观潮》《火烧云》《巨人的花园》《去年的树》《长城》《搭石》《五彩池》《小青石》
《迷人的张家界》
四年级下册
《桂林山水》《七月的天山》《永生的眼睛》《生命,生命》《花的勇气》《乡下人家》《麦哨》《生命的药方》《可爱的草塘》
五年级上册
《窃读记》《梅花魂》《桂花雨》《小桥流水人家》《地震中的父与子》《学会看病》
《最后一分钟》《黄果树听瀑》《鞋匠的儿子》《剥豆》《你一定会听见的》《百泉村》
五年级下册
《草原》《祖父的园子》《再见了,亲人》《自己的花是让别人看的》《威尼斯的小艇》《彩色的非洲》
PS:双击获取文档,ctrl+A,ctrl+C,然后粘贴到word即可。
未能直接提供word版本,抱歉。
【想象】麦哨_600字
麦哨是一个充满想象力的小男孩,他的思维趣味非常丰富,总是能够想出各种新奇有
趣的主意。
他还非常喜欢创造和发明一些独特的东西,让自己的想象力得到充分的发挥和
展示。
每天放学后,麦哨总是会来到一个小花园里,静静地坐在那里思考、想象。
有一天,
他看着自己手中的一片黄叶,突然凝神了起来,眼前浮现出了一个场景:一座黄叶城堡。
城堡的石头全部由黄叶构成,城墙上爬满了各种各样的植物和藤蔓,门口有两个门卫,全
身都被黄叶覆盖着,栩栩如生。
麦哨快速拿出笔和纸,开始细细描绘出黄叶城堡的每一个细节,城堡呈六边形,拥有
六个塔楼,每个塔楼都用黄叶砌成,透出金黄的光芒。
城堡周围是广阔的草原和清澈的小溪,小溪水潺潺而过,远处是一片郁郁葱葱的森林。
绘画完成后,麦哨还为黄叶城堡设计了一个魔法故事,这个城堡是魔法师创造出来的,城堡的六个塔楼代表着六种不同的魔法元素,每个塔楼都有一个魔法师来守护并保护着那
种元素。
麦哨为这个故事配上了一首小调,把故事讲给他的小伙伴们听,引来了大家的一
片赞叹。
不仅如此,麦哨还发明了一个魔法药水,可以让人感知到黄叶城堡魔法的真正力量。
这个魔法药水背后的秘密是:药水是由麦哨家里的黄叶树叶、一些草药和大量的想象力制成。
麦哨把这个魔法药水带到学校里,让他的同学们感受到了真正魔法的奇妙之处。
麦哨是个小小发明家,他有很多神奇的想法和创意。
他的想象力和创造力在无数次发
明创造中得到了淋漓尽致的展示,而他的精神世界和人格魅力,也正是源于这份无尽的想
象力和创造力。
2023年最新的麦哨课文朗读田野里,什么声响和(h )着孩子的鼻音,在浓绿的麦叶上掠过一声呼,一声应(y nɡ),忽高忽低,那么欢快,那么柔美。
湖畔(p n),到处是割草的孩子。
白竹布衬衫小凉帽,绣花兜(dōu)肚彩头巾。
那一张张红扑扑的脸蛋,蒙上了一层晶莹的细汗,犹如一朵朵沾满露珠的月季花。
前几天,田野里还是鹅黄嫩绿,芽苞初放。
转眼间,到处都是浓阴。
金黄的油菜花谢了,结出了密密的嫩荚(ji );黑白相间的蚕豆花谢了,长出了小指头似的豆荚;雪白的萝卜花谢了,结出了一蓬蓬的种子。
麦田换上了耀眼的浅黄色新装。
每根麦秆都擎(q nɡ)起了丰满的穗(su )儿,那齐刷刷的麦芒,犹如乐谱上的线条,一个麦穗儿,就是一个跳动的音符。
湖边的草又肥又嫩,只消用手拉拉,竹篮很快就装满了。
男孩子跑到铺满青草的土坡上面,翻跟头,竖蜻蜒,还有摔跤比赛。
草地柔软而有弹性,比城里体育馆的垫子还要强,这简直是一个天然的运动场!玩累了,喊渴了,不知是谁一声招呼,大家采集起茅(m o)茅针来。
那是一种和茅草差不多的野草,顶部的茅穗儿还裹(ɡuǒ)在绿色的叶片里,显得鼓鼓的。
剥(bāo)开叶片,将茅穗儿连同茎轻轻抽出,把茎放进嘴里嚼(ji o)嚼,吮(shǔn)吮,一股甘甜清凉的滋味很快从舌尖直沁(q n)肺(f i)腑(fǔ)!呜卟,呜卟,呜是谁又吹响了那欢快、柔美的麦哨一忽儿,四处都响了起来,你呼我应,此起彼落。
那欢快的哨声在撩(li o)起麦浪的东南风里,传得很远、很远麦哨课文教案教材分析:《麦哨》这一篇课文有两个美:1、文章的意境:文章为我们展现了一幅儿童在田园无忧无虑玩耍的欢快场面,让我们感受到田园风光的动人,田园生活的惬意。
2、作者语言的美:文中用了排比、拟人、比喻等修辞手法,文中首尾两段表达相近意思的地方均用了不同的措辞。
3、文中描写的画面离现在的孩子距离较远,因而我个人认为因在感受语言美的基础上感受田园生活的美,以及培养他们向往大自然的情感。
24麦哨一、教学目标:1、认识“畔、兜、穗、裹、嚼、肺、腑、撩”八个生字,能准确认读。
2、感悟乡村的欢快、柔美生活,能有感情朗读。
3、体会作者对田园生活的向往与热恋。
二、教学重点:引导学生自读自悟,在理解课文内容的同时,品味优美语言,丰富语言积累。
三、教学难点:体会乡村生活的欢快、柔美,和我们这些整天忙忙碌碌的现代人相比较,他们才是真正的生活的主人,是自己生命的主人,是真正快乐、幸福、自由的主人。
四、教学准备:《牧童短笛》的音乐,挂图或课件,识字卡片五、教学课时:一课时教学过程一、导入课题。
1、读了课题,你有什么问题要问?2、学生汇报,那我们就一起来读读《麦哨》这篇课文,读完后,相信你一定有美好的感受。
二、初读课文,整体感知。
1.自由朗读课文,读准字音,读通句子,初步感受课文大意。
2.同桌互读课文,想一想:课文描写的乡村孩子的生活是怎样的?从中感受到了什么3.小组交流在全班交流。
三、细读课文,品味语言。
1.默读课文,画出你最喜欢的部分,试着有感情地读一读。
2、学生可能汇报的句子:a.那一张张红扑扑的脸蛋,蒙上了一层晶莹的细汗,犹如一朵朵沾满露珠的月季花。
b.金黄的油菜花谢了,结出了密密的嫩荚;黑白相间的蚕豆花谢了,长出了小指头似的豆荚;雪白的萝卜花谢了,结出了一蓬蓬的种子。
c.草地柔软而有弹性,比城里体育馆的垫子还要强,这简直是一个天然的运动场!3、小组交流后再全班交流。
4、有朗读你喜欢的句子。
四、感受全文,积累语言。
1、播放《牧童短笛》,有感情地朗读全文。
2、课外找有关这样的文章来读。
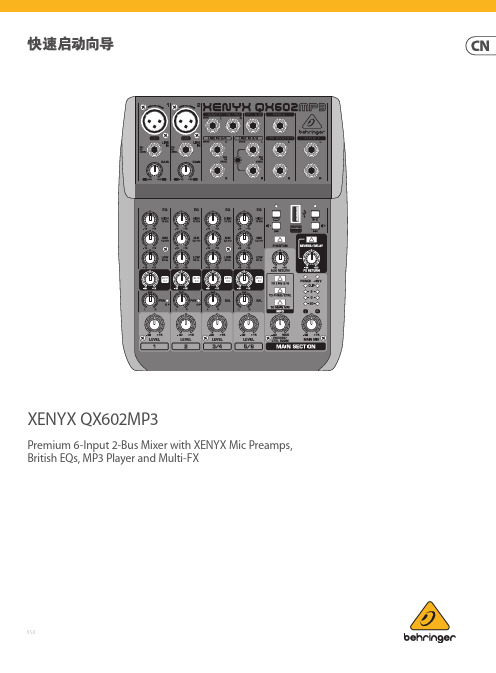
XENYX QX602MP3Premium 6-Input 2-Bus Mixer with XENYX Mic Preamps, British EQs, MP3 Player and Multi-FXV 5.0保修条款法律声明带有此标志的终端设备具有强大的电流, 存在触电危险。
仅限使用带有 ¼'' TS 或扭锁式插头的高品质专业扬声器线。
所有的安装或调整均须由合格的专业人员进行。
此标志提醒您, 产品内存在未绝缘的危险电压, 有触电危险。
此标志提醒您查阅所附的重要的使用及维修说明。
请阅读有关手册。
小心为避免触电危险, 请勿打开机顶盖 (或背面挡板)。
设备内没有可供用户维修使用的部件。
请将维修事项交由合格的专业人员进行。
小心为避免着火或触电危险, 请勿将此设备置于雨淋或潮湿中。
此设备也不可受液体滴溅, 盛有液体的容器也不可置于其上, 如花瓶等。
小心维修说明仅是给合格的专业维修人员使用的。
为避免触电危险, 除了使用说明书提到的以外, 请勿进行任何其它维修。
所有维修均须由合格的专业人员进行。
1. 请阅读这些说明。
2. 请妥善保存这些说明。
3. 请注意所有的警示。
4. 请遵守所有的说明。
5. 请勿在靠近水的地方使用本产品。
6. 请用干布清洁本产品。
7.请勿堵塞通风口。
安装本产品时请遵照厂家的说明。
8. 请勿将本产品安装在热源附近,如 暖 气 片, 炉子或其它产生热量的设备 ( 包 括功放器)。
9. 请勿移除极性插头或接地插头的安全装置。
接地插头是由两个插塞接点及一个接地头构成。
若随货提供的插头不适合您的插座, 请找电工更换一个合适的插座。
10. 妥善保护电源线, 使其不被践踏或刺破, 尤其注意电源插头、多用途插座及设备连接处。
11. 请只使用厂家指定的附属设备和配 件。
12. 请只使用厂家指定的或随货销售的手推车, 架子, 三 角架, 支架和桌子。
若使用手推车来搬运设备, 请注意安全放置设备, 以 避免手推车和设备倾倒而受伤。

鲜甜、美味、可口、醇厚、细致 MIMETISM(模范)AL432H
合并式功放
小路(文/图)
【期刊名称】《视听前线》
【年(卷),期】2022()10
【摘要】不知道从哪个时候开始,“民以食为天”被一些人改成“民以食为鲜”,这一改确实也巧妙,正好说明了人们从追求吃饱到吃好的转变。
“鲜”在这里大多指的是食材的新鲜,但还有一个意思,那就是食材的原味。
【总页数】5页(P28-32)
【作者】小路(文/图)
【作者单位】不详
【正文语种】中文
【中图分类】TN7
【相关文献】
1.平衡大气可盐可甜 MIMETISM(模范)CD422 CD机与AL432合并式功放
因版权原因,仅展示原文概要,查看原文内容请购买。
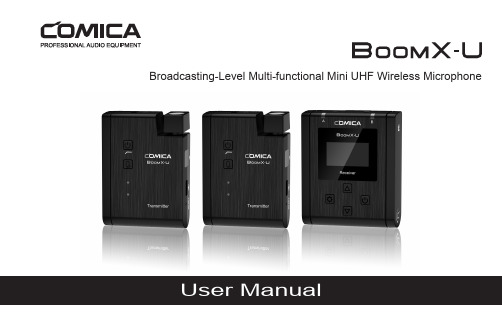
Broadcasting-Level Multi-functional Mini UHF Wireless Microphone User ManualTechnology Parameters Transmitter (TX)ChannelsGroup A Wireless Frequency Group B Wireless Frequency Transmitting Power 48568.125MHz ~ 579.875MHz 580.125MHz ~ 591.875MHz 15dBmReceiver (RX)ChannelsGroup A Wireless Frequency Group B Wireless Frequency 48568.125MHz ~ 579.875MHz 580.125MHz ~ 591.875MHzForewordMain FeaturesThanks for purchasing COMICA BoomX-U Broadcasting-Level Multi-functional Mini UHF Wireless Microphone.To ensure bring you a good using experience, please read this manual book carefully before using and correctly install and operate.. Mini and Portable, Broadcast Level. Dual-Channel UHF Wireless Microphone . Internal and External Mic Two Input Modes . Working Distance is Up to 120m. Multiple Channels Used for Several Devices Working Together. Auto-scanning and Quick IR Pair. LCF, M/S Switch, 16-Levels Adjusted Gain Control, Muting Functions. Real-time Visual Power and Audio Dynamic Monitor . Special Anti-loose Design for External Lavalier Mic . Colorful TFT Display, High Resolution . Support Screen Flip. Designed with Multi-functional Belt Clip and Compact1Packing ListU1 = TX + RX U2 = TX + TX + RXReceiver (RX)Transmitter(TX)Purchase Options:Main Parts:23.5mm Lavalier Mic Wind Mu3.5mm TRS-TRRS Audio Cable 3.5mm TRS-TRS Audio Cable 3.5mm-XLR Audio Output Cable USB A-USB C Charging Cable Carry Case User Manual Warranty CardAccessories:The accessories of each combination include :①+②+③+④+⑤+⑥+⑦+⑧+⑨U1=①x2+②x2+③+④+⑤+⑥+⑦+⑧+⑨U2=1234567897896543213Components and Instruction Transmitter (TX):1. Power / Low Cut Filter Button2. Muting Button4. Audio Status Indicator Light5. External Mic Locking Buckle6. 3.5mm TRS Port of External Mic7. Internal Mic8. IR Sensor9. USB-C Charging Port10. Reset Hole11. Belt Clip12. Antenna4Receiver (RX)1. Menu Function Button +2. Function Setting Button3. Menu Function Button -4. Group A Working Status Indicator5. 3.5mm TRS/TRRS Monitoring Port6. IR Sensor7. 3.5mm TRS Audio Output Port8. Group B Working Status Indicator9. Reset Hole10. USB-C Charging Port11. Power Button12. Belt Clip13. Group A Antenna14. Group B AntennaInstallationTransmitter (TX)e internal microphone :Adjust the antenna angle; Install the transmitter on the collar through the belt clip so that the internal microphone points in the direction of the sound source1. Work with Camera:Adjust the antenna angle; Fix the receiver through the belt clip to the camera's hot shoe mount, then connect the receiver with camera through the 3.5mm TRS-TRS audio cable; Insert the headphone into the monitoring port for monitoringReceiver (RX)82. Work with Smartphone:Clip the receiver to the cold shoe mount through the belt clip; Connect the receiver with the mobile phonethrough the 3.5mm TRS-TRRS audio cable and pay attention to the access to the audio output jack of the receiver is the 3.5mm TRS plug, and the access to the mobile phone is the 3.5mm TRRS plug; Insert the headphone to the9Function and Usage11You can flip the screen 180 degrees to use according to di erent scenes9. Screen Flip Function(Normal Display)(After Screen Flips 180 Degrees)MenuScreen Flip OM e n u S c r e e n F l i pO nReceiver (RX) Screen Display Instruction:Group BTransmitting Power Channel of Group BGroup ATransmitting PowerGroup A 151.1 Short press button to “setting” display page; press button to Pair mode of Group A or Group B1.2 Short press button for adjustment, press button to select whether or not pairing, then short press to confirm. It will show “Paired CHXX” to prompt the channel of Paired after successful pairing; it will show1.3 Short press button to back to home screen ( The operation methods for other interfaces are the same as above )1.Pairing of Group A/BMenu Group A Pair YesSuccessful Pairing Failed Pairing Receiver (RX) Operation Instruction:16A channel is the left channel andB channel is the right channel in Stereo Mode. Please attention that it can not realize STEREO function when in single channel mode3. ‘Stereo/Mono’ Mode Adjustment(Stereo)(Mono)5. VersionGroup A/B Volume Adjustment2. Volume AdjustmentMenuOutput Mode StereoMenuOutput Mode MonoMenu Version X.X.XYou can flip the screen 180 degrees to use according to di erent scenes4. Screen Flip Function( Normal Display )( After Screen Flips 180 Degrees )MenuScreen Flip OM e n u S c r e e n F l i pO n171. Set the display page to A/B Group Pairing2. Keep the receiver and transmitter's IR sensor are closely aligned before pairing(Transmitter)(Receiver)Pairing MethodDual-Channel Mode:orMenu Group A Pair YesMenu Group B Pair Yes183. Use the pairing function to pair the two transmitters respectively for the A/B Group19Specification Transmitter (TX)AntennaPolar PatternFrequency Response Sound DelayExternal Mic Input Interface BatteryBattery LifeNet WeightDimensionOperating Temperature Storage Temperature PCB AntennaOmnidirectional80Hz ~ 20kHz<20ms3.5mm TRSLi-ion Battery 600mAh 3.7V6 Hours47g49 x 22 x 66mm0℃ ~ 50℃-20℃ ~ 60℃Receiver (RX)AntennaReceiving SensitivitySound DelayExternal Mic Input InterfaceMonitor InterfaceBatteryBattery LifeNet WeightDimensionOperating TemperatureStorage TemperaturePCB Antenna-90dBm<20ms3.5mm TRS3.5mm TRS/TRRSLi-ion Battery 600mAh 3.7V6 Hours55g49 x 22 x 66mm0℃ ~ 50℃-20℃ ~ 60℃20。