万能车操作说明书 WI-GW-021
- 格式:doc
- 大小:19.50 KB
- 文档页数:1


万能电动车遥控器使用---简介本文档旨在向用户提供关于万能电动车遥控器的详细使用说明。
万能电动车遥控器是一种方便操控电动车的设备,通过遥控方式控制车辆的启动、熄火以及其他功能。
通过阅读本文档,用户将能够快速掌握遥控器的相关操作,并正确使用。
功能及特点万能电动车遥控器具备以下主要功能:1. 启动/熄火:通过遥控器上的相应按钮,用户可以启动或熄火电动车。
2. 锁车/解锁:遥控器上的锁车/解锁按钮可以控制车辆的车锁状态。
3. 定位功能:遥控器上有定位按钮,可以触发电动车发出声音,帮助用户找到停放位置。
4. 密码保护:遥控器支持设定密码,增加使用安全性。
5. 长距离遥控:遥控器信号覆盖范围广,方便用户在较远距离操控车辆。
使用说明步骤一:安装电池1. 打开遥控器背部的电池仓。
2. 插入两节合适的电池,注意极性方向。
3. 关上电池仓盖。
步骤二:启动车辆1. 确保电动车与遥控器的通信连接正常。
2. 按下遥控器上的启动按钮,车辆应该发出启动信号,并开始运行。
3. 如果启动失败,请检查车辆电量是否充足,并尝试重新启动。
步骤三:熄火车辆1. 确保电动车与遥控器的通信连接正常。
2. 按下遥控器上的熄火按钮,车辆应该发出熄火信号,并停止运行。
3. 如果熄火失败,请检查车辆是否处于安全停放位置,并尝试重新熄火。
步骤四:锁车/解锁1. 确保电动车与遥控器的通信连接正常。
2. 按下遥控器上的锁车按钮,车辆应该锁定,车辆的车锁上会发出锁定信号。
3. 按下遥控器上的解锁按钮,车辆应该解锁,车辆的车锁上会发出解锁信号。
步骤五:使用定位功能1. 按下遥控器上的定位按钮,车辆会发出一段声音,用户可以通过声音找到停放的位置。
步骤六:设置密码1. 打开遥控器上的设置菜单。
2. 选择密码设置功能,并按照提示进行密码设置。
3. 确保设置的密码记住,以便日后使用。
步骤七:注意事项- 遥控器仅适用于特定款式的电动车,使用时请确认适配性。
- 避免将遥控器暴露在极端高温或低温环境中,以免影响正常功能。


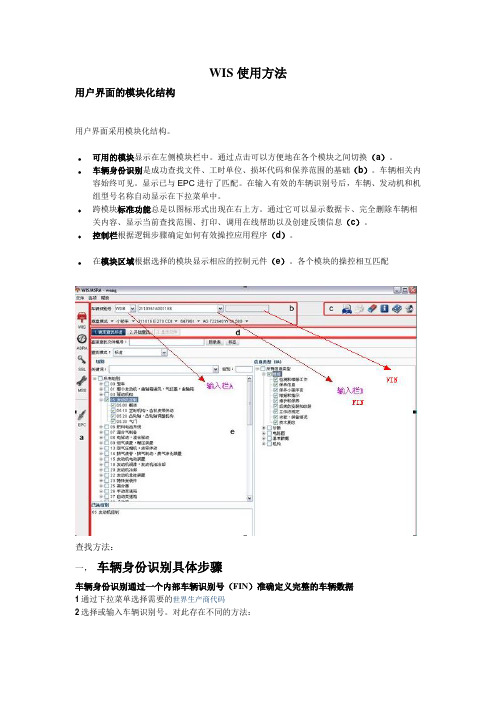
WIS使用方法用户界面的模块化结构用户界面采用模块化结构。
可用的模块显示在左侧模块栏中。
通过点击可以方便地在各个模块之间切换(a)。
车辆身份识别是成功查找文件、工时单位、损坏代码和保养范围的基础(b)。
车辆相关内容始终可见。
显示已与EPC进行了匹配。
在输入有效的车辆识别号后,车辆、发动机和机组型号名称自动显示在下拉菜单中。
跨模块标准功能总是以图标形式出现在右上方。
通过它可以显示数据卡、完全删除车辆相关内容、显示当前查找范围、打印、调用在线帮助以及创建反馈信息(c)。
控制栏根据逻辑步骤确定如何有效操控应用程序(d)。
在模块区域根据选择的模块显示相应的控制元件(e)。
各个模块的操控相互匹配查找方法:一,车辆身份识别具体步骤车辆身份识别通过一个内部车辆识别号(FIN)准确定义完整的车辆数据1通过下拉菜单选择需要的世界生产商代码2选择或输入车辆识别号。
对此存在不同的方法:—输入栏(B)输入带或不带世界生产商代码(14或7位)的内部车辆识别号(FIN)并用回车键确—通过历史记录选择已经输入的车辆识别号。
通过一个外部车辆识别号(VIN)确定车辆数据1通过下拉菜单选择需要的世界生产商代码。
2在输入栏(A)输入带或不带世界生产商代码(14或7位)的外部车辆识别号(VIN)并用回车键确认。
在“车辆识别号”输入栏(B)中输入外部车辆识别号(VIN)并按下后,它会转化为一个内部车辆识别号。
然后外部车辆识别号会显示在“外部车辆识别号(VIN)”信息栏中, 反之亦然。
通过底盘型号名称确定车辆数据车辆数据可以通过底盘型号名称确定(例如“636813”)。
为此必须依次确定底盘型号名称、发动机编号和机组型号名称。
底盘型号名称可以直接通过输入栏“车辆识别号”输入。
在这种情况下会进行型号名称的车型识别。
底盘型号名称在“型号名称”下拉菜单中选择。
“发动机”下拉菜单展开显示。
确定适合底盘的发动机和机组1确定“底盘模式”已选择2通过“车型”下拉菜单选择需要的适合型号名称的车型3通过“型号名称”下拉菜单选择需要的型号名称4通过“发动机”下拉菜单选择需要的发动机编号通过“机组”下拉菜单选择需要的机组型号名称通过选项按钮可以选择多个机组选项按钮“选择所有”选择所有的机组(如果定义了多个机组,则在选择后通过占位符**** *****显示。

GPS车辆定位追踪器使用说明书(V3.0)发送123 回复中文短信地址例如:任意手机发送短信“123”到追踪器手机卡号码上,追踪器将回复中文短信,短信中描述车辆当前所处的位置。
信息内容为:XX省XX市XX路XX大厦附近。
【注】离线状态回复经纬度安装使用前请仔细阅览本说明书安装注意事项、网上查车方法请看说明书第五、六项一、常用指令1.任意手机编辑短信CQ发送到定位器手机卡号可以重启定位器。
2.任意手机编辑短信SZCS,123456,JZ=0发送到定位器手机卡号可以关闭基站定位。
出厂设置JZ=1(默认是打开)二、技术参数1.GPS性能跟踪灵敏度:<-160dBm启动时间:冷启动45秒、热启动3秒定位精度: 10米速度精度: 0.3米/秒2.GSM性能频率: GSM 900/1800最大发射功率: 1W3.整机主要技术参数整机尺寸:86mm×54mm×16mm工作电压: 9V~30V最大工作电流: < 250mA(12V)普通模式工作电流: < 15mA(12V)工作温度: -20 ℃~ +70 ℃工作湿度: 20 ~ 95%三、状态指示追踪器侧面有3个指示灯,用于指示运行状态1.SIM卡指示灯灯的状态含义长亮设备开机且SIM卡正常慢闪设备开机但SIM卡不正常灭设备未开机2.GSM信号强度指示灯灯的状态含义长亮信号4格(满格)慢闪信号3格快闪信号1-2格灭无信号3.GPS信号强度指示灯灯的状态含义长亮成功定位慢闪可以搜到卫星但不能定位快闪GPS模块在工作但没搜到星灭GPS模块被关闭或工作不正常四、安装方法1.安装SIM卡打开SIM卡仓盖,插入SIM卡并扣紧,关闭SIM卡仓盖。
2.安装主机建议由经销商指定的专业机构进行安装,并注意以下事项:1)为避免窃贼破坏,主机安装应尽量隐蔽;2)避免与发射源放在一起,比如倒车雷达、其它车载通讯设备等;3)避开高温、高湿的环境;4)使用捆扎带或双面胶贴固定,以免影响振动检测的效果;5)GPS天线为内置,则主机安装时务必保证正面朝上,且上方无金属物遮挡;3.安装电源线1)本设备标准供电为9V-30V,红色线为电源正极,黑色为电源负极;2)电源负极请选择单独接地,搭铁,勿与其它地线共接;五、使用说明产品的正确使用步骤如下:安装→开机→短信(或网上)操作接通车辆电源后,设备将会自动开机。

学习型万能遥控器使用说明学习型万能遥控器(也叫自拷贝遥控器,对拷遥控器)适合所有固定码芯片及学习型芯片,只要用户遥控器可以正常使用,芯片型号匹配即可以使用本款遥控器。
该遥控器具有价格便宜、操作简单、使用方便、适合范围广等特点。
本遥控器使普通买家增配遥控器变得非常简单,不需要过多的专业知识,不用对遥控器进行编码设置,轻松几步就能快速复制品种繁多的同频率的固定码遥控器,也可将二个或多个芯片兼容,频率一致遥控器的部分功能合并在一个遥控器上使用,可拷贝市面上绝大多数的无线遥控器(家用防盗遥控器、汽车后加装的防盗遥控器、摩托车防盗遥控器、电动车防盗遥控器、卷闸门遥控器、车库门遥控器、电动门遥控器等等),不适合汽车原装遥控和双向遥控器,不适合滚动码遥控器。
一、确定是否能用对拷遥控器; 原遥控正常,芯片兼容,频率正确是选用对拷遥控器必备的三个条件。
购买前先确定你现在在用的遥控器的按键是绝对好的,外观无所谓。
再打开你的遥控器查看芯片型号和频率。
为节省大家的宝贵的时间,请在联系我们之前先抄下您的芯片型号和频率,直接报给我们,我们会为您确认是否能用的。
查看方法:如果您的遥控器不是汽车原装遥控和双向遥控器。
请打开您的遥控器外壳,查看里面的线路板:查找芯片:一个多脚的黑色元件(8脚、16脚或18脚以上),上面印有的文字(英文加数字)就是芯片型号。
固定码遥控器常用芯片有PT2260、PT2262、PT2264、PT2240、SC2260、SC2262、CS5211、HX2260、HX2262、HS2262、EV1527、HS1527、HX1527等,芯片型号只需对上数字部分就可以确定是类型了,所有固定码的遥控器都适用。
滚动码或隐藏码的不适用,滚动码遥控器芯片的常用芯片有HSC200、HSC201、HSC300、HSC301等。
查找声表:一个长条形或圆形的银色的元件上面的文字(英文加数字),常见的有NDR315、315、330、433等,各个款式的遥控器可能所处的位置不一样,元器件也可能不同,但都是铁质的,圆形长形居多,实际中也有不带可调电容,也没有声表元件的遥控器,频率不能目测测定 如果没有频率计,以上两种情况只能选用可调频率的对拷遥控器频率能够确定但不是315M、433M时,也只能选用可调频率的对拷遥控器。
车万能钥匙使用方法一、车万能钥匙的概述车万能钥匙是一种方便实用的工具,它可以解决人们在日常生活中经常遇到的车辆开锁问题。
对于忘记拿钥匙、钥匙丢失或钥匙卡在车内的情况,车万能钥匙提供了一种简单便捷的解决方案。
二、车万能钥匙的分类车万能钥匙按照不同的技术原理和使用方式可以分为以下几类:1. 电子车万能钥匙电子车万能钥匙使用射频芯片或蓝牙技术与车辆的中央处理单元进行通信,可以实现远程开锁、关锁等功能。
使用电子车万能钥匙时,只需要按下相应的按钮,即可实现对车辆的控制。
2. 机械车万能钥匙机械车万能钥匙通常由一把小型工具组成,可以模拟常见车辆的钥匙形状和结构。
使用机械车万能钥匙时,需要根据车辆类型选择相应的模具,并按照操作指南进行操作。
3. 车万能钥匙APP车万能钥匙APP是一种将车辆钥匙信息通过手机应用程序进行存储和管理的软件。
用户只需在手机上安装相应的APP,并进行绑定操作,就可以通过手机实现对车辆的开锁、关锁等操作。
三、车万能钥匙的使用方法不同类型的车万能钥匙有不同的使用方法,下面将分别介绍各种类型车万能钥匙的使用方法。
1. 电子车万能钥匙的使用方法使用电子车万能钥匙时,需要按照以下步骤进行操作:1.打开车万能钥匙电源开启车万能钥匙的电源开关,确保电量充足。
2.连接车辆手持车万能钥匙,将其与车辆的中央处理单元进行连接,一般通过蓝牙或射频芯片等方式进行通信。
3.实现车辆控制按下相应按钮,实现车辆的开锁、关锁等操作。
2. 机械车万能钥匙的使用方法使用机械车万能钥匙时,需要按照以下步骤进行操作:1.确定车辆类型根据车辆类型选择相应的模具。
2.插入车万能钥匙插入车万能钥匙到车门锁孔中,模拟常见车辆的钥匙形状和结构。
3.转动车万能钥匙仿照使用正常钥匙的操作,通过转动车万能钥匙来实现车辆的开锁、关锁等操作。
3. 车万能钥匙APP的使用方法使用车万能钥匙APP时,需要按照以下步骤进行操作:1.下载安装进入应用商店,搜索并下载安装相应的车万能钥匙APP。

汽修掌上通操作手册 Corporation standardization office #QS8QHH-HHGX8Q8-GNHHJ8新动源汽修掌上通操作手册(1.0版)贰零壹伍年拾贰月目录2、门店管理......................................................................... .. (27)汽修掌上通使用手册--企业注册1.注册企业注册首先打开汽修工社网址(考虑到系统的稳定性必须要用火狐或者谷歌浏览器)点击右上角注册按钮选择汽修掌上通注册点击立即注册按着要求填写完点击下一步(版本不可选择,人数决定版本,10人以内标准版,10~20人专业版,20以上旗舰版)依次填写好点击下一步最后一步拍一张营业执照的照片,还有三张门店环境照片,点击选择文件上传照片,上传完成后点击提交注册2.登录汽修掌上通PC端点击登录按钮登陆完成。
第一章、前台接待首先打开汽修掌上通APP依次输入车辆数据后点击接车按钮。
在这个页面可以设置交车时间和故障描述。
选择九宫格的项目功能,如车辆预检:代替了常规的接车单,车身有什么问题我们可以直接用拍照的方式标记并记录。
这一页面我们可以标记车辆燃油剩余量、漆面、玻璃,、灯罩、随车物品、轮胎,是否存在损伤,破碎,以及丢失等情况车辆外观,出现问题,可以直接维修增加项目。
这一页漆面格是一个红色的“1”表示一处有问题,玻璃有三处问题,灯罩、随车物品是绿色的表示一切正常,轮胎是灰色的表示轮胎未检查。
我们可以点击上面的八个小模块选择添加项目,点击展开选择具体维修项目。
选择好项目后点击确认至工单。
点击小三角选择添加材料、查看客户是否有优惠卷或者会员卡。
套餐优惠点击套餐优惠选择办理综合套餐卡,选择要办的类型点击购买,保存工单点核价。
精品销售点击精品销售,选择精品选择数量,保存工单点击核价。
点击你需要的配件选择好数量,这时配件变成绿色说明您已经选择过了该配件。
符号说明该符号表示参阅本手册某章某节的内容,该章节列有重要信息和必须遵守的相关安全注意事项 。
该符号表示本章节未结束,接下页。
该符号表示本章节已结束。
该符号表示必须立即停车。
®该符号表示注册商标,但无此符号的部件并不表示本公司放弃其所有权。
⇒ 该符号表示参阅本章节或给定页码内的警告说明。
列出了可能引发事故或受伤的风险以及规避风险的处理方法,以引起您的警觉。
⇒ ⇒ ⇒ 该符号表示参阅本章节或给定页码内的注意事项,列出了可能损坏汽车的相关信息。
提示凡以该符号开头的文本表示可能损坏汽车的原因,使用本车时务必严格遵守相关警告说明。
凡以该符号开头的文本均与环境保护和燃油经济性有关。
凡以该符号开头的文本均为某章节的补充说明。
鉴于一汽 - 大众汽车有限公司会持续对所有车型进行改进,因此,我们保留随时对车轮、设备或技术规格的某一部分进行修改的权利,敬请理解。
与交付范围、外观、性能、尺寸、重量、油耗、规范以及汽车功能修改的数据资料均为截止印刷时的正确内容(详情请咨询当地一汽 - 大众特许经销商)。
本手册中的所有信息、图示或描述均不可视为法律承诺。
未经一汽 - 大众汽车有限公司的书面同意,不得翻印、复制或翻译本说明书的任何部分。
本公司郑重申明保留著作权法所规定的所有权益及修改的权利。
中国印刷© 2013 年 6 月 一汽-大众汽车有限公司衷心感谢您对本公司及本公司产品的信任!本车技术先进,工艺精良,性能卓越,具有优良的动力性、经济性、舒适性和安全性,并配有众多便利功能供您使用。
首次使用本车前,请务必仔细阅读本使用说明书,尽快熟悉本车结构和各种功能、使用方法及本公司有关规定,正确使用和养护汽车,充分利用本车的优良性能,确保安全行驶,保持汽车的自身价值。
本车所有车型均已通过国家强制性产品认证(CCC认证)。
本说明书旨在为用户提供汽车使用和维护方面的说明指导,您所购汽车的具体配置请核对购车合同。
如您对本车及本套随车文件有任何疑问,敬请垂询本公司特许经销商。
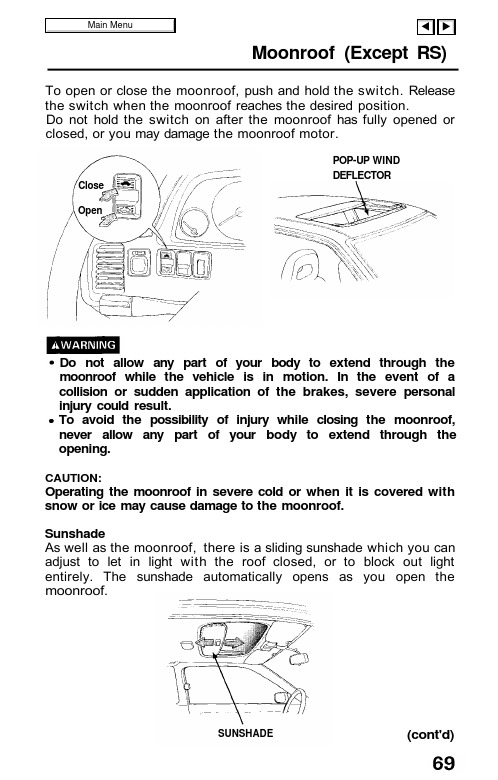
Moonroof (Except RS) To open or close the moonroof, push and hold the switch. Release the switch when the moonroof reaches the desired position.Do not hold the switch on after the moonroof has fully opened or closed, or you may damage the moonroof motor.POP-UP WINDDEFLECTOR Do not allow any part of your body to extend through the moonroof while the vehicle is in motion. In the event of a collision or sudden application of the brakes, severe personalinjury could result.To avoid the possibility of injury while closing the moonroof, never allow any part of your body to extend through the opening.CAUTION:Operating the moonroof in severe cold or when it is covered with snow or ice may cause damage to the moonroof.SunshadeAs well as the moonroof, there is a sliding sunshade which you can adjust to let in light with the roof closed, or to block out light entirely. The sunshade automatically opens as you open the moonroof.(cont'd) CloseOpenSUNSHADEMoonroof (cont'd)If the Moonroof Won't CloseThe moonroof can be closed manually, if the control switch will not close it.1. Remove the round plug near the rear center of the headliner.2. Insert the moonroof wrench (from the tool kit) into the socket.3.Turn the wrench until the moonroof seats in the closed position.4. Replace the plug.MaintenancePeriodically pour a little water down the drain holes to make sure they are not plugged. If they are free, water should drop on the ground behind each front wheel.DRAIN HOLECAUTION:Do not put weight on the moonroof or force it open or closed, you may damage the mechanism.Remove plugSOCKETStereo Sound System (Except US: RS) (Canada: RS)(LS)Bass Control(GS/GSR)Treble Control ON/OFF SwitchTurn the switch clockwise to turn the unit on; turn it counterclock-wise to turn the unit off.NOTE:(Except Canada: RS)The antenna will rise or retract automatically when the unit is turned on or off. It will also retract automatically if the ignition isswitched off.Volume ControlTurn the ON/OFF switch clockwise to increase volume and counter-clockwise to decrease volume.Tone ControlBass Control(cont'd)Treble ControlStereo Sound System (cont'd)(Canada: RS)Frequency Display (LS)(GS/GSR)Balance ControlBalances sound between left and right speakers.(Except Canada: RS)To use the control, push on the knob to get it to pop out, adjust the balance to your liking and push the knob back in when you are done.NOTE:(Except Canada: RS)When the headlights are on, the radio panel illumination is on, even if the radio is turned off.The panel lighting can be turned off by first pushing the Balance Control knob to its out position and then pulling it out slightly further.Fader ControlBalances sound between front and rear speakers.(Except Canada: RS)To use the control, push on the knob to get it to pop out, adjust the sound to your liking and push the knob back in when you are done.Frequency DisplayFrequency DisplayRadio OperationAM/FM Band SelectorPush to select AM or FM band. The corresponding band indicator will light.Manual Tuning(US: LS, Canada: RS/LS)Push the button to tune to a lower frequency station.Push the button to tune to a higher frequency station. (GS/GSR)Push the TUNE/SEEK switch up to change to a higher frequency, and down to change to a lower frequency.To change the frequency up or down a single increment, push and release the TUNE/SEEK switch.NOTE:(US: LS, Canada: RS/LS)If you hold either button for more than half a second, the tuning frequency will count up or down rapidly.(GS/GSR)To go to a frequency that is farther away, push the switch and hold it. You will hear a beep and the frequency display will begin to count rapidly.Seek Tuning(Canada: RS)Each time you push this button, the tuner will automatically seek the next higher frequency station.(LS)Each time you push this button up or down, the tuner will automatically seek the next higher or lower frequency station.(GS/GSR)Depending on which way you push the TUNE/SEEK switch, the system searches up or down from the current frequency. Push the switch until you hear a beep, then release it. The system searches until it finds a station with a strong signal, then stops.(cont'd)Stereo Sound System (cont'd)Preset Station Selection1. Make sure the Band Selector is on the band you want ... AM orFM. Then, find the station you want by Manual Tuning or Seek Tuning.2. Press and hold one of the Preset Buttons.3. In a few seconds, a beep will sound and the light in the button willcome on. The station is now preset in the memory. You may preset 1 AM and 1 FM station per button, (total, 6 of each on US: LS, Canada: RS/LS).(GS/GSR)Each button will store one frequency on the AM band, and two on the FM band by pushing the FM1, and FM2 switch. You can storea total of 6 stations on AM and 12 on FM.4. You can tune to a preset station by pushing its correspondingpreset button.NOTE:(GS/GSR)The Auto Select Button must be off before the Preset Station Selection can be used.Auto Select Button (GS/GSR)If you are visiting a new broadcast area, you can quickly enter into memory the stronger stations in that area by simply pushing the Auto Select Button. The radio will then automatically scan both the AM and FM bands and temporarily memorize up to six stations in each. With the Auto Select Button on, these stations can then be tuned by pushing the preset buttons. Manually-preset stations remain memorized for use when you return to your normal broadcast area, but are only selectable with the Auto Select Button off.Stereo IndicatorThis lights up when a FM broadcast in stereo is being received. It will flash when the signal strength diminishes. If it flashes, good stereo reception cannot be expected. Stereo reception is available only for FM stereo broadcasts, not for AM stereo broadcasts.Tape Operation(Canada: RS)(LS)(GS/GSR)Tape Direction IndicatorLoad the cassette into the slot with the tape opening to the right. The ( ) will light when the upper side is playing. The ( ) will light when the bottom side is playing.Program Selector (PROG)Push to change the direction of tape play.Auto Reverse Feature: The tape direction automatically reverses when the end of the tape is reached in play or FF mode and plays the other side.(cont'd)Stereo Sound System (cont'd)(Canada: RS)(LS)(GS/GSR)Fast Forward/Rewind (FF/REW)Note which Tape Direction Indicator is lighted, then push the appropriate button to rapidly wind the tape in the same direction (FF) or in the opposite direction (REW).(GS/GSR)To rewind the tape, push the FF/REW/TMS button down then release it. You will see REW in the display. To fast forward the tape, push the button up then release it. You will see FF displayed. To stop rewind or fast forward, press the PROG/PLAY button or push the FF/REW/TMS switch again.Play (PLAY)Push the PLAY button to resume tape play and stop rewind or fast forward operation.(On all models except RS, the indicator will light.)Repeat Button (REPEAT) (Except RS)Push the REPEAT button (indicator on) to return to the beginning of a song or section of programming and repeat its play. Push the button again (indicator off) to cancel the repeat function and resume normal play.TMS function (GS/GSR)The TMS function lets you skip to the beginning of a song or other passage. The tape skips forward or backward, depending on which direction you push the FF/REW/TMS switch.Activate TMS by pushing the FF/REW/TMS button and holding it until you hear a beep. If you push the button down, you will see REW blinking in the display as the tape rewinds. If you push the button up, you will see FF blinking in the display as the tape fast forwards. When the system senses a silent period on the tape, it goes back to PLAY mode.NOTE:(Except RS)The REPEAT and TMS functions use silent periods on the tape to find the end of a selection. These features may not work satisfactorily on tapes that have almost no gap between songs, a high noise level between songs, or silent periods in the middle of songs.Dolby® Noise Reduction ( ) (Except RS)Push when playing tapes recorded in Dolby NR (the Dolby NR indicator will light). Push again when playing tapes not recorded in Dolby NR. Use of the wrong setting will affect high frequency response.NOTE:The Dolby NR circuit will not operate during radio reception.Dolby noise reduction system is manufactured under license fromDolby Laboratories Licensing Corporation. "Dolby" and the double-D symbol are trademarks of Dolby Laboratories Licensing Corporation.(cont'd)Stereo Sound System (cont'd)(Canada: RS)(LS)(GS/GSR)Skip Button (LS)The circuit senses silent passages between songs or programs on a tape. Push upward to automatically advance to the beginning of the next song, or downward to return to the beginning of the song just played.NOTE:Tapes that contain short silent passages between songs, a high level of noise between songs, or silent passages within a song may not be suitable for this function.Metal Indicator (METAL/MTL) (Except Canada: RS)Most metal or Cr02 cassettes are coded with slots on their back edge. If such a cassette is inserted, the player will detect the slots and automatically switch to the proper equalization for fullenjoyment of metal/CrO2 tapes. The indicator light will go on whencoded cassettes are played.Eject (EJECT)Push this button to stop and eject the tape.Ignition Key-OFF Eject: The cassette being played will be automat-ically ejected when the ignition or the unit is turned off.NOTE:When one side of the tape ends, "Auto-Reverse" will automatically begin playing the other side, therefore, you must push the eject button to stop or remove the tape.CLEAN Indicator Light(US: LS, Canada: RS/LS)After 50 hours of cassette tape play, the light will come on as a reminder to clean the tape heads. If the light comes on and the tape heads were not cleaned at the recommended 30 hours of usage (see maintenance section on the next page), they should be cleaned immediately. To reset, push the indicator with a pointed instrument such as a ball-point pen until the light goes off (about 3 seconds). (GS/GSR)After 30 hours of cassette tape play, the CLEAN indicator light will come on as a reminder to clean the tape heads. If the light comes on and the tape heads were not cleaned at the recommended 30 hours of usage (see maintenance section on the next page), they should be cleaned immediately. To reset, push the indicator with a pointed instrument such as a ball-point pen until the light goes off (about 3 seconds).(cont'd)Stereo Sound System (cont'd)Defective Tape EjectThe tape player includes a protection mechanism to automatically eject defective tapes (warped housing, loose label, faulty tape movement) immediately upon insertion. If a tape malfunctions while in play, the tape direction will change back and forth and then eject the cassette. Tapes ejected before play should be considered faulty and discarded; tapes ejected during play may only be unevenly wound and could be re-usable if fully rewound, manually, outside the player.NOTE:The tape player may repeat cycle through the loading and unloading motion several times in an effort to eject a faulty tape. During this process the tape will either eject fully or rise to the loading level and have to be pulled out manually. In either case, discard the tape; re-use may damage the tape player.MaintenanceThe head in the cassette tape player can pick up dirt or tape deposits each time a cassette is played. The result is low or "muddy" sound from one or both channels, as if the treble tone control were turned all the way down. To prevent this, you should periodically clean the head with a commercially available cleaning cassette.As preventive maintenance, clean the head about every 30 hours of use. If you wait until the head becomes very dirty (noticeably poor sound), it may not be possible to remove all deposits with a simple cleaning cassette.The use of 120 minute tapes is not recommended.CAUTION:Storing cassettes out of their cases, or touching the magnetic tape with your fingers will increase the amount of dirt that gets to the tape head. Using low-quality "off-brand" tape will increase the amount of tape deposits that get on the head. Both of these practices may eventually lead to damage of the head and playing mechanism.。
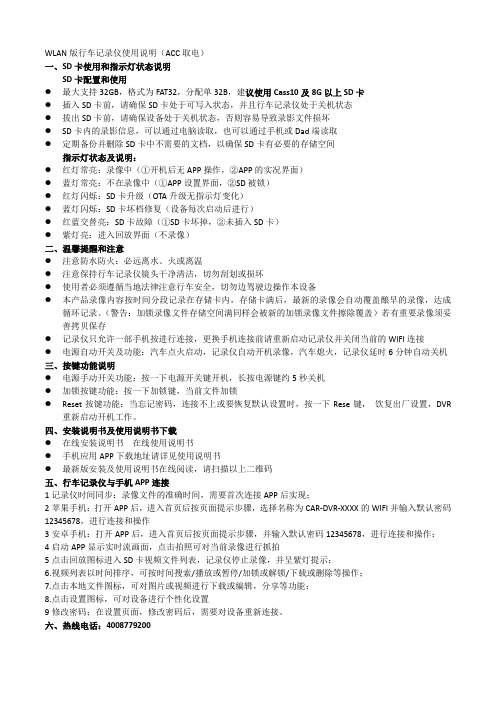
WLAN版行车记录仪使用说明(ACC取电)一、SD卡使用和指示灯状态说明SD卡配置和使用●最大支持32GB,格式为FAT32,分配单32B,建议使用Cass10及8G以上SD卡●插入SD卡前,请确保SD卡处于可写入状态,并且行车记录仪处于关机状态●拔出SD卡前,请确保设备处于关机状态,否则容易导致录影文件损坏●SD卡内的录影信息,可以通过电脑读取,也可以通过手机或Dad端读取●定期备份并删除SD卡中不需要的文档,以确保SD卡有必要的存储空间指示灯状态及说明:●红灯常亮:录像中(①开机后无APP操作,②APP的实况界面)●蓝灯常亮:不在录像中(①APP设置界面,②SD被锁)●红灯闪烁:SD卡升级(OTA升级无指示灯变化)●蓝灯闪烁:SD卡坏档修复(设备每次启动后进行)●红蓝交替亮:SD卡故障(①SD卡坏掉,②未插入SD卡)●紫灯亮:进入回放界面(不录像)二、温馨提醒和注意●注意防水防火:必远离水、火或离温●注意保持行车记录仪镜头干净清洁,切勿刮划或损坏●使用者必须遵循当地法律注意行车安全,切勿边驾驶边操作本设备●本产品录像内容按时间分段记录在存储卡内,存储卡满后,最新的录像会自动覆盖酿早的录像,达成循环记录。
(警告:加锁录像文件存储空间满同样会被新的加锁录像文件擦除覆盖)若有重要录像须妥善拷贝保存●记录仪只允许一部手机按进行连接,更换手机连接前请重新启动记录仪并关闭当前的WIFI连接●电源自动开关及功能:汽车点火启动,记录仪自动开机录像,汽车熄火,记录仪延时6分钟自动关机三、按键功能说明●电源手动开关功能:按一下电源开关键开机,长按电源键约5秒关机●加锁按键功能:按一下加锁键,当前文件加锁●Reset按键功能:当忘记密码,连接不上或要恢复默认设置时,按一下Rese键,饮复出厂设置,DVR重新启动开机工作。
四、安装说明书及使用说明书下载●在线安装说明书在线使用说明书●手机应用APP下载地址请详见使用说明书●最新版安装及使用说明书在线阅读,请扫描以上二维码五、行车记录仪与手机APP连接1记录仪时间同步:录像文件的准确时间,需要首次连接APP后实现;2苹果手机:打开APP后,进入首页后按页面提示步骤,选择名称为CAR-DVR-XXXX的WIFI并输入默认密码12345678,进行连接和操作3安卓手机:打开APP后,进入首页后按页面提示步骤,并输入默认密码12345678,进行连接和操作;4启动APP显示实时流画面,点击拍照可对当前录像进行抓拍5点击回放图标进入SD卡视频文件列表,记录仪停止录像,并呈紫灯提示;6.视频列表以时间排序,可按时间搜索/播放或暂停/加锁或解锁/下载或删除等操作;7.点击本地文件图标,可对图片或视频进行下载或编辑,分享等功能;8.点击设置图标,可对设备进行个性化设置9修改密码;在设置页面,修改密码后,需要对设备重新连接。

万能电动车遥控器使用1. 简介万能电动车遥控器是一种用于控制电动车的便携式设备。
它通过无线通信技术与电动车进行连接,并提供方便、快捷的操作方式。
本文将介绍万能电动车遥控器的使用方法及相关注意事项,帮助您更好地运用该设备。
2. 遥控器功能万能电动车遥控器具备如下功能:- 开关电动车的电源- 调节电动车速度- 控制电动车转向- 远程锁定或解锁电动车3. 使用步骤以下是使用万能电动车遥控器的简单步骤:步骤1:激活遥控器在使用遥控器前,确保它已经被激活。
通常,遥控器会配备一个电池或可充电电池,需要将其安装在正确的位置上,并按照说明书中的步骤进行激活。
步骤2:与电动车配对在激活遥控器后,需要将其与电动车配对。
通常,这一步骤需要在电动车中设置的界面中进行。
具体的配对方式可能会有所不同,建议查阅电动车说明书以获取详细的操作指南。
步骤3:开启电动车一旦遥控器与电动车配对成功,可以使用遥控器来开启电动车的电源。
通过按下遥控器上的开关按钮,可以打开或关闭电动车电源。
步骤4:调节速度和转向遥控器通常会配备一个速度调节按钮和一个转向按钮,用于调节电动车的速度和转向。
通过按下相应的按钮,可以增加或减少电动车的速度,并控制电动车的转向。
步骤5:锁定或解锁电动车一些万能电动车遥控器还提供远程锁定或解锁电动车的功能。
通过按下相应的按钮,可以远程锁定或解锁电动车,并对电动车进行安全保护。
4. 注意事项在使用万能电动车遥控器时,请注意以下事项:- 阅读和理解遥控器的说明书,并严格按照要求进行操作。
- 注意遥控器和电动车的电池电量,保证其充足以支持正常的使用。
- 避免将遥控器暴露在极端的温度或湿度环境中,以免损坏设备。
- 如遥控器出现故障或无法正常操作,请及时与售后服务联系进行维修或更换。
5. 总结万能电动车遥控器是一种方便且实用的设备,能够有效地控制电动车的使用。
通过按照上述步骤进行操作,并遵循相关的注意事项,您可以更好地利用万能电动车遥控器,享受更加便捷、舒适的电动车使用体验。

大众elsawin使用方法
嘿,朋友们!今天咱就来唠唠大众 elsawin 这玩意儿的使用方法。
你说这大众 elsawin 啊,就像是汽车世界里的一把万能钥匙。
它能帮你打开了解汽车的各种秘密大门。
首先呢,你得把它安装好,就跟给你的手机装个新软件似的,这可不能马虎。
安装好了之后,打开它,哇哦,就像进入了一个汽车知识的宝库。
你可以在里面找到各种车型的详细信息,什么发动机型号啦,零部件规格啦,就好像你对每辆车都了如指掌一样。
比如说,你车子出了个小毛病,你就可以在大众 elsawin 里找找,说不定一下子就找到原因了呢!这多厉害呀,不比你到处找人问方便多啦?
然后呢,它还有超级详细的维修手册。
哎呀呀,这可真是维修师傅的好帮手呀!就好比一个经验丰富的老师傅在旁边指导你一样。
你按照它说的步骤一步一步来,还怕修不好车?
还有啊,它能给你提供各种配件的信息。
你想想,要是你自己想给车换换零件啥的,直接在这上面一查,型号、价格啥都清楚了,多省心呐!这就好像你去超市买东西,一下子就知道自己要买啥,不用在那瞎转悠半天。
而且哦,它还能不断更新呢!汽车技术在发展,它也跟着进步,随
时给你提供最新最准确的信息。
这可真是与时俱进啊!
咱再打个比方,大众 elsawin 就像是你的汽车私人医生,随时能给
你的爱车做个全面检查,有啥问题都能及时发现并解决。
你说,这是
不是超级棒?
总之呢,学会使用大众elsawin 真的能让你在汽车世界里如鱼得水。
不管是日常保养还是遇到问题解决问题,它都能帮上大忙。
别再犹豫啦,赶紧去试试吧,你肯定会爱上它的!相信我,准没错!。
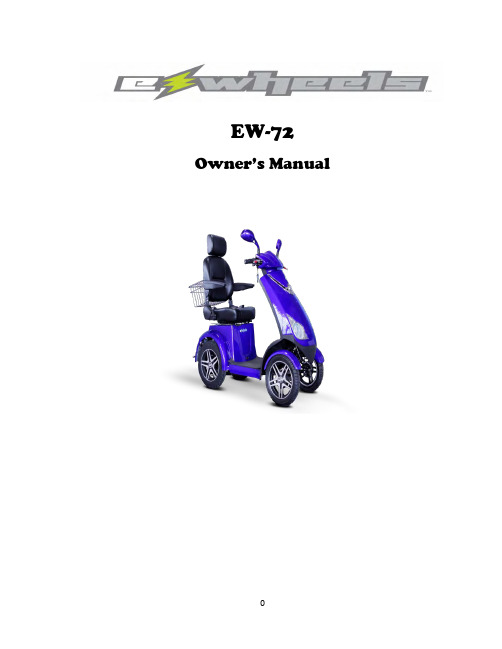
EW-72 Owner’s ManualTable of Contents1.Before y ou operate your scooter (2)2.Scooter initial operation (2)3.Technic al specification (3)4.Mirror Assembly (4)5.Safety Instruction………………………………………………4-66.Environ ment Condition (6)7.Seat A djustment (7)8.Instru ment Panel (8)9.Storage Compartment (9)10.Key Fob (9)11.Batteries and Charger (10)12.EMC Statement (11)Before you operate the scooterLocate the below listed materials in rear basket:∙Set of mirrors∙Electric charger∙Scooter Key (Key #2 located under seat in the storage compartment)∙Owner’s manualIT IS VERY IMPORTANT TO READ OWNER’S MANUAL BEFORE SCOOTER OPERATION Scooter Initial Operation∙Read Owner’s manual∙Buckle seat belt∙Insert key into ignition (or activate scooter using key fob)∙Set variable speed dial to lowest setting∙Turn lights on∙Adjust mirrors to desired positions∙Place both hands on black hand grips∙Twist the throttle slowly with your right hand∙Enjoy the ride!∙Turn off scooter by simply turning key to the off positionTechnical SpecificationsMirror AssemblyYour power scooter is shipped partially disassembled for protection during shipping. After unpacking, please check whether you have received the following main components as our standard specification (See Fig 1)1.MirrorsMirror PostFig 1To attach the mirrors simply place each mirror threaded end into the mirror post. Turn mirror clockwise and fasten mirror to scooter.Operation of Scooter:1.To prevent injury to yourself or others, always ensure that the power is switched off whengetting on or off the scooter, and that the emergency brake tabs are set.2.Always check that the variable speed control is set to the desired speed setting.Variable Speed Dial3.Always check you have selected the correct forward or reverse button when about to drive.Forward/Reverse switch4.Always reduce your speed when making sharp turns.5.Do not switch off the power when the scooter is still moving forward.Ramps and Curbs1.Check that ramp surface is toughened to prevent slipping. Never drive across a slope of turnsharply on a slope.2.When driving up curbs, always check the height of the curb to ensure that it does not exceed4” height.General1.Always use a seatbelt, and keep your feet on the scooter all the time.2.Do not over load the scooter with its maximum weight capacity of 500lbs includingaccessories and carry ons.3.Do not attempt to lift or move a power scooter by any of its removable parts. Personal injuryand damage to the power chair may result.4.Never try to use your scooter beyond its limitations as described in the manual.5.Do not operate your vehicle if it is not functioning properly.6.Do not connect any electrical or mechanical device to the scooter. Failure to obey thisinstruction may result in injury and will void the warranty.Use While Under the Influence of Medication or Alcohol1.Check with your physician if you are taking any medication that may affect your ability tooperate your powered scooter safely.2.Do not operate your scooter while you are under the influence of alcohol as this may impairyour ability to operate your power scooter in a safe manner.Environment ConditionRain, Sleet and SnowIf exposed to water, your power scooter is susceptible to damage to electronic or mechanical components. Water can cause electronic malfunction or promote premature corrosion of electrical components and frame.WarrantyFor valid warranty claims E-Wheels will, at their discretion, replace/repair/refund items mutually agreed to be defective.E-Wheels warranty as following:1.Frame: (3) Year limited warranty2.Electronic component: (1) Year limited warranty3.Controllers: (1) Year limited warranty4.Batteries: Not warranted5.Consumables: Wheel, tires, arm pads and seat cushions: Not warrantedbor costs are NOT covered by warrantyAny damage or defect of any nature occurring from the misuse of the product is not to be covered. The warranty is to start from the date of arrival of our products.Seat Adjustment1.Locate forward/reverse seat handle located under the seatForward/Reverse Handle2.Locate the reclining seat lever located on side of seat.Tilt Lever Seat arm rest can be in an upright position or a down position.Instrument PanelSpeedometer and Battery level indicatorSpeedometerBattery Indicato Battery Level IndicatorSpeed ControlLights on/offKey IgnitionHornTrunk Key InsertInsert Key into lock mechanism (as shown above) and turn while lifting so seat will lift and tilt forward to gain access to storage compartment and circuit breaker.Key FobPress once to activate alarmPress once to disarm alarmPanic alarm buttonPress twice to power scooterWithout putting key in ignitionBatteries and ChargerWe recommend that you use deep-cycle batteries that are sealed and maintenance free for your power scooter. Both are lead acid (SLA) and gel cell are Deep cycle batteries that are similar in performance. Deep-cycle batteries are specifically designed to provide power, drain down, and then accept a relatively quick charge. Lead acid batteries should be charged as often as possible. Specification of the battery that we recommend:Type: Deep Cycle Sealed lead acid or gel ellSize: 20 AHVoltage: 12 V Each (4) totalsDepending on the use, terrain and driving conditions, the batteries will provide a range of 43 miles of travel. However, even if the power scooter is not in use we recommend that the batteries be charged at least a month.Note:-Do not use any automotive batteries, they are not designed to handle a long, deep discharge and are unsafe for use in power scooter.-The useful life of a battery is quite often a reflection of the care it receives.-Always charge your batteries in well ventilated areas.-The charger is intended for indoor use only.-For maximum performance, it is recommended that you replace all four batteries at the same time if the batteries are weak.-If the vehicle will not be used for a long period. Arrange to have batteries recharged at least once every month to avoid deterioration.Recharge Battery only when the key is in off position.Charger Use1.Plug charger into electric wall outlet.2.Insert charger plug into the scooter’s charging port which is located directly in front of thescooter’s main body directly under the seat.3.Red charger light indicates scooter is charging4.Green charger light indicates the scooter is fully charged.10。
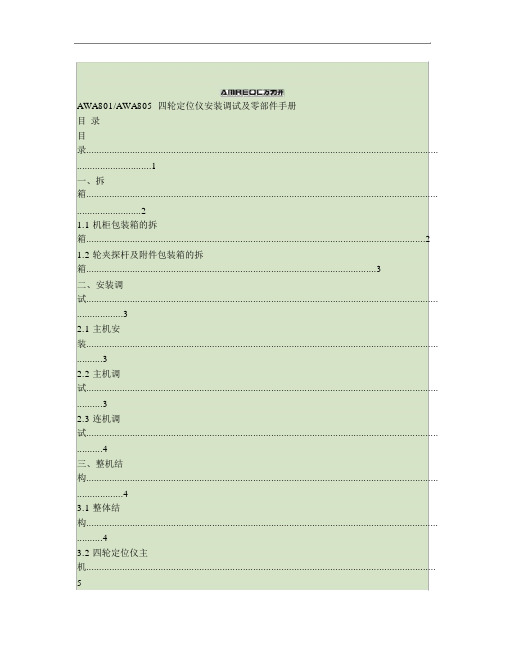
AWA801/AWA805 四轮定位仪安装调试及零部件手册目录目录......................................................................................................................................... .. (1)一、拆箱......................................................................................................................................... . (2)1.1 机柜包装箱的拆箱 (2)1.2 轮夹探杆及附件包装箱的拆箱 (3)二、安装调试......................................................................................................................................... (3)2.1 主机安装......................................................................................................................................... . (3)2.2 主机调试......................................................................................................................................... . (3)2.3 连机调试......................................................................................................................................... . (4)三、整机结构......................................................................................................................................... (4)3.1 整体结构......................................................................................................................................... . (4)3.2 四轮定位仪主机 (5)3.3 探杆.........................................................................................................................................5..................3.4 轮夹.........................................................................................................................................6..................3.5 轮夹挂架......................................................................................................................................... (6)3.6 无线通讯盒......................................................................................................................................... (6)3.7 转角盘(选配) ..................................................................................................................................... (7)3.8 方向盘固定架......................................................................................................................................... ..73.9 刹车板固定架......................................................................................................................................... ..73.10 标定架与标定架转接套(选配) (7)四、主要设备部件清单......................................................................................................................................... ..84.1 主要设备部件清单 (8)4.2 关键零部件名称及图片 (9)- 1 -AWA801/AWA805 四轮定位仪安装调试及零部件手册注意事项 :llllllllllllllllll 安装调试前应详细阅读本手册和说明书。
文件名称万能车操作说明书文件编号WI-GW-021 页次1/1
一、操作前准备:
1、接好电源线(220V单相)。
2、各油孔加入针车油。
3、用碎布清洁机台。
二、操作程序:
1、按要求选适当的针和线装上。
2、按马达启动开关(ON),听声音是否正常。
3、打好底线,线芯再装入梭壳,放入大釜。
4、用面线勾上底线。
5、按要求调好压脚的宽、窄位置。
6、按要求调好线路,即可作业。
7、如需暂停工作,请关闭马达开关(OFF)。
三、注意事项:
1、手不能放在针正下方,以免危险。
2、机器有异常声音时,请关闭马达,找专业机修。
发行核
准
审
查
制
订。