swt组件全集
- 格式:pdf
- 大小:138.98 KB
- 文档页数:21
swt技巧(二)SWT技巧简介SWT(Standard Widget Toolkit)是一种使用Java编写的界面工具包,它提供了一组丰富的图形界面控件和功能,用于构建跨平台的桌面应用程序。
在本文中,我们将介绍一些SWT的常用技巧,帮助您更好地利用SWT开发应用程序。
开发环境搭建1.下载并安装Java Development Kit(JDK)–访问官方网站,下载适用于您操作系统的JDK安装包–执行安装程序,并根据提示完成安装2.下载并配置Eclipse开发环境–访问官方网站,下载适用于您操作系统的Eclipse IDE for Java Developers安装包–执行安装程序,并根据提示完成安装–启动Eclipse,选择合适的工作区(Workspace)–配置Java运行环境(JRE),选择已安装的JDK路径3.下载并导入SWT库–访问Eclipse官方插件市场,搜索并安装SWT插件–在Eclipse项目中,右键单击项目,选择“属性”并导航到“Java Build Path”–在“库”选项卡下,点击“添加外部JARs”按钮,选择SWT库的路径常用控件和布局管理器•Shell:应用程序窗口的容器•Composite:可嵌套的容器•Label:文本标签•Text:文本输入框•Button:按钮•Combo:下拉列表框•Table:表格•Tree:树状结构•GridLayout:网格布局管理器•FormLayout:表单布局管理器•RowLayout:行布局管理器事件处理•使用addListener()方法添加事件监听器•实现Listener接口或使用匿名内部类处理事件•常用事件类型:、、``等绘图和图像操作•使用GC(Graphical Context)对象绘制图形•使用Image类加载和处理图像数据•实现PaintListener接口处理绘图事件资源管理•使用ResourceManager类管理图像、颜色等资源•使用dispose()方法释放资源,防止内存泄漏高级功能•实现自定义控件:继承Canvas或Composite类,并重写相应方法•实现自定义布局管理器:继承Layout类,并重写相应方法•实现拖放功能:使用DragSource和DropTarget类•实现本地系统集成:使用Program类打开外部程序或文件结语本文介绍了一些常用的SWT技巧,帮助您更好地使用SWT进行应用程序开发。


一抛砖引玉本文指在利用一个小程序”Swing 组件大全”来引导大家学习Java这门语言,熟悉Ja va Swing的各个组件。
并在学习过程中参考作者设计这一程序的方法和思想,最终形成自己的思维方式和学习方式。
你能举一返三是作者最开心的事情。
小程序演示了Java Swing 大部分组件。
最后附上了全部代码及详细的注释说明。
希望本文能对大家学习Java有所帮助。
随着Java风潮席卷国内,学习Java的方法和路径越来越多。
而在大量的书本前,在J ava庞大的类库前大大家都有点迷失方向的感觉,是学J2EE,J2ME还是。
然而所有的这些都或多或少的离不开J2SE。
万丈高楼平地起。
J2SE是整个Java的基础,学好了这个对Java的各个方向都是很有利的。
而学习J2SE的最初点就在界面设计,因为界面编程是你来感觉最直接的手段,是提高大家编程兴趣的很好开始,因为你写完程序编译后可马上看到自己的成果。
而不像后台编程做完了都感受不到效果。
而好的界面也是你测试你其他程序的基础。
界面设计!不就是拖拉操作吗?如果是VB,VC等可视化的编程,的确只是一些拖拉操作,由于Java语言的设计中所有的东西都是程序代码,在Java中如果想要设计一个好的界面,可不是简单的拖拉操作能完成的。
即使使用了如JBuilder这么强大的可视化工具,你也得亲自动手写一些界面设计代码才能很好的完成你的任务。
如果你能在此基础上理解Java界面设计的思想,对你学习这门语言将有莫大的帮助。
Java界面设计主要涉及Awt,Swing两大类库,Swing是Awt的扩展和功能加强。
下面我们就以Swing为基础来说说整个Java的界面设计。
二感受效果在开始之前,让我们看看这篇文章要达到的效果,有了目标和成果才有学习的兴趣,起码我是这样认为和学习的。
如下图所示,这就是我们设计的界面,它包括了Swing中大部分常用的组件。
有些功能界面上反映不出来,大家可尝试编译源代码点南击各个部分,看看它们的响应事件。

swing组件及其用法Swing组件是用于创建图形用户界面的Java库。
它提供了丰富的界面元素和布局管理器,可以实现各种图形界面应用程序。
下面是一些常用的Swing组件及其用法:1. JFrame:顶层窗口组件,用于创建一个窗口。
用法示例:```javaJFrame frame = new JFrame("My Frame");frame.setDefaultCloseOperation(JFrame.EXIT_ON_CLOSE); frame.setSize(500, 300);frame.setVisible(true);```2. JPanel:容器组件,用于组织其他组件。
用法示例:```javaJPanel panel = new JPanel();panel.setLayout(new FlowLayout());panel.add(new JButton("Button 1"));panel.add(new JButton("Button 2"));```3. JButton:按钮组件,用于触发动作。
用法示例:```javaJButton button = new JButton("Click me");button.addActionListener(e -> System.out.println("Buttonclicked"));```4. JLabel:标签组件,用于显示文本或图像。
用法示例:```javaJLabel label = new JLabel("Hello, world!");label.setIcon(new ImageIcon("image.png"));```5. JTextField:文本输入框组件,用于接收用户输入。
JavaSWT控件4.2 SWT/JFace常用组件SWT/JFace常用组件有按钮(Button类)、标签(Label类)、文本框(Text类)、下拉框(Combo类)和列表框(List类)等。
4.2.1 按钮组件按钮(Button)组件是SWT中最常用的组件,Button类的构造方法是:Button(Composite parent,int style)该方法有两个参数:第一个参数parent是指Button创建在哪一个容器上。
Composite(面板)是最常用的容器,Shell(窗体)继承自Composite,此参数也能接受Shell和任何继承自Compsite的类。
第二个参数style用来指定Button的式样。
SWT组件可以在构造方法中使用式样(style)来声明组件的外观形状和文字的式样。
SWT组件的构造方法和Button类相似,参数的含义也相同。
1.Button组件常用式样SWT.PUSH:按钮。
SWT.CHECK:多选按钮。
SWT.RADIO:单选按钮。
SWT.ARROW:箭头按钮。
SWT.NONE:默认按钮。
SWT.CENTER:文字居中,与SWT.NONE相同。
SWT.LEFT:文字靠左。
SWT.RIGHT:文字靠右。
SWT.BORDER:深陷型按钮。
SWT.FLAT:平面型按钮。
一个Button也可以指定多个式样,只要将指定的各个式样用符号“|”连接起来即可。
如:Button bt=newButton(shell,SWT.CHECK|SWT.BORDER|SWT.LEFT);表示创建的按钮bt是一个复选按钮(CHECK),深陷型(BORDER)、文字左对齐(LEFT)。
2.Button组件的常用方法setText(String string):设置组件的标签文字。
setBounds(int x,int y,int width,int height):设置组件的坐标位置和大小(x轴坐标,y轴坐标,组件宽度width,组件高度height)。


Java考试题之swt组件一、JavaTest01C:.│.classpath│.project│├─.settings│org.eclipse.jdt.core.prefs│├─bin│└─com│└─example│└─test│Main.class│WindowsActionEvent.class│└─src└─com└─example└─testMain.javaWindowsActionEvent.java//WindowsActionEvent.javapackage com.example.test;import java.awt.FlowLayout;import java.awt.event.ActionEvent;import java.awt.event.ActionListener;import javax.swing.JButton;import javax.swing.JFrame;import javax.swing.JTextField;/*一、编写一个GUI程序,要求如下* 1.有一个窗口,标题是计算sin的值,布局是FlowLyaout布局* 初始大小是(200,300),初始位置是(120,260)* 2.窗口中有两个文本框(JTextField),名字分别是input和show,可见字符长度不小于15 * 3.窗口中有两个按钮(JButton),button_1和button_2,这两个按钮上的名字分别是"按度计算","按弧度计算"* 4.将文本框和按钮添加到窗口,顺序是input,button_1,button_2,show* 5.用户在input中输入一个数,比如60,* 单击"按度计算",在show 中显示(sin)正弦60度的值* 单击"按弧度计算",在show 中显示(sin)正弦60弧度的值** 提示:Math类中的静态方法sin(x)将x看成弧度,因此,要计算60度的正弦值,必须写成 * Math.sin(60*3.1415926/180)* 或Math.sin(60*Math.PI/180)** 在命令行输入一个数,程序输出这个数的sin值* 在命令行输入2个数,然后计算Math.pow(a,b)** */public class WindowsActionEvent extends JFrame implements ActionListener {JTextField input, show;JButton button_1, button_2;WindowsActionEvent() {setTitle("计算sin的值");// setSize(200, 300);// setLocation(120, 260);setBounds(120, 260, 200, 300);setLayout(new FlowLayout());input = new JTextField(15);show = new JTextField(15);button_1 = new JButton("按度计算");button_2 = new JButton("按弧度计算");add(input);add(button_1);add(button_2);add(show);input.addActionListener(this);button_1.addActionListener(this);button_2.addActionListener(this);setVisible(true);setDefaultCloseOperation(JFrame.EXIT_ON_CLOSE);}@Overridepublic void actionPerformed(ActionEvent e) {if (e.getSource() == button_1){String str=input.getText();double a=Double.parseDouble(str);double r=Math.sin(a*3.1415926/180);show.setText(""+r);}if (e.getSource() == button_2) {String str=input.getText();double a=Double.parseDouble(str);double r=Math.sin(a);show.setText(""+r);}}}//Main.javapackage com.example.test;public class Main {public static void main(String[] args) {WindowsActionEvent wae=new WindowsActionEvent();}}二、JavaTest02C:.│.classpath│.project│├─.settings│org.eclipse.jdt.core.prefs│├─bin│└─com│└─example│└─test│Main.class│WindowsActionEvent.class│└─src└─com└─example└─testMain.javaWindowsActionEvent.java//WindowsActionEvent.javapackage com.example.test;import java.awt.FlowLayout;import java.awt.event.ActionEvent;import java.awt.event.ActionListener;import javax.swing.JButton;import javax.swing.JFrame;import javax.swing.JTextField;/*二、编写一个GUI程序,要求如下* 1.有一个窗口,标题是"大小写转换器",窗口宽300,高200* 布局是FlowLyaout布局* 2.窗口中有一个文本框(JTextField),两个按钮(JButton),两个按钮名字分别为"大写","小写",* 当用户单击"大写"按钮时,文本框中的文本转换成大写,并显示在文本框中,* 当用户单击"小写"按钮时,文本框中的文本转换成小写,并显示在文本框中,** */public class WindowsActionEvent extends JFrame implements ActionListener {JTextField text;JButton button_1, button_2;WindowsActionEvent() {setTitle("大小写转换器");setSize(300, 200);setLayout(new FlowLayout());text = new JTextField(20);button_1 = new JButton("大写");button_2 = new JButton("小写");add(text);add(button_1);add(button_2);text.addActionListener(this);button_1.addActionListener(this);button_2.addActionListener(this);setVisible(true);setDefaultCloseOperation(JFrame.EXIT_ON_CLOSE);}@Overridepublic void actionPerformed(ActionEvent e) {if (e.getSource() == button_1){String str=text.getText().toUpperCase();text.setText(""+str);}if (e.getSource() == button_2) {String str=text.getText().toLowerCase();text.setText(""+str);}}}//Main.javapackage com.example.test;public class Main {public static void main(String[] args) {WindowsActionEvent wae=new WindowsActionEvent();}}三、JavaTest03C:.│.classpath│.project│├─.settings│org.eclipse.jdt.core.prefs│├─bin│└─com│└─example│└─test│Main.class│WindowsActionEvent.class│└─src└─com└─example└─testMain.javaWindowsActionEvent.java//WindowsActionEvent.javapackage com.example.test;import java.awt.FlowLayout;import java.awt.event.ActionEvent;import java.awt.event.ActionListener;import javax.swing.JButton;import javax.swing.JFrame;import javax.swing.JTextField;/*三、编写一个GUI程序,要求如下* 1.给定a,b,c三个文本框。
//------------- 文件名:PeopleEntity.java--------------// 本类包含5个不同数据类型的变量,分别对应数据库表中的5个字段。
变量为private型,即只能// 由类的内部代码访问,外界只能通过这些变量相应的Setter/Getter方法来访问它们public class PeopleEntity {private Long id; //唯一识别码,在数据库里常为自动递增的ID列private String name; //姓名private boolean sex; //性别 true男,flase 女private int age; //年龄private Date createDate; //记录的建立日期。
Date类型是java.util.Date,而不是java.sql.Date//以下代码为字段各自的Setter/Getter方法。
参考第3.5.2节,这些方法在Eclipse可自动生成public Long getId() { return id;}public void setId(Long long1) {id = long1;} public String getName() {return name;} public void setName(String string) {name = string;}public boolean isSex() { return sex;} public void setSex(boolean sex) { this.sex = sex; }public int getAge() {return age;}public void setAge(int i) {age = i;}public Date getCreateDate() {returno.setId(2L); // 利用JDK5.0的自动装箱功能,省了long到Long对象的转化o.setName("周阅");o.setSex(false);o.setAge(18);o.setCreateDate(new Date());list.add(o);}{ // 第3个实体类对象PeopleEntity o = new PeopleEntity();o.setId(3L);o.setName("陈常恩");o.setSex(true);o.setAge(27);o.setCreateDate(new Date());list.add(o);}return list;}}程序说明:在实际应用中,getPeoples方法可由硬性生成PeopleEntity对象,改为从数据库中取出数据后生成PeopleEntity对象。
Eclipse开发经典教程:常用SWT组件在介绍组件之前,有必要介绍一下Control类。
Control类是一个抽象类,它是所有窗口组件(即在Windows中能获得句柄的部件)的基类。
Control类的继承关系Control类是为继承而设计的,所有窗口组件都继承于Control类,如图1所示。
图1 Control类的继承关系Control的一个实例代表Windows中的一个窗口组件,它中有窗口名柄属性,但是在程序中不能够直接访问。
Control类的常用方法Control类提供了窗口组件中的常用方法,所有的窗口组件都可以调用Con trol类的方法,常用方法如下。
1. setBounds (int x, int y, int width, int height)解释:设定窗口组件的位置,参数(x,y)为窗口组件左上角顶点的相对于父窗口坐标,(width,height)为窗口的宽度和高度。
示例:button.setBounds(40, 50, 100, 30)。
2. setEnabled (boolean enabled)解释:设定窗口是否可用,参数enabled为true表示窗口可用,为false 表示窗口禁用。
示例:button.setEnabled(false)。
3. setVisible (boolean visible)解释:设定窗口是否可显示,参数visible为true表示窗口可显示,为fa lse表示窗口不可显示。
示例:button.setVisible(false)。
4. setToolTipText (String string)解释:设定鼠标指向窗口时的提示信息,参数string为提示信息的内容。
示例:button.setToolTipText("very good")。
5. setFont (Font font)解释:设定窗口文字的字体,参数font为字体对象。

MenuItem fileExitItem, fileSaveItem, fileEnglishItem, fileGermanItem, editCopyItem;Text text;public MenuExample() {display = new Display();shell = new Shell(display);shell.setText("Menu Example");shell.setSize(300, 200);text = new Text(shell, SWT.BORDER);text.setBounds(80, 50, 150, 25);//添加主菜单项menuBar = new Menu(shell, SWT.BAR);//添加一级子菜单fileMenuHeader = new MenuItem(menuBar, SWT.CASCADE); fileMenuHeader.setText("&File");//添加一级子菜单的菜单项fileMenu = new Menu(shell, SWT.DROP_DOWN);fileMenuHeader.setMenu(fileMenu);fileSaveItem = new MenuItem(fileMenu, SWT.PUSH);fileSaveItem.setText("&Save");fileEnglishItem = new MenuItem(fileMenu, SWT.RADIO);fileEnglishItem.setText("English");fileGermanItem = new MenuItem(fileMenu, SWT.RADIO);fileGermanItem.setText("German");fileExitItem = new MenuItem(fileMenu, SWT.PUSH);fileExitItem.setText("E&xit");editMenuHeader = new MenuItem(menuBar, SWT.CASCADE); editMenuHeader.setText("&Edit");editMenu = new Menu(shell, SWT.DROP_DOWN);editMenuHeader.setMenu(editMenu);editCopyItem = new MenuItem(editMenu, SWT.PUSH);editCopyItem.setText("&Copy");//添加菜单项的事件监听器fileExitItem.addSelectionListener(new MenuItemListener()); fileSaveItem.addSelectionListener(new MenuItemListener()); editCopyItem.addSelectionListener(new MenuItemListener()); fileEnglishItem.addSelectionListener(new RadioItemListener()); fileGermanItem.addSelectionListener(new RadioItemListener());shell.setMenuBar(menuBar);shell.open();while (!shell.isDisposed()) {if (!display.readAndDispatch())display.sleep();}display.dispose();}class MenuItemListener extends SelectionAdapter {public void widgetSelected(SelectionEvent event) {text.setText("You selected " + ((MenuItem) event.widget).getText()); if (((MenuItem) event.widget).getText().equals("E&xit")) {shell.close();}}}class RadioItemListener extends SelectionAdapter {public void widgetSelected(SelectionEvent event) {MenuItem item = (MenuItem) event.widget;text.setText(item.getText() + " is on.");}}public static void main(String[] args) {MenuExample menuExample = new MenuExample();}}以上程序中添加了主菜单,并在主菜单中添加了两个子菜单项,子菜单项添加了相应的事件响应机制,程序运行效果如图1所示。

SWT常用控件风格,事件等常量定义SWT类所代表的事件常量:事件类型常量说明SWT.Activate当激活窗口时SWT.Arm菜单项被选中之前SWT.Close关闭窗口时SWT.Collapse折叠树的节点时SWT.Deactivate窗口处于非激活状态时SWT.DefaultSelection默认选中时SWT.Deiconify窗口不是最小化时SWT.Dispose释放资源时SWT.DragDetect拖动控件时SWT.Expand展开树节点时SWT.FocusIn控件获得焦点时SWT.FocusOut控件失去焦点时SWT.HardKeyDown硬件按键按下时,例如Pocket PC SWT.HardKeyUp硬件按键抬起时,例如Pocket PC SWT.Help按下帮助键时SWT.Hide隐藏控件时SWT.Iconify窗口最小化时SWT.KeyDown按下按键时SWT.KeyUp抬起按钮时SWT.MenuDetect选中菜单时SWT.Modify文本修改时SWT.MouseDoubleClick双击鼠标时SWT.MouseDown鼠标按下时SWT.MouseEnter鼠标进入时SWT.MouseExit鼠标离开时SWT.MouseHover鼠标在控件区域上时SWT.MouseMove鼠标移动时SWT.MouseUp鼠标抬起时SWT.Move移动控件时SWT.None无类型事件SWT.Paint绘制控件时SWT.Resize重新设置控件大小时SWT.Selection选中控件时SWT.Show显示控件时SWT.Traverse使用Tab键切换时SWT.Verify文本进行修改时JA VA.SWT/JFace:按键与其对应的常量表、KeyEvent事件比较、VerifyEvent事件比较按键与其对应的常量表:按键keyCode常量方向键下SWT.ARROW_DOWN方向键上SWT.ARROW_UP方向键左SWT.ARROW_LEFT方向键右SWT.ARROW_RIGHTAlt键SWT.ALT空格键SWT.BSEnter键SWT.CRCtrl键SWT.CTRLEnd键SWT.ENDEsc键SWT.ESCF1~F12键SWT.F1~SWT.F12Home键SWT.HOMEInsert键SWT.INSERTPage Down下翻页键SWT.PAGE_DOWNPage Up上翻页键SWT.PAGE_UPShift键SWT.SHIFTTab键SWT.TAB换行键SWT.LFKeyEvent事件比较:示例描述各属性的值说明按下A键character='a' keyCode=97stateMask=097表示键盘上的a键。


实例变量也被翻译成"域"和"成员变量"。
在面向数据库的实体类中叶被称为"属性"或"字段"的变量。
Hibernate中也称为POJO,即简单原始的Java变量。
使用变量的一般原则是:尽量使变量的有效范围最小化,即优先考虑用局部变量。
其次是实例变量,最后才是类变量。
还有一种常量的写法,比类常量前多了一个final,如下:final static int ALL_CLICKS = 0; //somethingALL_CLICKS全是大写的,这是常量的规范式命名方式。
这时的ALL_CLICKS被final约束,它不能再被赋值了。
SWT 的Button分为四类样式。
他们分别是SWT.PUSH:这是最正常的按钮SWT.CHECKSWT.RADIO:和上面的有点相似。
SWT.ARROW。
Button中间的字体可以调节向左或着居中什么的。
他的表面还提供了深凹陷和平面型等外观设置。
使用符号"|"可以让一个控件(如:Button)应用多个样式。
如:new Button(shell,SWT.LEFT|SWT.BORDER|SWT.CHECK);其方法参数:new Button(Composite parent,int style)标签类:Label Label是SWT中最简单的界面组件,给出一个类实例如下:Label label = new Label(shell,SWT.NONE);Label.setBounds(38,21,100,18);Label.setText("姓名");Label类提供了样式列表。
包括居中、靠左等,SWT.WRAP:自动换行。
还有SWT.BORDER:深陷型。
他还有分栏符的功能。
分栏符有横有竖。
SWT.SEPARATOR等。
文本框类:Text文本框类也是比较简单的界面组件,但他很重要。

JAVA.SWTJFace:SWT高级控件之SWT系统资源JAVA.SWT/JFace: SWT高级控件之SWT系统资源2010年08月05日星期四 22:15《Eclipse SWT/JFACE 核心应用》清华大学出版社 12 SWT系统资源系统资源包括颜色(Color)、字体(Font)、光标(Cursor)、图像(Image)等,对于这些本地系统资源,在使用后一定要释放掉,否则会严重影响系统的整体性能。
12.1 系统资源概述系统资源一般是指颜色(Color)、字体(Font)、光标(Cursor)、图像(Image)等,SWT中创建的各种控件也属于系统资源。
当在SWT中创建了系统资源,那么也就创建了对应的本地资源。
下面这种方式创建的资源必须释放:// 创建红色对象Color color = new Color(diaplay, 255, 0, 0);// 使用完时释放color.dispose();下面这种方式获取的资源不需释放:// 获得系统中的红色对象Color color = display.getSystemColor(SWT.COLOR_RED);因为这种方式是从底层平台获得的颜色资源,这个资源不是我们自己创建的,只是被我们引用了,其他的对象有可能正在使用或者将要使用这个资源,释放这样的资源会带来不可预知的严重后果。
JAVA的垃圾回收只能回收Java虚拟机中的对象,而对本地操作系统的对象是不能够自动释放的,所以对本地资源的释放一定要显式的释放掉。
释放资源的原则1. 通过new创建的资源一定要显式的释放。
2. 释放了父控件也就释放了子控件。
例如窗口(Shell)对象中有一个按钮(Button),释放Shell时该Button也隐式的释放了。
该规则只适用于Widget的子类。
如果程序中使用了字体、颜色、图像、图标等系统资源,扔需要在程序中显示的dispose()掉。
3. 释放了控件也就释放了控件所设置的菜单。
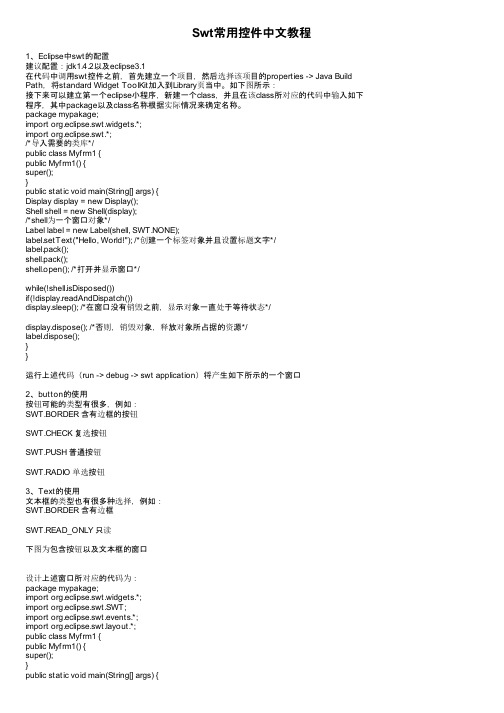
Swt常用控件中文教程1、Eclipse中swt的配置建议配置:jdk1.4.2以及eclipse3.1在代码中调用swt控件之前,首先建立一个项目,然后选择该项目的properties -> Java Build Path,将standard Widget ToolKit加入到Library页当中。
如下图所示:接下来可以建立第一个eclipse小程序,新建一个class,并且在该class所对应的代码中输入如下程序,其中package以及class名称根据实际情况来确定名称。
package mypakage;import org.eclipse.swt.widgets.*;import org.eclipse.swt.*;/*导入需要的类库*/public class Myfrm1 {public Myfrm1() {super();}public static void main(String[] args) {Display display = new Display();Shell shell = new Shell(display);/*shell为一个窗口对象*/Label label = new Label(shell, SWT.NONE);label.setText("Hello, World!"); /*创建一个标签对象并且设置标题文字*/label.pack();shell.pack();shell.open(); /*打开并显示窗口*/while(!shell.isDisposed())if(!display.readAndDispatch())display.sleep(); /*在窗口没有销毁之前,显示对象一直处于等待状态*/display.dispose(); /*否则,销毁对象,释放对象所占据的资源*/label.dispose();}}运行上述代码(run -> debug -> swt application)将产生如下所示的一个窗口2、button的使用按钮可能的类型有很多,例如:SWT.BORDER 含有边框的按钮SWT.CHECK 复选按钮SWT.PUSH 普通按钮SWT.RADIO 单选按钮3、Text的使用文本框的类型也有很多种选择,例如:SWT.BORDER 含有边框SWT.READ_ONLY 只读下图为包含按钮以及文本框的窗口设计上述窗口所对应的代码为:package mypakage;import org.eclipse.swt.widgets.*;import org.eclipse.swt.SWT;import org.eclipse.swt.events.*;import yout.*;public class Myfrm1 {public Myfrm1() {super();Display display = new Display( );Shell shell = new Shell(display);shell.setSize(300, 200);shell.setLayout(new RowLayout( ));shell.setText("Button Example");final Button button = new Button(shell, SWT.BORDER);button.setText("Click Me");final Text text = new Text(shell, SWT.BORDER);shell.open( );while(!shell.isDisposed( )) {if(!display.readAndDispatch( )) display.sleep( );}display.dispose( );}}如果想对控件的位置以及大小进行精确的设置,可以使用setBounds(x, y, width, height)方法来取代shell.setLayout(new RowLayout( ))。
Basic SWT Widgets 1, 2by Shantha RamachandranDepartment of Computer Science, University of Manitoba, Winnipeg, Manitoba, Canada Last revised: June 4, 2003Overview:In this document, we describe the basic SWT (Standard Widget Toolkit) widgets. Our focus is on developing Java applications that use the SWT, not on developing plugins to extend the Eclipse workbench. If you have not already run an SWT-based application using the Eclipse workbench, you should review the information on installing Eclipse and setting up the SWT libraries in the previous document, Installing Eclipse.Widget Structure:To create an application that uses SWT widgets, you need to start by importing the following packages:org.eclipse.swt.*;org.eclipse.swt.widgets.*;It is necessary to create a Display and a Shell to hold the SWT widgets:Display display = new Display();Shell shell = new Shell(display);A display is an object that contains all GUI components. A display is not actually visible but the components added to a display are visible. Typically, only one display is created for an application. A shell is a window within the application. There may be any number of shells created for an application, with shells being at the top level (attached to a display) or shells being attached to other shells.1 This work was funded by an IBM Eclipse Innovation Grant.2 © Shantha Ramachandran and David ScuseThe properties of the SWT widgets are initialized and/or modified in the same manner as Swing widgets. You can set the size of the shell:shell.setSize(100,100);Finally, you need to open the shell and run an event loop. This event loop is required for the shell to visible on the screen. You can place it after any code you have initializing widgets on the shell. When the shell is closed, the display must be disposed.shell.open();while(!shell.isDisposed()){if(!display.readAndDispatch())display.sleep();}display.dispose();Now, you are ready to add any widgets to your shell. We will not use a layout manager for now, as creating widgets with a layout manager is a little more complicated. The following examples all deal with placing widgets on a shell with no layout.LabelA label is a collection of characters that can not be modified by the user (although the characters can be modified by the programmer).To place a label on your shell, use the following code:Label label1 = new Label(shell, SWT.BORDER);The different styles of labels are BORDER, CENTER, LEFT, RIGHT, WRAP and SEPARATOR. The separator style is a special kind of label that draws a line separating your other widgets. The styles that can be added for a separator are HORIZONTAL, VERTICAL, SHADOW_IN, SHADOW_OUT and SHADOW_NONE.The following code creates five labels, two of which are separators. The first text label has a border, the second is a normal label, and the third has a colored background that was set using the setBackground() method. The two separators in the example are horizontal, but the first has a shadow style applied to it.Label label1 = new Label(shell, SWT.BORDER);label1.setText("See no evil");label1.setSize(100,20);label1.setLocation(30,30);Label sep1 = newLabel(shell, SWT.SEPARATOR| SWT.HORIZONTAL |SWT.SHADOW_IN);sep1.setBounds(30,60,100,20);Label label2 = new Label(shell, SWT.NONE);label2.setText("Hear no evil");label2.setSize(100,20);label2.setLocation(30,90);Label sep2 = new Label(shell, SWT.SEPARATOR | SWT.HORIZONTAL); sep2.setBounds(30,120,100,20);Label label3 = new Label(shell, SWT.NONE);label3.setSize(100,20);label3.setLocation(30,150);label3.setBackground(new Color(display,200,111,50));label3.setText("Speak no evil");This results in the following window:TextA text widget contains text that can normally be modified by the user.To place a text widget on your screen, use the following code:Text text1 = new Text(shell, SWT.BORDER);The styles that are supported by Text are BORDER, H_SCROLL, V_SCROLL, MULTI, SINGLE, READ_ONLY and WRAP.The text widget has some interesting properties that can be set. If your text is editable, you can set the maximum number of characters that can be typed:text1.setTextLimit(30);You can also create password text boxes by using the setEchoChar() method. The argument for this method is the character that is to be displayed in the text. The correct string will still be in the text, but will only be viewed as a sequence of a specified character:text2.setEchoChar('*');The following code creates three text widgets. The first one has a 30 character text limit. The second one displays all text as a series of asterisks, much like a password field. The final text has used the setEditable() method to make the control read only. Another way to accomplish this would be to give it the style SWT.READ_ONLY.Try running the following code and typing in the text widgets:Text text1 = new Text(shell, SWT.BORDER);text1.setText("Type something in here");text1.setBounds(10,10,200,20);text1.setTextLimit(30);Text text2 = new Text(shell, SWT.NONE);text2.setEchoChar('*');text2.setBounds(10,50,200,20);text2.setText("Password");Text text3 = new Text(shell, SWT.BORDER | SWT.H_SCROLL |SWT.V_SCROLL);text3.setBounds(10,90,200,100);text3.setEditable(false);text3.setText("Bet you can't type in here");This produces the following window:ButtonA button is a widget that is clicked by the user in order to initiate some processing.To place a button on the shell, use the following code:Button button1 = new Button(shell,SWT.PUSH);You can replace SWT.PUSH with any of the button types that SWT supports. This includes PUSH, CHECK, RADIO, TOGGLE and ARROW. You can also use the styles FLAT, BORDER, LEFT, RIGHT and CENTER with one of these types.To set the text of the button, use the setText() method:button1.setText("Hello");In order for the button to be visible on the screen, you need to set the size and the location of the button. Alternatively, you can set the bounds of the button and both the size and the location will be set at once.button1.setLocation(0,0);button1.setSize(100,20);You can also set the style, background, image and more by using set methods. To add an event handler to your button, you first need to import the events package:import org.eclipse.swt.events.*;A basic event handler for the button is a selection event handler. This is called when the button is selected by clicking on it. To create the event handler, we add a listener to the button using the following code:button1.addSelectionListener(new SelectionAdapter() {public void widgetSelected(SelectionEvent e) {System.out.println("Button1 was clicked");}});Here is a small sample that incorporates all the code seen above. It creates a button which, when clicked, will print “Button was clicked” to the console, an arrow button, and a button with more than one style - toggle and flat.Button button1 = new Button(shell,SWT.PUSH);button1.setText("Click me");button1.setLocation(0,0);button1.setSize(100,20);button1.addSelectionListener(new SelectionAdapter() {public void widgetSelected(SelectionEvent e) {System.out.println("Button1 was clicked");}});Button button2 = new Button(shell, SWT.ARROW);button2.setSize(20,20);button2.setLocation(250,200);Button button3 = new Button(shell, SWT.FLAT|SWT.TOGGLE);button3.setSize(50,50);button3.setLocation(0,150);The following window is displayed:ListA list is a widget that contains a collection of items; the user may select an item from the list.To place a list on your screen, use the following code:List list1 = new List(shell, SWT.MULTI);The different styles that a list supports are BORDER, H_SCROLL, V_SCROLL, SINGLE and MULTI.To add items to a list, you can use the setItems() method, or the add() method.In the following example, two lists are created. The first list uses the H_SCROLL style to create a horizontal scrollbar within the list. The second one uses a MouseListener to respond to MouseDown and MouseUp events. The MouseListener works in a similar fashion to the SelectionListener. A MouseAdapter is created with one of or both of mouseUp() and mouseDown() methods. This is the code that is necessary:list2.addMouseListener(new MouseAdapter() {public void mouseDown(MouseEvent e) {System.out.println(list2.getSelection()[0]+" wins");}public void mouseUp(MouseEvent e) {System.out.println("Try again!");}});Note that list2 must be declared as final in order to use it within the adapter:List list1 = new List(shell, SWT.MULTI | SWT.H_SCROLL);list1.setItems(new String[] {"Strawberry","Banana","Apple"});list1.add("Pickle");list1.setBounds(0,0,60,100);final List list2 = new List(shell, SWT.SINGLE | SWT.BORDER);list2.setItems(new String[] {"Rock","Paper","Scissors"});list2.setBounds(110,0,50,50);list2.addMouseListener(new MouseAdapter() {public void mouseDown(MouseEvent e) {+" wins"); System.out.println(list2.getSelection()[0]}public void mouseUp(MouseEvent e) {System.out.println("Try again!");}});ComboA combo widget allows the user to select an item from a collection of items. The user may also type a value into the combo widget.To place a combo box on the shell, use the following code:Combo combo1 = new Combo(shell,SWT.DROP_DOWN | SWT.READ_ONLY);The styles that are supported by Combo are BORDER, DROP_DOWN, READ_ONLY and SIMPLE. More than one style can be used at a time, as in the above code.To add items to a Combo, use the setItems() method. This takes a string array as an argument.combo1.setItems(new String[] {"One","Two","Three"});Use the select() method to select one of the list items. This method takes an integer argument - the index of the item to be selected.The following example creates three Combos. The first is a drop down list whose location and size are set. The second is a simple Combo whose location and size are set at one time using the setBounds() method. The third is a Combo with no items.Combo combo1 = new Combo(shell, SWT.DROP_DOWN|SWT.READ_ONLY);combo1.setItems(new String[] {"One","Two","Three"});combo1.select(0);combo1.setLocation(0,0);combo1.setSize(100,20);Combo combo2 = new Combo(shell, SWT.SIMPLE);combo2.setItems(new String[] {"Red","Green","Blue","Yellow"});combo2.setBounds(50,50,200,150);combo2.select(1);Combo combo3 = new Combo(shell, SWT.DROP_DOWN);combo3.setLocation(200,0);combo3.setSize(50,50);CompositeA composite is a widget that can contain other widgets. Widgets are placed inside a composite in the same manner that widgets are placed on a shell. The position of each widget inside a composite is relative to the composite, so if the composite is moved on the shell, the widgets inside the composite retain their relative positions.To place a composite on your shell, use the following code:Composite composite1 = new Composite(shell,SWT.BORDER);The styles supported by composites are BORDER, H_SCROLL and V_SCROLL.You can set properties of the composite, like background colour, but you cannot set a text value.Label label = new Label(composite1,SWT.NONE);The following code is an example of placing a composite within a composite. The first composite has a border and a coloured background, so it is easily spotted on the screen. In order to use the setBackground() method for any control, you need to import the graphics library and create a color:importorg.eclipse.swt.graphics.*;Color myColor = new Color(display, 0, 0, 0);Note that if you do not give a composite a border or a background, you will not be able to distinguish it from the rest of the shell. The second composite exists within the first. It has horizontal and vertical scroll bars, and a list within the composite:Composite composite1 = new Composite(shell,SWT.BORDER);composite1.setBounds(10,10,270,250);composite1.setBackground(new Color(display,31,133,31));Label label = new Label(composite1,SWT.NONE);label.setText("Here is a green composite");label.setBounds(10,10,200,20);Composite composite2 = newComposite(composite1,SWT.H_SCROLL|SWT.V_SCROLL);composite2.setBounds(10,40,200,200);List list = new List(composite2,SWT.MULTI);for (int i=0; i<50; i++) {list.add("Item " + i);}list.setSize(300,300);This produces the following screen:GroupA group is also a widget that can contain other widgets. A group is surrounded by a border and may, optionally, contain a title. As with composites, the position of each widget inside a group is relative to the group, so if the group is moved on the shell, the widgets inside the group retain their relative positions.To add a group to your screen, use the following code:Group group1 = new Group(shell, SWT.BORDER);The styles that are supported by group are BORDER, SHADOW_ETCHED_IN, SHADOW_ETCHED_OUT, SHADOW_IN, SHADOW_OUT and SHADOW_NONE. You can set all the standard properties for a group, such as size, location, background, and more. However, the principal use of a group is to separate other controls into sections. A group is a subclass of composite, and works in very much the same way. It has additional functionality though, such as setting the text:group1.setText("Group 1");You can place a control onto a group in the same way you would add a control to a shell or a composite:Button button = new Button(group1, SWT.PUSH);The following example only uses one group on the main shell, but has a second group embedded within the first group. Since a group is a control as well as a composite, this is allowable. You can have many nested groups to arrange numerous controls on a screen: Group group1 = new Group(shell, SWT.BORDER);group1.setBounds(30,30,200,200);group1.setText("Group 1");Button button = new Button(group1, SWT.PUSH);button.setBounds(10,20,80,20);button.setText("I'm in a group");Label label = new Label(group1, SWT.NONE);label.setBounds(10,50,80,20);label.setText("So am I!!");Group group2 = new Group (group1, SWT.NONE);group2.setBounds(10,100,150,50);group2.setBackground(new Color(display,233,20,233));group2.setText("I'm a group inside a group");Button button2 = new Button(group2, SWT.PUSH);button2.setBounds(10,20,50,20);button2.setText("Twice..");This results in the following window:Running under Linux:The widgets shown in this document were also run under Linux (GTK and Motif). Other than some slight differences in appearance, we have not found any differences in behaviour.GTK MotifEvents:In the earlier sections of this document, we introduced the Eclipse event structure by defining listeners for buttons and a few other simple events. We now describe the Eclipse event structure in more detail and create listeners for a variety of common events.To capture events in SWT, you need to add listeners to your controls. Then when the event corresponding to the listener occurs, the listener code will be executed.In order to capture events in SWT, you need to do two things. First, you create a listener specific to the event that you wish to capture. There is an interface for each listener that you can use (ie. SelectionListener). There is also a class that will provide you with the event information (ie. SelectionEvent). Within the listener that you create, you must implement the methods defined in the interface.SelectionListener listener = new SelectionListener() {public void widgetSelected(SelectionEvent arg0) {System.out.println("Button Selected");}public void widgetDefaultSelected(SelectionEvent arg0) {}};If there is more than one method, you can create an adapter instead (ie. SelectionAdapter). An adapter implements the interface with empty methods so that you do not have to define code for methods that you do not need in your listener. Note that in our SelectionListener, we did not add any code for the widgetDefaultSelected() method. In this case, we can create an adapter instead, and only implement the widgetSelected() method.SelectionAdapter adapter = new SelectionAdapter() {public void widgetSelected(SelectionEvent arg0) {System.out.println("Button Selected");}};The second thing you need to do is add the listener to your widget. Each control has methods to add listeners (ie. addSelectionListener()). You pass your listener to this method, and you are all set to capture events.Button button = new Button(shell, SWT.PUSH);button.addSelectionListener(listener);Or, in our case, we could have also used:button.addSelectionListener(adapter);Now that we know how to add a listener to a widget, we will go over the more common types of listeners. The most common type of listener is the selection listener, which we have just seen. Some other important ones include key listeners and mouse listeners.Key ListenerThe KeyListener has two methods, keyPressed and keyReleased, whose functions are obvious. The event object is KeyEvent. Because there are two methods, there is also a KeyAdapter you can use to implement only one of the methods.The KeyEvent is the more interesting feature of capturing key events. In most cases, if you are using a key listener, you wish to know which key was pressed. The KeyEvent has a property called character, which stores which character was just pressed. You can access this character value using e.character (where e is the KeyEvent parameter). You can also access the key code and state mask of the key that was pressed. The key codes for special keys are constants in the SWT library, like SWT.CTRL for the control key and SWT.CR for the carriage return key. The state mask indicates the status of the keyboard modifier keys. The example at the end of this section demonstrates how you can use the state mask.The following example demonstrates using the key pressed and key released methods in the key listener. We attach the key listener to a basic text widget and a key event is generated every time you type in the text. In the key pressed method, we check to see if the key pressed was a special key (such as tab, carriage return, etc.), and print out the readable character for that key. Otherwise, we print out the character as is. In the key released method, we check to see if the control key was pressed before another character was pressed, such as Control-C. This is a method that could be used to capture ctrl-key sequences in a widget such as a text:Text text = new Text(shell, SWT.MULTI|SWT.BORDER);text.setBounds(10,10,100,100);text.addKeyListener(new KeyListener() {public void keyPressed(KeyEvent e) {"";=stringStringswitch (e.character) {case 0: string += " '\\0'"; break;case SWT.BS: string += " '\\b'"; break;case SWT.CR: string += " '\\r'"; break;case SWT.DEL: string += " DEL"; break;case SWT.ESC: string += " ESC"; break;case SWT.LF: string += " '\\n'"; break;default: string" '" + e.character +"'";+=break;}(string);System.out.println}public void keyReleased(KeyEvent e) {if (e.stateMask == SWT.CTRL && e.keyCode != SWT.CTRL) System.out.println("Command can execute here");}});Try this code out and see what kind of results you get from pressing various keys. Note that if we used a KeyAdapter instead of a KeyListener, we would have only had to implement one of keyPressed and keyReleased.Mouse ListenersThere are three types of mouse listeners; MouseListener, which tracks pressing the mouse, MouseMoveListener, which tracks when the mouse is being moved, and MouseTrackListener, which tracks where the mouse is in relation to the control. We will go over all three of these listeners. Since we are dealing with events, it is not possible to show the results here, so make sure you try out the code, to see what kind of results you get.MouseListenerThe MouseListener has three methods, mouseDown, mouseUp and mouseDoubleClick. The functions of these methods are stated in the names. Because there are three methods in this listener, a MouseAdapter is available. The class that contains information on the event is MouseEvent.The fields in MouseEvent which are unique to the MouseListener are x, y, stateMask and button. The button property returns the number of the button that was pressed or released. So the first button on the shell would return a value of 1, the second would return 2, and so on. The x and y properties return the location coordinates of the mouse at the time of the event. The stateMask property returns the state of the keyboard modifier keys at the time of the event.The following example has two MouseAdapters. One of the adapters implements the mouseUp and mouseDown methods. This adapter is attached to two different buttons. We can do this by first creating the adapter, then adding it to whichever widgets need to use it. We find the number of the button that has been pressed, and also the coordinates of the mouse when it is both pressed and released. The other adapter implements the mouseDoubleClick method. It opens a new window when the double click event it created on the Label:Button button = new Button(shell, SWT.PUSH);button.setText("Push Me");button.setBounds(10,10,60,20);Button button2 = new Button(shell, SWT.PUSH);button.setText("Push Me Too");button.setBounds(100,10,60,20);MouseAdapter mouseAdapter = new MouseAdapter() {public void mouseDown(MouseEvent e) {System.out.println("Button "+e.button+" pressed");System.out.println("Mouse pressed at ("+ e.x + ",” + e.y + ")");}public void mouseUp(MouseEvent e) {System.out.println("Mouse released at (""," + e.y + ")");++e.x}};button.addMouseListener(mouseAdapter);button2.addMouseListener(mouseAdapter);Label label = new Label(shell, SWT.NONE);label.setText("Double Click Me");label.setBounds(10,40,100,20);label.addMouseListener(new MouseAdapter() {public void mouseDoubleClick(MouseEvent e) {Shell shell2 = new Shell(display);shell2.setSize(100,100);Label label2 = new Label(shell2,SWT.NONE);label2.setText("Hello New Window!");label2.setBounds(0,50,100,20);shell2.open();}});Try this code out. Note that if you press on the first button, it tells you that Button 1 has been pressed, and pressing on the second button tells you that Button 2 has been pressed. If you press your mouse down, move it around, and then release it, you will see the different coordinates that your mouse was pressed and released at.Mouse Move ListenerThe MouseMoveListener has one method, mouseMove. This method is invoked when the mouse is moved over the control onto which it is attached. The event generated is a MouseEvent again.See the example at the end of this section.Mouse Track ListenerThe MouseTrackListener has three methods, mouseEnter, mouseExit and mouseHover. The mouseEnter method is called when the mouse enters into the area covered by the control to which it is attached. Similarly, the mouseExit method is called when the mouse exits said region. The mouseHover method is executed when the mouse hovers over the control to which it is attached.The following example illustrates how to use both the mouse move listener and the mouse track listener. The first canvas has a mouse move listener attached to it. When you move the mouse over top of the canvas, the colour of the canvas changes. The second canvas has a mouse track listener attached to it. When your mouse enters over top of the canvas, a number is displayed in the canvas. Each time you hover your mouse over the canvas, the number is increased. When the mouse leaves the area of the canvas, the number disappears and starts at zero again when the mouse re-enters the area.int count1=0, count2=0;final Canvas canvas = new Canvas(shell, SWT.BORDER);canvas.setBounds(10,10,100,100);Canvas canvas2 = new Canvas(shell, SWT.BORDER);canvas2.setBounds(150,150,100,100);final Text text = new Text(canvas2, SWT.READ_ONLY);text.setBounds(40,30,20,20);MouseMoveListener mouseMove = new MouseMoveListener() {public void mouseMove(MouseEvent e) {=canvas.getBackground();colorColorcolor.dispose();canvas.setBackground(newColor(display,count1,0,255));count1++;count1%255;count1=}};canvas.addMouseMoveListener(mouseMove);MouseTrackListener mouseTrack = new MouseTrackListener() {public void mouseEnter(MouseEvent arg0) {text.setText(Integer.toString(count2));}public void mouseExit(MouseEvent arg0) {text.setText("");0;=count2}public void mouseHover(MouseEvent arg0) {count2++;text.setText(Integer.toString(count2));}};canvas2.addMouseTrackListener(mouseTrack);Note that in order to change a control within a listener, it must be declared as a final variable. Run this code and see what kind of results you get by generating mouse events on the controls.Text ListenersThere are a couple of listeners that are useful when using Text widgets. These are the ModifyListener and the VerifyListener. The ModifyListener is called when text is modified, and the VerifyListener is called before text is modified. This one can be used to verify that the new values being entered are valid. We will briefly go over both of these listeners.ModifyListenerThe ModifyListener has one method, modifyText. The event object is a ModifyEvent. This event is similar to a TypedEvent, and has fields such as time and widget.The ModifyListener can be used when we need to be notified if text has been changed. The modifyText method is called every time a character is modified. See the example at the end of this section.VerifyListenerThe VerifyListener has one method, verifyText. The event object is a VerifyEvent. This event has all the properties of a TypedEvent and a KeyedEvent, as well as the fields start, end, doit and text. The start and end properties indicate the range of text which is about to be modified. The text variable indicates the new text to which your text is being changed. The doit flag indicates whether or not we should complete the action that triggered the event.We can use the VerifyListener to check and make sure certain characters can be entered in specific fields. In the following example, we check to see if the user is entering an asterisk in the text. If so, the action is cancelled. Notice that no matter how many times the ‘*’ key is pressed, no asterisks will appear in the text.Text text = new Text(shell, SWT.MULTI|SWT.WRAP);text.setBounds(10,10,200,100);text.setText("Here is some sample text");text.addModifyListener(new ModifyListener() {public void modifyText(ModifyEvent e) {System.out.println("Modified at " + e.time);}});text.addVerifyListener(new VerifyListener() {public void verifyText(VerifyEvent e) {if (e.text.equals("*")) {System.out.println("Cannot type *");false;e.doit=}}});Focus ListenersThis section deals with FocusListener and TraverseListener. The FocusEvent is generated when a widget receives focus, by any means. A TraverseEvent is generated when a widget gains focus by means of traversal. We will cover both kinds of event handlers. FocusListenerThe FocusListener has two methods, focusGained and focusLost. They are called at obvious times. The event generated is a FocusEvent. This event has all the properties of a TypedEvent. See the example at the end of this section for more details.。