VMware ESX Server 命令行
- 格式:doc
- 大小:20.50 KB
- 文档页数:3
VMware ESX常用命令和IP 地址修改一.VMware ESX Command1. 看你的esx版本vmware –v2. 查看显示ESX硬件,内核,存储,网络等信息esxcfg-info -a(显示所有相关的信息)esxcfg-info -w(显示esx上硬件信息)3. 列出esx里知道的服务esxcfg-firewall –s4. 查看具体服务的情况esxcfg-firewall -q sshclinet5. 重新启动vmware服务service mgmt-vmware restart6. 修改root的密码passwd root7. 设置kernel高级选项esxcfg-advcfg -d(将系统内核恢复默认值)8. 管理资源组esxcfg-resgrp -l(显示所有资源组)9. 列出你当前的虚拟交换机esxcfg-vswitch -lesxcfg-vswitch -v 10 -p "Service Console" vSwitch0 (将vSwitch0上的Service Console划分到vLan 10上,如果vLan号为0则不设置vLan)10. 查看控制台的设置esxcfg-vswif -l (列出已添加的网卡)esxcfg-vswif -a (添加网卡)11. 列出系统的网卡esxcfg-nics –l12. 添加一个虚拟交换机,名字叫(internal)连接到两块物理网卡,(重新启动服务,vi就能看见了)esxcfg-vswitch -a vSwitch1esxcfg-vswitch -A internal vSwitch1esxcfg-vswitch -L vmnic1 vSwitch1esxcfg-vswitch -L vmnic2 vSwitch113. 删除交换机,(注意,别把控制台的交换机也删了)esxcfg-vswitch -D vSwitch114. 删除交换机上的网卡esxcfg-vswitch -u vmnic1 vswitch215. 删除portgroupesxcfg-vswitch -D internel vswitch116. 创建vmkernel switch,如果你希望使用vmotion,iscsi的这些功能,你必须创建(通常是不需要添加网关的)esxcfg-vswitch -lesxcfg-vswitch -a vswitch2esxcfg-vswitch -A "vm kernel" vswitch2esxcfg-vswitch -L vmnic3 vswitch2esxcfg-vmknic -a "vm kernel" -i 172.16.1.141 -n 255.255.252.0 (添加一个vmkernel)17. 防火墙设置esxcfg-firewall -e sshclient (打开防火墙ssh端口)esxcfg-firewall -d sshclient (关闭防火墙ssh端口)esxcfg-firewall -e veritasNetBackup(允许Veritas Netbackup服务)esxcfg-firewall -o 123,udp,out,ntp(为ntp服务打开UDP协议中的123端口的输出)18. 路由管理esxcfg-route(VM生成网卡的路由管理)esxcfg-route(显示路由表)esxcfg-route 172.16.0.254(设置vmkernel网关)19. 创建控制台esxcfg-vswitch -a vSwitch0esxcfg-vswitch -A "service console" vSwitch0esxcfg-vswitch -L vmnic0 vSwitch0esxcfg-vswif -a vswif0 -p "service console" -i 172.16.1.140 -n 255.255.252.020. 添加nas设备(a添加标签,-o,是nas服务器的名字或ip,-s是nas输入的共享名字)esxcfg-nas -a isos -o -s isos21. nas连接管理esxcfg-nas -r (强迫esx去连接nas服务器)esxcfg-nas -l (用esxcfg-nas -l来看看结果)esxcfg-nas -a(添加NAS文件系统到/vmfs目录下)esxcfg-nas -d(删除NAS文件系统)22. 扫描SCSI设备上的LUN信息esxcfg-rescan <vmkernel SCSI adapter name>23. 连接iscsi设备(e:enable q:查询d, disable s:强迫搜索)esxcfg-swiscsi -e24. 设置targetipvmkiscsi-tool -D -a 172.16.1.133 vmhba4025. 列出和target的连接vmkiscsi-tool -l -T vmhba4026. 列出当前的磁盘ls -l /vmfs/devices/disks27. 内核dump管理工具esxcfg-dumppart -l(显示当前dump分区配置信息)28. 路径管理esxcfg-mpath -l(显示所有路径)esxcfg-mpath -a(显示所有HBA卡)29. ESX授权管理配置esxcfg-authesxcfg-auth --enablenis(运行NIS验证)30. 管理启动设备esxcfg-bootesxcfg-boot -b(更新启动设备)31. 执行initrd的初始化设置esxcfg-initesxcfg-init(初始化设备)32. esxcfg-linuxnet(在linux debug模式中,转换vswif设备命名为linux自带的eth命名规则)esxcfg-linuxnet --setup33. 升级esxcfg-upgrade(ESX2.X升级到ESX3.X)二.使用命令更改Service Console IP在CLI下更改service console的ip地址,注意大小写,vmware是把物理nic虚拟成vmnic,在vmnic上创建虚拟交换机vswitch,是把网卡当成交换机来使用,不能对网卡进行ip地址的设置,只能在vswitch上创建interface就是vswif,对vswif进行ip设置1. 使用CLI创建Service Console[root@VI3 root]# esxcfg-vswitch -a vSwitch0 #创建vSwitch0[root@VI3 root]# esxcfg-vswitch -A "Service Console" vSwitch0 #在vSwitch0上创建Portgroup,命名为Service Console[root@VI3 root]# esxcfg-vswitch -L vmnic0 vSwitch0 #将vmnic0绑定在vSwitch0 [root@VI3 root]# esxcfg-vswitch –l #可以看到service console已经绑定vmnic0Switch Name Num Ports Used Ports Configured Ports MTU UplinksvSwitch0 64 5 64 1500 vmnic0PortGroup Name VLAN ID Used Ports UplinksService Console 0 1 vmnic0[root@VI3 root]# esxcfg-vswif -a vswif0 -p "Service Console" -i 192.168.1.1 -n 255.255.255.0#创建vswif0并与service console绑定,在ESX里ip地址只能跟vswif0绑定,也就是虚拟交换机的interface[root@VI3 root]# esxcfg-vswif –l #可以看到Service console的IP已经配置到vswif0Name Port Group IP Address Netmask Broadcast Enabled DHCPvswif0 Service Console 192.168.1.50 255.255.255.0 192.168.1.255 true false[root@VI3 root]# esxcfg-vswitch –lSwitch Name Num Ports Used Ports Configured Ports MTU UplinksvSwitch0 64 5 64 1500 vmnic0PortGroup Name VLAN ID Used Ports UplinksService Console 0 1 vmnic0[root@VI3 root]# service mgmt-vmware restart #重启服务,到这里正常情况下就可以使用VI连接到ESX--------------↓如果不小心配置错了要删除,请看下面↓---------------[root@VI3 root]# esxcfg-vswif –l #vswif0代表的虚拟网卡的interface0,service console对应vswif0Name Port Group IP Address Netmask Broadcast Enabled DHCPvswif0 Service Console 192.168.1.1 255.255.255.0 192.168.1.255 true false[root@VI3 root]# esxcfg-vswif -d vswif0 #删除vswif0[root@VI3 root]# esxcfg-vswitch -lSwitch Name Num Ports Used Ports Configured Ports MTU UplinksvSwitch0 64 5 64 1500 vmnic0PortGroup Name VLAN ID Used Ports UplinksService Console 0 1 vmnic0[root@VI3 root]# esxcfg-vswitch –D “Service Console” vSwitch0 #删除vSwitch0上面portgroup[root@VI3 root]# esxcfg-vswitch –D “VM Network” vSwitch0[root@VI3 root]# esxcfg-vswitch -d vSwitch0 #删除vswitch0[root@VI3 root]# esxcfg-vswitch –l #之前操作删除了vswitch信息,现在是空白Switch Name Num Ports Used Ports Configured Ports MTU UplinksPortGroup Name VLAN ID Used Ports Uplinks2. 如果不行检查一下以下配置文件.[root@VI3 root]# vi /etc/sysconfig/network #这里纪录主机名字和网关NETWORKING=yesHOSTNAME=VI3GATEWAY=192.168.251.12 #网关GATEWAYDEV=vswif0 #网关指定在vswif0[root@VI3 root]# vi /etc/sysconfig/network-scripts/ifcfg-vswif0 #看看这里的信息是否跟之前配置吻合DEVICE=vswif0 #之前把service cosole与vswif0关联MACADDR=00:50:56:43:a3:52PORTGROUP=portgroup6 #这里的protgroup与service console一致BOOTPROTO=staticBROADCAST=192.168.251.255IPADDR=192.168.251.60 #与service console一致NETMASK=255.255.255.0ONBOOT=yes如果以上不一致,可以手动更改在vi编辑器中,i键是插入模式,进行文本更改,esc键退出插入模式,:wq保存并退出.编辑完成reboot.可能启动后显示地址跟设置不同,但是可以使用VI连接到ESX补:如果只想修改Service Console的IP可以直接执行以下命令:esxcfg-vswif -i xxx.xxx.xxx.xxx vswif<X>。
VMware-ESX-ServerVMware-ESX-Server这个版本并不需要操作系统的支持。
它本身就是一个操作系统,用来管理硬件资源。
所有的系统都安装在它的上面。
带有远程web管理和客户端管理功能。
VMware-GSX-Server这个版本就要安装在一个操作系统下了,这个操作系统叫做HOST OS.这个HOST OS可以是Windows 2000 Server以上的Windows 系统或者是Linux(官方支持列表中只有RH,SUSE,Mandrake很少的几种),和VMware-ESX-Server一样带有远程web管理和客户端管理功能。
VMware-WorkStation这个版本和VMware-GSX-Server版本的机构是一样的。
也是要安装在一个操作系统下,对操作系统的要求也是Windows 2000以上或者Linux。
和Vmware的区别就是没有web远程管理和客户端管理。
VMware服务器使用心得--VMware server及VMware ESX server产品比较在公司使用VMware虚拟机产品一段时间,有一些心得体会。
下面总结一下。
1.免费产品,收费产品选哪个?对于VMware产品的选择不得不说一说。
VMware服务器产品目前主要有免费的VMware server和收费版的Vmware ESX server.不过目前VMware公司不单独发行VMware ESX server. ESX server作为VMware Infrastructure套件的一部分成套销售。
VI分为N个版本,企业版,精简版之类的。
免费的和收费的版本各有优缺点:VMware server支持多种操作系统,可以在现有的Windows,Linux平台上安装VMware server。
充分利用已有的硬件系统。
而且可以充分利用底层操作系统丰富的驱动,硬件适应性更好。
收费版ESX server的其实底层也是个linux,最麻烦的就是安装驱动,不一定能发挥最大的硬件功效。
vmware命令⾏VMware vSphere PowerCLI 是⼀款功能强⼤的命令⾏⼯具,可⾃动执⾏ vSphere 的各⽅⾯管理,包括主机、⽹络、存储、虚拟机、客户操作系统等等打开打开的⽅法第⼀种1.直接在ESXi控制台界⾯上按住ALT+F1也能进⼊2.把ESXi的SSH功能开开,然后⽤⼯具连接⾏了,root/password。
选择esxi主机----配置--(软件)安全配置-----(安全配置⽂件)属性---(ssh)选项打开后远程root 密码链接即可。
常⽤命令主机信息查询vmware -v 查询系统版本esxcli system version get 查询系统信息esxcli system time get 查询时间esxcli system time set -y=2016 -M=9 -d=13 -H=10 -m=9esxcli system maintenanceMode set --enable true/false 进⼊/退出维护模式esxcli system maintenanceMode get 查询维护模式esxcli system shutdown reboot/poweroff 关机/重启/断电⽹络信息查询esxcli network ip interface ipv4 get 查询ipesxcli network ip route ipv4 list 查询路由表esxcli network nic list 查询⽹卡 up/down 信息esxcli network nic down/up -n=vmnic1 关闭/打开⼀个⽹卡 -n=指定⽹卡磁盘信息esxcli storage core device list 查看磁盘列表利⽤vshpere powercli 管理vcenter安装powe rcli ( windows)安装过程:1、下载VMWare.PowerCLI Save-Module -Name VMware.PowerCLI #执⾏后,会提⽰要输⼊path,它的⽬的是询问你将powercli软件下载到哪2、安装install-module VMware.PowerCLI3、导⼊模块Import-Module VMware.VimAutomation.Core4 设置powercli的证书机制为ignore。
esxi vsan 常用命令ESXi和vSAN是VMware公司推出的两个重要的虚拟化技术产品,它们在企业级虚拟化环境中被广泛应用。
本文将介绍ESXi和vSAN 的常用命令,并对其功能和用法进行详细说明。
一、ESXi常用命令1. esxcli network ip interface list:列出ESXi主机上所有的网络接口信息,包括名称、MAC地址、IP地址等。
2. esxcli network ip interface set:设置ESXi主机上指定网络接口的配置参数,如IP地址、子网掩码、网关等。
3. esxcli system hostname set:设置ESXi主机的主机名。
4. esxcli system shutdown:关闭ESXi主机。
5. esxcli system reboot:重启ESXi主机。
6. esxcli storage core device list:列出ESXi主机上所有存储设备的信息,包括名称、容量、使用情况等。
7. esxcli storage core adapter list:列出ESXi主机上所有存储适配器的信息,包括名称、型号、驱动程序等。
8. esxcli storage core path list:列出ESXi主机上所有存储路径的信息,包括名称、状态、使用情况等。
9. esxcli hardware memory get:查看ESXi主机的内存信息,包括总容量、使用情况等。
10. esxcli hardware cpu list:列出ESXi主机上所有CPU的信息,包括型号、核心数、频率等。
二、vSAN常用命令1. esxcli vsan cluster get:查看当前vSAN集群的配置信息,包括集群状态、版本、缓存策略等。
2. esxcli vsan cluster join:将ESXi主机加入到指定的vSAN集群中。
3. esxcli vsan cluster leave:将ESXi主机从vSAN集群中移除。
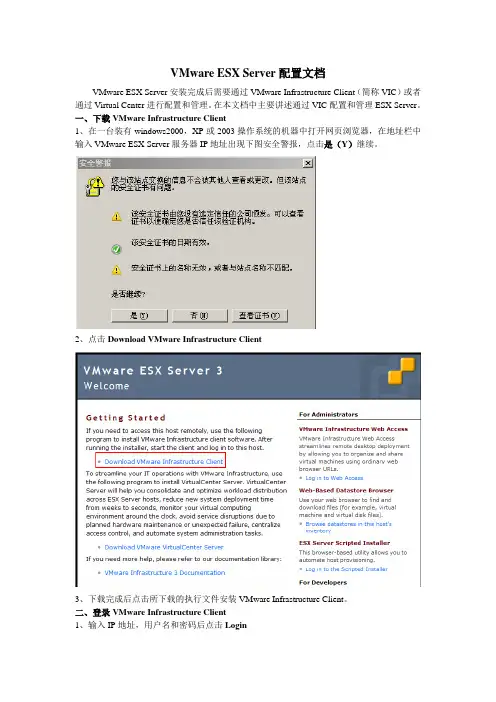
VMware ESX Server配置文档VMware ESX Server安装完成后需要通过VMware Infrastructure Client(简称VIC)或者通过Virtual Center进行配置和管理。
在本文档中主要讲述通过VIC配置和管理ESX Server。
一、下载VMware Infrastructure Client1、在一台装有windows2000,XP或2003操作系统的机器中打开网页浏览器,在地址栏中输入VMware ESX Server服务器IP地址出现下图安全警报,点击是(Y)继续。
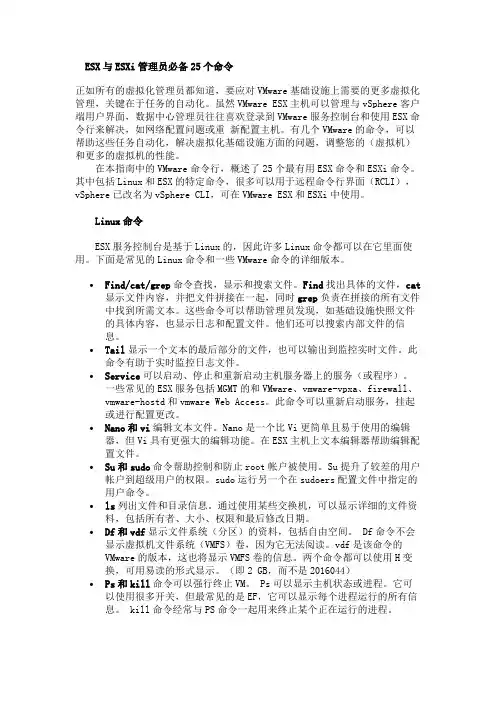
2、点击Download VMware Infrastructure Client3、下载完成后点击所下载的执行文件安装VMware Infrastructure Client。
二、登录VMware Infrastructure Client1、输入IP地址,用户名和密码后点击Login2、点击Ignore继续3、登录到VIC控制台。
三、添加Host License1、点击VIC控制台顶部标签栏中的Configuration标签,再点击Configuration界面左边的Software菜单中的Licensed Features;再在Licensed Features页中点击Edit…2、选择添加License的方式这里我们选择用Host License文件,如图,点择Use Host License File;然后点击Browse按钮选择Host License文件的正确存储路径;点击OK返回点击ESX Server Edtion右边的Edit…然后点选ESX Server Standard,再点击OK返回完成License的添加。
四、添加存储设备1、点击VIC控制台顶部标签栏中的Configuration标签,再点击Configuration界面左边的Hardware菜单中的Storage;在点击右上角的Add Storage…2、选择存储类型按照步骤设置,设置完成后点击Finish完成存储设备的添加。
ESX与ESXi管理员必备25个命令正如所有的虚拟化管理员都知道,要应对VMware基础设施上需要的更多虚拟化管理,关键在于任务的自动化。
虽然VMware ESX主机可以管理与vSphere客户端用户界面,数据中心管理员往往喜欢登录到VMware服务控制台和使用ESX命令行来解决,如网络配置问题或重新配置主机。
有几个VMware的命令,可以帮助这些任务自动化,解决虚拟化基础设施方面的问题,调整您的(虚拟机)和更多的虚拟机的性能。
在本指南中的VMware命令行,概述了25个最有用ESX命令和ESXi命令。
其中包括Linux和ESX的特定命令,很多可以用于远程命令行界面(RCLI),vSphere已改名为vSphere CLI,可在VMware ESX和ESXi中使用。
Linux命令ESX服务控制台是基于Linux的,因此许多Linux命令都可以在它里面使用。
下面是常见的Linux命令和一些VMware命令的详细版本。
∙Find/cat/grep命令查找,显示和搜索文件。
Find找出具体的文件,cat 显示文件内容,并把文件拼接在一起,同时grep负责在拼接的所有文件中找到所需文本。
这些命令可以帮助管理员发现,如基础设施快照文件的具体内容,也显示日志和配置文件。
他们还可以搜索内部文件的信息。
∙Tail显示一个文本的最后部分的文件,也可以输出到监控实时文件。
此命令有助于实时监控日志文件。
∙Service可以启动、停止和重新启动主机服务器上的服务(或程序)。
一些常见的ESX服务包括MGMT的和VMware、vmware-vpxa、firewall、vmware-hostd和vmware Web Access。
此命令可以重新启动服务,挂起或进行配置更改。
∙Nano和vi编辑文本文件。
Nano是一个比Vi更简单且易于使用的编辑器,但Vi具有更强大的编辑功能。
在ESX主机上文本编辑器帮助编辑配置文件。
∙Su和sudo命令帮助控制和防止root帐户被使用。
VMware ESXi 6.0命令行操作教程VMware服务器开启命令行模式步骤:1、用vSphere Client客户端登录VMware Esxi 6.0服务器;2、点击VMware Esxi 6.0服务器根目录;3、选择VMware Esxi 6.0服务器根目录—>“配置”标签;4、“配置”标签—>“安全配置文件”—>“防火墙”—>“属性”—>“勾选”安全SSH客户端和SSH服务器两个选项。
5、“配置”标签—>“安全配置文件”—>“服务”—>“属性”—>“远程访问”—>“启动ESXi shell和SSH”两个服务器。
6、使用Xshell 5.0工具进行命令行远程登录访问控制VMware ESXi 6.0服务器。
VMware服务器命令行使用操作释义:1、VMware服务器关机命令:命令:[root@VMSRC:~] poweroff2、VMware服务器重启命令:命令:[root@VMSRC:~] reboot3、VMware服务器版本查看命令:命令:[root@VMSRC:~]vmware -v示例:VMware ESXi 6.0.0 build-28092094、VMware服务器系统版本包括PATCH等信息查看命令:命令:[root@VMSRC:~]esxcli system version get示例:Product: VMware ESXiVersion: 6.0.0Build: Releasebuild-3620759Update: 25、VMware服务器系统时间查看命令:命令:[root@VMSRC:~] esxcli system time get示例:2017-06-11T09:41:57Z6、VMware服务器系统时间修改设置命令:命令:[root@VMSRC:~]esxcli system time set-y=2017 #修改年份命令:[root@VMSRC:~]esxcli system time set-M=6 #修改月份(注意命令大小写)命令:[root@VMSRC:~]esxcli system time set-d=6 #修改日期命令:[root@VMSRC:~]esxcli system time set-H=6 #修改小时(注意命令大小写)命令:[root@VMSRC:~]esxcli system time set-m=6 #修改分钟命令:[root@VMSRC:~]esxcli system time set-s=6 #修改秒钟命令:[root@VMSRC:~]esxcli system time set -y=2016 -M=9 -d=13 -H=10 -m=9 (注意红色字体)命令选项:-d|--day=<long> Day-H|--hour=<long> Hour-m|--min=<long> Minute-M|--month=<long> Month-s|--sec=<long> Second-y|--year=<long> Year7、VMware服务器维护模式管理命令:命令:[root@VMSRC:~]esxcli system maintenanceMode set --enable true #进入维护模式命令:[root@VMSRC:~]esxcli system maintenanceMode get #查看维护模式状态示例:Enabled #启用状态命令:[root@VMSRC:~]esxcli system maintenanceMode set --enable false #退出维护模式命令:[root@VMSRC:~]esxcli system maintenanceMode get #查看维护模式状态Disabled #关闭状态8、VMware服务器网络地址查看命令:命令:[root@VMSRC:~] esxcli network ip interface ipv4 get #查看IPV4网络地址示例:Name IPv4 Address IPv4 Netmask IPv4 Broadcast Address Type DHCP DNS---- ------------ ------------- -------------- ------------ --------vmk0 10.10.10.20 255.255.255.0 10.10.10.255 STATIC false9、VMware服务器路由表查看命令:命令:[root@VMSRC:~] esxcli network ip route ipv4 list #查看路由表示例:Network Netmask Gateway Interface Source---------- ------------- ----------- --------- ------default 0.0.0.0 10.10.10.10 vmk0 MANUAL10.10.10.0 255.255.255.0 0.0.0.0 vmk0 MANUAL10、VMware服务器网络适配器信息查看命令:命令:[root@VMSRC:~] esxcli network nic list #查看网络适配器列表信息示例:Name PCI Device Driver Admin Status Link Status Speed Duplex MAC Address MTU Description------ ------------ ------ ------------ ----------- ----- ------ ----------------- ---- --------------------vmnic0 0000:00:19.0 e1000e Up Up 100 Full08:62:66:4a:f5:10 1500 Intel Corporation Ethernet Connection I217-V11、VMware服务器网络适配器管理命令:命令:[root@VMSRC:~]esxcli network nic down -n=vmnic0 #关闭序号0网络适配器命令:[root@VMSRC:~]esxcli network nic up -n=vmnic0 #开启序号0网络适配器12、VMware服务器磁盘信息查看命令:命令:[root@VMSRC:~] esxcli storage core device list示例:t10.ATA_____ST3000VX0062D1HH166__________________________________W6A0PFTN Display Name: Local ATA Disk(t10.ATA_____ST3000VX0062D1HH166__________________________________W6A0PFTN) Has Settable Display Name: trueSize: 2861588Device Type: Direct-AccessMultipath Plugin: NMPDevfs Path:/vmfs/devices/disks/t10.ATA_____ST3000VX0062D1HH166_______________________________ ___W6A0PFTNVendor: ATAModel: ST3000VX006-1HH1Revision: CV11SCSI Level: 5Is Pseudo: falseStatus: onIs RDM Capable: falseIs Local: trueIs Removable: falseIs SSD: falseIs VVOL PE: falseIs Offline: falseIs Perennially Reserved: falseQueue Full Sample Size: 0Queue Full Threshold: 0Thin Provisioning Status: unknownAttached Filters:VAAI Status: unknownOther UIDs:vml.0100000000202020202020202020202020573641305046544e535433303030 Is Shared Clusterwide: falseIs Local SAS Device: falseIs SAS: falseIs USB: falseIs Boot USB Device: falseIs Boot Device: trueDevice Max Queue Depth: 31No of outstanding IOs with competing worlds: 32Drive Type: unknownRAID Level: unknownNumber of Physical Drives: unknownProtection Enabled: falsePI Activated: falsePI Type: 0PI Protection Mask: NO PROTECTIONSupported Guard Types: NO GUARD SUPPORTDIX Enabled: falseDIX Guard Type: NO GUARD SUPPORTEmulated DIX/DIF Enabled: false13、VMware服务器虚拟机管理命令:命令:[root@VMSRC:~] vim-cmd vmsvc/getallvms |grep #查看虚拟机信息BusyBox v1.20.2 (2014-08-27 12:48:18 PDT) multi-call binary.Usage: grep [-HhnlLoqvsriwFEz] [-m N] [-A/B/C N] PATTERN/-e PATTERN.../-f FILE [FILE]... Search for PATTERN in FILEs (or stdin)命令选项:-H Add 'filename:' prefix #附加虚拟机名称前缀,模糊查询。
VMware ESX Server LabPart 1: Installing ESX ServerIn this lab, you will install and configure ESX Server v2.1.1 using the graphical interface, as well as create and configure a VM. Follow the steps below, and for more detailed information, refer to the VMware ESX Server v2.1.1 Installation Guide on the CD.Use these license keys during this lab:ESX: 5A2LA-04ZRA-DM214-4R5JESMP: 527JA-0DYHG-HPQ22-4H0R91.Boot your server from the ESX CD2.At the boot prompt, press Enter to start the installation3.Select Next at the Welcome screen4.For Installation Type, select Custom5.Keep defaults for the Keyboard, Layout, Dead Keys, Mouse Configuration6.Accept the End User License Agreemente the supplied license keys8.On the Device Allocation, use the following settings:a.Reserved Memory = 192 MBb.Make sure the ServeRAID controller is Shared with Service Consolec.Make sure one NIC is dedicated to the Service Console and one NIC isdedicated to the Virtual Machines9.If you receive a message about the “Partition Table Unreadable”, select Yes toinitialize the partition.10.Select to Automatic ally partition the system drives. Select Remove all partitions.Select sda as the only Installation Drive.11.Select Yes on the WARNING screen12.Add a new partition. On the Disk Setup screen, select New, and define thepartition as follows:a.Mount point = /vmimagesb.Filesystem type = ext3c.Deselect sdbd.Size (MB) = 2000e.Leave the rest of the fields defaultf.This partition will be used to store Windows ISO images to install theVMs from13.Add a new partition. On the Partitioning screen, select New, and define thepartition as follows:a.Mount point = /vmconfigsb.Filesystem type = ext3c.Deselect sdbd.Size (MB) = 2000e.Leave the rest of the fields defaultf.This partition will be used to store the VM config files and the suspendfiles14.Add a new partition. On the Partitioning screen, select New, and define thepartition as follows:a.Leave the Mount point blank.b.Filesystem type = vmfs2c.Leave Size (MB) blankd.Select “Fill to maximum allowable size”e.Leave the rest of the fields default.15.Press Next to continue.16.On the Network Configuration screen, select Static IP. Then fill in the networkinformation as follows (where x = student number):a.IP address = 10.10.10.x0 (e.g. team 1 would use 10.10.10.10, team 2would use 10.10.10.20, etc)mask = 255.0.0.0c.The rest of the fields can be left blank because the lab does not have eithera gateway or a DNS server.17.Enter in a Hostname = studentx, where x = student number18.Select an appropriate Time Zone Selection19.For Root Password, enter in password (all lower case)20.Next, select to Add a user to add a normal user account. Enter in information asfollows (where x = student number):er ID = studentxb.Password = password21.Select Next, Next to continue the installation.22.select Next to reboot, when prompted23.After the ESX server fully boots, on your Windows management workstation,open Internet Explorer and enter in your ESX Server’s IP address in the Address field.24.Log in as root.25.On the Status Monitor page, notice both Warning messages. Add and Activate asmall swap file. Then select to Reconfigure the network settings.a.Create a virtual Ethernet switch by clicking on “create.”b.Give it an appropriate name, such as “Public”.c.Bind the available physical adapter to the switch, and then select CreateSwitch.Part 2: Create a VMIn this exercise, you will create a VM definition.1.First, you will create a Windows 2003 ISO image on the hard drive from which toinstall the VM. Follow these steps:a.At the ESX Server machine, insert the Windows 2003 CD in the server’sCD drive. Press ALT-F2, and then log in as root.b.Mount the CD by typingmount /dev/cdromc.Create the ISO by typingdd if=/dev/cdrom of=/vmimages/w2k03.isod.Unmount the CD drive by typingumount /dev/cdrome.Eject the CD by typingeject2.At the Windows management workstation, login at root, then select to AddVirtual Machine3.Select the following options:a.Guest Operating System = Microsoft Windows Server 2003, StandardEditionb.Display Name to be “VM1 for Studentx” where x = student numberc.Location =“/vmconfigs/vmware/winNetStandard/vm1/winNetStandard.vmx”d.Processors = 2e.Memory = 512f.For Virtual Disk, select “Blank”, for VMware Disk Image, type in“vm1.dsk”, Capacity = “2000 MB”, Virtual Device = “0:0”, Disk Mode =“Persistent”g.On the Hardware tab for the virtual machine, select to Edit the DVD/CD-ROM Drive. Uncheck the boxes for Connected and Connect at PowerOn4.Close the window, and return to the main VMware Management window inInternet ExplorerPart 3: Start Virtual MachineIn this exercise, you will install the VM from an ISO image you created.1.You first need to download and then install the Remote Console. On the mainVM overview page. Select to Download VMware Remote Console: Windows,and then install the program, taking defaults.2.Now, to the left of the VM name (should be VM1 for studentx), click on thedown arrow that displays a drop down menu and select Attach Remote Console.3.If you are using Windows 2003, you will need to change a setting in InternetExplorer. In IE, go to Tools – Internet Options – Advanced. Then, underneaththe Browsing section, enable the setting Notify when downloads complete.4.Save the file to a temporary location. When the download completes, select toOpen the file. This should bring up the VMware Remote Console.5.Enter the correct password in the password dialog box.6.Double-click on the DVD/CD-ROM line. Check the Connect on power oncheckbox. Select Use ISO Image radio button, and then enter in/vmimages/w2k03.iso for the path. Then select OK.7.Press the Power On button, and the VM should start booting.8.Install Windows. When you get to the Networking Settings dialog, select Customand assign a TCP/IP address of 10.10.10.x1, where x = student number, and anetmask of 255.0.0.0.Part 4: File System WalkthroughIn this exercise, you will look at the ESX console OS’s file system, noting important directories and files.1.While Windows is installing, go to the ESX Server’s command line. You can usethis time to explore the various directories and files. This is a Linux commandshell, so typical Linux commands will work.2.Go the /vmfs directory. This is the directory tree where the VM files are stored.cd /vmfs3.The vmhba directory specifies a particular partition on a particular disk on aspecific SCSI card in the server. The other directory is simply an alias (thelogical volume name that you entered during ESX Server configuration) thatpoints to the same directory as the vmhba path. Change to this directory and look at the VM file. “cd vmhba2:0:0:7”. Note: Depending on what hardwareyou have, the vmhba path may be different. To do a file listing, type “ls –l”.One file is the swap file you created for the VMs to use; the other is the vm fileitself, vm1.dsk.ing these 3 commands, cd and ls, navigate the file systems to view thefollowing directories:a./etc, /etc/vmware, /etc/sysconfig, /etc/sysconfig/network-scriptsb./rootc./vmconfigs, /vmconfigs/vmware,/vmconfigs/vmware/winNetStandard/vm1d./vmimages5.To look at the contents of a file, use the following command:cat file_name”.Look at the contents of the following files:a./vmconfigs/vmware/winNetStandard/vm1/winNetStandard.vmxb./etc/modules.confc./etc/sysconfig/network-scripts/ifcfg-eth0d./etc/vmware/vmkmodule.confPart 5: Installing VMware ToolsIn this exercise, you will install the VMware Tools into the VM. This is a very important step. You can learn more about the tools in the ESX documentation.1.Once the VM is fully installed, you will need to install the VMware Tools into theVM. The VMware Tools provide a number of enhancements, like a better videodriver, seamless mouse support, and a memory driver that let’s ESX Servermanage the VM memory better. To do so, do the following steps:a.Log on to the Windows VM by typing CTL-ALT-INSERTb.Then, to release the mouse from the VM, press CTL-ALT.c.Go the Settings menu on the VMware Remote Console and selectVMware Tools Install.d.Install the Tools, taking defaults. Select Typical Installation. If you get awarning about not having digitally signed drivers, select Yes or ContinueAnyway to install the driver. Select Yes to set hardware acceleration, andfollow the instructions. Reboot Windows.Part 6: Changing the Ethernet DriverIn this exercise, you will change the virtualized ethernet device that is presented to the VM. The driver you change to has better performance characteristics, but is not autodetected by Windows.In the Windows VM, go to Device Manager and notice the type of Network adapter that is present. Also, notice the type of SCSI controller that is available. Neither of these 2 devices is actually physically on the server. The hardware presented to a VM is all virtual, allowing you to move VMs from one hardware platform to anotherwithout having to worry about hardware consistency.In this section, you will change the type of Network Adapter presented to the VM.The new driver provides better performance, particularly with gigabit adapters.1.Shut down the VM, and close the Remote Console.2.Go back to IE on the management workstation, click on the VM name, and thenclick on the Hardware tab.3.Next to Network Adapter, click on Edit. Next to Virtual Device, select vmxnetand then OK. This changes the type of virtual network adapter presented to theVM.4.Start the Remote Console, log in, and start the VM.5.Because you changed the type of adapter presented to the VM, the driver willhave to change.6.After logging in to Windows, the New Hardware Wizard will start. Select toInstall the software automatically and Windows will find the right driver.7.Now, go back to Device Manager and notice that the Network Adapter haschanged.8.While you’re in Device Manager, look at the other hardware categories to viewthe virtual devices.9.Shutdown the VM when you’re finished.Part 7: Resource ManagementIn this exercise, you will modify the resources your VM uses. ESX Server gives the administrator control over how individual VMs utilize shared resources such as CPU, memory, and disk1.Make sure your VM is not running.2.To get a better explanation of the settings for this section, click the Help button onany screen.3.On the Status Monitor tab, click on the VM name.4.Click on the CPU tab. By clicking on Edit next to Resource Settings, you canchange the amount of CPU a VM consumes, and which processors the VM canrun on.5.Click on the Memory tab. Next to Resource Setting s, click Edit to change thememory settings for that particular VM.6.Click on the Disk tab. Next to Number of Shares, click Edit. You can changethe disk bandwidth associated with this VM for this disk. This will change therelative priority this VM receives when accessing this disk.7.Click on the Network tab. Next to Traffic Shaping, click Edit. Here, you canenable traffic shaping to modify the network resources available to the VM.Part 8: Exploring VMKFSTOOLSIn this section, you will learn about the vmkfstools command. Unfortunately, we do not have the equipment in this lab to utilize most of the options, but in a normal environment, these commands can be very useful. Learn about the options by typing any of the following commands (“vmkfstools”, “vmkfstools –help”, “man vmkfstools”) and then answer the questions below.1.If you ran out of space to store VM files, what option would you use to extend aVMFS partition? _________________2.If the VM itself ran out of disk space, which option would you use to extend the.dsk file? ___________________3.If the ESX server was connected to a SAN, and you wanted to add additionaldisks that were assigned to the ESX server, which option would you use to forcethe HBA to re-scan without rebooting? _____________________4.What are the differences between the -l, and –P options? Go ahead and runvmkfstools with these options (separately) to find out. When might you want touse these options?5.If a VMFS partition on a SAN is shared between 2 or more ESX servers, howwould you recover the partition if you start getting errors that the partition islocked? ________________________6.Create a symbolic link to on of the vmhba paths by typingvmkfstools –s dsk_space vmhba1:1:0:1Part 9: Swapping NIC CardsIn this section, you will swap the ethernet card that is assigned to the console OS with the ethernet card assigned to the VMs.1.From the ESX command line, run “vmkpcidivy –i”. Then do the following:a.accept the default boot image configuration and keep the same nameb.don’t change the amount of memory allocated to the Console OS.c.when the first ethernet controller comes up, change it from [c] to [v] bytyping “v”.d.leave the SCSI controllers alone.e.change the second ethernet controller to [c] by typing “c”.f.save changes.g.reboot the ESX server.2.After the ESX server reboots, go to the Windows browser and try to connect tothe ESX server. It shouldn’t work.3.Go back to the ESX server, and edit the /etc/modules.conf file by typing “vi/etc/modules.conf”a.add a line that says “alias eth0 driver”, where driver is e100, bcm5700,e1000, or 3c59x, depending on what PCI network card you have.b.Note: depending on your hardware, you may not have to change thedriver at all. Many servers will have a dual port controller, so bothnetwork ports would use the same driver.ment out the original “alias eth0 driver” line by putting a “#” sign atthe beginning of the line.d.save and exit the file.4.Type “service network restart” to restart the “new” network card.Part 10: Setting Network SpeedIn many environments, the network card will not autonegotiate properly with the switches, and the line speed must be hard coded. To do so, follow these steps:1.Edit /etc/modules.conf.2.After the “alias eth0 driver” line, add an additional line with the appropriateoptions (these examples are for 100 Mbps Full Duplex)a.options e100 e100_speed_duplex=4b.options e1000 Speed=100 Duplex=2c.options bcm5700 auto_speed=0 line_speed=100 full_duplex=1d.options 3c59x options=4 full_duplex=13.Save and exit, then restart the network.4.Run mii-tool, or look in the /proc/net directory to verify link speed.Part 11: Command Line AdministrationESX provides a command line utility called vmware-cmd that allows an administrator to perform various operations on VMs. You will explore using this utility during this section.1.List all the virtual machines on the ESX server: vmware-cmd –l2.Get the state of the VMs returned: vmware-cmd <vm-cfg-path> getstate3.Shutdown each virtual machine, utilizing the output of the previous command:vmware-cmd <vm-cfg-path> stop hard4.Unregister your VM: vmware-cmd –s unregister <vm-cfg-path>. Now look inthe Windows browser to verify that the VM is no longer available. You may need to refresh your browser.5.Re-register the VM: vmware-cmd –s register <vm-cfg-path>. Verify that the VMis now available.Part 12: Editing Configuration FilesIn this exercise, you will manually edit a VM configuration file through the MUI. You can also directly edit the configuration file through the command line. You will be adding a virtual serial port to the VM.1.On the Windows workstation, connect to the ESX server. Make sure the VM isnot running.2.Click on the VM name to bring up the properties notebook3.Click on the Options tab4.At the bottom of the screen, under Verbose Options, click to add or modifyconfiguration parameters directly.5.At the top of the page, click on Add…6.Under Option Name, put in serial0.present. For the value, put in true7.Now, in the same way, add in the following options names and values:a.serial0.fileType deviceb.serial0.fileName /dev/ttyS08.Now, start the VM and verify in Device Manager that there is now a serial port.9.Go to the command line of the ESX server, go to the directory where theconfiguration file is stored, and look at the file. Verify you see the new lines in the file.Part 13: Changing the ESX Server’s Host NameOccasionally, you will want to change the host name of the ESX server after you install it. You will need to change it in 3 places.1.Type hostname to verify the current host name.2.Edit /etc/hosts, and change the line with the correct IP address (10.10.10.x) to anew host name.3.Edit /etc/syconfig/network, and change the HOSTNAME= line to the same newname.4.Edit /usr/lib/vmware-mui/apache/conf/httpd.conf, and change the Server Nameline to the new name.。
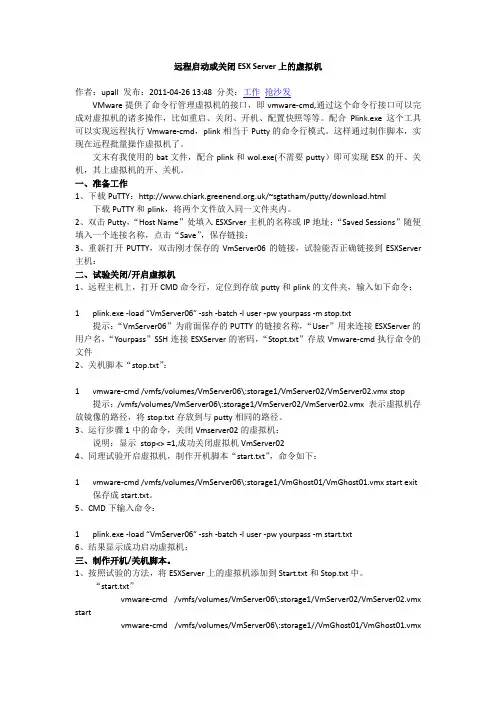
远程启动或关闭ESX Server上的虚拟机作者:upall 发布:2011-04-26 13:48 分类:工作抢沙发VMware提供了命令行管理虚拟机的接口,即vmware-cmd,通过这个命令行接口可以完成对虚拟机的诸多操作,比如重启、关闭、开机、配置快照等等。
配合Plink.exe这个工具可以实现远程执行Vmware-cmd,plink相当于Putty的命令行模式。
这样通过制作脚本,实现在远程批量操作虚拟机了。
文末有我使用的bat文件,配合plink和wol.exe(不需要putty)即可实现ESX的开、关机,其上虚拟机的开、关机。
一、准备工作1、下载PuTTY:/~sgtatham/putty/download.html下载PuTTY和plink,将两个文件放入同一文件夹内。
2、双击Putty,“Host Name”处填入ESXSrver主机的名称或IP地址;“Saved Sessions”随便填入一个连接名称,点击“Save”,保存链接:3、重新打开PUTTY,双击刚才保存的VmServer06的链接,试验能否正确链接到ESXServer 主机:二、试验关闭/开启虚拟机1、远程主机上,打开CMD命令行,定位到存放putty和plink的文件夹,输入如下命令:1 plink.exe -l oad “VmServer06″ -ssh -batch -l user -pw yourpass -m stop.txt提示:“VmServer06”为前面保存的PUTTY的链接名称,“User”用来连接ESXServer的用户名,“Yourpass”SSH连接ESXServer的密码,“Stopt.txt”存放Vmware-cmd执行命令的文件2、关机脚本“stop.txt”:1 vmware-cmd /vmfs/volumes/VmServer06\:storage1/VmServer02/VmServer02.vmx stop提示:/vmfs/volumes/VmServer06\:storage1/VmServer02/VmServer02.vmx 表示虚拟机存放镜像的路径,将stop.txt存放到与putty相同的路径。
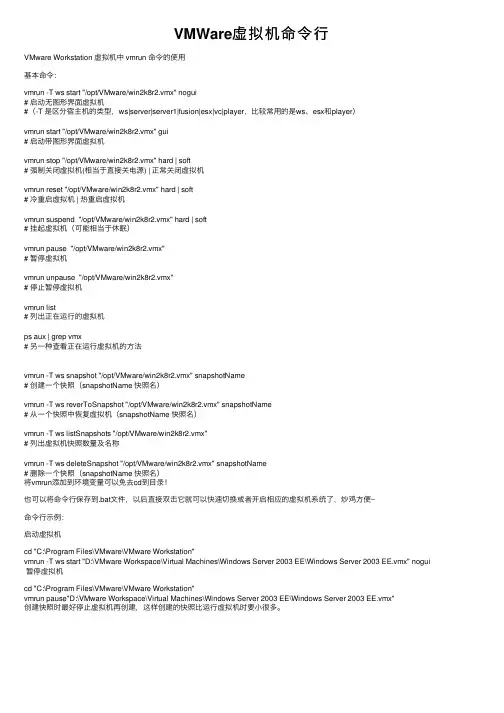
VMWare虚拟机命令⾏VMware Workstation 虚拟机中 vmrun 命令的使⽤基本命令:vmrun -T ws start "/opt/VMware/win2k8r2.vmx" nogui# 启动⽆图形界⾯虚拟机#(-T 是区分宿主机的类型,ws|server|server1|fusion|esx|vc|player,⽐较常⽤的是ws、esx和player)vmrun start "/opt/VMware/win2k8r2.vmx" gui# 启动带图形界⾯虚拟机vmrun stop "/opt/VMware/win2k8r2.vmx" hard | soft# 强制关闭虚拟机(相当于直接关电源) | 正常关闭虚拟机vmrun reset "/opt/VMware/win2k8r2.vmx" hard | soft# 冷重启虚拟机 | 热重启虚拟机vmrun suspend "/opt/VMware/win2k8r2.vmx" hard | soft# 挂起虚拟机(可能相当于休眠)vmrun pause "/opt/VMware/win2k8r2.vmx"# 暂停虚拟机vmrun unpause "/opt/VMware/win2k8r2.vmx"# 停⽌暂停虚拟机vmrun list# 列出正在运⾏的虚拟机ps aux | grep vmx# 另⼀种查看正在运⾏虚拟机的⽅法vmrun -T ws snapshot "/opt/VMware/win2k8r2.vmx" snapshotName# 创建⼀个快照(snapshotName 快照名)vmrun -T ws reverToSnapshot "/opt/VMware/win2k8r2.vmx" snapshotName# 从⼀个快照中恢复虚拟机(snapshotName 快照名)vmrun -T ws listSnapshots "/opt/VMware/win2k8r2.vmx"# 列出虚拟机快照数量及名称vmrun -T ws deleteSnapshot "/opt/VMware/win2k8r2.vmx" snapshotName# 删除⼀个快照(snapshotName 快照名)将vmrun添加到环境变量可以免去cd到⽬录!也可以将命令⾏保存到.bat⽂件,以后直接双击它就可以快速切换或者开启相应的虚拟机系统了,炒鸡⽅便~命令⾏⽰例:启动虚拟机cd "C:\Program Files\VMware\VMware Workstation"vmrun -T ws start "D:\VMware Workspace\Virtual Machines\Windows Server 2003 EE\Windows Server 2003 EE.vmx" nogui 暂停虚拟机cd "C:\Program Files\VMware\VMware Workstation"vmrun pause"D:\VMware Workspace\Virtual Machines\Windows Server 2003 EE\Windows Server 2003 EE.vmx"创建快照时最好停⽌虚拟机再创建,这样创建的快照⽐运⾏虚拟机时要⼩很多。
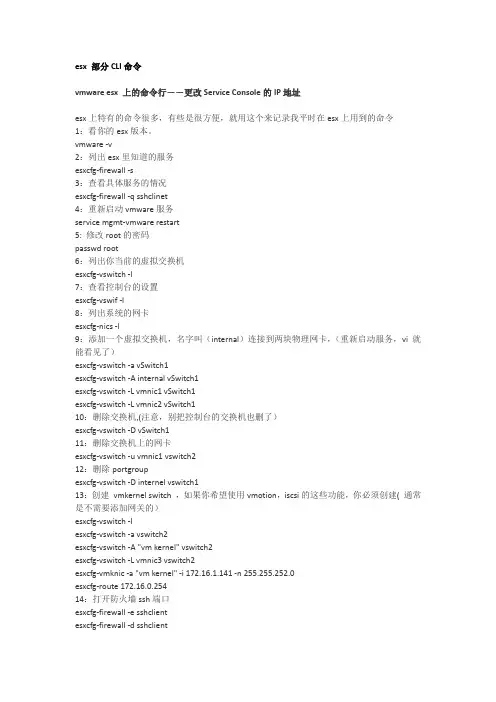
esx 部分CLI命令vmware esx 上的命令行--更改Service Console的IP地址esx上特有的命令很多,有些是很方便,就用这个来记录我平时在esx上用到的命令1:看你的esx版本。
vmware -v2:列出esx里知道的服务esxcfg-firewall -s3:查看具体服务的情况esxcfg-firewall -q sshclinet4:重新启动vmware服务service mgmt-vmware restart5: 修改root的密码passwd root6:列出你当前的虚拟交换机esxcfg-vswitch -l7:查看控制台的设置esxcfg-vswif -l8:列出系统的网卡esxcfg-nics -l9:添加一个虚拟交换机,名字叫(internal)连接到两块物理网卡,(重新启动服务,vi就能看见了)esxcfg-vswitch -a vSwitch1esxcfg-vswitch -A internal vSwitch1esxcfg-vswitch -L vmnic1 vSwitch1esxcfg-vswitch -L vmnic2 vSwitch110:删除交换机,(注意,别把控制台的交换机也删了)esxcfg-vswitch -D vSwitch111:删除交换机上的网卡esxcfg-vswitch -u vmnic1 vswitch212:删除portgroupesxcfg-vswitch -D internel vswitch113:创建vmkernel switch ,如果你希望使用vmotion,iscsi的这些功能,你必须创建( 通常是不需要添加网关的)esxcfg-vswitch -lesxcfg-vswitch -a vswitch2esxcfg-vswitch -A "vm kernel" vswitch2esxcfg-vswitch -L vmnic3 vswitch2esxcfg-vmknic -a "vm kernel" -i 172.16.1.141 -n 255.255.252.0esxcfg-route 172.16.0.25414:打开防火墙ssh端口esxcfg-firewall -e sshclientesxcfg-firewall -d sshclient15: 创建控制台esxcfg-vswitch -a vSwitch0esxcfg-vswitch -A "service console" vSwitch0esxcfg-vswitch -L vmnic0 vSwitch0esxcfg-vswif -a vswif0 -p "service console" -i 172.16.1.140 -n 255.255.252.016: 添加nas设备(a 添加标签,-o,是nas服务器的名字或ip,-s 是nas输入的共享名字)esxcfg-nas -a isos -o -s isos17:列出nas连接esxcfg-nas -l18: 强迫esx去连接nas服务器(用esxcfg-nas -l 来看看结果)esxcfg-nas -resxcfg-nas -l19:连接iscsi 设备(e:enable q:查询d:disable s:强迫搜索)esxcfg-swiscsi -e20:设置targetipvmkiscsi-tool -D -a 172.16.1.133 vmhba4021:列出和target的连接vmkiscsi-tool -l -T vmhba4022:列出当前的磁盘ls -l /vmfs/devices/disks更改Service Console的IP地址本来想创建两个SC,一个用于内网,另个这用于外网,使之内外都可以控制ESX,但是只能添加一个默认网关,而VMware工程师说不能实现,eddyc提示可以添加第二网关,有时间试下.为了可以内外网都可以控制暂时手动更改SC的IP,以下是我看了其它同仁的帖子并按自己需要简化测试而来的在CLI下更改serviceconsole的ip地址,注意大小写,vmware是把物理nic虚拟成vmnic,在vmnic上创建虚拟交换机vswitch,是把网卡当成交换机来使用,不能对网卡进行ip地址的设置,只能在vswitch上创建interface就是vswif,对vswif 进行ip设置[root@VI3root]# esxcfg-vswif –l #vswif0代表的虚拟网卡的interface0,service console对应vswif0 Name Port Group IP Address Netmask Broadcast Enabled DHCPvswif0 Service Console 192.168.251.50 255.255.255.0 192.168.251.255 true false[root@VI3 root]# esxcfg-vswif -d vswif0 #删除vswif0[root@VI3root]# esxcfg-vswitch –l #vswitch0代表虚拟交换机,vswitch0下面有两个PortGroup,“vm network”和“service console”对应vmnic0Switch Name Num Ports Used Ports Configured Ports UplinksvSwitch0 32 3 32 vmnic0PortGroup Name Internal ID VLAN ID Used Ports UplinksVM Network portgroup1 0 0 vmnic0Service Console portgroup0 0 1 vmnic0[root@VI3root]# esxcfg-vswif -a vswif0 -p "Service Console" -i10.0.0.50 -n255.255.255.0 #建立vswif0并与Service console的绑定[root@VI3 root]# esxcfg-vswif –lName Port Group IP Address Netmask Broadcast Enabled DHCPvswif0 Service Console 10.0.0.50 255.255.255.0 10.0.0.255 true false[root@VI3 root]#service mgmt-vmware restart #重启服务--------------------------------分割线-----------------------------------也许是频繁的更改SC的地址,造成了配置文件混乱,想到的办法只有删掉所有的vswitch,vswif,portgroup,在重新建立,并对照vswif配置文件,是否吻合,手动更改.1.CLI创建service console[root@VI3 root]# esxcfg-vswif -lName Port Group IP Address Netmask Broadcast Enabled DHCPvswif0 Service Console 192.168.251.60 255.255.255.0 192.168.251.255 true false[root@VI3 root]# esxcfg-vswif -d vswif0 #删除vswif0[root@VI3 root]# esxcfg-vswitch -lSwitch Name Num Ports Used Ports Configured Ports UplinksvSwitch0 32 3 32 vmnic0PortGroup Name Internal ID VLAN ID Used Ports UplinksVM Network portgroup1 0 0 vmnic0Service Console portgroup0 0 1 vmnic0[root@VI3 root]# esxcfg-vswitch –D “Service Console” vSwitch0 #删除vSwitch0上面portgroup [root@VI3 root]# esxcfg-vswitch –D “VM Network” vSwitch0[root@VI3 root]# esxcfg-vswitch -d vswitch0 #删除vswitch0[root@VI3 root]# esxcfg-vswitch –l #之前操作删除了vswitch信息,现在是空白[root@VI3 root]# esxcfg-vswitch -a vSwitch0 #创建vSwitch0[root@VI3 root]# esxcfg-vswitch -A "Service Console" vSwitch0 #在vSwitch0上创建portgroup,命名为Service Console[root@VI3 root]# esxcfg-vswitch -L vmnic0 vSwitch0 #将vmnic0绑定在vSwitch0[root@VI3 root]# esxcfg-vswitch –l #可以看到service console已经绑定vmnic0[root@VI3root]# esxcfg-vswif -a vswif0 -p "Service Console" -i 192.168.251.50 -n255.255.255.0 #创建vswif0并与serviceconsole绑定,在ESX里ip地址只能跟vswif0绑定,也就是虚拟交换机的interface[root@VI3 root]# esxcfg-vswif –lName Port Group IP Address Netmask Broadcast Enabled DHCPvswif0 Service Console 192.168.251.50 255.255.255.0 192.168.251.255 true false[root@VI3 root]# esxcfg-vswitch –lSwitch Name Num Ports Used Ports Configured Ports UplinksvSwitch0 64 3 64 vmnic0PortGroup Name Internal ID VLAN ID Used Ports UplinksService Console portgroup6 0 1 vmnic0[root@VI3 root]# service mgmt-vmware restart #到这里正常情况下就可以使用VI连接到ESX 2.如果不行检查一下以下配置文件.[root@VI3 root]# vi /etc/sysconfig/network #这里纪录主机名字和网关NETWORKING=yesHOSTNAME=VI3GATEWAY=192.168.251.12 #网关GATEWAYDEV=vswif0 #网关指定在vswif0[root@VI3 root]# vi /etc/sysconfig/network-scripts/ifcfg-vswif0 #看看这里的信息是否跟之前配置吻合DEVICE=vswif0 #之前把service cosole与vswif0关联MACADDR=00:50:56:43:a3:52PORTGROUP=portgroup6 #这里的protgroup与service console一致BOOTPROTO=staticBROADCAST=192.168.251.255IPADDR=192.168.251.60 #与service console 一致NETMASK=255.255.255.0ONBOOT=yes如果以上不一致,可以手动更改在vi编辑器中,i键是插入模式,进行文本更改,esc键退出插入模式,:wq保存并退出.编辑完成reboot.可能启动后显示地址跟设置不同,但是可以使用VI连接到ESX。
VMWARE ESXi Server 概要图文使用入门目录VMWARE ESXi Server 概要使用入门 (1 写在前面 (2说明 (2常用术语与概念 (2连接到ESXi (2安装管理客户端 (2连接到ESXi (2配置ESXi (4用户管理 (4范例:创建一个使用指定虚拟机的账号 (4 虚拟机自动启动与关机 (12使用ESXi (14创建一个虚拟机 (14启动虚拟机并安装操作系统 (14从模板导入虚拟机 (14使用虚拟机 (18启动虚拟机 (18切换虚拟机与本机的键鼠操作 (18修改虚拟机配置 (18连接到本地的ISO镜像 (20快照功能(Snapshots (20注意事项 (21内存分配 (21磁盘分配 (21虚拟机快照 (21写在前面说明本文档以ESXi v4.1.0为范例编写,ESXi v3.5-v4.0的的相关操作与之类似,可以参考。
常用术语与概念Host:主机,例如一个物理存在的ESXi服务器,我们可以看作是一个Host。
Guest:客户机,例如存在于物理主机中的虚拟机,我们可以称之为GuestESXi Server:1.ESXi Server是一个基于Linux的独立服务器操作系统,可以直接安装在物理服务器上。
2.目前IBM、HP、DELL等厂商的服务器基本都能够支持,普通台式计算机和笔记本在满足硬件兼容性的条件下,也可以安装使用。
3.通常我们需要另外一台计算机安装相应的客户端管理软件来进行管理连接到ESXi安装管理客户端vSphere Client用于配置ESXi主机和管理运行主机之上的虚拟机。
vSphere Client需要在Windows环境下安装使用,对于Windows Xp / Windows 2003 Server需要预先安装.Net Framework;Windows Vista / Windows 7 已经包含了.Net Framework,因此可以直接安装。
连接到ESXi确认计算机与ESXi服务器之间网络连接正常,并且ESXi服务器已经启动。
VMware ESX Server 常用命令行VMware ESX Server 上特有的命令很多,以下分享一下常见的命令行的使用方法。
1:看你的esx版本。
vmware -v2:列出esx里知道的服务esxcfg-firewall -s3:查看具体服务的情况esxcfg-firewall -q sshclinet4:重新启动vmware服务service mgmt-vmware restart5: 修改root的密码passwd root6:列出你当前的虚拟交换机esxcfg-vswitch -l7:查看控制台的设置esxcfg-vswif -l8:列出系统的网卡esxcfg-nics -l9:添加一个虚拟交换机,名字叫(internal)连接到两块物理网卡,(重新启动服务,vi 就能看见了)esxcfg-vswitch -a vSwitch1esxcfg-vswitch -A internal vSwitch1esxcfg-vswitch -L vmnic1 vSwitch1esxcfg-vswitch -L vmnic2 vSwitch110:删除交换机,(注意,别把控制台的交换机也删了)esxcfg-vswitch -D vSwitch111:删除交换机上的网卡esxcfg-vswitch -u vmnic1 vswitch212:删除portgroupesxcfg-vswitch -D internel vswitch113:创建 vmkernel switch ,如果你希望使用vmotion,iscsi的这些功能,你必须创建( 通常是不需要添加网关的)esxcfg-vswitch -lesxcfg-vswitch -a vswitch2esxcfg-vswitch -A "vm kernel" vswitch2esxcfg-vswitch -L vmnic3 vswitch2esxcfg-vmknic -a "vm kernel" -i 172.16.1.141 -n 255.255.252.0esxcfg-route 172.16.0.25414:打开防火墙ssh端口esxcfg-firewall -e sshclientesxcfg-firewall -d sshclient15: 创建控制台esxcfg-vswitch -a vSwitch0esxcfg-vswitch -A "service console" vSwitch0esxcfg-vswitch -L vmnic0 vSwitch0esxcfg-vswif -a vswif0 -p "service console" -i 172.16.1.140 -n 255.255.252.016: 添加nas设备(a 添加标签,-o,是nas服务器的名字或ip,-s 是nas输入的共享名字)esxcfg-nas -a isos -o -s isos17:列出nas连接esxcfg-nas -l18: 强迫esx去连接nas服务器(用esxcfg-nas -l 来看看结果)esxcfg-nas -resxcfg-nas -l19:连接iscsi 设备(e:enable q:查询 d:disable s:强迫搜索)esxcfg-swiscsi -e20:设置targetipvmkiscsi-tool -D -a 172.16.1.133 vmhba4021:列出和target的连接vmkiscsi-tool -l -T vmhba4022:列出当前的磁盘ls -l /vmfs/devices/disks。
命令行下配置ESX4.* /ESXi5.*的管理接口ESX4.*下使用命令行配置ESX的管理接口在安装和配置ESX Server 4.*过程中,管理员经常使用的工具是vsphere Client。
但是,如果出现误操作,为Service Console配置了错误的参数,就会造成vSphere Client无法连接到ESX Server,无法管理ESX Server的问题。
可以使用ESX Server的命令行方式,重新配置Server Console的参数,恢复vSphere Client 到ESX Server的连接。
下面首先介绍ESX Server 4.*中命令行的使用,然后介绍常用的命令和实际修复Servcie Console的方法。
命令行的使用当前网络配置使用命令行查看当前的网络配置当前的Console接口按Alt+F2进入ESX的Shell接口,实际是linux的命令行界面,输入用户名和密码登陆ESX Server内置了Linux Shell,可以使用linux常用命令操作系统。
查看网络的配置的常用命令利用系统的命令补全功能,在命令行下输入ESX,按Tab键,列出所有以ESX 开头的命令,这些都是ESX有关的命令。
在实际配置时,如果想了解有哪些可用的命令,以及命令的正确写法,都有按Tab,利用系统的自动补全功能。
与配置和显示网络有关的命令使用[command] –help,可以随时查看命令的帮助信息和具体的参数意义。
如果内容很多,可以使用[command ] –help | less翻页显示例如,esxcfg-vswitch –help | less的显示内容第一页按【Pgup】和【Pgdn】,翻到第二页通过查看帮助信息,显示当前虚拟交换机的命令是esxcfg-vswitch -l命令行下显示当前虚拟交换机的配置信息(注,大小写是不一样的)esxcfg-vswitch –l从vSphere Client查看网路配置,虚拟交换机供支持128个端口,其中8个端口留给物理上联端口,也就是物理网卡。
VMware ESX中出现的常见问题转帖服务器控制台问题有时候,你可能会遇到服务器控制台问题,表现为:服务器控制台挂起,同时,不允许在本地登录。
这种状况可能是由硬件锁定或僵尸状态引起,但是,通常这种问题不会影响在ESX主机上运行的虚拟机(VM)。
重启是解决这种问题的常用方法,但是,在重启之前,你应该关闭VM,或者将VM VMmotion到其他的ESX。
可以使用各种可用的途径来操作VM,完成关闭或迁移。
比如,使用VI client、通过SSH登录到服务控制台或者使用可替代的/紧急的控制台(通过按Alt+F2到F6)。
当VM被迁移或者关闭之后,你可以使用reboot命令重启ESX,如果所有的控制台都没有响应,你就只能去按主机上的电源按钮,冷启动主机。
网络问题有时,你也会遇到某种故障导致丢失了所有或者部分的网络配置,或者网络配置改变导致服务控制台丢失网络连接。
当服务控制台的网络连接丢失时,你将无法使用远程的方法来连接ESX主机,包括VI client和SSH。
你只能在本地的服务控制台上使用esxcfg-命令行工具恢复/修正网络配置,以下是一些命令,你可以从ESX CLI上使用它们配置网络:esxcfg-nics这个命令显示物理网卡列表,除去每个网卡的驱动信息、PCI设备、链接状态,你可以使用这个命令控制物理网卡的速度、双工模式等。
esxcfg-nics –l显示网卡信息、esxcfg-nics –h显示该命令可用的选项,以下是一些例子:o设置物理网卡vmnic2的速度和双工模式为100/Full:esxcfg-nics -s 100 -d full vmnic2o设置物理网卡vmnic2的速度和双工模式为自适应模式:esxcfg-nics -a vmnic2esxcfg-vswif创建或者更新服务控制台网络,包括IP地址和端口组,esxcfg-vswif –l显示当前设置、esxcfg-vswif –h显示可用的选项,以下是一些例子:o更改服务控制台(vswif0)IP地址和子网掩码:esxcfg-vswif -i 172.20.20.5 -n 255.255.255.0 vswif0o添加服务控制台(vswif0):esxcfg-vswif -a vswif0 -p "Service Console" -i 172.20.20.40 -n255.255.255.0esxcfg-vswitch创建或者更新虚拟机网络(vSwitch) ,包括上行链路、端口组和VLAN ID. 输入esxcfg-vswitch –l显示当前的vSwitch、 esxcfg-vswitch –h显示所有可用的选项. 以下是一些例子:o将物理网卡(vmnic2) 添加到vSwitch (vSwitch1):esxcfg-vswitch -L vmnic2 vswitch1o将物理网卡(vmnic3)从一个vSwitch (vSwitch0)上移除:esxcfg-vswitch -U vmnic3 vswitch0o在vSwitch (vSwitch1)上添加一个端口组(VM Network3):esxcfg-vswitch -A "VM Network 3" vSwitch1o在vSwitch (vSwitch1)上给端口组(VM Network 3)分配一个VLAN ID(3): esxcfg-vswitch -v 3 -p "VM Network 3" vSwitch1esxcfg-route设置或提取缺省的VMkernel网关路由。
如何通过命令行把我的VMware ESX服务器设置为维护模式?佚名
【期刊名称】《《Windows IT Pro Magazine:国际中文版》》
【年(卷),期】2010(000)009
【摘要】您可以使用VI客户端把服务器设置为维护模式,或者您也可以通过以下
命令行来实现:
【总页数】1页(P62-62)
【正文语种】中文
【中图分类】TP311.56
【相关文献】
1.VMware ESX Server4.0技术精选 [J], 顾武雄;
2.行之有效的VMware管理解决方案全面监控VirtualCenter,VMware ESX和虚
拟机 [J],
3.虚拟系统的“贵族”与“草根”——VMware Server与VMware ESX Server
技术介绍 [J], 赵永华
4.基于VMware ESX软件的高可用性虚拟化服务器系统建设应用 [J], 赵烽帆;李刚;周利霞;王晓磊;刘磊;杨奕;丁晶
5.构建基于VmWare ESX虚拟化平台的企业私有云 [J], 李罡
因版权原因,仅展示原文概要,查看原文内容请购买。
VMware ESX Server 上特有的命令很多,以下分享一下常见的命令行的使用方法。
1:看你的esx版本。
vmware -v
2:列出esx里知道的服务
esxcfg-firewall -s
3:查看具体服务的情况
esxcfg-firewall -q sshclinet
4:重新启动vmware服务
service mgmt-vmware restart
5: 修改root的密码
passwd root
6:列出你当前的虚拟交换机
esxcfg-vswitch -l
7:查看控制台的设置
esxcfg-vswif -l
8:列出系统的网卡
esxcfg-nics -l
9:添加一个虚拟交换机,名字叫(internal)连接到两块物理网卡,(重新启动服务,vi就能看见了)
esxcfg-vswitch -a vSwitch1
esxcfg-vswitch -A internal vSwitch1
esxcfg-vswitch -L vmnic1 vSwitch1
esxcfg-vswitch -L vmnic2 vSwitch1
10:删除交换机,(注意,别把控制台的交换机也删了)
esxcfg-vswitch -D vSwitch1
11:删除交换机上的网卡
esxcfg-vswitch -u vmnic1 vswitch2
12:删除portgroup
esxcfg-vswitch -D internel vswitch1
13:创建vmkernel switch ,如果你希望使用vmotion,iscsi的这些功能,你必须创建( 通常是不需要添加网关的)
esxcfg-vswitch -l
esxcfg-vswitch -a vswitch2
esxcfg-vswitch -A "vm kernel" vswitch2
esxcfg-vswitch -L vmnic3 vswitch2
esxcfg-vmknic -a "vm kernel" -i 172.16.1.141 -n 255.255.252.0
esxcfg-route 172.16.0.254
14:打开防火墙ssh端口
esxcfg-firewall -e sshclient
esxcfg-firewall -d sshclient
15: 创建控制台
esxcfg-vswitch -a vSwitch0
esxcfg-vswitch -A "service console" vSwitch0
esxcfg-vswitch -L vmnic0 vSwitch0
esxcfg-vswif -a vswif0 -p "service console" -i 172.16.1.140 -n 255.255.252.0
16: 添加nas设备(a 添加标签,-o,是nas服务器的名字或ip,-s 是nas输入的共享名字)esxcfg-nas -a isos -o -s isos
17:列出nas连接
esxcfg-nas -l
18: 强迫esx去连接nas服务器(用esxcfg-nas -l 来看看结果)
esxcfg-nas -r
esxcfg-nas -l
19:连接iscsi 设备(e:enable q:查询d:disable s:强迫搜索)
esxcfg-swiscsi -e
20:设置targetip
vmkiscsi-tool -D -a 172.16.1.133 vmhba40
21:列出和target的连接
vmkiscsi-tool -l -T vmhba40
22:列出当前的磁盘
ls -l /vmfs/devices/disks
***************************管理安装在ESX上安装的虚拟机*******************************
在ESX中,主要是通过vmware-cmd这个命令来管理虚拟机的,包括虚拟机的开关、状态查询和添加删除虚拟设备。
1,列出所有虚拟机(这里列出的是所有虚拟机各自对应的配置文件,ESX技术通过修改这些配置文件来完成对虚拟机的管理的):
# vmware-cmd -l
/vmfs/volumes/4655dd66-758d208c-1b24-001aa0187722/sol_vm1/sol_vm1.vmx
2,查询某个虚拟机状态(是否加电):
# vmware-cmd /vmfs/volumes/4655dd66-758d208c-1b24-001aa0187722/sol_vm1/sol_vm1.vmx getstate getstate() = on
3,启动/停止/重启/暂停某台虚拟机:
# vmware-cmd /vmfs/volumes/4655dd66-758d208c-1b24-001aa0187722/sol_vm1/sol_vm1.vmx
start/stop/reset/suspend trysoft
这里,trysoft是电源管理模式,意思是先尝试安全操作,如果失败则进行强制操作,除了这个选项,还用soft和hard这两种模式。
start/stop/reset/suspend只能选择其一.
4,查询设备属性:
# vmware-cmd //vmfs/volumes/4655dd66-758d208c-1b24-001aa0187722/sol_vm1/sol_vm1.vmx getconfig ide0:0.deviceType
getconfig(ide0:0.deviceType) = cdrom-raw
这里,我们获得的是ide0:0设备的类型,由输出可知,该设备是CDROM,而且是虚拟一个物理光驱。
5,将4中的光驱改为可以读取ISO文件的虚拟光驱:
# vmware-cmd //vmfs/volumes/4655dd66-758d208c-1b24-001aa0187722/sol_vm1/sol_vm1.vmx setconfig ide0:0.deviceType cdrom-image
6,为虚拟光纤指定ISO文件
# vmware-cmd //vmfs/volumes/4655dd66-758d208c-1b24-001aa0187722/sol_vm1/sol_vm1.vmx setconfig ide0:0.fileName /export/images/Linux4-U3.iso
7,断开设备连接
# vmware-cmd //vmfs/volumes/4655dd66-758d208c-1b24-001aa0187722/sol_vm1/sol_vm1.vmx disconnectdevice ide0:0
8,连接设备:
# vmware-cmd //vmfs/volumes/4655dd66-758d208c-1b24-001aa0187722/sol_vm1/sol_vm1.vmx connectdevice ide0:0
这里列出的管理命令仅仅是ESX众多设备管理中的一部分,然而通过实践,用户可以利用命令行完成所以需要通过VM client可以实现的工作,而且用户可以更加理解ESX的实现原理,更好的维护自己的ESX操作系统。