RHCE实验手册
- 格式:pdf
- 大小:13.14 MB
- 文档页数:44


RHCE----教学大纲一、红帽系统管理Ⅰ124(RHSAⅠ:RedHat System AdaministrationⅠ)第1章...................................GNOME图形桌面环境1、使用GNOME桌面环境2、通过gedit编辑文件第2章................................通过Nautilus管理文件1、如何使用Nautilus2、通过Nautilus访问远程文件系统第3章.............................在图形环境中获取帮助信息1、获取本地帮助信息2、在线获取帮助信息3、获取更多的红帽支持的服务第4章........................................配置本地服务1、了解root用户2、系统时钟管理3、打印机队列管理4、打印作业管理第5章.........................................磁盘管理Ⅰ1、描述MBR、主分区、扩展分区、逻辑分区2、列出可用的磁盘设备3、介绍教室环境中心的虚拟机4、创建新的分区、为分区格式化并使用它第6章............................................逻辑卷1、LVM的基本概述2、显示当前LVM的使用情况3、创建逻辑卷的步骤4、扩展卷组5、扩展逻辑卷6、删除物理卷第7章.......................................监视系统资源1、了解进程、优先级以及信号的概念2、监视进程的CPU或内存的使用情况3、管理正在运行的进程1、查询已经安装的软件2、注册RHN3、安装、卸载、升级软件包第9章..........................................BASH应用1、Bash的语法结构2、使用Bash3、在图形化界面中开启Bash第10章..........................在文本环境中获取帮助信息1、通过man获取帮助文档2、通过关键字来识别相关帮助文档3、通过pinfo获取帮助文档4、从/usr/share/doc目录中查看帮助第11章.......................................建立网络连接1、网络的基本概念2、Linux中网络管理3、查看网络连接操作第12章.......................................管理用户与组1、用户与组的管理第13章.................................在命令行中管理文件1、Linux系统中的文件系统的层次结构2、通过地址栏的绝对路径来切换路径3、根据描述输入相关路径第14章.......................Linux系统中的文件的安全访问1、用户、组及其他用户(U、G、O)的概念2、通过图形化工具管理文件权限3、在命令行界面中管理文件权限第15章......................................管理远程系统1、访问远程GNOME桌面2、远程Shell的访问3、远程文件传输4、使用SSH密钥第16章....................................配置一般的服务1、安全SSH的访问2、安全访问远程GNOME桌面1、检测文件系统属性2、修改文件系统属性3、删除已经存在的分区4、交换空间的概念5、交换分区管理第18章.................................图形界面安装Linux1、通过安装程序Anaconda图形化安装Linux2、安装后要运行的post-install脚本配置第19章........................................虚拟机管理1、简介KVM虚拟化2、安装虚拟机3、在开机时配置虚拟机第20章......................................引导过程管理1、在引导时改变内核参数2、在引导时进入不同的运行级别3、制作持久的GRUB配置文件4、目前的内核参数5、改变默认的运行级别第21章.....................................部署文件共享1、部署一个FTP服务器2、FTP服务器的配置3、部署一个Web服务器4、Web服务器的配置第22章..................................网络服务的安全1、启用与禁用防火墙的保护2、通过修改防火墙来允许访问要可信的服务3、基本的安全SElinux的概念4、SElinux的模式5、使用SElinux管理工具去管理SElinux的模式6、显示进程与文件的SElinux上下文二、红帽系统管理Ⅱ135(RHSAⅡ:RedHat System AdaministrationⅡ)第1章.........................自动安装红帽Linux操作系统1、通过system-config-kickstart创建kickstart文件2、为安装者创建一个可用的kickstart文件3、创建引导介质4、kickstart文件的指定5、修改kickstart文件第2章.......................................命令行的访问1、本地命令行的访问2、使用ssh访问命令行第3章.......................................命令行的工具1、使用硬链接2、归档与缩3、介绍vim编辑器4、基本的vim编辑器的流程第4章.......................正则表达式、管道及I/O重定向1、基本的正则表达式2、使用grep指令3、管道与重定向第5章.................................网络配置与故障处理1、理解网络配置文件2、基本的故意处理过程3、网络故障处理工具第6章...........................简单的分区与文件系统管理1、简单的分区与文件系统管理2、激活通过对文件系统加密来保护私有数据3、管理交换空间第7章.................通过逻辑卷管理器灵活的管理存储设备1、认识LVM的组成部分2、通过命令行工具让LVM存储生效3、扩展逻辑卷以及ext4文件系统大小4、扩展与减小卷组的大小5、为逻辑卷创建一个快照以备份数据第8章..............访问NFS与CIFS文件系统共享的网络文件1、挂载网络文件系统2、自动挂载网络存储第9章.......................................用户帐号管理1、什么是用户2、本地用户3、密码管理第10章.................................使用LDAP网络帐户1、使用LDAP服务器验证网络用户身份2、挂载网络用户家目录第11章....................................文件的访问控制1、组的管理2、文件的访问控制列表(ACL)管理第12章....................................SELinux的管理1、SELinux的介绍2、显示与修改文件SELinux的上下文3、SELinux布尔值的管理4、监控违例的SELinux第13章....................................安装与管理软件1、使用yum管理软件2、yum组件的选项管理3、处理第三方软件4、使用yum仓库管理第三方软件第14章................................管理已经安装的服务1、服务的管理2、确认服务是否可用第15章....................................分析与保存日志1、确定日志存放的位置和文件2、查找和分析日志的摘要报告3、改变日志摘要发送的邮件地址第16章..........................................进程管理1、监控进程2、进程的终结与调整优先级3、管理周期计划任务4、安排延时计划任务第17章....................................调整与维护内核1、辨认Linux支持的体系架构与内核版本2、管理内核模块3、指定内核启动参数4、更新内核第18章....................................修复系统的方法1、系统启动的过程2、采用单用户与SuLogin模式登录三、红帽系统管理Ⅲ255(RHSAⅢ:RedHat System AdaministrationⅢ)第1章...................................开始使用教室环境1、回顾虚拟化工具第2章.....................................增强用户的安全1、配置sudo2、配置Kerberos3、排除系统安全服务守护进程第3章....................................bash脚本及工具1、bash程序2、文本处理工具3、成熟的密码配置文件第4章...........................通过GPG密码保护文件安全1、通过GPG为文件加密第5章.........................................软件包管理1、yum插件2、RPM包的组成3、构建、签名一个RPM包4、发布rpm包(repo)第6章..........................................网络监视1、探测端口2、数据包嗅探第7章......................................高级网络配置1、IP的别名配置2、网卡绑定3、改变内核参数4、静态路由配置第8章......................................安全网络通信1、SSH端口转发2、包过滤iptables3、网络地址转换nat第9章....................................NTP服务器配置1、配置NTP服务器第10章...................................系统监视与日志1、使用情况报告2、通过aide与sar监视系统3、tmpwatch与logrotate4、配置一个远程的日志服务器第11章.....................................集中安全存储1、访问ISCSI存储2、加密集中存储3、集中存储第12章.............................通过SSL封装Web服务1、Apache的安全加密2、定义一个自签名的证书3、生成一个证书请求文件第13章.............................Web服务器的其它配置1、基于域名的虚拟主机2、使web服务器支持CGI脚本3、配置一个基于用户的验证4、Apache的故障修复第14章....................................基本SMTP配置1、基本的邮件服务器传输原理2、企业内部邮件服务器配置第15章............................Cache-only DNS服务器1、DNS概述2、Cache-only DNS服务器第16章.....................................NFS共享文件1、NFS服务器的概念及配置2、使用NFS3、NFS服务器安全第17章....................................CIFS共享文件1、准备CIFS共享的主要目录2、访问CIFS的共享3、配置一个组与打印机第18章.....................................FTP共享文件1、匿名上传第19章................................引导过程故障排错1、引导过程与救援模式2、修复启动问题3、配置串行控制台。

RHCE 案例操作RHCE(Red Hat Certified Engineer)是Red Hat公司颁发的Linux认证,主要考察考生在Red Hat Enterprise Linux环境中进行系统管理、配置、排错和故障恢复等能力。
以下是RHCE考试中可能涉及的一个案例操作:假设你是一家公司的系统管理员,负责管理公司的Linux服务器。
最近,你发现公司的一台服务器上运行的Apache HTTP服务器出现了问题,无法正常提供服务。
你的任务是诊断并解决这个问题。
首先,你需要检查服务器的系统日志,查看是否有与Apache服务器相关的错误信息。
你可以使用以下命令来查看系统日志:shellsudo journalctl -u apache2如果系统日志中没有错误信息,你可以尝试重启Apache服务器,看是否能够解决问题。
可以使用以下命令来重启Apache服务器:shellsudo systemctl restart apache2如果重启服务器后问题仍然存在,你需要检查Apache服务器的配置文件是否正确。
配置文件通常位于/etc/apache2/apache2.conf或/etc/httpd/conf/httpd.conf。
你可以使用文本编辑器打开配置文件,检查是否有语法错误或配置错误。
如果配置文件没有问题,你需要检查服务器上的防火墙设置是否允许Apache服务器通过HTTP协议进行通信。
你可以使用以下命令来检查防火墙设置:shellsudo firewall-cmd --list-all如果防火墙没有打开HTTP协议的端口(通常是80端口),你需要添加相应的规则来允许通信。
可以使用以下命令来打开HTTP端口的防火墙规则:shellsudo firewall-cmd --add-port=80/tcp --permanentsudo firewall-cmd --reload最后,如果以上步骤都没有解决问题,你可能需要检查服务器上的网络设置,确保网络连接正常。

RHCE安全与身份验证配置指南身份验证是网络安全的关键环节之一,它确保只有授权用户能够访问系统资源。
Red Hat Certified Engineer (RHCE)是一项为IT专业人员提供的认证,旨在证明他们在Red Hat Enterprise Linux系统上的技术能力。
本指南将重点介绍RHCE认证考试中关于安全和身份验证的配置要求,以帮助考生准备并成功通过考试。
一、概述在开始介绍具体配置要求之前,让我们先了解一下RHCE考试中与安全和身份验证相关的基本知识。
1. 安全基础知识:了解系统安全的基本概念和原则,包括用户账户管理、权限控制、防火墙配置等内容。
2. 身份验证方式:掌握不同的身份验证方式,如本地账户验证、LDAP验证、Kerberos验证等。
3. 安全协议和加密:了解常见的安全协议和加密技术,如SSH协议、SSL/TLS协议等。
二、配置要求在实际考试中,考生需要根据相关场景和任务,完成以下安全和身份验证的配置:1. 用户账户管理:创建、修改和删除用户账户,并设置适当的访问权限。
2. SSH远程访问:配置和管理SSH服务,包括修改端口号、禁用root登录、使用公钥验证等。
3. 防火墙配置:使用firewalld或iptables工具配置防火墙规则,限制网络访问和连接。
4. SELinux配置:了解SELinux的基本原理和策略,配置和管理SELinux的状态和规则。
5. 使用证书进行身份验证:了解证书和密钥的生成和使用,配置系统使用证书进行身份验证。
6. 集中式身份验证:配置系统与LDAP服务器进行集中式身份验证,实现统一的用户账户管理。
7. 使用Kerberos进行身份验证:了解Kerberos的基本原理和架构,配置系统使用Kerberos进行身份验证。
8. 安全日志分析和审计:配置系统记录安全事件和日志,定期分析和审计系统日志。
三、配置实例为了更好地理解和应用上述配置要求,以下是一些具体的配置实例:1. 创建用户账户和设置权限:命令示例:```# useradd -m -s /bin/bash user1# passwd user1# chmod 700 /home/user1```2. 配置SSH服务并禁用root登录:修改sshd配置文件`/etc/ssh/sshd_config`,将`PermitRootLogin`设置为`no`。
ObjectivesAfter completing this lab, you will be able to:►Report on Rhapsody Models and Linked Requirements using Rational Publishing Engine ScenarioIn this Lab, you will first start the Rhapsody REST server (by starting the Report Publishing Wizard). You will then open Rational Publishing Engine Document Studio and create a simple template to report Use Cases and their linked Requirements. Note that this lab is only intended to show that you can report on linked requirements in RMM models – for a more detailed guide on Reporting on Rhapsody please refer to the RPE for Rhapsody lightning lab and the full RPE for Rhapsody course – contact your IBM representative for details.It is assumed you are still working in Pete’s workspac e – and have the model open with linked requirements loaded– following on from the end of Lab 4.© Copyright IBM Corp. 2018 1 - 1Rhapsody Model Manager Tech Jam1 -2 © Copyright IBM Corp. 2018Task 1: Start the Rhapsody REST ServerIn this task, you will launch the Rhapsody REST Server. The simplest way to do this is to start the IBM Rational Rhapsody Report Generation Wizard – which also launches the server in preparation to generate a report. You will cancel the report generation wizard once the REST server has started. In the next task, you will design a simple template from scratch 1. Start the REST Server:a. Switch to the Rhapsody clientb. From the menu, select Tools → Publish → Generate Reportc.Note that this first launches the Rhapsody REST server:d. Then the Report Generator Wizard is launched:Lab 5 – Reporting with RPE© Copyright IBM Corp. 20181 - 3e. Click Cancel to close the RRDG report generator wizardRhapsody Model Manager Tech Jam1 - 4 © Copyright IBM Corp. 2018Task 2: Create a New Document Template for RhapsodyIn this task, you will start RPE Document Studio, create a new blank template and add Rhapsody as a data source. 1. Start RPE Document Studio:a. Launch Rational Publishing Engine Document Studio 2.1.2from the Windows start menu:2. Create a New Template:a.Click the New Document Template link on the Welcome page:b. Click OK :Lab 5 – Reporting with RPE© Copyright IBM Corp. 20181 - 53. Close Guide Views:a. Click the X in the Guide View tabto close itb. Click the X in the New Document Template headerto close it:c. In the blue Add data source to template popup, click Done:4. Add Rhapsody as a Data Source:a. From the menu, select Data Add Data SourceRhapsody Model Manager Tech Jam1 - 6 © Copyright IBM Corp. 2018b. Click Next:c. In the Predefined field, select Rhapsody:d. Click Nexte. Click FinishTask 3: Create a Use Case ReportIn this task, you will create a simple report that outputs the names of all the Use Cases in the model. You will then configure the document specification so that RPE can connect to and report on the currently loaded model. 1. Create a Container to Iterate Over All Use Cases:a. Right-click inside the empty template and select Insert Container:Lab 5 – Reporting with RPE© Copyright IBM Corp. 20181 - 7b. In the Data Source View , expand the tree to Projects → Project → Predefined Queries → AllUseCases :c. Expand the AllUseCases node and drag the UseCase(UseCase) node from the Data Source View onto theContainer :Rhapsody Model Manager Tech Jam1 - 8 © Copyright IBM Corp. 2018d. Note that the Container now has the context $1Projects/Project/PredefinedQueries/AllUseCases/UseCase:2. Add the Use Case Name:a. Right-click the container and select Insert → Paragraph:b. Right-click the new paragraph container and select Insert → Text:c. Double-click the new Text containerLab 5 – Reporting with RPE© Copyright IBM Corp. 20181 - 9d. In the Set Content for Current Element window, select the Data Expressiontab:e. Expand the Attributes sectionf. Expand $1 Projects/Project/PredefinedQueries/AllUseCases/UseCaseg. Select the name attribute:Rhapsody Model Manager Tech Jam1 - 10 © Copyright IBM Corp. 2018h. Click OK:3. Apply a Style:a. Right-click the Paragraph and select Styles → Heading Styles → 1:© Copyright IBM Corp. 20181 - 114. Record the Rhapsody REST server URI:a. In the windows taskbar, switch to the Rhapsody REST server consoleb.Highlight the server URI and right-click to copy it (alternatively simply make a note of it):c. Return to RPE Document Studio5. Start the Report Configuration and Generation Wizard:a. On the toolbar, click the Configure and Generate Documentbutton:b. Click Yes to save the template:1 - 12 © Copyright IBM Corp. 2018c. Choose a location and a filename for the template (in this sample you can name it Use Case Report) andclick Save d.The configuration wizard then starts:e. Click Nextf. In the Enter a URL or filepath to the data source field, paste (or type in) the Rhapsody REST serveraddress:g. Click Next© Copyright IBM Corp. 20181 - 13h. Note that four output documents will be generated (in parallel). For each output a save location and a stylesheet may optionally be selected:i. Click Nextj.Note the Finish options:k. Click Finishl.The document is now generated in all four output formats and a results window appears:m. Click the result with the .pdf extension to open the generated PDF document:1 - 14 © Copyright IBM Corp. 2018n. Close Acrobat Readero. Click Closeto close the results generation window:Task 4: Report on Linked RequirementsIn this task, you will complete this simple template – adding a container that will report on the Remote Requirements linked to the Use Cases.1. Add a Container to Iterate Over Dependencies:© Copyright IBM Corp. 20181 - 15a. Right-click inside the $1 Container – after the Paragraph – and select Insert Container:2. Iterate over Dependencies:a. In the Data Source View panel, scroll down and expand the Dependencies node (make sure you arelooking at the child nodes of UseCase(UseCase) b. Drag the Dependency(Dependency) node onto the new container:c.In the Select Context window, click OK:3.Cast Dependent Element to Requirement:a.In the Data Source View, expand the Dependency(Dependency) node - then scroll down and expand theDependsOn node:1 - 16 © Copyright IBM Corp. 2018© Copyright IBM Corp. 20181 - 17b. Right-click the ModelElement(ModelElement) node and select Cast to Type:c. In the Select Type window, select Requirement and click OK :d.In the Data Source View panel, expand the ModelElement(ModelElement) node and note thatunder ModelElement:Requirement appears as a node4.Add a Container to report on Requirements:a.In the Template, right-click the $2 Container and select Insert Container:1 - 18 © Copyright IBM Corp. 2018© Copyright IBM Corp. 20181 - 19b. Drag the Requirement node from the Data Source View to the new Container and click OK in the SelectContextwindow:c. Right-click the $3 Container and select Insert → Paragraphd. Right-click the new Paragraph and select Insert → Texte. Repeat step (d) twice more –you should now have three text elements inside the Paragraph:5. Report the Requirement ID:a. Double-click the first Text containerb. In the Set Content for Current Element window, select the Data Expression tabc. Expand the Attributes sectiond. Note that you may select attributes from any of the three contexts in the template:e. Expand the $3 context and select requirementUserID:f.Click OK6.Report the Requirement Specification:a.Double-click the third Text container and repeat the above steps – this time selecting the specificationattributeb.Double click the second Text container and in the Simple Value tab, type : (that is a space, followed by acolon, followed by another space – this is to separate the ID and the Specification in the report):1 - 20 © Copyright IBM Corp. 2018Lab 5 – Reporting with RPE© Copyright IBM Corp. 2018 1 - 21c. Click OK7. Generate the Report:a. On the toolbar, click the Configure and Generate Document button:b. Click Yes to save thetemplate:c. The configuration wizard then startsd. Click Finishe.The document is now generated in all four output formats and a results window appears:f. Click the result with the .pdf extension to open the generated PDF document – note the linked requirementsin the report:Rhapsody Model Manager Tech Jam1 - 22© Copyright IBM Corp. 2018g. Close Adobe Acrobat Reader h. Close Rational Publishing Enginei. Close the REST server console window.。


RHCE 6.0 -1 红帽系统管理Ⅰ本文档由东方瑞通提供课程大纲:RHCE6.0培训红帽系统管理Ⅰ课程大纲:第一章GNOME开始,使用gedit编辑文本文件1.1使用GNOME桌面1.2使用gedit编辑文本文件第二章图形下管理文件,使用Nautilus访问远程系统2.1使用Nautilus2.2使用Nautilus访问远程文件系统第三章访问远程和在线的帮助文档3.1搜索本地文档3.2搜索在线文档3.3如何获取红帽全球技术支持服务第四章配置本地服务4.1理解root用户的角色4.2管理系统时间4.3管理打印队列4.4管理打印任务第五章磁盘管理(一)5.1 理解MBR、主分区和扩展分区及逻辑分区5.2 查询可用磁盘分区5.3 创建新的磁盘分区、格式化分区、和如何在文件系统中使用分区第六章管理逻辑卷6.1 理解LVM的概念和术语6.2 理解LVM的正确使用方法6.3 LVM的初步管理6.4 扩展卷组6.5 扩展逻辑卷6.6 删除物理卷第七章监控系统资源7.1 理解进程、优先级、和信号的概念7.2 监控CPU、内存资源使用情况7.3 管理运行中的进程7.4 监控磁盘使用情况第八章管理系统软件8.1 查询系统已安装的软件包8.2 将本地系统注册到红帽网络(RHN)8.3 安装、删除和升级软件包第九章开始Bash,理解SHELL9.1 Bash语法规则9.2使用Bash9.3使用图形化下的Bash 工具第十章在文本环境中获取帮助10.1 使用MAN工具获取帮助文档10.2 从键盘快捷键中获取帮助信息10.3 使用pinfo获取帮助文档10.4 获取/usr/share/doc下的文档第十一章建立网络连接11.1 理解网络的概念和网络的要点11.2 在Linux下的网络配置11.3 检查网络的功能和网络连接性第十二章管理用户和用户组12.1 用户和用户组管理第十三章从命令行管理文件13.1 Linux下的文件系统架构13.2 如何操作绝对路径13.3 命令行下的文件管理13.4 如何使用相对路径第十四章安全的Linux文件访问机制14.1 用户、用户组和其他的概念14.2 使用GNOME图形界面管理权限14.3 从命令行管理权限第十五章管理远程系统15.1 远程主机GNOME图形界面的访问15.2 远程SHELL访问15.3 归档和压缩文件第十六章配置基本服务16.1 部署一般的网络服务16.2 安全的SSH访问16.3 配置VNC服务器16.4 安全访问远程GNOME桌面环境第十七章磁盘管理(二)17.1 检查文件系统属性17.2 修改文件系统属性17.3 删除分区17.4 理解交换分区的概念17.5 管理交换分区第十八章图形化安装红帽企业版Linux 618.1 在图形化下使用Anaconda安装程序安装系统18.2 在第一次启动时配置系统安装脚本第十九章管理虚拟机19.1 KVM虚拟化技术介绍19.2虚拟化客户端的安装19.3 在第一次启动的时候配置虚拟化客户端第二十章控制启动进程20.1 从内核引导系统20.2 启动一个运行级别20.3 解决GRUB的问题20.4 设置GRUB选项20.5 简单的内核参数第二十一章部署文件共享服务21.1部署FTP服务器21.2 FTP服务器配置21.3部署WEB服务器21.4 WEB服务器配置第二十二章安全的网络服务22.1 启动和关闭防火墙22.2 修改防火墙访问控制机制22.3 理解基本的SELinux概念22.4 SELinux状态22.5 使用SELinux管理工具更改SELinux的状态22.6 查看文件和进程的SELinux安全规则。
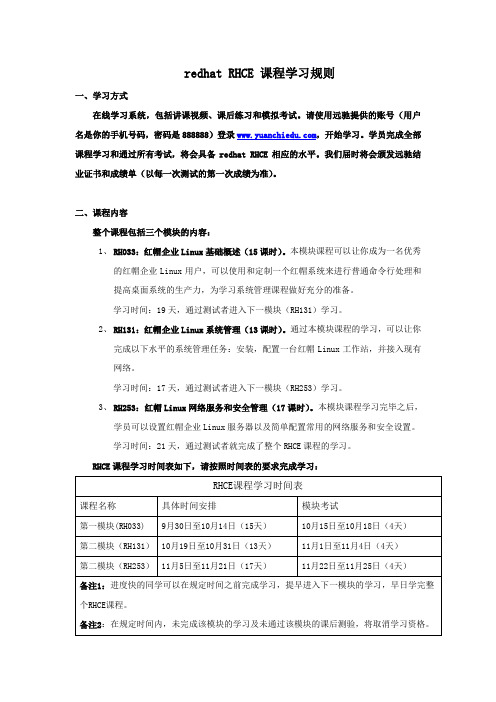
redhat RHCE 课程学习规则一、学习方式在线学习系统,包括讲课视频、课后练习和模拟考试。
请使用远驰提供的账号(用户名是你的手机号码,密码是888888)登录,开始学习。
学员完成全部课程学习和通过所有考试,将会具备redhat RHCE相应的水平。
我们届时将会颁发远驰结业证书和成绩单(以每一次测试的第一次成绩为准)。
二、课程内容整个课程包括三个模块的内容:1、RH033:红帽企业Linux基础概述(15课时)。
本模块课程可以让你成为一名优秀的红帽企业Linux用户,可以使用和定制一个红帽系统来进行普通命令行处理和提高桌面系统的生产力,为学习系统管理课程做好充分的准备。
学习时间:19天,通过测试者进入下一模块(RH131)学习。
2、RH131:红帽企业Linux系统管理(13课时)。
通过本模块课程的学习,可以让你完成以下水平的系统管理任务:安装,配置一台红帽Linux工作站,并接入现有网络。
学习时间:17天,通过测试者进入下一模块(RH253)学习。
3、RH253:红帽Linux网络服务和安全管理(17课时)。
本模块课程学习完毕之后,学员可以设置红帽企业Linux服务器以及简单配置常用的网络服务和安全设置。
学习时间:21天,通过测试者就完成了整个RHCE课程的学习。
RHCE课程学习时间表如下,请按照时间表的要求完成学习:三、考试规则为了保证大家的学习质量,我们在整个学习过程中设置了两种形式的考试。
1、课后测试。
考试形式:在线考试每学完一个课时,必须通过对应的课后测验,才能进入下一课时的学习。
可重复考,直到系统告诉你可以进入下一课时的学习。
2、模块考试。
考试形式:在线考试。
在学完一个模块后,会有一次模拟考试。
只有通过测试,才能进入到下一模块的学习。
考试未通过者,将有一次补考机会。
四、结业证书在规定时间内完成整个RHCE课程并且成绩合格的同学,如果需要,我们可以提供远驰颁发的完整的学习证明和结业证书,但是须收取200元的工本费。

rhcsa一、破解系统密码1、更改内核参数,进入单用户模式2、进入单用户模式、重设管理员密码二、配置主机名、使其开机生效三、配置网卡、使其开机生效四、系统管理配置:1、YUM配置:五、磁盘管理1、新建一个分区,大小为500M,格式化为ext4文件系统,并挂载在/common目录,要求每次启动生效,在470M--510M之间是允许的。
保存并重启2、设置/common/adm目录为共享目录,其属于admin组,属于该组的用户有可读、可写、可访问的权限,其他用户无任何权限。
六、内核设置1、升级内核,到指定的地址下载或直接在线安装:/pub/iso/kernel-2.6.34-200.e l6.x86_64.rpm并设置为默认启动项,要求旧的内核依然可用。
(题目已给出合适的内核rpm包的链接,打开后有两个rpm包,其中一个是我们需要的,不过这两个包存在依赖关系,需注意。
可以用rpm指令安装,若有依赖关系,最好用yum localinstall kernel-rpm other-rpm –nogpgcheck –y rpm --nodeps来安装)例如:2.开启IP转发,忽略ICMP请求,都要保证下次启动生效七、设置计划任务:1、为用户natasha配置一个定时执行任务,在每天14:23分执行“/bin/echo I AM RHCE”2、仅允许natasha和root用户能建crontab,相反只阻止natasha 用户创建crontab。
-------------------当:仅允许natasha和root用户能建crontab时;可以仅仅编辑文件“/etc/cron.allow”,不考虑文件“/etc/cron.deny”--------------------当:只阻止natasha用户创建crontab时;须删除文件“/etc/cron.allow”,编辑文件“/etc/cron.deny”八、建立用户创建用户hellokitty,其家目录在/home/body下,shell是/sbin/nologin,用户的uid是98,附加组是mail。
RHCE实践实验环境搭建与配置方法为了顺利通过RHCE考试,其中一个重要的步骤是搭建和配置实践实验环境。
这样可以使你更好地了解和掌握相关的技能和知识。
本文将详细介绍RHCE实践实验环境的搭建与配置方法,帮助你顺利进行实践并取得优异的成绩。
一、准备工作在开始搭建实践实验环境之前,你需要做一些准备工作。
首先,确保你已经具备了一定的Linux操作系统基础知识。
其次,准备一台支持虚拟化技术的计算机,并安装一台稳定的Linux发行版,如CentOS。
此外,你还需要下载和安装VirtualBox或VMware等虚拟化软件。
二、选择适合的操作系统版本RHCE考试的要求是在指定的Linux版本上进行实践。
当前,RHCE实践实验使用的是最新版本的Red Hat Enterprise Linux,建议你选择最新的稳定版本进行搭建和配置。
在搭建实验环境之前,确保你已经下载了指定版本的操作系统镜像文件。
三、创建虚拟机使用虚拟化软件,你可以创建多个虚拟机来模拟不同的实践场景。
打开虚拟化软件,在菜单中选择"新建虚拟机",根据向导提示设置虚拟机的名称、硬件配置和存储等参数。
在创建虚拟机时,确保为每个虚拟机分配足够的内存和硬盘空间,以满足实践的需求。
四、安装操作系统创建完虚拟机后,你需要为虚拟机安装操作系统。
在虚拟机启动之前,为虚拟机指定安装介质,这可以是光盘镜像文件或者操作系统的ISO镜像文件。
启动虚拟机后,按照安装向导的提示进行操作系统的安装。
在安装过程中,确保按照RHCE考试的要求进行分区和网络设置。
五、配置网络在完成操作系统的安装后,你需要配置虚拟机的网络。
RHCE考试要求你熟悉网络配置和管理,因此在实践实验环境中,你需要设置合适的网络环境以满足实验的需求。
根据实验场景的要求,可以配置虚拟机的IP地址、网关、DNS等网络参数。
六、安装和配置RHCE实践所需的软件RHCE考试涵盖了众多的主题和技术,你需要安装和配置相关的软件来满足实践的需求。

1. RHCE 6.0 -- 红帽系统管理I (RH124) 5天 30学时2. RHCE 6.0 -- 红帽系统管理II(RH134)4天24学时3. RHCE 6.0 -- 红帽系统管理III(RH254)4天24学时课程1:RHCE 6.0 -- 红帽系统管理I (RH124)课程简介红帽系统管理I (RH124) 是针对不了解Linux 并需要核心红帽企业Linux技能的IT 专业人员而设计的。
本课程专注于在工作场地遇到的管理任务,旨在积极地鼓励学员参加以任务为中心的活动、在实验室进行的知识检查,以及引导性的讨论,以保证最高效的知识传授和掌握。
此外,课程将采用基于GUI 的工具帮助学员利用现有的技术知识,而且本课程将介绍关键的命令行概念,为计划成为全职Linux 系统管理员的学员奠定基础。
学完这个为期五天的课程后,学员将能够执行安装操作,建立网络连接,管理物理存储器,并执行基础的安全管理。
适合对象l 需要快速掌握核心红帽企业Linux 能力的Microsoft Windows 系统管理员l 需掌握在Linux 系统中执行核心任务的能力的系统管理员、网络管理员和其他IT 专业人员l 希望成为全职Linux 系统管理员的非Linux IT 专业人员课程大纲课程2:RHCE 6.0 --红帽系统管理II(RH134)课程简介本课程包含RHCSA考试的红帽系统管理II考试;在系统管理I基础上深入学习企业Linux,能够对文件系统和分区进行管理和故障排除,逻辑卷管理、接入控制和程序包管理。
参加红帽系统管理I和II的学员将为参加红帽系统管理(RHCSA)考试做好充分准备。
适合对象已经参加红帽系统管理I 并希望成为全职企业Linux 管理员和/或获得RHCSA 认证的IT 专业人员预备知识l 红帽系统管理I课程大纲课程3:RHCE 6.0 --红帽系统管理III(RH254)课程简介本课程包含RHCE考试的红帽系统管理III考试;通过本课程学习可以安全配置部署与管理Linux网络服务,包含DNS、Apache、SMTP和网络文件共享;此外本课程注重安全性,包括监控、数据包过滤、接入控制和SELinux。
新手必读:RHCE课堂实验笔记(1)单元一:概述UNIX由贝尔实验室(Bell Labs)发明。
UNIX为AT&T的注册商标,所以其他公司开发的UNIX都有自己的名字,例如IBM的AIX,Sun的Solaris等。
UNIX中,任何事物都是文件。
基于这个定理,UNIX的配置文件都储存在文本文件中,并可以将多个程序链起来完成复杂的任务。
GNU Project开始于1984年,由自由软件基金(FSF for Free Software Foundation)支持,目的是为了建立免费的UNIX系统。
到1990年,建立了一套包括gcc,emac等在内的近乎完备的系统。
GPL=GNU General Public License。
GPL鼓励自由软件,所有对遵循GPL的软件进行的改进和修改也都必须遵循GPL。
而Linux起源于1991年有个大学毕业生Linux Torvalds建立了一个叫做"Linux"的操作系统内核。
虽然该内核当时只支持gcc和bash两个GNU产品,但它预示着组合Linux内核和GNU应用程序使得建立免费的类UNIX系统成为可能。
Linux具备的特性有:#Linux是一个类UNIX系统#支持多任务和多用户#并有广泛的硬件支持(至少是越来越广泛)#Red Hat发行版Linux提供了相当多Red Hat推荐的、普遍使用的、有用的程序。
Red Hat Linux是Linux的一个发行版本(distribution)。
它具有的特性有:#最新的系统内核#常用的实用程序和应用软件#安装和配置软件#提供技术支持Red Hat Linux推荐的硬件配置#Pentium级以上的CPU#128M内存#600M-1.2G的硬盘空间,取决于使用目的。
#可启动的CDROM或者软驱Linux在图形用户界面(GUI)环境上,提供标准的X Window系统:XFree86。
两种桌面环境:KDE和GNOME,分别建立在Qt和GTK+开发包上。

RHEL实验手册实验:使用fdisk创建磁盘分区不论是Windows还是Linux,我们日常的操作与使用几乎都是围绕文件系统而展开。
本实验包含了建立和管理文件系统的基本操作。
实验要求:按如下要求新建磁盘分区:实验详解:1.查看当前磁盘分区状态:[root@localhost /]# fdisk -l2.使用fdisk命令新建2个容量分别为1G的磁盘分区。
[root@localhost /]# fdisk /dev/sda在Command命令处输入n,开始新建磁盘分区;Command (m for help): n✧fdisk命令会开始分区创建向导:1)首先要求输入分区开始的柱面编号,此处可以自定义输入,也可以直接键入回车,使新建的分区开始的柱面紧邻前一分区的结束柱面;2)输入新建分区的结束柱面,默认键入回车会将所有剩余空间划分至新的分区,如果需要,请自定义需要新建的分区空间大小,默认形式输入会定义该分区结束的柱面,若以“+”为前缀并以“容量+单位”为形式输入则表示分区容量大小,如:+100M 表示新建分区容量为100MB;✧使用fdisk向导创建2个大小为1G的分区后,在fdisk中使用命令p来查看当前磁盘上的分区状态,对上述分区操作的正确性进行验证:Command (m for help): p这里可以看到,/dev/sda8与/dev/sda9是本实验中新划分的2个分区,其容量大小分别为1G。
3.保存并退出fdisk工具:Command (m for help): w4.此时,fdisk弹出如下提示:其大意为:内核仍在使用旧的磁盘分区表,新的磁盘分区表将在计算机下次启动时生效。
这时,使用partprobe命令,它能使内核在不重启的情况接受新的分区表信息;[root@localhost /]# partprobe /dev/sda至此,本实验全部结束。
RHEL实验手册实验:Linux文件系统管理不论是Windows还是Linux,我们日常的操作与使用几乎都是围绕文件系统而展开。

RHCE 考试:1 判定给出root 用户密码是否可用(一组复杂的字母加数字,一定要安要求输入否则考试后有可能主机收不到你的配置),不可用进入闭眼第一斧单用户模式重起进入Grub 菜单后,press a 修改内核参数为1, 再修改密码,顺便改为运行模式5;重起2 第二斧,根据要求静态配置网络参数,可用图形化工具,system--admin--network 完成配置,包括ip,netmask,gateway,DNS,hostname 也可用手动修改分别在/etc/sysconfig/network-script/ifcfg-eth0;/etc/reslv.conf;/etc/sysconfig/network 修改,修改完应用3 第三斧,配置YUM 库客户端,详见置顶文章4 最后一斧,打开system-admin-firewall and security. disable firewall 以及enforce selinux.顺便yum 一下setroubelshoottd 包yum install setr*,帮助提供警告信息1.fdisk2.磁盘逻辑卷一, 创建逻辑卷:第一步: 创建分区, 并将分区类型设为8e, 执行以下命令:fdisk /dev/hda #进入磁盘分区操作, 并将分区类型设为8epartprobe #进行内核初始化第二步: 创建物理卷:pvcreate /dev/hda{5,6,7} #5,6,7 指/dev/hda5, /dev/hda6, /dev/hda7 分区第三步: 创建卷组:vgcreate vgname /dev/hda{5,6,7}第四步: 创建逻辑卷:lvcreate -L 1.5 -n lvname vgname第五步: 格式化逻辑卷:mkfs.ext3 /dev/vgname/lvname第六步: 挂载文件系统:mount /dev/gvname/lvname /mnt/xxx二, 逻辑卷扩展:1, 查看卷组容量:vgdisplay /dev/vgname #查看有多少PE 块未用2, 增加逻辑卷:lvextend -l +255 /dev/vgname/lvname3, 执行扩展;resize2fs /dev/vgname/lvname4, 使用df -h 命令检查三, 逻辑卷减少:1, 卸载逻辑卷:umount /dev/vgname/lvname2, 执行文件系统检查:e2fsck -f /dev/vgname/lvname3, 文件系统减少:resize2fs /dev/vgname/lvname 1024M # 这里指减少到1024M4, 执行逻辑卷减少:lvreduce -L 1024M /dev/vgname/lvname5, 挂载文件系统, 并检查分区容量:mount /dev/vgname/lvname /mnt/xxxdf -h3.磁盘配额1)修改/etc/fstab 参数/dev/vg-test/lv-test /u01 ext3 defaults,usrquota 0 0 mount -o remount /u012)quotacheck /u013)edquota -u wanggang4)quotaon /u01实例针对quser1 和quser2 两个用户进行磁盘配额的设置,且这两个用户都在qgruop 用户组里,每个用户共用50M 的磁盘空间,并且最低限制为45M,1、准备好测试环境,建立用户与用户组#groupadd qgroup#useradd –m –g qgroup quser1#useradd –m –g qgroup quser1#passwd quser1#passwd quser22、建立文件系统的磁盘配额支持。
RHCSA/RHCE (RHEL7)教学大纲细化文档KevinZou RHCSA 部分(包括RH124 和RH134,等同ULE EL7 基础操作部分)基础概念及命令部分1.介绍Linux 系统及GNU、GPL 概念,说明Linux 与Windows 及其他操作系统的相同点和不同点。
演示简单的登录图形化桌面及TTY 终端,打开Gnome Terminal 说明提示符和命令输入,切换登录用户等。
2.介绍Gnome3 使用,介绍Gnome Shell 桌面的组成和常用快捷方式。
3.演示Gnome3 中图形化工具的使用,重点是比较Gnome3 和Windows7 的操作不同。
4.介绍Gnome Terminal 中命令补全方式、快捷键和date、passwd、history 等。
5.介绍切换Gnome3 图形化界面和TTY 终端的方法,说明TTY 终端的特点和重要性。
6.通过Gnome3 中文件资源管理器和Gnome Terminal 终端演示常用文件和目录操作,包括ls、dir、mkdir、touch、cp、mv、touch、rm 等。
7.在Gnome3 中文件资源管理器介绍Linux 目录结构和其中存放的主要文件类型,通过Gnome Terminal 终端介绍相对路径和绝对路径概念,使用命令pwd、cd、ls 等命令操作目录。
8.通过Gnome Terminal 终端介绍命令行通配符并使用通配符创建、操作、移动和删除文件和目录。
比较相同操作在Gnome3 文件资源管理器要完成所面对的问题。
9.介绍使用man 和pinfo(漂亮点的info)寻求帮助,查看/usr/share/doc 下的文档寻求帮助,使用RedHat 相关工具如redhat‐support‐tool和sosreport。
10.介绍普通文本文件的文件格式,介绍DOS 和UNIX 文本文件格式上的区别。
11.同Gnome Terminal 终端命令介绍输入输出流及管道的操作(>,>>,|,2>等)。
Red Hat Certification RHCA Original English Textbook - RHCE7 IntroductionThe Red Hat Certified Architect (RHCA) certification is a professional designation that validates the skills and expertise of IT professionals in designing, deploying, and managing solutions based on Red Hat technologies. This certification is highly respected in the industry and serves as a benchmark for employers to evaluate the proficiency of candidates.In this document, we will explore the original English textbook for the RHCA certification, specifically focusing on the RHCE7 (Red Hat Certified Engineer) exam. This exam is designed to test the skills and knowledge of IT professionals in managing Red Hat Enterprise Linux 7 systems.RHCE7 Exam OverviewThe RHCE7 exam is a hands-on performance-based exam that evaluates the abilities of system administrators in real-world scenarios. It is a rigorous exam that requires practical knowledge and expertise in managing and configuring Red Hat Enterprise Linux 7 systems.The exam consists of various tasks that simulate real-world problems and challenges faced by system administrators. These tasks include system configuration, system maintenance, networking, security, and troubleshooting. Candidates are required to demonstrate their proficiency in performing these tasks within the given time limit.RHCA Certification PathTo achieve the RHCA certification, candidates must pass multiple exams, including the RHCE7 exam. The certification path includes the following exams:1.Red Hat Certified System Administrator (RHCSA)2.Red Hat Certified Engineer (RHCE)3.Red Hat Certified Specialist in Server Security and Hardening (RHCSS)4.Red Hat Certified Specialist in Directory Services and Authentication(RHCDS)5.Red Hat Certified Specialist in Kernel-based VirtualizationAdministration (RHCVA)6.Red Hat Certificate of Expertise in Containerized ApplicationDevelopment (RHCECA)7.Red Hat Certificate of Expertise in Hybrid Cloud Storage (RHCEHCS)8.Red Hat Certificate of Expertise in Ansible Automation (RHCEAA)The RHCE7 exam is a critical milestone in the RHCA certification path as it covers essential skills and knowledge required to manage Red Hat Enterprise Linux systems.RHCE7 Textbook OverviewThe RHCA original English textbook for the RHCE7 exam is a comprehensive resource designed to provide in-depth knowledge and practical insights intomanaging Red Hat Enterprise Linux 7 systems. The textbook covers various topics that align with the exam objectives and ensures that candidates are well-prepared for the exam.Key Topics Covered in the Textbook1.System configuration and management: The textbook covers topicssuch as installation, package management, network configuration, user andgroup management, file system management, and system monitoring.working: The textbook provides an in-depth understanding ofnetwork configuration, including IP addressing, routing, DNS, DHCP, andfirewall configuration.3.Security: Security is a crucial aspect of systems administration. Thetextbook covers topics related to authentication, authorization, SELinux,firewalls, and intrusion detection systems.4.System maintenance and troubleshooting: The textbook equipscandidates with the knowledge and skills to efficiently maintain andtroubleshoot Red Hat Enterprise Linux systems. Topics include system updates, kernel module management, service management, log file analysis, andperformance tuning.5.Automation and scripting: The textbook introduces scripting conceptsand tools like Bash scripting, regular expressions, and automated system tasks using cron.ConclusionThe RHCA original English textbook for the RHCE7 exam is an invaluable resource for IT professionals seeking to acquire the skills and knowledge required to manage and configure Red Hat Enterprise Linux 7 systems. By studying this textbook, candidates will be well-prepared to pass the RHCE7 exam and take further steps towards obtaining the prestigious RHCA certification.Markdown Version: 1.0。
