CodeWarrior Compiler Settings
- 格式:pdf
- 大小:331.03 KB
- 文档页数:11
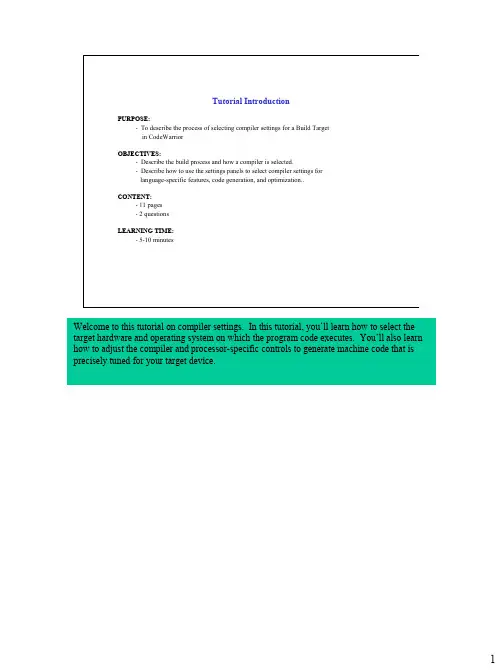
Tutorial IntroductionPURPOSE:-To describe the process of selecting compiler settings for a Build Targetin CodeWarriorOBJECTIVES:-Describe the build process and how a compiler is selected.-Describe how to use the settings panels to select compiler settings forlanguage-specific features, code generation, and optimization..CONTENT:-11 pages-2 questionsLEARNING TIME:-5-10 minutesWelcome to this tutorial on compiler settings. In this tutorial, you’ll learn how to select the target hardware and operating system on which the program code executes. You’ll also learn how to adjust the compiler and processor-specific controls to generate machine code that is precisely tuned for your target device.Overview of the Build Process•The build process issues commands that generate code.•.The Project Manager handles all dependencies.–The process is automatic.–If one file is changed, all dependent files are marked for update.•The object code is generated in accordance with --–Language settings–Global (IR) optimizations–Back-end settings•“Object code” is placed in the project data folder.–Users should not change the contents of the data folder manuallyLet’s begin this tutorial with an overview of the build process.A Build command can be issued in three different ways: (1) from the Project Window toolbar, (2) from the Project menu, or (3) from a keyboard sequence. The first thing the IDE does is to check dependencies, for files that have changed. Such files need to be updated or recompiled as part of the build.Note that CodeWarrior automatically handles file dependencies. If you change any file, a header file for example, all other files that use that header are automatically marked for update.The object code is generated according to your Build Target settings. There are no traditional .o files. Rather, CodeWarrior places the object code in a single flat file. This file is located inside the data folder. The data folder is in your project directory. You should never change the contents of the data folder manually. CodeWarrior manages access to the object code transparently.Selecting a Compiler•Front-end compiler --–Save files with the correct name extension.–Use the File Mappings panel to see or modify options.–Select Edit ==> Target Name Settings ==> File Mappings•Back-end compiler --–Specify a linker, the Platform target.–Select Edit ==> Target Name Settings ==> Target Settings panel–Appropriate language panels will appear.–Other target-specific panels will appear.You control which compiler is used to compile your code based on the file properties in the File Mappings panel. Each file has an associated compiler. For example, a source file with a .cpp extension uses the MW C/C++ compiler.The back-end compiler is chosen in the Target Settings panel. Choosing the Platform target, that is, the linker-setting item in this panel, causes the appropriate language panel and target-specific panel to appear.Controlling Language Features•Use the language settings panel foryour programming language.–Select Edit ==> Target NameSettings ==> C/C++ Language panel.•Modify the settings to fit your work.• Same for all CodeWarrior compilers.•For additional details see–C Compilers ReferenceLanguage-specific settings are controlled by the appropriate language panel. You should modify the settings in this panel to match your program’s requirements. Some language-specific settings you can control include: (1) function in-lining actions, (2) language support (ex. bool, wchar_t) and (3) how strict the source code should conform to the language standard.Using the Target Panel•Use the Target Settings panel–Select Edit ==> Target NameSettings ==> Target Settings.•The panel varies per target, buttypical options are listed below:–output file name–type of code being built (e.g.,executable, library)–basic options for the build•See Targeting manuals for details.The "Target" panel is specific to the chip you are targeting. The panel shown here is the EPPC Target panel. While there are differences between platform targets, the common options include: (1) the file name for the binary you create; (2) the ability to choose what kind of code you build, such as library, executable, etc.; and (3) related options.Using the Processor Panel•Use the Processor settings panel.–Select Edit ==> Target NameSettings ==> Chip Name Processor.•The panel varies per target, buttypical options are as follows:–processor selection–data alignment–some target-specific optimizations•See Targeting manuals for details.The “Processor” panel is another chip-specific panel. Again, the options in this panel vary depending on the target platform. The panel shown is the EPPC Processor Panel. Typical options include: (1) the processor type you want to target, (2) data alignment options, and (3) some chip-specific optimizations.Note that some platforms include additional panels. For example, the EPPC platform includes a EPPC Exceptions panel in the Debugger group.Global Optimizations•Optimize for size or speed.•Choose the desired level ofoptimization.–Levels 1,2 typically debug-friendly.–Levels 3,4 aren’t debug-friendly.•You can select individual optimizationsoutside of this panel.–Pragmas can be used to control fine detail.• Same for all CodeWarrior compilers.Now let’s discuss optimization, beginning with global optimization. Specific optimizations can be performed on your code, regardless of the platform target. The type of optimization performed depends on the optimization level you choose.There are two types of optimization commands available. Optimize for Faster Execution Speed or for Smaller Code Size, which tells the compiler to favor one type of optimization over the other, since the compiler actually performs both optimizations all of the time. For example, if you choose Optimize For: Faster Execution Speed, the compiler performs both speed and size optimizations, but in some cases will favor speed and thus may produce code slightly larger than optimal size. The same is true for the Optimize For: Smaller Code Size option. One option is always favored.There are four levels of optimization available. Each setting is compounded. Level 2performs all the optimizations of Level 1, plus some extras. Unlike the Optimize For: Faster Execution Speed and Optimize For: Smaller Code Size options, the optimization levelcommand can be disabled. While optimization Levels 1 and 2 are generally debug-friendly, it is advisable to disable all optimizations when debugging your code. That is recommended because the compiler might be able to “optimize out” an entire function making you unable debug the non-optimized code. For fine tuning optimizations, pragmas must be used in your code. See the C Compiler Reference for more information.Highlight 1 (E07)Highlight 2(E07A)Highlight 3(E07B)Processor-Specific Optimizations•These optimizations are found in the Chip Name Processor panel•These optimizations vary with the type of platform target.•Some typical optimizations include:–Instruction scheduling–Peephole optimizations–Data alignmentThis page summarizes the optimizations controlled by the processor-specific settings panel. This panel lets you control how the back-end generates and applies optimizations to the machine code generated for the target processor. Generally, such settings determine the following: (1) how the back-end schedules instructions, (2) how certain instruction sequences are optimized, and (3) how data is aligned in memory.Instruction scheduling arranges the instruction stream for a selected processor; it’s precisely tuned to the processor’s micro-architecture for maximum execution speed. Please note that scheduling code for one processor may hinder the code’s performance on another.The peephole optimizer examines the generated machine code and replaces certain sequences of instructions with more efficient ones. The instructions do not have to be adjacent for the CodeWarrior peephole optimizer to perform an instruction substitution.The data alignment optimizer organizes data structures so that they fit within the processor’s preferred memory access patterns. Note that aligned data can triple the processor’s data fetch rate.QuestionWhich of the following mechanisms selects the front-end language compiler?Click on your choice.A) The file extensionB) The Target Settings panelC) The Chip Name Processor panelD) The Global Optimizations panelLet’s complete this tutorial with a couple of questions.Which of the following mechanisms selects the front-end language compiler?Answer:The file extension determines which front-end language compiler CodeWarrior uses.QuestionWhich of the following mechanisms selects the back-end compiler? Click on yourchoice.A) The file extensionB) The Target Settings panelC) The Chip Name Processor panelD) The Global Optimizations panelWhich of the following mechanisms selects the back-end compiler?Answer:The Target Settings panel is where you choose the linker, which in turn specifies the back-end compiler.Tutorial Completion•CodeWarrior supports a variety of high-level languages and processor targets.–The file extension determines the front-end language parser used.–The Target Settings panel determines the back-end processor-specific code generator used.•The front-end language panel controls language-specific optimizations, support, andconformance to a language standard.•The Global Optimizations panel controls how well internal representations of theprogram are optimized.•The back-end Chip Name panel controls processor-specific optimizations.Let’s review what we discussed in this tutorial.CodeWarrior has an extensive group of settings panels that enable you to precisely controlmachine code generation. Using these panels, you can adjust the resulting machine code sothat it runs on an entire family of processors or on just one specific member of that processorfamily. This wide range of settings enables you to migrate code quickly among products thatcontain related members of a processor family, or fine-tune the code for a specific embeddedprocessor for maximum performance.11。
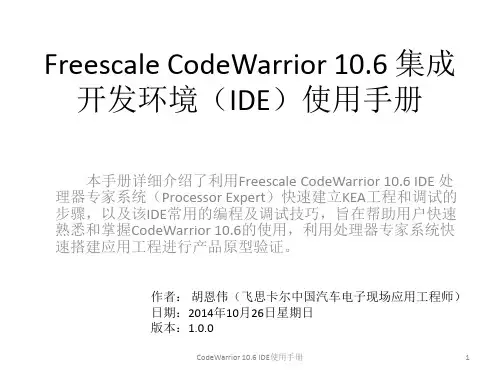


CodeWarrior嵌入式系统开发环境主要内容MCORE/CCORE嵌入式系统开发工具MCORE的ABI开发板系统调试接口集成开发环境CodeWarriorMCORE/CCORE嵌入式系统开发工具•C和C++编译器•Diab Data•Gnu C 和GDB Debugger•程序跟踪器•SingleStep•实时操作系统•Inegrated System ——pSOSystem•Microtec——VRTXmc内核•uC/OS-II•软件综合开发平台•Metrowerks ——CodeWarrior IDE•软硬件协同设计平台•Simulation Technologies ——virtual-CPU•OnCE(On Chip Emulation)MCORE的ABI•ABI 标准•遵守的两条基本原则•标准接口的使用可以进一步进行程序运行性能和器件功耗的最小化•标准接口的使用可以尽可能地做到与M68000的C语言程序保持兼容•主要内容1、底层执行代码二进制接口标准,2、目标文件二进制接口标准3、源程序级标准4、库函数标准开发板(EVB2107)及EBDI•144-pin, quad flat pack MMC2107 resident MCU.• 2 megabytes FLASH memory.• 1 megabyte FSRAM (fast static RAM), configurable for 16-or 32-bit operations.•Xilinx complex programmable logic device (CPLD).•Power supply that converts line power to 12-volt input power.•Two RS232 serial communication ports.•OnCE connector.•Four user-accessible LEDs.•Two DIP switches for system configuration and firmware selection.•User prototyping (breadboard) area.•Motorola's System Development Software (SysDS).•Metrowerks MetroTRK debug software•GNU source-level debugger (from the Free Software Foundation).•Metrowerks CodeWarrior®IDE•Sites for optional, user-installed prototyping connectors.MMC2107Microcontroller (144-pin QFP)Xilinx CPLD RS-232 Ports (2)User AccessibleLEDs (4)DIP Switches forSystem Configuration and User Accessibility 2 MB Fast Static RAM 2 MB FLASH OnCE Port Connectors (3)Modular All-Purpose Interface (MAPI)Connectors (4)系统基本要求•PC 机,配置至少为Pentium CPU,16Mbytes RAM,50Mbytes 硬盘,SVGA 彩显,和两个RS232 串口•操作系统: windows 95/windownsNT(V4.0)或以上•电源:12-volts,0.5AEVB板组件配置-1组件配置设置,见下表与计算机系统的连接•连结之前确保关掉电源•用RS232 电缆连结到计算机的串口和EVB2107 J58 连结口•或者用EBDI, 一端连结EVB2107 J7和EBDI, 一端连结计算机串口和EBDI•如果代码运行在目标板上,则可以用RS232 电缆连结目标板和EVB2107 接口J57•连结12-volt 电源到EVB2107 接口J61•打开电源开关,连接完成执行EVB2107 自检•设置开关S2:USR0,USR1,和USR2 都设置为OFF •打开电源,EVB2107开始进行自检•自检中LED DS2-DS5 将运行点亮,其运行顺序如下表:•当四个LED 都熄灭时,则EVB2107自检正确•关闭电源,自检完成图于OFF 状态时的内存印象图调试跟踪嵌入代码•使用Picobug monitor作为独立的跟踪软件,其调试步骤如下:1。
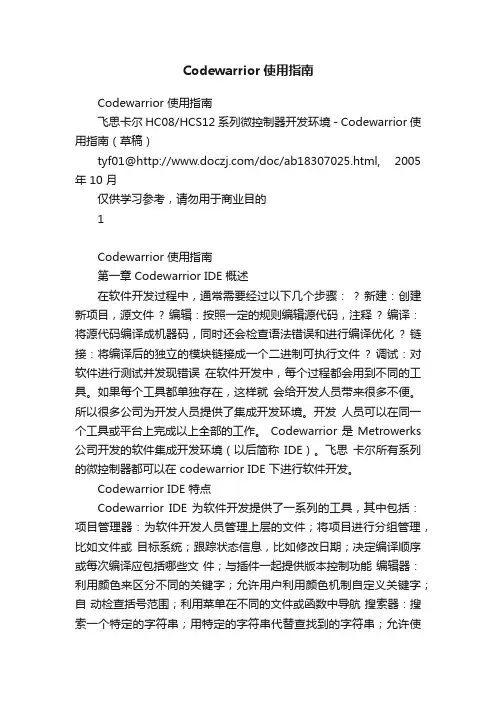
Codewarrior使用指南Codewarrior 使用指南飞思卡尔 HC08/HCS12 系列微控制器开发环境 - Codewarrior 使用指南(草稿)tyf01@/doc/ab18307025.html, 2005 年 10 月仅供学习参考,请勿用于商业目的1Codewarrior 使用指南第一章 Codewarrior IDE 概述在软件开发过程中,通常需要经过以下几个步骤:? 新建:创建新项目,源文件? 编辑:按照一定的规则编辑源代码,注释? 编译:将源代码编译成机器码,同时还会检查语法错误和进行编译优化? 链接:将编译后的独立的模块链接成一个二进制可执行文件? 调试:对软件进行测试并发现错误在软件开发中,每个过程都会用到不同的工具。
如果每个工具都单独存在,这样就会给开发人员带来很多不便。
所以很多公司为开发人员提供了集成开发环境。
开发人员可以在同一个工具或平台上完成以上全部的工作。
Codewarrior 是 Metrowerks 公司开发的软件集成开发环境(以后简称IDE)。
飞思卡尔所有系列的微控制器都可以在 codewarrior IDE 下进行软件开发。
Codewarrior IDE 特点Codewarrior IDE 为软件开发提供了一系列的工具,其中包括:项目管理器:为软件开发人员管理上层的文件;将项目进行分组管理,比如文件或目标系统;跟踪状态信息,比如修改日期;决定编译顺序或每次编译应包括哪些文件;与插件一起提供版本控制功能编辑器:利用颜色来区分不同的关键字;允许用户利用颜色机制自定义关键字;自动检查括号范围;利用菜单在不同的文件或函数中导航搜索器:搜索一个特定的字符串;用特定的字符串代替查找到的字符串;允许使用常规表达式;提供文件比较功能;源代码浏览器:标志符(变量名称,函数名称)数据库;利用数据库来对代码快速定位;对所有的标志符连接到用到它的代码中;编译系统:编译器将源代码编译成机器码;链接器将目标文件链接成可执行文件调试器:利用标志符数据库进行源代码级调试;支持各种标志符数据库,比如:codeview, DWARF, SYM 等Codewarrior IDE 优点交叉平台开发2Codewarrior 使用指南开发人员可以在不同的操作系统下使用codewarrior IDE 来开发自己的软件。
CodeWarrior 使 用 教 程一、认识 CodeWarriorCodeWarrior 能做些什么?当你知道自己能写更好的程序时,你一定不会再使用别人开发的应用程序。
但是常常会发生这种情况,就是当你写了无数行代码后,却找不到使得整个程序出错的那一行代码,导致根本没法编译和链接整个程序。
这可能更令人灰心丧气。
本文将告诉你如何使用 CodeWarrior 这一工具解决上述问题。
从现在开始,我们将集中精力学习如何在 CodeWarrior 中使用 C/C++ 进行编程。
为了学习本课程,你必须已经能够比较熟练地使用上述两种语言之一。
CodeWarrior 也可以支持 Java 开发,但那是另一门课程的内容。
本课程仅限于在 Windows 平台上使用 CodeWarrior 进行的开发。
一旦你精通了 CodeWarrior 编程后,你可以试试在其它平台上使用 CodeWarrior。
本文中讨论过的大部分内容都可以应用到开发 Mac 应用程序中。
CodeWarrior 能够自动地检查代码中的明显错误,它通过一个集成的调试器和编辑器来扫描你的代码,以找到并减少明显的错误,然后编译并链接程序以便计算机能够理解并执行你的程序。
你所使用过的每个应用程序都经过了使用象 CodeWorrior 这样的开发工具进行编码、编译、编辑、链接和调试的过程。
现在你在我们的指导下,自己也可以去做这些工作了。
你可以使用 CodeWarrior 来编写你能够想象得到的任何一种类型的程序。
如果你是一个初学者,你可以选择编写一个应用程序(比如一个可执行程序),比如象微软公司的文本编辑器 WordPad 这样的应用程序。
应用程序可能是最容易编写的程序了,而那些庞大的商业软件,比如象 Adobe Photoshop,Microsoft Word 以及 CodeWarrior 软件都是极其复杂的。
其它类型的程序指的是控制面板(control panels),动态链接库(dynamic linked libraries,DLLs) 和插件(plug-ins)。

Codewarrior 使用指南飞思卡尔 HC08/HCS12 系列微控制器开发环境 - Codewarrior 使用指南(草稿)tyf01@ 2005 年 10 月仅供学习参考,请勿用于商业目的1Codewarrior 使用指南第一章 Codewarrior IDE 概述在软件开发过程中,通常需要经过以下几个步骤: • 新建:创建新项目,源文件 • 编辑:按照一定的规则编辑源代码,注释 • 编译:将源代码编译成机器码,同时还会检查语法错误和进行编译优化 • 链接:将编译后的独立的模块链接成一个二进制可执行文件 • 调试:对软件进行测试并发现错误 在软件开发中,每个过程都会用到不同的工具。
如果每个工具都单独存在,这样就 会给开发人员带来很多不便。
所以很多公司为开发人员提供了集成开发环境。
开发 人员可以在同一个工具或平台上完成以上全部的工作。
Codewarrior 是 Metrowerks 公司开发的软件集成开发环境(以后简称 IDE)。
飞思 卡尔所有系列的微控制器都可以在 codewarrior IDE 下进行软件开发。
Codewarrior IDE 特点Codewarrior IDE 为软件开发提供了一系列的工具,其中包括: 项目管理器:为软件开发人员管理上层的文件;将项目进行分组管理,比如文件或 目标系统;跟踪状态信息,比如修改日期;决定编译顺序或每次编译应包括哪些文 件;与插件一起提供版本控制功能 编辑器:利用颜色来区分不同的关键字;允许用户利用颜色机制自定义关键字;自 动检查括号范围;利用菜单在不同的文件或函数中导航 搜索器:搜索一个特定的字符串;用特定的字符串代替查找到的字符串;允许使用 常规表达式;提供文件比较功能; 源代码浏览器:标志符(变量名称,函数名称)数据库;利用数据库来对代码快速 定位;对所有的标志符连接到用到它的代码中; 编译系统:编译器将源代码编译成机器码;链接器将目标文件链接成可执行文件 调试器:利用标志符数据库进行源代码级调试;支持各种标志符数据库,比如: codeview, DWARF, SYM 等Codewarrior IDE 优点•交叉平台开发2Codewarrior 使用指南 开发人员可以在不同的操作系统下使用 codewarrior IDE 来开发自己的软 件。
codewarrior简介CodeWarrior Development Studio(开发工作室)是完整的用于编程应用中硬件bring-up的集成开发环境。
采用CodeWarrior IDE,开发人员可以得益于采用各种处理器和平台(从Motorola到TI到Intel)间的通用功能性。
根据Gartner Dataquest的报告,CodeWarrior编译器和调试器在商用嵌入式软件开发工具的使用率方面排名第一。
而这只是流行的CodeWarrior软件开发工具中的两个。
CodeWarrior包括构建平台和应用所必需的所有主要工具 - IDE、编译器、调试器、编辑器、链接器、汇编程序等。
另外,CodeWarrior IDE支持开发人员插入他们所喜爱的工具,使他们可以自由地以希望的方式工作。
CodeWarrior开发工作室将尖端的调试技术与健全开发环境的简易性结合在一起,将C/C++源级别调试和嵌入式应用开发带入新的水平。
开发工作室提供高度可视且自动化的框架,可以加速甚至是最复杂应用的开发,因此对于各种水平的开发人员来说,创建应用都是简单而便捷的。
它是一个单一的开发环境,在所有所支持的工作站和个人电脑之间保持一致。
在每个所支持的平台上,性能及使用均是相同的。
无需担心主机至主机的不兼容。
CodeWarrior开发工作室包括完成大多数嵌入式开发项目所需的所有工具。
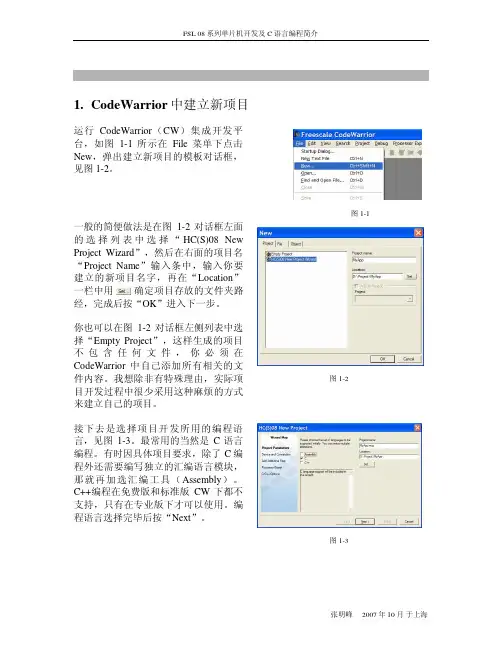
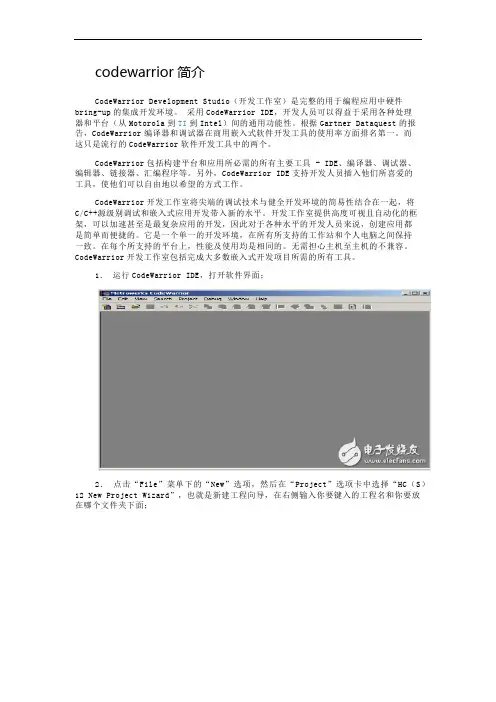
1.运行CodeWarrior IDE,打开软件界面;2.点击“File”菜单下的“New”选项,然后在“Project”选项卡中选择“HC(S)12 New Project Wizard”,也就是新建工程向导,在右侧输入你要键入的工程名和你要放在哪个文件夹下面;3.点击“确定”后下面选择你采用的单片机型号,比如你选择“MC9S12D64”或者“MC9S12NE64”;(其中如果选择MC9S12NE64,则必须安装光盘上的NE64补丁插件)4.点击“下一步”后,选择你采用哪种编程语言,尽量不要选第三个“C++”,因为好像我试的有问题,如果你单纯的C,则选择第二个,如果你是C和汇编混合编程,则前两个都要选的;5.选择是否采用“处理器专家”,该项功能可以方便程序的寄存器设置,但我用过感觉比较糊涂,所以我一般选择“No”;6.下面就是选择是否采用“PC-lint”,选择“No”;7.选择是不是支持浮点数,如果你的工程采用浮点数则选择下面的两个中一个,否则选择“No”;8.选择采用哪种内存定位模式,一般选择第一个“Small”模式9.最后一步,选择前面两项,如果仅选择第一项,则仅可以软件调试,前两项都选择可以支持软件和硬件调试。
CodeWarrior使⽤说明第⼀章: 认识CodeWarrior第⼆章: ⼯程和⽬标⽂件的显⽰和定制第三章: 编译第四章: 链接第五章: 调试第六章: 定制第七章: 库函数和Microsoft Foundation Classes (MFC)1). CodeWarrior 能做些什么?A).使⽤C/C++ 进⾏编程B).也⽀持Java 开发本课程仅限于应⽤C/C++ 语⾔在Windows 平台上使⽤CodeWarrior 进⾏的开发.2). CodeWarrior 优点是什么?CodeWarrior 能够⾃动地检查代码中的明显错误,它通过⼀个集成的调试器和编辑器来扫描你的代码,以找到并减少明显的错误,然后编译并链接程序以便计算机能够理解并执⾏你的程序.3).常⽤编程类型说明:A).应⽤程序(如:⽂本编辑器WordPad )B). 庞⼤的商业软(如:⽐如象Adobe Photoshop,MicrosoftWord,CodeWarrior…)C). 控制⾯板(control panels)<实际上是设置系统功能的⼀个简单界⾯,⽐如可以在控制⾯板中完成.如:设置⾳量和⿏标移动速度这样⼀些参数.>D). 动态链接库(dynamic linked libraries,DLLs)<提供⼀些很有⽤的被系统和应⽤程序共享的函数.通常它们没有⽤户界⾯.>E). 插件(plug-ins)<类似于DLLs,插件也是可供其它软件使⽤的⼩程序,但插件只能被特定的软件使⽤.>4).CodeWarrior⼯具条介绍: 4.1).⽂件菜单: 4.2).编辑菜单4.3).查看菜单4.4).查找菜单4.5).⼯程菜单4.6).调试菜单4.8).窗⼝菜单4.9).帮助菜单4.7).VCS 菜单5).CodeWarrior 集成开发环境的设置5.1).通⽤设置5.5.1).编译设置(Build Settings): 选择是否在执⾏编译之前保存已打开的源⽂件,以及有多少内存被⽤于编译⼯作;5.5.2).IDE 之外(IDE Extras): ⼏个独⽴的设置.⽐如指定CodeWarrior 是否使⽤⼀个第三⽅的⽂本编辑器——因为集成的编辑器并不是很完美,这可以通过指定⼀个你惯⽤的编辑器来替代它;5.5.3).插件设置(Plug-In Settings): 供插件开发商调试他们的插件;5.5.4).隐藏⽂件夹(Shielded Folders): 在这⾥指定的⽂件夹在⼯程设计期间,或执⾏查找和⽐较操作期间,将要被忽略掉.如果在你的⼯程级有⼀个巨⼤的“数据”⽂件⽬录,⽽你⼜不想让这些⽂件降低CodeWarrior 的操作速度时,这个设置就很管⽤了;5.5.5).资料树(Source Trees): ⽤于指定CodeWarrior 在编译程序时⽤不着的⽬录.5.2).编辑器设置5.2.1).编辑器设置(Editor Settings): ⼏个⽤于定制编辑器显⽰、管理⽂本和窗⼝的设置项;5.2.2).字体和制表符(Fonts and Tabs): 设置编辑器中的⽂本⼤⼩、字体、制表符和其它显⽰设置;5.2.3).⽂本颜⾊(Text Colors): ⽤于指定特定语⾔元素(⽐如程序的注释)在编辑窗⼝中的显⽰的颜⾊。
CodeWarrior 使用教程第一课认识CodeWarriorTranslated from CodeWarrior 能做些什么?当你知道自己能写更好的程序时,你一定不会再使用别人开发的应用程序。
但是常常会发生这种情况,就是当你写了无数行代码后,却找不到使得整个程序出错的那一行代码,导致根本没法编译和链接整个程序。
这可能更令人灰心丧气。
本文将告诉你如何使用CodeWarrior 这一工具解决上述问题。
从现在开始,我们将集中精力学习如何在CodeWarrior 中使用C/C++ 进行编程。
为了学习本课程,你必须已经能够比较熟练地使用上述两种语言之一。
CodeWarrior 也可以支持Java 开发,但那是另一门课程的内容。
本课程仅限于在Windows 平台上使用CodeWarrior 进行的开发。
一旦你精通了CodeWarrior 编程后,你可以试试在其它平台上使用CodeWarrior。
本文中讨论过的大部分内容都可以应用到开发Mac 应用程序中。
CodeWarrior 能够自动地检查代码中的明显错误,它通过一个集成的调试器和编辑器来扫描你的代码,以找到并减少明显的错误,然后编译并链接程序以便计算机能够理解并执行你的程序。
你所使用过的每个应用程序都经过了使用象CodeWorrior 这样的开发工具进行编码、编译、编辑、链接和调试的过程。
现在你在我们的指导下,自己也可以去做这些工作了。
你可以使用CodeWarrior 来编写你能够想象得到的任何一种类型的程序。
如果你是一个初学者,你可以选择编写一个应用程序(比如一个可执行程序),比如象微软公司的文本编辑器WordPad 这样的应用程序。
应用程序可能是最容易编写的程序了,而那些庞大的商业软件,比如象Adobe Photoshop,Microsoft Word 以及CodeWarrior 软件都是极其复杂的。
其它类型的程序指的是控制面板(control panels),动态链接库(dynamic linked libraries,DLLs) 和插件(plug-ins)。
Codewarrior 使用指南飞思卡尔 HC08/HCS12 系列微控制器开发环境 - Codewarrior 使用指南(草稿)tyf01@ 2005 年 10 月仅供学习参考,请勿用于商业目的1Codewarrior 使用指南第一章 Codewarrior IDE 概述在软件开发过程中,通常需要经过以下几个步骤: • 新建:创建新项目,源文件 • 编辑:按照一定的规则编辑源代码,注释 • 编译:将源代码编译成机器码,同时还会检查语法错误和进行编译优化 • 链接:将编译后的独立的模块链接成一个二进制可执行文件 • 调试:对软件进行测试并发现错误 在软件开发中,每个过程都会用到不同的工具。
如果每个工具都单独存在,这样就 会给开发人员带来很多不便。
所以很多公司为开发人员提供了集成开发环境。
开发 人员可以在同一个工具或平台上完成以上全部的工作。
Codewarrior 是 Metrowerks 公司开发的软件集成开发环境(以后简称 IDE)。
飞思 卡尔所有系列的微控制器都可以在 codewarrior IDE 下进行软件开发。
Codewarrior IDE 特点Codewarrior IDE 为软件开发提供了一系列的工具,其中包括: 项目管理器:为软件开发人员管理上层的文件;将项目进行分组管理,比如文件或 目标系统;跟踪状态信息,比如修改日期;决定编译顺序或每次编译应包括哪些文 件;与插件一起提供版本控制功能 编辑器:利用颜色来区分不同的关键字;允许用户利用颜色机制自定义关键字;自 动检查括号范围;利用菜单在不同的文件或函数中导航 搜索器:搜索一个特定的字符串;用特定的字符串代替查找到的字符串;允许使用 常规表达式;提供文件比较功能; 源代码浏览器:标志符(变量名称,函数名称)数据库;利用数据库来对代码快速 定位;对所有的标志符连接到用到它的代码中; 编译系统:编译器将源代码编译成机器码;链接器将目标文件链接成可执行文件 调试器:利用标志符数据库进行源代码级调试;支持各种标志符数据库,比如: codeview, DWARF, SYM 等Codewarrior IDE 优点•交叉平台开发2Codewarrior 使用指南 开发人员可以在不同的操作系统下使用 codewarrior IDE 来开发自己的软 件。
写给CodeWarrior初学者1.运行CodeWarrior IDE,打开软件界面;2.点击“File”菜单下的“New”选项,然后在“Project”选项卡中选择“HC(S)12 New Project Wizard”,也就是新建工程向导,在右侧输入你要键入的工程名和你要放在哪个文件夹下面;3.点击“确定”后下面选择你采用的单片机型号,比如你选择“MC9S12D64”或者“MC9S12NE64”;(其中如果选择MC9S12NE64,则必须安装光盘上的NE64补丁插件)4.点击“下一步”后,选择你采用哪种编程语言,尽量不要选第三个“C++”,因为好像我试的有问题,如果你单纯的C,则选择第二个,如果你是C和汇编混合编程,则前两个都要选的;5.选择是否采用“处理器专家”,该项功能可以方便程序的寄存器设置,但我用过感觉比较糊涂,所以我一般选择“No”;6.下面就是选择是否采用“PC-lint”,选择“No”;7.选择是不是支持浮点数,如果你的工程采用浮点数则选择下面的两个中一个,否则选择“No”;8.选择采用哪种内存定位模式,一般选择第一个“Small”模式9.最后一步,选择前面两项,如果仅选择第一项,则仅可以软件调试,前两项都选择可以支持软件和硬件调试。
10.完成后,软件会自动创建一个工程,如下图所示,,其中左侧的sources 文件夹下面的main.c就是你的主程序文件,你可以在里面添加代码,同时在左侧按鼠标右键,会弹出菜单,里面有“Add Files”或“Create Group”等,可以根据你的需要往新创建的工程里添加你自己的头文件或者C文件。
11.你可以在main.c里面编辑你的代码,如果需要加入中断,则在左侧找到Prm文件夹下面打开“P&E_ICD_Linker.prm”,然后在右侧该文件里你可以加入你自己的中断函数和中断向量入口地址,记住:你在这个Prm里定义的自己的中断函数名,要和主函数里面的中断函数名对应起来;比如我在Prm文件里定义了串口接收中断:VECTOR ADDRESS 0XFFD6 SCI0Recive_ISR则在主函数(main.c)里面这样引用该中断函数:interrupt void SCI0Recive_ISR(void){里面是你自己的代码}12.现在一个简单的工程基本创建完成,点击下面的编译按钮进行或者调试按钮就进入调试环境13.如果您点击调试(绿色类似箭头按钮)的时候没反应,那可能是您设置的Debug 路径有问题,如果您采用我的方法,比如CW3.0仅安装了Compiler,然后安装了CW4的Debugger,这样的话就要设置一下Debug的路径。
更多电子资料请登录赛微电子网CodeWarrior 使用教程第五课调试Translated from 关于调试Purging pesky pests proves productive for programmers!调试就是在你的程序代码中找到一个问题并着手去解决它的过程。
不管是谁,在编程时都难免出现一些输入或程序逻辑上的错误,一旦出现这种问题,很可能你想破了头也找不到错误在哪。
这个问题可能只是一个输入上的小错误或者只是一个变量用错了,因此你很难发现它。
但是因为这个错误的存在使得你的程序无法实现预期的功能。
有时候会更糟糕,以致你的机器都崩溃了。
这时,你就必须借助调试来解决问题。
CodeWarrior 带有一个集成的调试器,可以让你在CodeWarrior 主窗口中打开一个窗口来进行调试工作。
使用调试器的方法是,从工程菜单中选择Enable Debugger 项,然后重新编译你的目标文件。
完成上述步骤后,你的程序就会在调试窗口中运行,此时你就可以隔离并改正你找到的任何一个问题了。
通常进行调试时总要生成源程序的一个调试目标文件。
该目标文件的源文件保持不变,但是需要预先设置置一些选项才能产生该程序的调试版本。
通过点击工程窗口的弹出菜单中的调试目标文件,你就可以进入调试状态。
图5-1: 调试器界面图5-1显示了Hello World 这个程序在CodeWarrior 调试器中进行调试时的情况。
为了能够更方便地演示调试器的工作过程,我们在程序中添加了一小段循环代码(其中使用了i、x 和y 等三个变量)。
调试器允许对代码执行单步逐行调试。
当你在代码中移动时,你还可以查看程序中所有变量的值。
在这种“慢速移动(slow motion)”的方式下调试程序,你可以非常清晰地查看到代码的运行情况并很容易地解决问题。
但实际情况是,不是所有的问题都很容易解决的。
有些问题就有可能要花费你长达数周的时间去解决。
不管是经验多么丰富的编程老手,同样不可避免地要遇到这样的问题。
Tutorial IntroductionPURPOSE:-To describe the process of selecting compiler settings for a Build Targetin CodeWarriorOBJECTIVES:-Describe the build process and how a compiler is selected.-Describe how to use the settings panels to select compiler settings forlanguage-specific features, code generation, and optimization..CONTENT:-11 pages-2 questionsLEARNING TIME:-5-10 minutesWelcome to this tutorial on compiler settings. In this tutorial, you’ll learn how to select the target hardware and operating system on which the program code executes. You’ll also learn how to adjust the compiler and processor-specific controls to generate machine code that is precisely tuned for your target device.Overview of the Build Process•The build process issues commands that generate code.•.The Project Manager handles all dependencies.–The process is automatic.–If one file is changed, all dependent files are marked for update.•The object code is generated in accordance with --–Language settings–Global (IR) optimizations–Back-end settings•“Object code” is placed in the project data folder.–Users should not change the contents of the data folder manuallyLet’s begin this tutorial with an overview of the build process.A Build command can be issued in three different ways: (1) from the Project Window toolbar, (2) from the Project menu, or (3) from a keyboard sequence. The first thing the IDE does is to check dependencies, for files that have changed. Such files need to be updated or recompiled as part of the build.Note that CodeWarrior automatically handles file dependencies. If you change any file, a header file for example, all other files that use that header are automatically marked for update.The object code is generated according to your Build Target settings. There are no traditional .o files. Rather, CodeWarrior places the object code in a single flat file. This file is located inside the data folder. The data folder is in your project directory. You should never change the contents of the data folder manually. CodeWarrior manages access to the object code transparently.Selecting a Compiler•Front-end compiler --–Save files with the correct name extension.–Use the File Mappings panel to see or modify options.–Select Edit ==> Target Name Settings ==> File Mappings•Back-end compiler --–Specify a linker, the Platform target.–Select Edit ==> Target Name Settings ==> Target Settings panel–Appropriate language panels will appear.–Other target-specific panels will appear.You control which compiler is used to compile your code based on the file properties in the File Mappings panel. Each file has an associated compiler. For example, a source file with a .cpp extension uses the MW C/C++ compiler.The back-end compiler is chosen in the Target Settings panel. Choosing the Platform target, that is, the linker-setting item in this panel, causes the appropriate language panel and target-specific panel to appear.Controlling Language Features•Use the language settings panel foryour programming language.–Select Edit ==> Target NameSettings ==> C/C++ Language panel.•Modify the settings to fit your work.• Same for all CodeWarrior compilers.•For additional details see–C Compilers ReferenceLanguage-specific settings are controlled by the appropriate language panel. You should modify the settings in this panel to match your program’s requirements. Some language-specific settings you can control include: (1) function in-lining actions, (2) language support (ex. bool, wchar_t) and (3) how strict the source code should conform to the language standard.Using the Target Panel•Use the Target Settings panel–Select Edit ==> Target NameSettings ==> Target Settings.•The panel varies per target, buttypical options are listed below:–output file name–type of code being built (e.g.,executable, library)–basic options for the build•See Targeting manuals for details.The "Target" panel is specific to the chip you are targeting. The panel shown here is the EPPC Target panel. While there are differences between platform targets, the common options include: (1) the file name for the binary you create; (2) the ability to choose what kind of code you build, such as library, executable, etc.; and (3) related options.Using the Processor Panel•Use the Processor settings panel.–Select Edit ==> Target NameSettings ==> Chip Name Processor.•The panel varies per target, buttypical options are as follows:–processor selection–data alignment–some target-specific optimizations•See Targeting manuals for details.The “Processor” panel is another chip-specific panel. Again, the options in this panel vary depending on the target platform. The panel shown is the EPPC Processor Panel. Typical options include: (1) the processor type you want to target, (2) data alignment options, and (3) some chip-specific optimizations.Note that some platforms include additional panels. For example, the EPPC platform includes a EPPC Exceptions panel in the Debugger group.Global Optimizations•Optimize for size or speed.•Choose the desired level ofoptimization.–Levels 1,2 typically debug-friendly.–Levels 3,4 aren’t debug-friendly.•You can select individual optimizationsoutside of this panel.–Pragmas can be used to control fine detail.• Same for all CodeWarrior compilers.Now let’s discuss optimization, beginning with global optimization. Specific optimizations can be performed on your code, regardless of the platform target. The type of optimization performed depends on the optimization level you choose.There are two types of optimization commands available. Optimize for Faster Execution Speed or for Smaller Code Size, which tells the compiler to favor one type of optimization over the other, since the compiler actually performs both optimizations all of the time. For example, if you choose Optimize For: Faster Execution Speed, the compiler performs both speed and size optimizations, but in some cases will favor speed and thus may produce code slightly larger than optimal size. The same is true for the Optimize For: Smaller Code Size option. One option is always favored.There are four levels of optimization available. Each setting is compounded. Level 2performs all the optimizations of Level 1, plus some extras. Unlike the Optimize For: Faster Execution Speed and Optimize For: Smaller Code Size options, the optimization levelcommand can be disabled. While optimization Levels 1 and 2 are generally debug-friendly, it is advisable to disable all optimizations when debugging your code. That is recommended because the compiler might be able to “optimize out” an entire function making you unable debug the non-optimized code. For fine tuning optimizations, pragmas must be used in your code. See the C Compiler Reference for more information.Highlight 1 (E07)Highlight 2(E07A)Highlight 3(E07B)Processor-Specific Optimizations•These optimizations are found in the Chip Name Processor panel•These optimizations vary with the type of platform target.•Some typical optimizations include:–Instruction scheduling–Peephole optimizations–Data alignmentThis page summarizes the optimizations controlled by the processor-specific settings panel. This panel lets you control how the back-end generates and applies optimizations to the machine code generated for the target processor. Generally, such settings determine the following: (1) how the back-end schedules instructions, (2) how certain instruction sequences are optimized, and (3) how data is aligned in memory.Instruction scheduling arranges the instruction stream for a selected processor; it’s precisely tuned to the processor’s micro-architecture for maximum execution speed. Please note that scheduling code for one processor may hinder the code’s performance on another.The peephole optimizer examines the generated machine code and replaces certain sequences of instructions with more efficient ones. The instructions do not have to be adjacent for the CodeWarrior peephole optimizer to perform an instruction substitution.The data alignment optimizer organizes data structures so that they fit within the processor’s preferred memory access patterns. Note that aligned data can triple the processor’s data fetch rate.QuestionWhich of the following mechanisms selects the front-end language compiler?Click on your choice.A) The file extensionB) The Target Settings panelC) The Chip Name Processor panelD) The Global Optimizations panelLet’s complete this tutorial with a couple of questions.Which of the following mechanisms selects the front-end language compiler?Answer:The file extension determines which front-end language compiler CodeWarrior uses.QuestionWhich of the following mechanisms selects the back-end compiler? Click on yourchoice.A) The file extensionB) The Target Settings panelC) The Chip Name Processor panelD) The Global Optimizations panelWhich of the following mechanisms selects the back-end compiler?Answer:The Target Settings panel is where you choose the linker, which in turn specifies the back-end compiler.Tutorial Completion•CodeWarrior supports a variety of high-level languages and processor targets.–The file extension determines the front-end language parser used.–The Target Settings panel determines the back-end processor-specific code generator used.•The front-end language panel controls language-specific optimizations, support, andconformance to a language standard.•The Global Optimizations panel controls how well internal representations of theprogram are optimized.•The back-end Chip Name panel controls processor-specific optimizations.Let’s review what we discussed in this tutorial.CodeWarrior has an extensive group of settings panels that enable you to precisely controlmachine code generation. Using these panels, you can adjust the resulting machine code sothat it runs on an entire family of processors or on just one specific member of that processorfamily. This wide range of settings enables you to migrate code quickly among products thatcontain related members of a processor family, or fine-tune the code for a specific embeddedprocessor for maximum performance.11。