itsa_1_20071024
- 格式:pdf
- 大小:3.13 MB
- 文档页数:8
1C重量小于等于150磅(68KG)的包装件的扩展测试ISTA 是运输包装联盟,是包装行业的先驱。
ISTA 1系列是包装测试中最基本的测试。
用于考察包装的保护能力以及产品承受运输工具的能力,但不是严格模拟实际运输环境也没有必要。
按照ISTA标准进行包装的好处有:1 减少包装开发时间,是产品运输更有保障;2 保护产品,同时减少破损和产品损失,保持利润3 有效的平衡运输成本;4 使客户满意整个过程有三部分:概述、测试和报告。
概述就是在进入实验室测试之前提供总体的资料,测试即早实验室测试的具体程序说明,报告则是记录必要的数据并提交给ISTAISTA测试程序中的重量和高度有两种计量单位。
英制(英寸/磅)和国际单位制(米制)。
英制单位一般先用而国际单位制则标在后面的括号内。
两种单位系统都用做测量单位,但必须在此试验中前后保持一致,并使用2位有效数字,两种单位可以互相转换,但不完全等价。
1C的概述1C是对个体包装的完整测试#它可以用来衡量包装产品#可以用来比较包装设计和产品设计的好坏#包装和产品是同时考虑的而不是单独的设计#有些运输环境没有考虑,比如湿度、压力和不正当的搬运等对于不同的运输条件或满足不同的试验目的,选用其他ISTA试验标准可能更合理。
用于重量小于150磅的单个包装件的测试,当单个包装件当单个包装件打滑或有固定棘爪,且重量大于100磅则按照1D测试发货人在测试之前应该知道以下几点:产品的破坏方式和破坏程度,产品破损的允许限度是什么,以及在测试结论中确定测试后产品破坏程度的方法和可以接受的产品破坏程度。
试样必须是未是使用的产品和包装,如果试样和合格,替代品必须与原来的试样是一样的样品的数量:最少一个建议重复试验:为了保证正确确定包装产品典型的性能,ISTA#要求执行此试验标准一次,但#建议执行此试验标准五次或更多次,每次使用新的样品。
注意事项:已经经历严酷运输条件的包装件不可能被用来代表包装品的标准状况,为了确保试验的准确性,运送到已认证的实验室的产品和包装必须是:1、包装件在运往实验室的过程中要增加额外包装, 2、包装件在到达试验室后更换包装。
ISTA,您的运输包装联盟,是包装产品性能测试的全球领导者。
ISTA 1系列是最基本的性能测试类别:•它们挑战包装和产品承受运输危险的能力,但•它们不是对实际运输危险的模拟,且•不一定符合承运人的包装规定。
当适当应用ISTA程序时,ISTA程序可提供以下具体好处:•缩短包装开发时间和产品上市信心•保护产品和利润,减少损害和产品损失•经济平衡的分销成本•客户满意度和持续业务。
有三个部分:概述、测试和报告•概述提供进入测试实验室前所需的一般知识,•测试提供在实验室进行测试的具体说明,•报告指出需要记录哪些数据才能向ISTA提交测试报告。
在ISTA测试程序中,提出了两种重量和测量系统。
它们是英制(英寸-磅)和国际制SI(米制)。
英寸磅单位首先用括号中的公制单位表示,除非在某些表中单独显示。
•任何一个系统都可以作为度量单位(标准单位)使用,但是•在整个过程中始终如一地选择应使用作为标准单位。
•单位被转换成两个重要的数字,而不是精确的等价物。
非常重要:在进行测试之前,必须阅读并理解整个文档。
程序1A概述测试程序1A是针对单个包装产品的完整性测试。
•它可以用来评估包装产品的性能。
•可用于比较包装和产品设计方案的相对性能。
•包装和产品放在一起考虑,而不是分开考虑。
•一些运输条件,如湿度、压力或不寻常的搬运,可能不包括在内。
其他ISTA程序可能适合不同的条件或满足不同的目标。
具体建议:•使用随机振动代替固定位移振动,使用ISTA测试程序1G,而不是1A。
•对于应测试最小压缩值的包装产品,请使用ISTA测试程序1C。
•对于国际分销的包装产品,请考虑ISTA部分模拟性能测试程序2A。
•对于可能在小型包裹递送系统中运输的包装产品,请考虑ISTA通用模拟性能测试程序3A。
•更多信息请参考选择和使用ISTA程序和项目的指南。
程序1A概述测试程序1A包括单个包装产品在准备装运时的重量为150磅(68公斤)或更轻的测试。
例:重量超过100磅(45公斤)的单个包装产品,可以按照测试程序1E进行测试。
包裝件在150磅(68KG)以下ISTA 是運輸包裝聯盟,是包裝行業的先驅。
ISTA 1系列是包裝測試中最基本的測試。
用於考察包裝的保護能力以及產品承受運輸工具的能力,但不是嚴格模擬實際運輸環境也沒有必要。
按照ISTA標準進行包裝的好處有:1 減少包裝開發時間,是產品運輸更有保障;2 保護產品,同時減少破損和產品損失,保持利潤3 有效的平衡運輸成本;4 使客戶滿意整個過程有三部分:概述、測試和報告。
概述就是在進入實驗室測試之前提供總體的資料,測試即早實驗室測試的具體程式說明,報告則是記錄必要的資料並提交給ISTAISTA測試程式中的重量和高度有兩種計量單位。
英制(英寸/磅)和國際單位制(米制)。
英制單位一般先用而國際單位制則標在後面的括弧內。
兩種單位系統都用做測量單位,但必須在此試驗中前後保持一致,並使用2位元有效數字,兩種單位可以互相轉換,但不完全等價。
1A測試程式概述1A是對個體包裝的完整測試#它可以用來衡量包裝產品#可以用來比較包裝設計和產品設計的好壞#包裝和產品是同時考慮的而不是單獨的設計#有些運輸環境沒有考慮,比如濕度、壓力和不正當的搬運等對於不同的運輸條件或滿足不同的試驗目的,選用其他ISTA試驗標準可能更合理。
具體的建議:#使用隨機振動方式代替固定頻率振動,用ISTA測試程式的1G#需要測試包裝件的最小耐壓值是用ISTA測試程式1C#需要小件運輸的包裝件可以使用ISTA類比測試程式3C#使用ISTA測試程式可以參考附錄中的指導方針#1A用於測試重量小於150磅(68KG)的個體包裝另外:當單個包裝件放在滑車或託盤上時,且超過100鎊(45KG)個體包裝產品應按照1B測試。
發貨人在測試之前應該知道以下幾點:產品的破壞方式和破壞程度,產品破損的允許限度是什麼,以及在測試結論中確定測試後產品破壞程度的方法和可以接受的產品破壞程度。
試樣必須是未是使用的產品和包裝,如果試樣和合格,替代品必須與原來的試樣是一樣的樣品的數量:最少一個建議重複試驗:為了保證正確確定包裝產品典型的性能,ISTA#要求執行此試驗標準一次,但#建議執行此試驗標準五次或更多次,每次使用新的樣品。
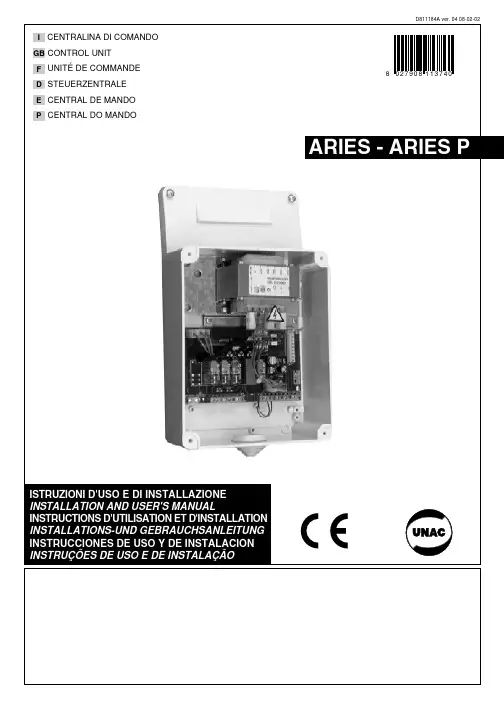
ISTRUZIONI D'USO E DI INSTALLAZIONE INSTALLATION AND USER'S MANUALINSTRUCTIONS D'UTILISATION ET D'INSTALLATION INSTALLATIONS-UND GEBRAUCHSANLEITUNG INSTRUCCIONES DE USO Y DE INSTALACION INSTRUÇÕES DE USO E DE INSTALAÇÃOCENTRALINA DI COMANDO D811184A ver. 04 08-02-02I CONTROL UNIT GB UNITÉ DE COMMANDE F STEUERZENTRALE D CENTRAL DE MANDO E CENTRAL DO MANDOP ARIES - ARIES P8027908113740a“WARNINGS” leaflet and an “INSTRUCTION MANUAL”.These should both be read carefully as they provide important information about safety, installation, operation and maintenance. This product complies with the recognised technical standards and safety regulations. We declare that this product is in conformity with the following European Directives: 89/336/EEC and 73/23/EEC (and subsequent amendments).1) GENERAL OUTLINEThe ARIES control unit has been designed for swing gates. It can be used for one or two gate controllers.The control unit mod. ARIES P can also be used to perform opening of a single actuator while keeping the other one closed (pedestrian access).2) FUNCTIONSSTOP: In all cases: it stops the gate until a new start command is given.PHOT:Functions can be set with Dip-Switch.Activated during closing.Activated during opening and closing.Rapid closingON: When the position of the gate photocells is exceeded, during both opening and closing, the gate automatically starts to close even if TCA is activated. We recommend setting DIP3 to ON (photocells only activated during closing).Blocks impulsesON: During opening, START commands are not accepted.OFF: During opening, START commands are accepted.PhotocellsON: Photocells only activated during closing.OFF: Photocells activated during opening and closing.Automatic closing time (TCA)ON: Automatic closing activated (can be adjusted from 0 to 90s)Preallarm (mod. ARIES P only)ON: The flashing light turns on abt 3 seconds before the motors start.FOR THE INSTALLER: check the boxes you are interested in.START:four-step logic Gate closedGate openDuring openingDuring closingAfter stop START: two-step logic SCA: Gate open indicating lightit opens it opensit stops and activates TCAit closesit stops and does not activate TCAit starts opening it stops and activats TCA (if activated)it closesit opensit opensoffononflashingATTENTION:Dip non used in mod. ARIES (always in OFF set).3) MAINTENANCE AND DEMOLITIONThe maintenance of the system should only be carried out by qualified personnel regularly. The materials making up the set and its packing must be disposed of according to the regulations in force.Batteries must be properly disposed of.WARNINGSCorrect controller operation is only ensured when the data contained in the present manual are observed. The company is not to be held responsible for any damage resulting from failure to observe the installation standards and the instructions contained in the present manual.The descriptions and illustrations contained in the present manual are not binding. The Company reserves the right to make any alterations deemed appropriate for the technical, manufacturing and commercial improvement of the product, while leaving the essential product features unchanged, at any time and without undertaking to update the present publication.D 811184A _04Thank you for buying this product, our company is sure that you will be more than satisfied with the product ’s performance. The product is supplied with a “WARNINGS ” leaflet and an “INSTRUCTION MANUAL ”.These should both be read carefully as they provide important information about safety, installation, operation and maintenance.This product complies with the recognised technical standards and safety regulations. We declare that this product is in conformity with the following European Directives: 89/336/EEC and 73/23/EEC (and subsequent amendments).1) GENERAL OUTLINEThe ARIES control unit has been designed for swing gates. It can be used for one or two gate controllers.The control unit mod. ARIES P can also be used to perform opening of a single actuator while keeping the other one closed (pedestrian access).2) GENERAL SAFETYWARNING! An incorrect installation or improper use of the product can cause damage to persons, animals or things.•The “Warnings ” leaflet and “Instruction booklet ” supplied with this product should be read carefully as they provide important information about safety, installation, use and maintenance.•Scrap packing materials (plastic, cardboard, polystyrene etc) according to the provisions set out by current standards. Keep nylon or polystyrene bags out of children ’s reach.•Keep the instructions together with the technical brochure for future reference.•This product was exclusively designed and manufactured for the use specified in the present documentation. Any other use not specified in this documentation could damage the product and be dangerous.•The Company declines all responsibility for any consequences resulting from improper use of the product, or use which is different from that expected and specified in the present documentation.•Do not install the product in explosive atmosphere.•The Company declines all responsibility for any consequences resulting from failure to observe Good Technical Practice when constructing closing structures (door, gates etc.), as well as from any deformation which might occur during use.•The installation must comply with the provisions set out by the following European Directives: 89/336/EEC, 73/23/EEC, 98/37/ECC and subsequent amendments.•Disconnect the electrical power supply before carrying out any work on the installation. Also disconnect any buffer batteries, if fitted.•Fit an omnipolar or magnetothermal switch on the mains power supply,having a contact opening distance equal to or greater than 3mm.•Check that a differential switch with a 0.03A threshold is fitted just before the power supply mains.•Check that earthing is carried out correctly: connect all metal parts for closure (doors, gates etc.) and all system components provided with an earth terminal.•The Company declines all responsibility with respect to the automation safety and correct operation when other manufacturers ’ components are used.•Only use original parts for any maintenance or repair operation.•Do not modify the automation components, unless explicitly authorised by the company.•Instruct the product user about the control systems provided and the manual opening operation in case of emergency.•Do not allow persons or children to remain in the automation operation area.•Keep radio control or other control devices out of children ’s reach, in order to avoid unintentional automation activation.•The user must avoid any attempt to carry out work or repair on the automation system, and always request the assistance of qualified personnel.•Anything which is not expressly provided for in the present instructions,is not allowed.3) TECHNICAL SPECIFICATIONSPower supply:...............................................................230V ±10% 50Hz Absorption on empty:.................................................................0.5A max Output power for accessories:..........................................24V~ 6VA max Max relay current:................................................................................8A Max power of motors:...............................................................300 W x 2Torque limiter:.................................................Self-transformer with 4 pos Limit switch:................................................................Adjustable run timePanel dimensions:.........................................................................See fig.1Cabinet protection:............................................................................IP55Working temperature:...............................................................-20 +55°C 4) TERMINAL BOARD CONNECTIONS(Fig.2)CAUTION: Keep the low voltage connections completely separated from the power supply connections.Fig.3 shows the fixing and connection method of the drive condensers whenever they are not fitted to the motor.JP51-2 Single-phase power supply 230V ±10%, 50 Hz (1=L/2=N).For connection to the mains use a multiple-pole cable with a minimum cross section of 3x1.5mm 2 of the type indicated in the above-mentioned standard (by way of example, if the cable is not shielded it must be at least equivalent to H07 RN-F while, if shielded, it must be at least equivalent to H05 VV-F with a cross section of 3x1.5mm 2).JP33-4 (mod.ARIES-P) 230V 40W max. blinker connection.5-6 (mod.ARIES) 230V 40W max. blinker connection.7-8-9 Motor M1 connection - 8 common, 7-9 start.10-11-12 Motor M2(r) connection - 11 common, 10-12 start.JP413-14 Open-close button and key switch (N.O.).13-15 Stop button (N.C.). If unused, leave bridged.13-16 Photocell or pneumatic edge input (N.C.). If unused, leave bridged.17-18 24V 3W max. gate open warning light.18-19 24V~ 0.25A max. (6VA) output (for supplying photocell or other device).20-21 Antenna input for radio-receiver board (20 signal - 21 braid).22 Common terminal (equivalent to terminal 13).23 Terminal for pedestrian control. It moves the leaf of motor M2 connected to terminal 10-11-12. This terminal is available only in ARIES-P control unit.JP225-26 2nd radio channel output of the double-channel receiver board (terminals not fitted on ARIES but fitted on ARIES-P) contact N.O.JP1 Radio-receiver board connector 1-2 channels.5) FUNCTIONSDL1:Power-on LedIt is switched on when the board is electrically powered.START: four-step logic: (DIP5 OFF)gate closed:..................................................................................it opens during opening:............................................... it stops and activates TCA gate open:................................................................................... it closes during closing:.................................... it stops and does not activate TCA after stop:.........................................................................it starts opening START: two-step logic: (DIP5 ON)gate closed:..................................................................................it opens during opening:................................it stops and activats TCA (if activated)gate open:....................................................................................it closes during closing:..............................................................................it opens after stop:.....................................................................................it opens STOP: In all cases: it stops the gate until a new start command is given.PHOT:Functions can be set with DIP-SWITCH.Activated during closing if DIP3-ON.Activated during opening and closing if DIP3-OFF.SCA: Gate open indicating light.with gate closed:...................................................................................off when gate is opening:...........................................................................on with gate open:.......................................................................................on when gate is closing:.....................................................................flashing 6) DIP-SWITCH SELECTION DIP1 Rapid closingON: When the position of the gate photocells is exceeded, during both opening and closing, the gate automatically starts to close even if TCA is activated. We recommend setting DIP3 to ON (photocells only activated during closing).OFF: Function not activated.DIP2 Blocks impulsesON: During opening, START commands are not accepted.OFF: During opening, START commands are accepted.DIP3 PhotocellsON: Photocells only activated during closing.OFF: Photocells activated during opening and closing.D 811184A _04DIP4 Automatic closing time (TCA)ON: Automatic closing activated (can be adjusted from 0 to 90s).OFF: Automatic closing not activated.DIP5 Control logicON: 2-step logic is activated (see start paragraph).OFF: 4-step logic is activated (see start paragraph).DIP6: Preallarm (mod.ARIES P only)ON: The flashing light turns on abt 3 seconds before the motors start.OFF The flashing light turns on simultaneously with the start of the motors.ATTENTION:Dip non used in mod. ARIES (always in OFF set).7) TRIMMER ADJUSTMENTTCA This adjusts the automatic closing time, after which time the gate automatically closes (can be adjusted from 0 to 90s).TW This adjusts the motor working time, after which time the motor stops (can be adjusted from 0 to 40s).TDELAY This adjusts the closing delay time of the second motor (M2).8) MOTOR TORQUE ADJUSTMENTThe ARIES control unit has electric torque adjustment which allows the motor force to be adjusted.The adjustment should be set for the minimum force required to carry out the opening and closing strokes completely.Adjustment is carried out by moving the connection 55 (fig.3) on the tran-sformer sockets as described below:Pos.T1 1st TORQUE (MINIMUM TORQUE)Pos.T2 2nd TORQUE Pos.T3 3rd TORQUEPos.T4 4th TORQUE (MAXIMUM TORQUE)4 motor torque values can be obtained.To gain access to the torque adjustment sockets, disconnect the mains supply and remove the protective case “P ” of the transfomer.CAUTION: Excessive torque adjustment may jeopardise the anti-squash safety function. On the other hand insufficient torque adjustment may not guarantee correct opening or closing strokes.9) MAINTENANCE AND DEMOLITIONThe maintenance of the system should only be carried out by qualified personnel regularly. The materials making up the set and its packing must be disposed of according to the regulations in force.Batteries must be properly disposed of.WARNINGSCorrect controller operation is only ensured when the data contained in the present manual are observed. The company is not to be held responsible for any damage resulting from failure to observe the installation standards and the instructions contained in the present manual.The descriptions and illustrations contained in the present manual are not binding. The Company reserves the right to make any alterations deemed appropriate for the technical, manufacturing and commercial improvement of the product, while leaving the essential product features unchanged, at any time and without undertaking to update the present publication.D811184A_04ARIES/ARIES-P - Ver. 04 -23。
isa 101标准全文共四篇示例,供读者参考第一篇示例:ISA 101是一种人机界面(HMI)标准,旨在提高工业自动化系统中的操作人员效率和生产效率。
ISA 101标准的发布对于提升工业自动化系统的安全性、可靠性和可操作性起到了重要的作用。
ISA 101标准于2004年首次发布,随后在2015年进行了重大更新。
该标准详细规定了工业自动化系统中人机界面的设计原则,包括界面布局、颜色使用、字体大小、图标设计等方面。
ISA 101标准的主要目标是使操作者能够更加方便地监控和控制工业过程,从而提高生产效率。
在工业自动化系统中,人机界面起到了至关重要的作用。
一个好的人机界面设计可以让操作员快速准确地获取信息,做出正确的决策。
相反,一个糟糕的人机界面设计可能导致操作员误解信息,造成严重的事故。
ISA 101标准的出现,为工业自动化系统的人机界面设计提供了统一的标准和指导。
ISA 101标准主要包括以下几个部分:1. 界面布局:ISA 101标准规定了界面布局应该符合人类视觉习惯,遵循信息分级原则。
重要信息应该显示在显著位置,次要信息则可以放在不太显眼的位置。
界面布局应该简洁清晰,避免信息过载和混乱。
2. 颜色使用:ISA 101标准规定了颜色在人机界面设计中的使用原则。
不同颜色应该用于表示不同类型的信息,例如红色表示紧急情况,绿色表示正常运行。
颜色的选择应该符合人类视觉的感知规律,避免色彩过于浓烈或反差过大。
3. 字体大小:ISA 101标准规定了字体大小应该适中,易于阅读。
过小的字体会导致操作员难以辨认,从而影响操作效率。
字体的选择也应该考虑到人类视力特点,避免出现模糊或者眩晕的情况。
4. 图标设计:ISA 101标准还规定了图标设计原则,包括图标的形状、颜色、大小等方面。
图标应该简洁易懂,能够快速传达信息。
图标的设计也应该考虑用户的文化背景和操作习惯,避免误解或者混淆。
ISA 101标准的发布对于工业自动化系统的人机界面设计起到了积极的促进作用。
![[整理版]ISTA-1A中文版](https://uimg.taocdn.com/22cbe2273868011ca300a6c30c2259010302f341.webp)
针对小于或等于150磅的包装产品ISTA(国际运输安全协会)1系列非模拟整体测试程序ISTA(国际运输安全协会),您运输包装的合作伙伴,是全世界包装成品性能测试中的引领者ISTA(国际运输安全协会)测试系列是产品性能测试最基本的一类测试,主要针对包装及产品对运输损坏抵抗力测试,但不是指对产品的实际运输损坏的模拟,且并不一定严格符合承运者实际包装规则如果操作恰当,ISTA(国际运输安全协会)能够提供很多实际性的利益,如缩短包装时间,增加产品可信度产品保护,减少产品损伤,带来利润经济实惠的分销成本令客户满意,并维持长期交易共分为三个部分:概述,测试和报告概述部分讲了实验室测试前的基本知识测试部分讲了实验测试时的具体操作行动指令报告部分讲了记录的数据资料报告应递交到ISTAISTA(国际运输安全协会)测试程序中提供了两个重量和尺寸大小版本系统。
即英制版本(英寸-磅)及国际单位版本(米制)。
括号内提供了英寸-磅单位与米制单位,其他一些表格中则分开显示每一个单位系统版本均可选择,但选择其中一种单位系统后,整个测试程序中应保持一致,不能再选择另外一个单位系统。
两个单位均能够转换成实际意义的数据,但不是绝对相等非常重要:测试前须阅读并理解整个文件序言测试程序1A概述测试程序1A是针对单个包装产品的整体测试能够用来评估产品性能能够用于比较包装及产品设计更改后的相关性能包装与产品视为一个整体,不分开考虑未包括诸如潮湿,受压及异常搬运等运输条件状况其他一些ISTA(国际运输安全协会)程序适合于不同的条件或满足其他目的具体建议:实施随机振动而非固定位移,使用ISTA(国际运输安全协会)测试程序1G而非1A使用ISTA(国际运输安全协会)测试程序1C来测量包装产品的最小抗压值使用ISTA(国际运输安全协会)部分即时性能测试程序2A来测量国际运输分销产品使用ISTA(国际运输安全协会)全面即时性能测试程序3A来测量小包袋运输包装产品更多信息,请参考选用ISTA(国际运输安全协会)测试程序项目指导测试程序1A概述测试范围测试程序1A涵盖了重量小于或等于150磅(68千克)单个包装运输产品测试例外:对于置于卡板上其重量大于100磅(45千克)的单个包装产品,应按照测试程序1E进行产品损伤的容许及降级接受测试前承运人应确定什么构成对产品的损伤什么程度范围内损伤可容许测试结论中决定产品条件的正确方法测试结论中可接受的包装条件更多信息,请参考选用ISTA(国际运输安全协会)测试程序项目指导―――――――――――――――――――――――――――――――――――――――测试样品测试样品应是未经测试的实际包装和产品。
个别已包装产品的性能试验150磅(68千克)或小于150磅(68千克)ISTA 1系列完整性试验程序前言有三部分:概况、测试和报告z概况:提供走进试验室前所需的常识;z测试:给出在实验室做试验的特定指示;z报告:说明为了向ISTA提交试验报告而应记录的数据。
“ISTA试验程序”和“试验项目”是全世界已包装产品性能试验的主要指数。
在ISTA试验程序中给出了两个体系的度量衡。
它们是英制(英寸-磅)和国际单位制(米制/公制)。
‘英寸-磅’单位作为首选单位,而‘米制/公制’单位紧随其后的圆括号内,除了单位需分开显示的某些表中外。
z两种单位制中的任一种单位制均可作为度量单位(标准单位),但z在整个试验程序中应使用一致的标准单位;z单位被换算为两个重要的数字;z不是精确的等值;小心:在进行一项试验前,应阅读并理解整个文件。
概况“试验程序1A”是个别已包装产品的一个完整性试验。
z可用于评估一个已包装产品的性能;z可用于比较包装和产品设计的相对性能;z包装和产品被同时考虑,而不是分开考虑;z可以不包括某些运输条件,如潮湿、压力或者异常搬运。
其它的“ISTA程序”可适用于不同的条件或者满足不同的目标要求。
特别建议:z用随机振动代替固定的位移振动;采用“ISTA完整性试验程序1G”,而非“1A”。
z更详细信息,请参考“选择和使用ISTA项目与程序指南”。
ISTA 1系列试验是由完整性试验程序组成的基本试验。
z这些试验不是实际运输危险因素的模拟试验;z不必要遵守承运人的包装规定。
当被正确应用时,ISTA程序将带来实际利益:z减少损坏;z经济上平衡成本;z改进客户满意度;©2000国际安全运输协会版权所有 1A版本日期:1999年6月;修订日期:2000年7月第1/11页范围“试验程序1A”涵盖重量为150磅(68千克)或者小于150磅(68千克)的个别已包装产品的测试(当准备装运时)。
除外:在可见滑板或者货盘上的且重量超过100磅(45千克)的个别已包装产品可以根据“试验程序1E或者3E”进行测试。
ITAS考试系统使用手册ITAS考试系统使用手册.............................................................. 错误!未定义书签。
1运行教师端.. (1)1.1运行教师端程序 (2)1.2清除数据 (2)1.3导入数据 (2)1.4输入密钥 (3)1.5设置端口 (3)2考场监控 (3)2.1启动考场监控 (3)2.2开启考次 (4)2.3浏览学生信息 (5)2.4开始考试 (5)2.5换机考试 (6)2.6 重新考试 (6)3 结束考试 (7)3.1结束考试 (7)3.2导出分数 (8)3.3导出成绩 (8)4退出系统 (8)5 学生 (9)5.1登录入口 (9)5.2 初始化环境 (9)5.3 登录 (10)5.4 信息确认 (10)5.5 作答 (11)5.6 提交试卷 (12)5.7 考试结束 (12)1运行教师端1.1运行教师端程序1.2清除数据单击“清除历史数据”复选框(如果继续考试则不要选中,这样就会保留上次的数据,直接跳到第六步),在弹出的系统提示中选择“是”,单击下一步。
1.3导入数据单击“导入考试数据文件”,导入考试试卷,单击下一步。
1.4输入密钥输入数据密钥,单击下一步。
正规考试才会出现输入数据密钥界面,目的是保护数据安全. 1.5设置端口在端口号中选择合适的的端口号,默认情况下请不要修改,单击下一步。
如果出现WEB端口创建失败请更改端口,端口设置范围(8000-9000之间).2考场监控2.1启动考场监控1、在任务栏右下角会显示一个图标.右键单击该图标弹出快捷菜单,选择“考场监控”(图一)弹出考场监控界面(图二)。
图一图二2.2开启考次单击“开启考次数据”,弹出监考教师登陆对话框,选择相应的考次,老师代码保持默认值,单击“登陆”开启考次数据。
2.3浏览学生信息选择其中某个考生出现如下界面。
2.4开始考试单击“开始考试”,弹出系统提示框,单击提示框中“是”选项开始考试,如图1,考场时间开始计时,如图2。
Participant Help Guide for Completing Food Records Using the Automated Self-Administered 24-Hour Dietary Assessment Tool (ASA24®)ContentsIntroduction (2)Report meals and snacks (7)Find foods, drinks, and dietary supplements (8)My foods and drinks (15)Add details (20)Review and finish (22)General questions (26)ASA24® is a registered trademark of HHS.Last Reviewed November 7, 2017.IntroductionYou have been asked to complete a food record by using the Automated Self-Administered 24-Hour Dietary Assessment Tool (ASA24).A food record captures detailed information about all foods, drinks, and supplements (including vitamins, minerals, herbals, and other dietary supplements) you consumed. You may be asked to complete the record for a single day or for multiple consecutive days.•For a single-day food record: On the day you are asked to report, log in every time you eat or drink, and enter all of the foods, drinks, and dietary supplements you had. On the following day, you can still log in to add items and make changes to the previous day.•For a consecutive-day food record: For each day you are asked to report, log in every time you eat or drink, and enter all of the foods, drinks, and dietary supplements youhad. On the day following your last reporting day, you can still log in to add items andmake changes to any of the previous days.It should take about 30 minutes overall to report all your meals and everything you ate and drank for a single day.This help guide provides answers to frequently asked questions; however, if it does not address your specific question(s), please contact the person who asked you to complete the food record.Question: How do I complete a food record using the ASA24 system?Answer: To complete a food record, you will be asked to keep a record of everything you had to eat and drink for one or more days, depending on the instructions you were given. The first step is to report an eating occasion such as a meal, snack, just a drink, or just a supplement. You will then search for foods, drinks, and dietary supplements (vitamins, minerals, herbals, etc.) you consumed by adding to your meal or snack. Finally, you will add details about your foods, drinks, and dietary supplements, such as how they were prepared, the amount you ate or drank, and anything added (such as butter on potatoes, milk to cereal). For dietary supplements, you will be asked about dosage.Image:Report meals and snacksQuestion: How do I add a meal or snack?Answer: Select Report a Meal at the bottom of the My Foods & Drinks screen. Meals include breakfast, lunch, and dinner, as well as eating occasions such as when you have snacks, just a drink, or just a supplement. After you report your meal or snack, you will be asked for details, such as what meal it was and what time you had it. Once you enter meal details, select Find Foods and Drinks in the lower right to add foods, drinks, and dietary supplements you had at this meal.Image:Find foods, drinks, and dietary supplementsQuestion: How do I add a food, drink, or dietary supplement (vitamins, minerals, herbals, or other dietary supplements)?Answer: After you have added a meal, select Find Foods and Drinks in the lower right-hand corner to add foods, drinks, and dietary supplements. To add additional items to a meal you have already reported, select +Add within that meal on the My Foods & Drinks page. Image:Question: Can I save foods, drinks, and dietary supplements as “favorites” so that I don’t have to search for them later?Answer: Yes. Select the Tools button and then select the Favorite icon (a star) to add foods, drinks, and dietary supplements to your favorites list. Access your favorites list by selecting the star on the bottom left of the Find Foods & Drinks screen (next to the Help button). Image:Question: How do I enter restaurant foods and drinks?Answer: Some foods from restaurants are identified by the restaurant name, but others are not. Try searching using the name of the restaurant. If you do not find what you are looking for, search or use the filter categories to find the food you ate or drank using a general description, like hamburger, soda, taco, or milkshake.Question: Can I enter a recipe?Answer: ASA24 does not allow you to add recipes. Please search for a food or drink similar to what you ate or drank. If you cannot find the food or drink, please see, “What do I do if I can't find a food, drink, or dietary supplement?” (p. 12 in this guide).Question: How do I filter my search results?Answer: On the left side of the search results, there are filter categories that can be used to shorten the list of foods, drinks, and dietary supplements that appear. Check the box next to one of the categories—the search results will then include only those items within the category you chose.Image:Question: What do I do if I can’t find a food, drink, or dietary supplement?Answer: First, search for something close. If you still can’t find what you are looking for, scroll to the bottom of the search results and select I can’t find what I am looking for. You can then add the unfound food, drink, or dietary supplement to your meal or snack.Image:Question: How do I delete a food, drink, or dietary supplement?Answer: Select the Delete icon (a trash can) next to the food, drink, or dietary supplement you want to delete.Image:Question: What do I do after I'm done adding all my foods, drinks, and dietary supplements to a meal or snack?Answer: After you report everything you had to eat and drink at a meal or snack, select the Finish with This Meal button. You will then move on to report the details of each food and drink in that meal, such as how much you had and whether you added anything (for example, milk to cereal). After you finish entering details for each meal or snack, you will be asked if this was your last meal of the day. If it was your last meal, select Yes;otherwise select No and during the day, log in again to report each meal or snack you consume. From the home page, select Report a Meal to add more meals and snacks.Image:My foods and drinksQuestion:What do I do after I've reported everything I ate and drank, and all my dietary supplements for a day?Answer:After you have completed the details for your last meal of the day, you will be asked if you are done entering all meals for the day. When you select Yes, the My Foods & Drinks page will appear and you can review what you reported to ensure you did not forget anything. After reviewing, select Finish.Image:Question:How do I change the time, place, or other information about a meal or snack?Answer: On the My Foods & Drinks screen, select the Edit icon (a pencil) to the right of each meal or snack listed. The details of your meal or snack will be displayed and you can make changes.Image:Question:How can I move from one day to another in a consecutive-day food record? Answer: From the My Foods & Drinks page, select the Change Day button at the top right to move from one day to another within a food record.Image:Question: How do I delete a meal or snack?Answer: Select the Delete icon (a trash can) on the right of side of the meal or snack you want to delete. All foods, drinks, and dietary supplements associated with the meal will be removed. If you want to delete just a single item from a meal or snack, select the Tools button next to the item you wish to delete and then select the Delete icon that appears.Image:Question: What do I do if I selected Next but then want to add another food, drink, or dietary supplement, or to make changes?Answer: To add a food, drink, or dietary supplement or make changes, select the orange Home icon in the upper left corner. This will bring you to the My Foods & Drinks page, where you can add foods, drinks, and dietary supplements and make changes.Image:Add detailsQuestion: Why can’t I add salt and pepper to my foods?Answer: Salt and pepper aren’t included in the ASA24 system so you don’t need to add them. Question: What if the portion size choices shown don’t match what I had?Answer: Choose the portion size that is the closest to what you ate or drank. If the amount you had was smaller or larger than the smallest or largest portion image shown, you can select Less than or More than to report your portion size. Remember that the portion size pictures show how much you ate, not what you started with or were served.Image:Question: How do I report something that I added to my food or drink?Answer: When reporting details about your foods and drinks, you may be asked whether you added anything, like cream cheese to your bagel, lemon to your tea, or milk to your cereal. Cream cheese and lemon are examples of what are called additions. If you have already reported your addition(s) as a separate item, there is no need to report them again at this point. If you have not already reported the addition(s) to a food or drink, search for and add them when asked.Image:Review and finishQuestion: What do I do if I want to make changes during the final Review?Answer: Select Make Changes at the bottom right of the Review screen to go back to My Foods & Drinks. Edit icons next to each meal, food, drink, and dietary supplement allow you to make changes. You may have to select the words show details to see the additions you entered and to access the Edit icon.Image:Question:How do I copy a food, drink, or dietary supplement from one meal to another? Answer: If you had the same food, drink, or dietary supplement at more than one meal or snack, after you’ve entered it once, you can copy it from one meal to another. Next to the item you would like to copy, select the Tools and then the Copy icon (a piece of paper with the corner folded). A drop-down list will appear with the meals and snacks you already reported. You will then be able to select which meal you want to copy an item to.Image:Question: How do I move a food, drink, or dietary supplement from one meal to another?Answer: Select the Tools button next to the food you want to move; then select the Move icon (with four arrows pointing in all directions). You will then be able move the item to a meal you already reported using a drop-down list.Image:Question:How do I change a food, drink, or dietary supplement that I have reported?Answer: Use the icons within the Tools button to the right of the item you have reported to delete, move, copy, or edit it. Depending on the page you are on, you may need to select the words show details to view details and access the Edit icon.Image:General questionsQuestion: What should I do when I have finished reporting one meal or snack? How do I exit? Answer: You can select Finish Later at the top right corner of the screen to exit ASA24. You will need to log in again the next time you want to report a meal or snack. Your information is automatically saved as you complete each step.Image:Question: I'm stuck and can't move on—what should I do?Answer: Make sure that you have answered all the questions on the screen. Most screens have a Next button that won’t be active until you answer everything. If your internet browser or computer is not responding and you need to shut down, you can log back in within the time limit set by the research study to finish – your information is saved as you go so you will be able to pick up close to where you left off.If you require further assistance, please contact the person who asked you to complete ASA24. Question: How do I change the text size to be larger or smaller?Answer: Select one of the two As (A A) in the top right corner to make the text size smaller or larger.Image:Question: Where can I find help?Answer: Help is available in three places:1. Select Help at the bottom left to find answers to frequently asked questions.2. Select the yellow question marks (?) when they appear to see additional help for specific tasks.3. Select Show Tips at the top right to display helpful tips as you complete ASA24.If you require further assistance, please contact the person who asked you to complete ASA24. Image:。
1A 程序概述试验标准1A 适用于试验不超过150lb(68kg)的单一包装产品的运输试验。
例外 对于重量超过100磅(45公斤)堆放在一可见滑板或托盘上的单一包装的产品,应根据试验标准1E 进行试验。
运输者在试验前需确定下列几点: • 产品损坏包括哪些方面? • 如果可以,产品破损的允许限度是什么? • 试验结束后决定产品状况的正确方法,以及, • 试验下结论时判断可接受的产品包装状况; 对于有关此确定过程的其它资料请参阅选择及使用ISTA 试验标准及试行方案指南。
样品应该是未经过试验的实际包装和产品,但若没有实际包装或产品,代用件尽可能和实际包装或产品一样。
所需样品的数量: • 此试验标准中需要一个样品。
建议重复试验: 为了保证包装产品的试验结果具有代表性,ISTA 协会 : • 要求执行此试验标准一次,但 • 建议执行此试验标准五次或更多次,每次使用新的样品。
注意: 已经承受严峻运输条件的包装品不可能被用来代表包装品的标准状况,为了确保在理想状况下的试验,运输到已认证的实验室去试验的产品和包装必须是: • 包装产品在运往实验室的过程中要额外加外包装,或者, • 包装产品在到达试验室后更换包装。
每一试验样品必须按照下表中列出的次序来进行试验。
1A 所需试验设备 固定位移振动试验: • 能产生1英寸(25mm )固定制位移,或产生符合ASTM (美国材料试验协会)D999-01试验标准仪器章节方法A1或A2要求的可控位移的振动试验系统。
振动台产生的旋转运动或垂直线性运动都符合要求。
· 0.06英寸(1.5mm )厚,大约2英寸(50mm )宽,适当长度的金属薄片。
· 测量振动频率-每秒循环次数(HZ )或每分周数(CPM )的测速仪器或适当的指示仪。
· 自动计时器或秒表。
下列任一设备都可用于冲击试验所需的设备:1A 程序开始之前 开始试验之前,应按下表程序标识样品的面,棱和角。
Test Procedure 1A covers testing of individual packaged-products weighing 150 pounds (68kg) or less when prepared for shipment.EXCEPTION:Individual packaged-products on a visible skid or pallet and that weigh more than 100 pounds (45 kg) may be tested according to Test Procedure 1E.The shipper shall determine the following prior to testing: • What constitutes damage to the product and• what damage tolerance level is allowable, if any, and• the correct methodology to determine product condition at the conclusion of the test and • the acceptable package condition at the conclusion of the test.For additional information on this determination process refer to Guidelines for Selecting and Using ISTA Procedures andProjects .Samples should be the untested actual package and product, but if one or both are not available, the substitutes shall be as identical as possible to actual items.Number of samples required:• One sample is required for the tests in this procedure.Replicate Testing Recommended:To permit an adequate determination of representative performance of the packaged-product, ISTA: • Requires the procedure to be performed one time, but• Recommends performing the procedure five or more times using new samples with each test.NOTE:Packages that have already been subjected to the rigors of transportation cannot be assumed to represent standardconditions. In order to insure testing in perfect condition, products and packages shipped to certified laboratories for testing must be:• over-packaged for shipment to the laboratory or • repackaged in new packaging at the laboratory.The tests shall be performed on each test sample in the sequence indicated in the following table:Sequence #Test Category Test Type Test Level For ISTA Certification1VibrationFixed Displacement1 in. (25mm) peak to peak at a freq. to be determined Required DropHeight varies withpackaged-product weight Alternative Incline(Conbur) Impact Velocity varies with packaged-product weight 2 ShockAlternative HorizontalImpactImpact Velocity varies with packaged-product weightRequiredFixed Displacement Vibration Test:• Vibration Test System with a 1 inch (25 mm) fixed or controlled displacement complying with Method A1 or A2 of theapparatus section of ASTM D 999-01.Rotary or vertical linear motion of the platform is acceptable.Metal shim 0.06 inch (1.5 mm), thick approximately 2.0 inches (50 mm) wide and at a convenient length.Tachometer or suitable indicator for determining vibration frequency in cycles per second (Hz) or cycles per minute (CPM). Automatic timer or stopwatch.The following alternatives are acceptable for the equipment required for the Shock Test:You shall know the packaged-products:•gross weight in pounds (kg), and•outside dimensions of Length, Width and Height (L x W x H) in inches (mm or m)CAUTION:A restraining device or devices shall be used with the vibration test system to:•Prevent the test specimen from moving off the platform and•Maintain test orientation of the packaged-product, but•The device or devices shall not restrict the vertical motion of the test specimen during the test.Familiarity with the following formula is required to calculate the test duration after the frequency required to bounce thepackaged-product is determined in the Vibration Test Block:14, 200 Vibratory ImpactsTest Duration in Minutes =Cycles Per Minute (CPM) or [Cycles Per Second (Hz) x 60]The chart below shows example Test Duration’s calculated for several frequencies:CPM Hz Test Duration in Minutes150 2.5 95180 3.0 79210 3.5 68240 4.0 60270 4.5 53300 5.0 48The test drop height varies with the weight of the packaged-product. Find the weight of the packaged-product in thefollowing chart to determine a drop height or an equivalent impact velocity to be used for a substituted drop:Packaged-Product Weight Drop Height Impact VelocityEqual to or greater than But Less than Free Fall Incline or Horizontal lb kg lb kg in. mm ft/s m/s3.90 0 21 10 30 760133.521 10 41 19 24 610 113.041 19 61 28 18 460 1061 28 100 45 12 310 8.02.52.0100 45 150 68 8 200 6.6The test method requires the packaged-product to be dropped in several different package orientations.A drop test must be performed in all required orientations where dropping the packaged-product is practical.If dropping in a required orientation is not practical an equivalent incline or horizontal test can be substituted for thatorientation.When using impact velocity, if any test in a Test Sequence is below the required minimum level, that sequence eventmust be repeated until the test impact velocity meets the minimum.The test blocks that follow contain tables that indicate the required steps for each test in the procedure.FIXED DISPLACEMENTStep Action1 Put the packaged-product on the vibration table so that face 3 rests on the platform.2 Start the vibration system to vibrate at 1.0 inches (25 mm) total displacement at the machine’s lowest frequency.3 Maintain a fixed displacement at 1 inch (25 mm) and slowly increase the frequency (speed) of the vibration table until the packaged-product begins to momentarily leave the surface of the platform.4 Hold the vibration frequency to that determined in Step 3.5Can a metal shim be intermittently moved between the bottom of the longest dimension of the packaged-product and the surface of the platform? • If Yes , hold that frequency and then continue to next Step.•If No , then increase the frequency until the requirement of Step 5 is met and hold that vibration frequency.6 Determine the test duration in minutes using the formula indicated in the Before You Begin Block and the CPM or Hz frequency identified in Step 5.7 Begin the vibration duration.8Are you using a vertical linear motion on the vibration system? • If Yes , then go to Step 12.•If No , then continue with the next Step.Stop the vibration test half way through the vibration duration and perform the appropriate action as indicated in the table below:IF a single 90º horizontal rotation is… THEN perform a horizontal rotation of … Possible90º as the specimen rests on the platform. 9Not practical because of the size of the packaged-product or the stability of the packaged-product.180º as the specimen rests on the platform.10 Start the vibration system and continue the vibration test at the frequency used in Step 7.11Can a metal shim be intermittently moved between the bottom of the longest dimension of the packaged-product and the surface of the platform? • If Yes , then continue to next Step.•If No , then slowly increase the frequency until the requirement of Step 11 is met.12 Complete the vibration duration.13 Inspection of the packaged-product for visible damage is allowed, provided inspection does not alter, in any way, the current condition of the package or the condition or position of the product(s). 14 Vibration testing is now complete. Go to the Shock Test Block.DROPStepAction1 Determine the method(s) of test and the required drop height or impact velocity in the Before You Begin Block.2Do you have a packaged-product with only 6 faces as identified in the Face, Edge and Corner Identification Block? • If Yes , continue with the next Step. •If No , then go to Step 6.3 Test the packaged-product according to the method(s) and level(s) determined in Step 1. Follow the sequence in the table below. Sequence #Orientation Specific face, edge or corner1 Corner most fragile face-3 corner, if not known, test 2-3-52 Edge shortest edge radiating from the corner tested3 Edge next longest edge radiating from the corner tested4 Edge longest edge radiating from the corner tested5 Face one of the smallest faces6 Face opposite small face7 Face one of the medium faces8 Face opposite medium face9 Face one of the largest faces 410Faceopposite large face5 All testing is now complete. Go to the Test Report Block.6 Select a bottom face corner to replace the corner required in Step 4 Sequence 1 to begin the test.7 Identify the edges of the packaged-product that meet the Step 4 Sequence 2 through 4 requirements.8 Select any 6 faces to replace the faces required in Step 4 Sequence 5 through 10.9 Using the corner, edges and faces from Steps 6 through 8 go to Step 3 and proceed. 10 All testing is now complete. Go to the Test Report Block.The packaged-product has satisfactorily passed the test if, upon examination, it meets the Product Damage Tolerance and Package Degradation Allowance.ISTA Certified Testing Laboratories:• Should file a test report on all ISTA Test Procedures or Projects conducted.• Shall file a test report on all ISTA Test Procedures or Projects conducted to obtain Transit Tested PackageCertification or Acknowledgement.For additional information, refer to Guidelines for Selecting and Using ISTA Test Procedures and Projects .ISTA Transit Tested ProgramThe ISTA Transit Tested Certification Mark as shown is a:• registered certification mark and• can only be used by license agreement and• by a member of the International Safe Transit Association.When a member prints this certification mark on a packaged-product with their license number they are showing their customer and the carrier that ithas passed the requirements of ISTA preshipment testing.In order to maintain its certified status and eligibility for identification with the TRANSIT TESTED Certification Mark, each packaged-product must be re-tested whenever a change is made in the:• Product or • Process or • Package.Changes in the product include changes in: • Design or • Size or • Materials. Changes in the process include changes in: • Manufacturing or • Assembly or • Filling.Changes in the package include changes in: • Configuration or • Dimensions or • Weight or • Materials or • Components. As a quality control procedure, packaged-products should be re-tested frequently, for example, yearly.This Test Procedure is published by: International Safe Transit Association1400 Abbott Road, Suite 160, East Lansing, Mi 48823-1900 USACopyright © 2005 by International Safe Transit Association. All rights ReservedNo part of the contents of this Test Procedure may be reproduced or transmitted in any form or by any means without the written permission of the publisher.Order Information: Additional copies of this Test Procedure, the ISTA RESOURCE BOOK (in print or on CD ROM) may be ordered online at or by contacting ISTA at (+1) 517.333.3437.TRANSIT TESTED MANUFACTURER’S LICENSE NUMBER:®INTERNATIONAL SAFE TRANSIT ASSOCIATION。
ista 试验标准选择及使用指南English Answer:1. Introduction.ISTA (International Safe Transit Association) is a global organization that develops and publishes package testing standards for various industries, including the transportation of products. ISTA testing standards are widely used by manufacturers, distributors, and logistics providers to ensure that products can withstand the rigors of transit without sustaining damage.2. Selecting the Appropriate ISTA Test Standard.Choosing the appropriate ISTA test standard depends on several factors, including:Product characteristics: The size, weight, shape, and materials used in the product will determine the type oftesting required.Intended mode of transportation: The mode of transportation (e.g., truck, air, ocean) will subject the product to different types of stresses.Environmental conditions: The product may be exposed to extreme temperatures, humidity, and vibrations during transit.3. ISTA Test Standards.ISTA publishes a range of test standards, each designed for specific product types and transportation environments. Some of the most commonly used ISTA test standards include:ISTA 1: General vibration test for packaged products.ISTA 2: Random vibration test for packaged products.ISTA 3: Shock test for packaged products.ISTA 4: Drop test for packaged products.ISTA 6: Compressive strength test for packaged products.4. Using ISTA Test Standards.To effectively use ISTA test standards, follow these steps:Select the appropriate test standard: Determine the standard that best aligns with the product characteristics, transportation mode, and environmental conditions.Prepare the test samples: Ensure that the test samples are representative of the actual products being shipped.Perform the tests: Conduct the tests according to the specified procedures in the standard.Evaluate the test results: Analyze the data collected during the tests to determine if the product meets theperformance criteria.5. Benefits of Using ISTA Test Standards.Utilizing ISTA test standards offers several benefits, including:Reduced product damage: By simulating real-world transportation conditions, ISTA testing helps identify potential vulnerabilities and mitigate the risk of product damage.Improved packaging design: The test results provide insights into the effectiveness of packaging and can guide improvements to enhance product protection.Increased customer satisfaction: Delivering products in undamaged condition enhances customer satisfaction and reduces the likelihood of returns or claims.Cost savings: Preventing product damage can save money on replacement costs, shipping expenses, and customerreimbursements.中文回答:1. 简介。
深入理解ANSI AB1-2007标准引言:在当今全球化的商业环境中,标准化和合规性是关键。
作为美国国家标准化组织(American National Standards Institute, ANSI)发布的重要标准之一,ANSI AB1-2007标准在各个行业中都发挥着重要作用。
主体:1. 标准简介ANSI AB1-2007标准,全称“American National Standard for Building Automation and Control Networks (BACnet)”,是一种用于建筑自动化和控制网络的标准。
它规定了设备如何在网络上进行通信、数据交换以及互操作性的规则。
2. 标准内容ANSI AB1-2007标准主要包括以下几个部分:- 数据链接层:定义了如何将信息打包成数据包并在网络上发送。
- 网络层:定义了如何在网络中寻址和路由数据包。
- 应用层:定义了各种服务和对象,如温度控制、照明控制等。
3. 标准意义该标准的实施为建筑自动化系统提供了统一的语言,使得不同厂商的设备可以无缝地协同工作,提高了系统的稳定性和可靠性。
同时,也降低了设备的维护成本和升级难度。
4. 实施案例许多大型建筑物和设施,如医院、机场、酒店和办公楼等,都已经成功地采用了ANSI AB1-2007标准。
这些项目不仅实现了高效的能源管理,而且大大提高了用户体验。
结论:总的来说,ANSI AB1-2007标准是建筑自动化领域的一个重要里程碑。
随着技术的进步和社会的发展,我们期待这个标准能够持续进化和完善,为我们的生活带来更多的便利和舒适。
参考文献:[1] ANSI AB1-2007: American National Standard for Building Automation and Control Networks (BACnet)[2] Guide to the BACnet Standard, ASHRAE Handbook—HVAC Applications.[3] An Overview of BACnet Protocol, Journal of Computing in Civil Engineering.注:本文根据公开资料整理而成,如有不当之处,欢迎指正。
isa检验基准书是一种用于检验产品或过程是否符合特定标准的文件。
它通常包括以下内容:
1.检验目的和范围:说明检验的目的和所涉及的产品或过程的范
围。
2.检验依据:列出用于检验的标准、规范、技术要求等。
3.检验方法:描述检验的具体方法、步骤和使用的工具。
4.抽样方案:说明抽样的方式、样本量、抽样频率等。
5.判定准则:明确合格与不合格的判定标准。
6.检验报告:记录检验结果、结论和报告的格式。
通过编写ISA检验基准书,可以确保产品或过程的质量得到有效控制,并为客户提供可靠的质量保证。
ⅹⅹⅹⅹ信息中心整体信息安全策略编号:ISMS-A01-A版本号:V1.0密级:内部公开版本记录1.目的为了进一步指导和规范ⅹⅹⅹ信息中心系统有关业务操作、技术操作的实施,保障信息中心系统的正常运转和持续发展,ⅹⅹⅹ信息中心在参考国家标准GB/T22239-2008《信息安全技术信息系统安全等级保护基本要求》和GB/T22081-2008《信息技术信息安全管理实用规则》标准要求的基础上,结合ⅹⅹⅹ信息中心系统实际情况,制订了ⅹⅹⅹ信息中心整体信息安全策略。
2.适用范围本安全策略主要针对ⅹⅹⅹ信息中心系统相关的管理部门、人员及信息系统(硬件、软件、应用、运维等),提出了信息安全管理的要求。
本安全策略所针对的资产主要是硬件资产、软件资产、信息资产、人力资源。
3.定义信息安全:是指信息的保密性、完整性和可用性(含可控性、不可否认性、互操作性等)。
保密性:确保信息只能由那些被授权使用的人获取;完整性:保护信息及其处理方法的准确性与完整性;可用性:确保被授权使用的人在需要时可以获取信息和使用相关的资产。
4.职责4.1ⅹⅹⅹ信息中心信息安全小组负责制定及解释本信息安全策略。
4.2信息中心各个科室应将本策略作为指导信息安全建设及管理的纲领性文件,任何管理措施应满足信息安全策略的要求。
5.管理内容5.1信息安全管理方针ⅹⅹⅹ信息中心的信息安全管理方针为“ⅹⅹⅹⅹⅹⅹⅹⅹⅹ”。
信息中心管理层承诺为达到此方针提供有效的资源配置,提供人、财、物的支持。
5.2信息安全管理的组织结构与职责信息中心安全管理组织框架的建设目的是,为开展和监督信息中心内部信息安全的执行与实施提供有力的组织保障。
其中,安全管理组织框架的核心内容是建立信息安全领导小组,审批相关的信息安全策略,分配信息安全权责,以及协调信息中心内部安全的落实。
信息中心安全管理组织体系实行统一组织、分散管理、各司其职的管理方式。
5.3安全管理制度5.3.1应制定信息安全工作的总体方针和安全策略,说明机构安全工作的总体目标、范围、原则和安全框架等。