优瑞咖啡机说明书doc
- 格式:docx
- 大小:16.99 KB
- 文档页数:6

IMPRESSA X9 使用说明Fig. 1 Fig. 2 Fig. 3 Fig. 4Fig. 5 Fig. 6 Fig. 7 Fig. 8Fig. 9 Fig. 10 Fig. 11 Fig. 12Fig. 13 Fig. 14 Fig. 15 Fig. 16Fig. 17 Fig. 18使用说明IMPRESSA X9■屏幕显示:正在运行显示的程序■屏幕显示:请根据提示操作= 注意 = 重要 = 提示Jura Elektroapparate AG, CH-4626 Niederbuchsiten,Internet 机器各部说明A 废水盘B 废水盘盖C 粉渣盒D 可调节高低的咖啡/牛奶出口E 打奶沫键F 玛琪雅朵咖啡键G 奶咖键H 双杯键I 瑞丝崔朵咖啡键J 意式浓缩咖啡键K 咖啡键L 卡布基诺咖啡键M 语言显示系统N 豆槽O 预磨咖啡粉槽/添加药片槽P 咖啡杯围栏Q 程控外盖R 水箱S 蒸汽键T 热水键U 热水喷口V 蒸汽喷口W 附件盒X 水箱盖程序设置按键A 开关键B 过滤器键C 除垢键D 杯数统计键E 进入程式键F +G 润湿键H 清洗牛奶系统I 清洗咖啡系统J 清洗牛奶及咖啡系统K 退出L –目录1. 咖啡机说明 ........................................................................................... page 5标准功能 ................................................................................... page 5 1.1JURA工程师操作 .................................................................... page 51.22. 安全操作须知 ....................................................................................... page 5警告 ........................................................................................... page 5 2.1预防 ........................................................................................... page 62.23. 使用咖啡机之前 ................................................................................... page 6检查电源电压 ........................................................................... page 6 3.1检查电源保险负荷 ................................................................... page 6 3.2加水 ........................................................................................... page 6 3.3加豆 ........................................................................................... page 63.44. 初次使用 ............................................................................................... page 75. 开机 ....................................................................................................... page 86. 润湿 ....................................................................................................... page 87. 调节磨豆器 ........................................................................................... page 88. 调节水硬度 ........................................................................................... page 99. 过滤器 ................................................................................................... page 9安装过滤器 ............................................................................... page 99.110. 咖啡 ....................................................................................................... page 10制作咖啡/意式浓缩/瑞丝崔朵 ................................................. page 10 10.1卡布基诺/玛琪雅朵 .................................................................. page 10 10.2奶咖 ........................................................................................... page 10 10.310.4打奶沫 ....................................................................................... page 10双杯键 ....................................................................................... page 1110.511. 热水 ....................................................................................................... page 1112. 蒸汽 ....................................................................................................... page 1113. 关机 ....................................................................................................... page 1214. 程序设定 ............................................................................................... page 12设置水硬度 ............................................................................... page 1214.1自定义咖啡设置 ....................................................................... page 1214.2设置时间 ................................................................................... page 1414.3设置自动开机时间 ................................................................... page 1514.414.5设置自动关机时间 ................................................................... page 15设置语言 ................................................................................... page 1614.614.7设置显示 ................................................................................... page 17度量单位 (ml/oz) ........................................................... page 1714.7.1时间模式 ........................................................................ page 1714.7.2信息 ........................................................................................... page 1814.815. 杯数统计 ............................................................................................... page 1916. 保养 ....................................................................................................... page 19加水 ........................................................................................... page 1916.1自动进水系统 ........................................................................... page 2016.2清空粉渣盒 ............................................................................... page 2016.3清空废水盘 ............................................................................... page 2016.4找不到粉渣盒 ........................................................................... page 2016.5加豆 ........................................................................................... page 2016.6清除异物 ................................................................................... page 2016.716.8清洗须知 ................................................................................... page 2117. 清洗牛奶系统 ....................................................................................... page 2118. 拆除并清洗咖啡喷口 ........................................................................... page 2219. 清洗咖啡喷口 ....................................................................................... page 2220. 清洗咖啡系统 ....................................................................................... page 2321. 更换过滤器 ........................................................................................... page 2422. 除垢 ....................................................................................................... page 2523. 教您做一杯好咖啡 ............................................................................... page 2624. 提示 ....................................................................................................... page 2725. 报废 ....................................................................................................... page 2726. 法律声明 ............................................................................................... page 2727. 技术参数 ............................................................................................... page 28前言感谢您购买IMPRESSA X9. 为了确保您对这台机器的正确使用,请认真阅读并掌握此操作手册。
咖啡机家用操作方法
1. 准备咖啡豆和过滤纸:首先选择自己喜欢的咖啡豆,并使用刀片式磨豆机将其磨碎为适宜过滤的粒度。
然后将过滤纸插入咖啡机滤筒内。
2. 加水:根据咖啡机说明书中的提示,将适量的水倒入水箱中。
3. 加入咖啡粉:将咖啡豆粉末铺在过滤纸中。
4. 开始冲泡:将咖啡机通电,启动开关即可开始冲泡。
5. 收集咖啡:咖啡冲泡完成后,将咖啡杯放置在机器外侧的托盘上,等待咖啡流入杯中即可。
6. 清洁咖啡机:咖啡冲泡完成后,清空滤筒中的咖啡渣,并将滤筒、杯子和托盘清洗干净,以保证下次使用时的卫生和质量。

咖啡机保养说明书尊敬的用户:感谢您购买我们的咖啡机。
为了确保您能够长时间地享受到优质的咖啡,我们特别为您准备了以下保养说明书。
请您仔细阅读并按照指示进行操作,以确保咖啡机的正常运行和延长使用寿命。
一、清洁1. 每次使用完毕后,请务必清洁咖啡机。
首先,断开电源并等待咖啡机完全冷却。
然后,取下咖啡机的各个可拆卸部件,如水箱、过滤网、咖啡渣盒等,并用温水和中性洗涤剂进行清洗。
切勿使用酸性或腐蚀性清洁剂,以免损坏咖啡机。
2. 清洗水箱时,请务必彻底清除其中的咖啡渣和沉积物。
可以使用软刷或海绵进行清洁,确保水箱内部干净卫生。
3. 清洗过滤网时,可将其取出并用清水冲洗,以去除咖啡渣和油脂。
如发现过滤网有损坏或变形,请及时更换以保证咖啡的过滤效果。
4. 咖啡渣盒的清洁也非常重要。
请定期清空渣盒,并用清水彻底清洗。
如渣盒内有异味,可在清洗前先用中性洗涤剂进行浸泡,然后用清水冲洗干净。
二、除垢1. 随着使用时间的增长,咖啡机内部可能会产生水垢。
为了保证咖啡机的正常运行,我们建议您每隔一段时间就进行除垢操作。
2. 除垢前,请先将咖啡机的水箱清空。
然后,按照说明书上的比例,将除垢剂与适量的水混合,并倒入水箱中。
3. 接下来,将咖啡机接通电源,将开关调至除垢模式,并按照说明书上的步骤进行操作。
在除垢过程中,请确保咖啡机处于通风良好的环境中。
4. 完成除垢后,务必将咖啡机进行多次冲洗,直至除垢剂的残留物完全清除。
然后,再次清洗咖啡机的各个可拆卸部件,并确保它们干燥后放回咖啡机中。
三、保养1. 除了定期清洁和除垢外,咖啡机的保养还需要您的关注。
请确保咖啡机的外部干燥清洁,避免水滴和灰尘进入机身。
2. 如果咖啡机长时间不使用,请及时断开电源并清空水箱。
将咖啡机存放在干燥通风的地方,避免阳光直射和高温环境。
3. 定期检查咖啡机的电源线和插头,确保其完好无损。
如发现任何异常情况,请及时联系售后服务中心。
四、注意事项1. 请勿将咖啡机放置在易受潮湿和高温环境的地方,以免影响咖啡机的正常工作。
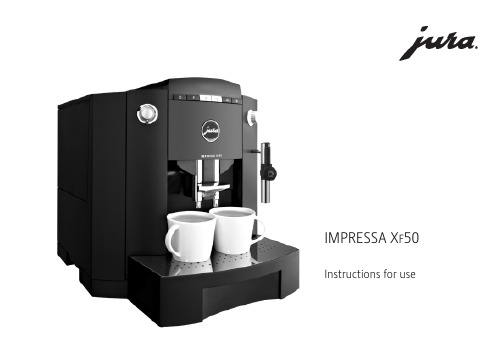
Instructions for useLegend:ⅢDISPLAY: serves as information.ⅢDISPLAY:please follow the instructions shown.= Note= Important= TipFig. 1Fig. 2Fig. 6Fig. 7Fig. 8Fig. 9Fig. 11Fig. 13Fig. 14Fig. 15Fig.17Fig. 16Fig.18Control elements1.Rotary Switch2.Illuminated ring3.ON/OFF key4.Programming key5.Draw-off key 1 cup6.Draw-off key 2 cups7.Maintenance key8.Steam pre-selection key9.Display dialog system10.Water tank with carrying handle 11.Filler funnel for pre-ground coffee:12.Bean tank cover 13.Aroma preservation cover 14.Steam/hot water draw-off valve15.Replaceable Easy Cappuccino Frother with milkpipe see Fig 616.Replaceable hot water nozzle mounted in illustration 17.Height-adjustable coffee spout 18.Coffee grounds container 19.Drip grate 20.Drip tray 21.Power Switch 22.Metal shelf131417183124785615/16Rotary SwitchE5Contents1.Safety information ..........................................page 61.1Warning ..............................................page 61.2Precautions ..........................................page 62.Preparing the IMPRESSA ................................page 62.1Check supply voltage ..............................page 62.2Check electrical fuse ..............................page 62.3Fill water tank ......................................page 72.4Fill coffee beans ....................................page 72.5Adjusting the grinding gear .....................page 72.6Power switch ........................................page 73.First use .......................................................page 74.Adjusting the water hardness ............................page 85.Installation of CLARIS plus filter cartridges ........page 95.1Installing the filter ................................page 95.2Replacing the filter ................................page 96.Rinsing the IMPRESSA ...................................page 107.Adjusting the water quantity for coffee ................page 108.Drawing off 1 cup of coffee ..............................page 109.Drawing off 2 cups of coffee .............................page 1110.Drawing off pre-ground coffee ...........................page 1111.Drawing off hot water .....................................page 1212.Drawing off steam ..........................................page 1213.Dispensing Cappuccino with theEasy Cappuccino Frother .................................page 1313.1Cleaning the Easy Cappuccino Frother .......page 1413.2Rinsing the Easy Cappuccino Frother .........page 1413.3Cleaning the Easy Cappuccino Frother .......page 1414.Switching off the IMPRESSA ...........................page 1515.Programming ................................................page1515.1Programming the filter ...........................page 1515.2Programming the water hardness ..............page1515.3Programming the aroma ROBUSTor STANDARD .....................................page 1515.4Programming the temperature ..................page 1615.5Programming the time ............................page 1615.6Programming the automaticswitch-on time ......................................page 1715.7Programming the automaticswitch-off time ......................................page 1715.8Cup counter .........................................page 1715.9Programming the language ......................page 1815.10Programming Display 24H/AM/PM ...........page 1815.11Programming the display for ML/OZ ..........page 1916.Maintenance .................................................page 1916.1Filling in water .....................................page 1916.2Emptying the coffee grounds container .......page 1916.3Drip tray missing ...................................page 1916.4Fill coffee beans ....................................page 2016.5Replacing the filter ................................page 2016.6Cleaning the IMPRESSA ........................page 2016.7IMPRESSA calcified .............................page 2016.8General cleaning instructions ...................page 2016.9Emptying the system ..............................page 2117.Cleaning .......................................................page 2118.Descaling ......................................................page 2219.Disposal .......................................................page 2320.Tips for perfect coffee .....................................page 2321.Messages ......................................................page 2422.Problems ......................................................page 2523.Legal information ...........................................page 2624.Technical Data ...............................................page 26IntroductionThank you for purchasing the IMPRESSA. To ensure perfect func-tioning of your IMPRESSA, carefully read this operating manual and keep it for future reference.Should you need more information or if you encounter particular problems not specified in these operating instructions in sufficient detail, either contact us directly or contact your local authorized dealer.You will also find useful tips on operation and maintenance of your IMPRESSA on the website at .Don’t forget to check out the K nowledge Builder our ani-mated operating instructions. LEO, our assistant, will take you through all the functions.1. Safety information1.1 WarningⅢChildren do not realize the dangers involved in using electric appliances, for this reason always keep an eye on children when they use electric appliances.ⅢThe coffee machine may only be used by instructed persons.ⅢNever use a defective coffee machine or a machine with a defective mains cable.ⅢNever repair or open the coffee machine yourself. Any repairs may only be carried out by authorized service shops using ori-ginal spare parts and accessories.ⅢNever immerse the coffee machine in water.1.2 PrecautionsⅢNever expose the coffee machine to weather (rain, snow, frost), never touch the machine when your hands are wet.ⅢPlace the IMPRESSA on a firm, level base that is resistant to any water that may leak. Never stand on hot or warm surfaces (oven hobs). Keep out of the reach of children.ⅢIf you don’t use the machine for a longer time (holidays, etc.) always disconnect the mains cable.ⅢAlways disconnect mains cable before cleaning the machine.ⅢWhen disconnecting the mains cable never pull on the mains cable or the machine itself.ⅢThe coffee machine is connected to mains supply via a mains cable. Make sure nobody can trip over the mains cable. Make sure children and pets cannot reach the machineⅢNever put the coffee machine or individual parts of it into a dishwasher.ⅢMake sure to install the machine at a place with sufficient air circulation, to prevent overheating of the machine.2. Preparing the IMPRESSA2.1 Check supply voltageThe IMPRESSA is preset in the factory to the correct mains voltage. Check if your local mains supply voltage complies with the information given on the type plate on the underside of the IMPRESSA.2.2 Check electrical fuseThe IMPRESSA is designed for an electric current of 10 amperes. Check if the electrical fuse has sufficient capacity.67E2.3 Fill water tankOnly use fresh, cold water. Never fill in milk, mineral water or other liquids.ⅢRemove the water tank and rinse it with cold tap water thoroughly (Fig. 4).ⅢThen fill the water tank and reinstall it. Make sure to install the tank properly, it must engage audibly.2.4 Fill coffee beansTo ensure that your machine will work perfectly for a long time and to avoid damage, please note that the grinding gear of your JURA coffee machine is not suitable for coffee beans which were treated, during or after roasting, with additives (e.g. sugar). Such coffee blends may damage the grinding gear. Any repair costs resulting from the use of such blends are not covered by warranty.ⅢOpen the bean tank cover (12) and remove the aroma preser-vation cover (13).ⅢRemove any dirt or foreign matter from the bean tank. ⅢFill coffee beans in the bean tank and close the cover.2.5 Adjusting the grinding gearYou can adjust the grinding gear to the roast of your coffee. We recommenda fine grinding degree Ǟfor bright roasts (the smaller the dots,the finer the grinding)a coarse degree Ǟfor dark roasts (the larger the dots, thecoarser the grinding)The grinding degree may only be adjusted while the grinding gear is running.ⅢOpen the bean tank cover (12) and remove the aroma preser-vation cover (13).ⅢTo adjust the grinding degree, turn the Rotary Switch (Fig. 2) to the required position.2.6 Power switchActuate the power switch (21) on your IMPRESSA before using the machine for the first time.We recommend that you switch off your IMPRESSA with the power switch (21) if you intend not to use the machine for longer periods of time (e.g.during holidays)3. First useⅢFill coffee beans in the bean tank (12).ⅢSwitch on the IMPRESSA using the ON/OFF key (3).ⅢSPRACHEDEUTSCHⅢThe illuminated ring (2) is active.ⅢTurn the Rotary Switch (1) until the required language is dis-played.ⅢFor example LANGUAGEENGLISHⅢConfirm your selection by pressing the Rotary Switch (1).ⅢFILLWATERⅢFill the water tank (10) with fresh water.ⅢOPEN TAPⅢPlace an empty cup under the replaceable hot water nozzle (16).ⅢOpen the steam / hot water draw-off tap (14) (Fig. 13).ⅢFILLING Array SYSTEMⅢCLOSE TAPⅢClose the steam / hot water draw-off tap (14).ⅢHEATINGⅢPRESSRINSEⅢPress the maintenance key (7).ⅢMachine carries out a rinsing operation.ⅢRINSINGⅢREADYIf BEANS FILL is displayed, press the coffee draw-off key again. Machine not filled with coffee beans yet.To get an excellent crema, adjust the coffee spout (17) to the size of your cup (Fig. 3).4. Adjusting the water hardnessWater is heated in the IMPRESSA. As a result, calcification occurs during normal use and is indicated automatically.Before using the IMPRESSA for the first time the hardness of the water used must be adjusted. Use the supplied test sticks for this.1°German hardness is equivalent to 1.79°French hardness.If the filter is activated, the program step Water Hardness no longer appears.The IMPRESSA has 5 hardness degrees which can be usedand are displayed while you are adjusting the water hardness.89EⅢClose the steam/hot water draw-off tap (14), now the IM-PRESSA will heat up to coffee temperature.ⅢHEATING ⅢREADYNow you have activated the filter. In Programming Mode thewater hardness selection function is no longer displayed.5.2 Replacing the filterAfter drawing off approx. 50 litres, the filter cartridge will beused up. A message requesting you to replace the filter will appear on the display. Please monitor the period of use of the CLARIS plus filter cartridge (max. 2 months) using the scale on the cartridge holder by the water tank.ⅢREADY/FILTERⅢSwitch off the IMPRESSA using the ON/OFF key (3).ⅢPress the maintenance key (7) until the following message is displayed: ⅢCHG FILTEROPEN TAPⅢRemove the water tank from the machine and empty it.ⅢFold up the cartridge holder. Install the filter cartridge in the water tank, applying a gentle pressure (Fig. 1).ⅢFold down the cartridge holder again until it engages audibly.ⅢFill the water tank with cold, fresh tap water and reinstall it.ⅢPlace a sufficiently large jug (approx 1 litre) under the replace-able hot water nozzle (16) and open the steam/hot water tap (14).ⅢRINSINGFILTERⅢCLOSE TAPⅢOpen the steam / hot water draw-off tap (14).ⅢHEATINGⅢREADY6. Rinsing the IMPRESSAWhen the IMPRESSA is switched off and has cooled down,a rinsing operation is started when the machine is switchedon again. When the machine is switched off, a rinsing oper-ation is started automatically.ⅢSwitch on the IMPRESSA using the ON/OFF key (3).ⅢHEATINGⅢPRESSRINSEⅢPress the maintenance key (7).ⅢRINSINGⅢREADY7. Adjusting the water quantity for coffeeThe indicated value in ML is a reference value and may deviate from the actual value.If you press the draw-off key for 2 cups (6) the water quantity is doubled automatically.You can change/stop the water quantity during the draw-off operation, too. Turn the Rotary Switch (1) until the required ML value is displayed.You can adjust the water quantity in steps of 5 ML using the Rotary Switch (1).ⅢREADY ⅢTurn the Rotary Switch (1) until the required water quantity is displayed.ⅢFor example, 120 ML8. Drawing off 1 cup of coffeeYou have the possibility of increasing the strength of the coffee at any time in the grinding process by pressing the 1-cup draw-off key again.For Example: by pressing the 1-cup draw-off key three times you get strong coffee.STRONGYou can choose among three strengths at the push of a but-ton. The longer you press the draw-off key for 1 cup (5), the stronger your coffee will be (Display: MILD/ NORMAL/ STRONG).You can adjust the water quantity before the draw-off opera-tion using the Rotary Switch (1).You can stop the draw-off operation at any time by pressing any coffee draw-off key.You can check the water quantity used for the last draw-off operation by pressing the Rotary Switch (1).ⅢREADYⅢPut a cup under the adjustable coffee spout (17).ⅢPress the draw-off key for 1 cup (5) until the required strength is displayed:ⅢMILDⅢ180 ML (water quantity last adjusted)ⅢThe illuminated ring (2) is active.ⅢTurn the Rotary Switch (1) again to select the water quantity individually:1011E10. Drawing off pre-ground coffeeNever use instant coffee or quick-coffee. We recommendthat you always use powder from fresh coffee beans or, pre-ground, vacuum-packed coffee. Never fill in more than 2portions of powder. The pre-ground coffee tank is no storage tank. Make sure that the pre-ground you use is not too fine.This may cause blocking of the system. In this case the coffee only drips out of the coffee spout.If you have filled in too little powder, the message ADD MORE POWDER will be displayed. The IMPRESSA stops the operation and returns to "ready for draw off" mode.You can stop the draw-off operation at any time by pressing any coffee draw-off key.ⅢREADYⅢPut 1 or 2 cups under the adjustable coffee spout (17).ⅢOpen the cover of the filler funnel for pre-ground coffee (11).ⅢFILLPOWDERⅢFill 1 or 2 level spoonfuls of pre-ground coffee in the filler funnel for pre-ground coffee (11) (FIG 11) and close the cover. ⅢPOWDER ⅢSELECTCUP BUTTONⅢPress the required draw-off key for 1 cup (5) or 2 cups (6)Ⅲ120 ML (water quantity last adjusted)ⅢThe illuminated ring (2) is active.ⅢPOWDERⅢTurn the Rotary Switch (1) again to select the water quantity individually:ⅢFor Example: 160 ML ⅢFor Example: MILD ⅢYour product is being prepared.ⅢREADY9. Drawing off 2 cups of coffeeSelecting the coffee strength is not possible when drawing off 2 cups of coffee. You will draw off 2 mild cups auto-matically.You can adjust the water quantity before the draw-off ope-ration using the Rotary Switch (1). The adjusted value (ML)refers to 1 cup.You can stop the draw-off operation at any time by pressing any coffee draw-off key.You can check the water quantity used for the last draw-off operation by pressing the Rotary Switch (1).ⅢREADYⅢPut 2 cups under the adjustable coffee spout (17).ⅢPress the draw-off key for 2 cups (6).Ⅲ 2 CUPSⅢ120 ML (water quantity last adjusted)ⅢThe illuminated ring (2) is active.ⅢTurn the Rotary Switch (1) again to select the water quantity individually:ⅢFor Example: 210 MLⅢ 2 CUPSⅢYour product is being prepared.ⅢREADYⅢFor Example: 210 MLⅢPOWDERⅢYour product is being prepared.ⅢREADY11. Drawing off hot waterIf you do not change the settings using the Rotary Switch(1), the water quantity last adjusted will be drawn off auto-matically.Install the hot water nozzle (see Fig. 5 ) to obtain perfect water flow. Do not replace the replaceable hot water nozzle(16) directly after drawing off water, because the nozzle ishot after the draw-off operation.At the start of the water draw-off operation there can be splashing Avoid direct contact with the skin!ⅢREADYⅢPlace a cup under the replaceable hot water nozzle (16).ⅢOpen the steam / hot water draw-off tap (14) (Fig. 13).ⅢThe illuminated ring (2) is active.ⅢFor example, 140 MLⅢWATERⅢAdjust the required water quantity by turning the Rotary Switch (1).ⅢFor example, 200 MLⅢWATERⅢIf the required water quantity is reached, the following message is displayed:ⅢCLOSE TAP ⅢClose the steam / hot water draw-off tap (14).ⅢREADYBefore CLOSE TAP water may still escape the system.12. Drawing off steamThe steam function is used for the preparation of milk foam as well as for the Easy Cappuccino Frother (15) cleaning programme.With the optionally available 2-stage frothing nozzle, liquids can be heated and frothed using the steam function.Make sure that the nozzle is correctly fitted when drawing steam. If the nozzle becomes blocked with particles of milk residue or is incorrectly assembled, a danger can arise during use whereby the nozzle may jump off.Due to the system design, some water will escape at first when steam is drawn. However, this will not affect the result in any way.When drawing steam, spluttering can occur at the start. The nozzle becomes hot in use. Avoid any direct skin contact.ⅢREADYⅢPress the steam pre-selection key (8).ⅢHEATINGⅢSTEAMREADYⅢTo draw off steam, open the steam/hot water draw-off tap (14) (Fig. 13).ⅢThe illuminated ring (2) is active.1213EⅢYou can adjust the steam draw-off time individually by turning the Rotary Switch (1) until the required SEC are displayed.ⅢFor example, 35 SECⅢIf you do not change the steam draw-off time settings using the Rotary Switch (1), the machine will use the settings last adjusted ⅢDuring the steam draw-off operation, the message STEAM is displayedⅢWhen the steam quantity is reached, the message CLOSE TAP is displayedⅢClose the steam / hot water draw-off tap (14).ⅢSTEAMREADYAs long as STEAM READY is on view in the display, the machine is ready to dispense steam.Before CLOSE TAP, steam may still escape the system.13.Dispensing Cappuccino with theEasy Cappuccino FrotherCappuccino comprises of one third each of Espresso, hot milk and milk foam. You produce the milk portion with the Easy Cappuccino Frother (15).When steam is drawn, a vacuum is produced which, with the aid of the Easy Cappuccino Frother (15), draws in the milk and produces milk foam.To ensure perfect function, the Easy Cappuccino Frother (15) must be cleaned regularly.Make sure that the nozzle is correctly fitted. If the nozzle be-comes blocked with particles of milk residue or is incorrectly assembled, a danger can arise during use whereby the nozzle may jump off.ⅢWhen using for the first time, remove the protective cover from the Easy Cappuccino Frother (15) (Fig. 6). The protective cover is used only during transport as protection to prevent the ingress of contaminated materials.ⅢRemove the milk pipe from the Welcome Pack and connect it to the Easy Cappuccino Frother (15).ⅢInsert the other end of the milk pipe into a Tetra Pak of milk or connect it to a milk container (Fig. 7).ⅢPlace a cup under the Easy Cappuccino Frother (15) (Fig. 7).A useful addition is available for all lovers of milk speciali-ties in the form of high-quality vacuum milk containers.They keep the milk cool the whole day long and are opti-mally suited to the design of your IMPRESSA.All original JURA accessories can be obtained from the specialist shop.ⅢPress the steam pre-selection key (8).ⅢHEATING ⅢSTEAMREADYⅢTo draw off steam open the steam/hot water draw-off tap (14)(Fig. 13). The milkfoam is prepared.ⅢThe illuminated ring (2) is active.ⅢYou can adjust the steam draw-off time individually by turning the Rotary Switch (1) until the required SEC are displayed.ⅢFor example, 35 SECⅢIf you do not change the steam draw-off time settings using the Rotary Switch (1), the machine will use the settings last adjustedAdjust the steam dispensing time to suit the size of your cup.ⅢDuring the steam draw-off operation, the message STEAM is displayed.ⅢWhen the steam quantity is reached, the message CLOSE TAP is displayed.ⅢClose the steam / hot water draw-off tap (14).ⅢSTEAMREADYAt any time, you can stop dispensing steam at an earlier stage by closing the tap for dispensing steam/hot water (14).As long as STEAM READY is on view in the display, the machine is ready to dispense steam.Due to the system design, steam can still escape and some milk may continue to drip before the TAP is closed.ⅢNow, move your cup with the milk foam and place it under the coffee spout and dispense the required coffee product. (Fig. 8) Your Cappuccino is ready.13.1 Cleaning the Easy Cappuccino FrotherTo ensure that the Easy Cappuccino Frother functions per-fectly, you should rinse it with water each time after pre-paring milk.You will not be prompted by your IMPRESSA to rinse the Easy Cappuccino Frother.13.2 Rinsing the Easy Cappuccino FrotherⅢCarefully pull off the Easy Cappuccino Frother.ⅢDismantle the Easy Cappuccino Frother (15) into its individual parts (Fig. 16)ⅢThoroughly rinse all parts of the nozzle under running water.ⅢReassemble the Easy Cappuccino Frother (15) and refit it on to your IMPRESSA.13.3 Cleaning the Easy Cappuccino FrotherTo ensure that the Easy Cappuccino Frother(15) functions perfectly, you should clean it daily if you have prepared milk foam.You will not be prompted by your IMPRESSA to clean the Easy Cappuccino Frother (15).You can obtain the JURA Auto-Cappuccino Cleaner from the specialist shop.ⅢPlace a container under the Easy Cappuccino Frother (15). (Fig. 9)ⅢFill a second container with 2.5 dl of fresh water and add one capful of the Auto-Cappuccino Cleaner.ⅢDip the milk pipe into the second container with the Auto-Cap-puccino Cleaner. (Fig. 9)ⅢPress the steam pre-selection key (8).ⅢHEATINGⅢSTEAMREADYⅢTo draw off steam open the steam / hot water draw-off tap (14) (Fig 13).ⅢDraw steam until the container with the Auto-Cappuccino Clea-ner is empty.This procedure cleans the Easy Cappuccino Frother and the milk pipe.ⅢClose the steam / hot water draw-off tap (14).ⅢSTEAMREADY1415EAs long as STEAM READY os on view in the display, the machine is ready to dispense steam.ⅢFill the container with 2.5 dl of fresh water.Dip the milk pipe into the container with the fresh water.When READY appears in the display, press the steam prese-lect key (8) again to set the machine in readiness for the steam function.ⅢOpen the tap for dispensing steam/hot water (14) (Fig. 13) in or-der to draw steam.ⅢDraw steam until the container with the fresh water is empty.This procedure rinses the Easy Cappuccino Frother (15) and the milk pipe with fresh water.ⅢCleaning of the Easy Cappuccino Frother (15) is now complete,your IMPRESSA is ready for use.14. Switching off the IMPRESSATo ensure perfect operation, please switch your IMPRESSA to standby mode with the (3) symbol first. Then switch the machine off with the power switch (21).ⅢREADYⅢSwitch off the IMPRESSA using the ON/OFF key (3).ⅢRINSINGⅢAn automatic rinsing operation is started.15. ProgrammingWhen your IMPRESSA leaves the factory it is adjusted such that you can draw off coffee without having to change any settings. However, you can programme various parameters individually.1617E1819EⅢREADYThe water tank should be rinsed daily and refilled with freshwater. Only fill in fresh, cold water. Never fill in milk,mineral water or other liquids.16.2 Emptying the coffee grounds containerⅢEMPTYGROUNDSIf this message appears on the display, you can no longer draw off coffee. You must empty the coffee grounds con-tainer first (FIG 14).ⅢCarefully take out the drip tray, it is filled with water.ⅢNOTRAYⅢInsert the empty and clean trip tray again.ⅢREADYThe red water level indicator appears when the drip tray isfull.16.3 Drip tray missingⅢNO TRAYⅢIf this information is displayed, the drip tray (20) is not installed properly or was not installed at all.ⅢInsert the drip tray (20).ⅢREADY16.4 Fill coffee beansⅢFILLBEANSⅢRefill beans as described in Chapter 2.4.The message REFILL BEANS will disappear after you draw off your next cup of coffee.We recommend that you clean the bean tank regularly before refilling beans, using a dry cloth. Before cleaning the tank, switch off the IMPRESSA.16.5 Replacing the filterAfter drawing off 50 litres, the filter cartridge will be used up. A message requesting you to replace the filter will appear on the display.Refer to Chapter 5.2 «Replacing the filter».16.6 Cleaning the IMPRESSAAfter 200 draw-off operations or after 160 rinsing operations, the IMPRESSA must be cleaned. A message appears on the display, telling you to start the cleaning programme. You can still draw off coffee or hot water/steam. However, we recommend you run the cleaning program (Chapter 17) on the same day.ⅢREADYCLEAN 16.7 IMPRESSA calcifiedDuring operation, the machine will calcify. The degree of scaling depends on the hardness of the water in your region. The machine will inform you when descaling is required. You can still draw off coffee or hot water/steam. However, we recommend you run the decalcifying program (Chapter 18) on the same day.ⅢREADYDECALCIFY16.8 General cleaning instructionsⅢNever use scratching objects, pan cleaners, cleaning sponges or caustic chemicals to clean the machine.ⅢWipe off the case on the inside and outside using a soft, moist cloth.ⅢClean the replaceable hot water nozzle after each use.ⅢAfter heating milk, draw off some hot water, to clean the inside of the replaceable Easy Cappuccino Frother, too.ⅢDisassemble the Easy Cappuccino Frother for proper cleaning (Fig. 6).ⅢThe water tank should be rinsed daily and refilled with fresh water.If the water tank shows signs of scaling, remove the scaling using a commercial descaling agent. Take out the water tank (Fig. 4).Remove the CLARIS filter cartridge, if installed, before descaling the water tank.2021E16.9 Emptying the systemPrecondition:IMPRESSA switched offThis operation is required to protect the IMPRESSA against frost damage during transports.ⅢPlace a container under the replaceable hot water nozzle (16).ⅢPress the steam preselection key (8) until the following message is displayed:ⅢOPEN TAP ⅢEMPTYING ⅢCLOSE TAPⅢThe IMPRESSA is switched off.17. CleaningYour IMPRESSA features an integrated cleaning program. The cleaning operation will take some 15 min.Please only use original JURA cleaning tablets: their formu-la is especially tailored to JURA coffee machines. Please note that machine defects or residues in the water cannot be excluded if you use inappropriate cleaning agents.Once started, the descaling operation must not be inter-rupted!After each cleaning operation the filler funnel for pre-ground coffee should be cleaned (11). ⅢREADY CLEANⅢPress the maintenance key (7) until the following message isdisplayed:ⅢEMPTY TRAYⅢEmpty the tray (Fig. 17/18).ⅢNO TRAYⅢInsert the tray again.ⅢRemove the drip grate (19).ⅢPlace a sufficiently large receptacle (Fig. 12) under the coffee spout (17).ⅢPRESS RINSEⅢPress the maintenance key (7).ⅢCLEANING ⅢFILL TABLETⅢFill in the tablet (see Fig. 15).ⅢPRESS RINSEⅢPress the maintenance key (7).ⅢCLEANING ⅢEMPTY TRAY ⅢNO TRAY ⅢREADYⅢWipe coffee powder tank with a dry cloth after the cleaning program has finished.ⅢThe cleaning operation was completed successfully.。
咖啡机使用教程
使用咖啡机的步骤如下:
1. 准备咖啡豆和过滤纸。
选择适合自己口味的咖啡豆,并将其研磨成适当的粗细程度。
然后,在过滤篮中放入过滤纸,确保完全遮盖篮底。
2. 添加水和咖啡豆。
将适量的清水倒入咖啡机的水箱中。
根据自己的口味和咖啡机的容量,加入适量的咖啡豆到过滤篮中。
3. 准备杯子。
将咖啡杯或咖啡壶放在咖啡机的出水口下方,确保能够收集到咖啡。
4. 开始冲泡。
根据咖啡机的设置,选择适当的冲泡模式和浓度。
按下启动按钮,咖啡机将会开始冲泡过程。
5. 等待冲泡完成。
根据咖啡机的品牌和型号,冲泡时间可能有所不同。
一般来说,等待大约几分钟,直到咖啡完全冲泡完成。
6. 倒出咖啡。
当咖啡冲泡完成后,将咖啡杯或咖啡壶从出水口下方移开,将咖啡倒入杯子中。
7. 清洁咖啡机。
在使用完毕后,记得清空咖啡机中的咖啡渣和过滤纸,并清洁过滤篮和水箱等部件。
以上就是使用咖啡机的简单教程。
不同品牌和型号的咖啡机可
能会有稍微不同的操作步骤,请根据自己的咖啡机说明书进行操作。
咖啡机的使用方法
咖啡机是现代生活中常见的一种家用电器,它可以帮助我们在家里轻松制作出美味的咖啡。
但是,对于一些新手来说,可能会对咖啡机的使用方法感到困惑。
在这篇文档中,我将为大家介绍咖啡机的使用方法,希望能帮助大家更好地享受咖啡的乐趣。
首先,准备咖啡机所需的材料和配件。
通常情况下,咖啡机的配件包括咖啡豆、滤纸、水和咖啡杯。
在使用咖啡机之前,我们需要确保这些配件都已经准备好,并且处于干净和完好的状态。
接下来,我们需要将咖啡机连接电源,并打开电源开关。
等待一段时间,让咖啡机预热,确保咖啡机的温度适宜。
然后,我们需要研磨咖啡豆。
将适量的咖啡豆放入磨豆机中,选择合适的研磨粗细度,然后开始研磨。
研磨完成后,将研磨好的咖啡粉倒入滤纸中,放入咖啡机的滤网中。
接着,我们需要加入适量的水。
根据咖啡机的容量,倒入适量的清水,然后将水箱放回咖啡机的位置。
现在,一切准备就绪,我们可以开始制作咖啡了。
按下咖啡机上的制作按钮,等待咖啡机完成制作过程。
在制作过程中,我们可以根据个人口味的喜好选择添加牛奶、糖或其他调味品。
最后,制作完成后,将咖啡倒入咖啡杯中,即可享用美味的咖啡了。
同时,记得将咖啡机清洁干净,以保证下次使用时的卫生和品质。
总的来说,咖啡机的使用方法并不复杂,只要按照上述步骤进行操作,就可以轻松制作出美味的咖啡。
希望这篇文档能够帮助大家更好地使用咖啡机,享受到美味的咖啡带来的乐趣。
Cafeteras de filtroCafeteras con contenedor y jarras`Amplia gama de cafeteras con producción de 15 a 145 litros/hora.`Gama completa, que ofrece la opción de hacer café filtrado de la más alta calidad en cualquier lugar de forma rápida y sencilla.`Permite obtener un producto de gran calidad.`La gama permite preparar gran cantidad de café en poco tiempo.`Manejo muy sencillo y de fácil limpieza.`Flexibilidad, adaptabilidad a distintos tipos de establecimientos.`Bajo coste por taza.La gama cafeteras con produccion a jarras comprende varios modelos con una producción de hasta 24 litros/hora.El modelo NOVO no necesita estar conectado al agua y tiene portafiltro de plástico. Los modelos MONDO tampoco necesitan estar conectados a la toma de agua y están equipados con un portafiltro de acero inoxidable. Los modelos MATIC , los más avanzados deCAFETERA DE JARRAS NOVOProducción de Café a JarrasProducción: 18 l/h.Modelo sin conexión al agua.`Calderín de acero inoxidable y porta-filtro de plástico.`No necesita estar conectado al agua, lo cual permite preparar café en cualquier lugar.`Dos placas calentadoras inteligentes se encargan de mantener el café a óptimatemperatura y calidad.`Operación y mantenimiento sencillos.NOVOPVP €5430002Cafetera NOVO 230/50-60/1459· Jarra de plástico irrompible 1,7 litros· Jarra de acero inoxidable 1,7 litros· Caja filtros papel de 1.000 unidades· Una jarra de cristal 1,7 litrosEquipamiento incluido CAFETERA MONDOProducción de Café a JarrasProducción: 18 l/h.Modelo sin conexión al agua.`No necesita estar conectado al agua, lo cual permite preparar café en cualquier lugar.`Calderín y porta-filtro en acero inoxidable.`El indicador de agua muestra si la maquina está llena.`Dos placas calentadoras inteligentes se encargan de mantener el café a óptima temperatura y calidad.MONDOPVP €5430000Cafetera MONDO 230/50-60/1618· Jarra de plástico irrompible 1,7 litros· Jarra de acero inoxidable 1,7 litros· Caja filtros papel de 1.000 unidades· Dos jarras de cristal 1,7 litrosEquipamiento incluidoCAFETERA DE JARRAS MONDO TWINProducción de Café a JarrasProducción: 28 l/h.Modelo sin conexión al agua.Modelo con doble sistema de filtrado y cuatro placas calentadoras. El resto de lascaracterísticas son similares al modelo MONDO .`No necesita estar conectado al agua, lo cual permite preparar café en cualquier lugar`Porta filtro en acero inoxidable`El indicador de agua muestra si la maquina está llena`Doble sistema de filtrado y cuatro placas calentadoras inteligentes se encargan del calor para mantener el café a la óptima calidadMONDO TWIN PVP €5430009Cafetera MONDO TWIN 230/50-60/1 1.445· Jarra de plástico irrompible 1,7 litros· Jarra de acero inoxidable 1,7 litros· Caja filtros papel de 1.000 unidades· Cuatro jarras de cristal 1,7 litrosEquipamiento incluido CAFETERA DE JARRAS MATIC 2Producción de Café a JarrasProducción: 15 l/h.Modelo con conexión al agua (llenado automático).`Calidad continua del café por la exactitud en la dosificación del agua.`Calderín y porta-filtro en acero inoxidable.`Dos Placas calentadoras inteligentes se encargan del calor para mantener el café ala optima calidad.`Interruptores independientes para placas calentadoras.MATIC 2PVP €5430005Cafetera MATIC-2 230/50-60/1904· Jarra de plástico irrompible 1,7 litros· Jarra de acero inoxidable 1,7 litros· Caja filtros papel de 1.000 unidades· Dos jarras de cristal 1,7 litrosEquipamiento incluido CAFETERA DE JARRAS MATIC TWINProducción de Café a JarrasProducción: 24 l/h.Modelo con conexión al agua (llenado automático).Modelo con doble sistema de filtrado y cuatro placas calentadoras.`Calidad continua del café por la exactitud en la dosificación del agua.`Calderín y porta-filtro en acero inoxidable.`Cuatro placas calentadoras inteligentes se encargan del calor para mantener el caféa la optima calidad.`Interruptores independientes para placas calentadoras.MATIC TWIN PVP €5430007Cafetera MATIC TWIN 230/50-60/1 1.592· Jarra de plástico irrompible 1,7 litros· Jarra de acero inoxidable 1,7 litros· Caja filtros papel de 1.000 unidades· Cuatro jarras de cristal 1,7 litrosEquipamiento incluidoLa gama cafeteras con produccion a termos comprende varios modelos con una producción de 18/19 litros/hora.El modelo ISO cuenta con portafiltro de plástico y no necesita conexión de agua. Los modelos TH/THa están equipados con un portafiltro de acero inoxidable. El modelo TH no cuenta con conexión a la toma de agua, mientras que el THa está equipado conCAFETERA A TERMO ISOProducción a termos.Producción: 18 l/h.`El café se hace directamente en el termo de doble pared (2 litros).`Porta-filtro de plástico.`Incluye termo de 2 litros.`No necesita estar conectado al agua, lo cual permite preparar café en cualquier lugar.`Operación y mantenimiento sencillos.ISOPVP €5430004Cafetera ISO 230/50-60/1537· Termo acero inoxidable 2 litros adicional· Caja filtros papel 1.000 unidades· Incluye termo inox de 2 litrosEquipamiento incluido CAFETERA TERMO AUTOMÁTICA TH/THAProducción a termosProducción: 18/19 l/h.Con o sin conexión al agua (según modelo).`El café es preparado directamente en un termo o un recipiente térmico.`TH: No necesita estar conectada al agua.`THa: Gracias a la conexión de agua, la máquina se llena automáticamente.`No incluye termo.`Porta filtro de acero inoxidable.`Operación y mantenimiento sencillos.TH(A)PVP €5430010Cafetera TH 230/50-60/16325430012Cafetera THA 230/50-60/1904· Termo Airport Furento 2,2 litros inoxidable· Caja filtros papel de 1.000 unidadesLas máquinas de café de la serie B son ideales para la producción de grandes cantidades de café en poco tiempo y para momentos de gran demanda.El café se produce directamente a contenedores de gran capacidad que se pueden desplazar a cualquier lugar.Cuentan con programación sencilla y un diseño atractivo que permite tenerlo tanto en la cocina como en el buffet.Todos los modelos están construidos el acero inoxidable de primerísima calidad y cuentan con portafiltros de acero inoxidable. Las cafeteras de la serie B están equipados con señal indicadora de café preparado, sistema de descalcificación, sistema de contadores y programación por tazas, jarras o volumen. Además, cuentan con temporizador integrado y el suministro de agua está regulado para una extracción óptima.Las cafeteras de la serie B están provistos de doble sistema de seguridad: contenedor y brazo vertedor.SERIE B Máquinas de café a contenedores de gran producciónCAFETERA DE FILTRO B-5Dos contenedores de 5+5 litrosSe compone de una columna central y dos contenedores.Los modelos A están equipados con depósito y grifo de agua caliente en lacolumna central.La cafetera B-5 es un modelo multifase:`230V / 50-60 / 1N~ `230V / 50-60 / 3~ `400-440V / 50-60 / 3N~(por defecto)B-5PVP €5400020Cafetera B-5 400/50-60/3N 3.6725400022Cafetera B-5A 400/50-60/3N (con grifo de agua) 5.067· Contenedor 5 litros adicional· Microfiltro permanente inox· Filtro de papel para B-5- 250 unidades· Dos contenedores de 5 litros con calentamiento eléctrico, tubo de nivel y grifo antigoteo.Equipamiento incluidoDos contenedores de 10+10 litrosSe compone de una columna central y dos contenedores.Los modelos A están equipados con depósito y grifo de agua caliente en la columna central.La cafetera B-10 es un modelo multifase:`230V / 50-60 / 1N~`230V / 50-60 / 3~`400-440V / 50-60 / 3N~(por defecto)B-10PVP €5400025Cafetera B-10 400/50-60/3N 4.5725400028Cafetera B-10A 400/50-60/3N (con grifo de agua) 5.563· Contenedor 10 litros adicional · Microfiltro permanente inox· Filtro de papel para B-10- 250 unidades· Dos contenedores de 10 litros con calentamiento eléctrico, tubo de nivel y grifo antigoteoEquipamiento incluido CAFETERA DE FILTRO B-20Dos contenedores de 20+20 litrosSe compone de una columna central y dos contenedores.Los modelos A están equipados con depósito y grifo de agua caliente en la columna central.La cafetera B-20 es un modelo multifase:`230V / 50-60 / 1N~`230V / 50-60 / 3~`400-440V / 50-60 / 3N~(por defecto)B-20PVP €5400030Cafetera B-20 400/50-60/3N 6.3195400032Cafetera B-20A 400/50-60/3N (con grifo de agua) 6.718· Contenedor 20 litros adicional.· Microfiltro permanente inox.· Filtro de papel para B-20- 250 unidades· Dos contenedores de 20 litros con calentamiento eléctrico, tubo de nivel y grifo antigoteo Equipamiento incluido CAFETERA DE FILTRO B-40Dos contenedores de 40+40 litrosSe compone de una columna central y dos contenedores.La cafetera B-40 puede conectarse a:`230V / 50-60 / 3~ `400-440V / 50-60 / 3N~B-40PVP €5400035Cafetera B-40 400/50-60/3N 9.510· Contenedor 40 litros adicional · Microfiltro permanente inox· Filtro de papel para B-40- 250 unidades· Dos contenedores de 40 litros con calentamiento eléctrico, tubo de nivel y grifo antigoteo Equipamiento incluidoUn contenedor de 5 litros (derecha o izquierda)Se compone de una columna central y un contenedor.Los modelos A están equipados con depósito y grifo de agua caliente en la columna central.La cafetera B-5 es un modelo multifase:`230V / 50-60 / 1N~`230V / 50-60 / 3~`400-440V / 50-60 / 3N~(por defecto)B-5 I/D PVP €5400051Cafetera B-5ID 400/50-60/3N (contenedor derecha o izquierda) 3.1055400052Cafetera B-5DA 400/50-60/3N (contenedor derecha + grifo de agua) 4.3535400053Cafetera B-5IA 400/50-60/3N (contenedor izquierda + grifo de agua) 4.353· Contenedor 5 litros adicional · Microfiltro permanente inox· Filtro de papel para B-5- 250 unidades· Un contenedor de 5 litros con calentamiento eléctrico, tubo de nivel y grifo antigoteoEquipamiento incluido CAFETERA DE FILTRO B-10 I/DUn contenedor de 10 litros (derecha o izquierda)Se compone de una columna central y un contenedor.Los modelos A están equipados con depósito y grifo de agua caliente en la columna central.La cafetera B-10 es un modelo multifase:`230V / 50-60 / 1N~ `230V / 50-60 / 3~`400-440V / 50-60 / 3N~(por defecto)B-10 I/D PVP €5400027Cafetera B-10I 400/50-60/3N (contenedor izquierda) 3.6495400054Cafetera B-10D 400/50-60/3N (contenedor derecha) 3.6495400055Cafetera B-10DA 400/50-60/3N (contenedor derecha + grifo de agua) 4.6465400056Cafetera B-10IA 400/50-60/3N (contenedor izquierda + grifo de agua) 4.646· Contenedor 10 litros adicional · Microfiltro permanente inox· Filtro de papel para B-10- 250 unidades· Un contenedor de 10 litros con calentamiento eléctrico, tubo de nivel y grifo antigoteo Equipamiento incluidoUn contenedor de 20 litros (derecha o izquierda)Se compone de una columna central y un contenedor.Los modelos A están equipados con depósito y grifo de agua caliente en la columna central.La cafetera B-20 es un modelo multifase:`230V / 50-60 / 1N~`230V / 50-60 / 3~`400-440V / 50-60 / 3N~(por defecto)B-20 I/DPVP €5400058Cafetera B-20ID 400/50-60/3N (contenedor derecha o izquierda) 4.5095400059Cafetera B-20IDA 400/50-60/3N (contenedor derecha o izquierda + grifo de agua) 5.427· Contenedor 20 litros adicional · Microfiltro permanente inox· Filtro de papel para B-10- 250 unidades· Un contenedor de 20 litros con calentamientoeléctrico, tubo de nivel y grifo antigoteo Equipamiento incluidoCAFETERA DE FILTRO B-40 I/DUn contenedor de 40 litros (derecha o izquierda)Se compone de una columna central y un contenedor.La cafetera B-40 puede conectarse a:`230V / 50-60 / 3~ `400-440V / 50-60 / 3N~B-40 I/DPVP €5400062Cafetera B-40D 400/50-60/3N (contenedor derecha) 6.1005400064Cafetera B-40I 400/50-60/3N (contenedor izquierda) 6.100· Contenedor 40 litros adicional · Microfiltro permanente inox· Filtro de papel para B-10- 250 unidades· Un contenedor de 40 litros con calentamientoeléctrico, tubo de nivel y grifo antigoteo Equipamiento incluidoACCESORIOSequipos.CAFETERÍA-BUFFETDispensadores de desayunosDispensadores de bebidas calientes basado en productos solubles.Máquinas enfocadas a dar servicio de desayuno en hoteles, comedores, oficinas y buffets.Los dispensadores de desayunos BOLERO de Sammic by Bravilor Bonamat garantizan rapidez de servicio encualquier lugar. Gracias a la conexión al agua, las BOLERO se llenan de agua automáticamente y su uso es muy sencillo.Los dispensadores de desayuno BOLERO están equipados con tecnología contrastada y cuentan con un menú de opciones claro con iluminación LED.Todos los modelos cuentan con una salida independiente de agua caliente para infusiones o sopas.El sistema único de mezcla con el que están equipados aseguran un flujo óptimo de ingredientes y el sistema de agua caliente tiende a que se forme menos cal, mejorando la durabilidad del equipo.Todos los modelos están provistos de un sistema de señalización, programa de limpieza y función de aclarado en el panel de control.Otras características como la salida del recipiente con cierre, la señal del escurridor lleno, contadores totales y diarios y el modo de ahorro de energía hacen de los dispensadores de desayunos Sammic by Bravilor Bonamat aparatos excepcionalesy únicos en el mercado.DISPENSADOR DE DESAYUNOS BOLERO 1Un contenedor de ingredientes Modelo compacto, para elaboración de café o chocolate caliente.BOLERO 1PVP €5400041Bolero 1 230/50-60/1 1.617· Un contenedor para ingredientes solubles.· Jarra de cristal.Equipamiento incluidoDISPENSADOR DE DESAYUNOS BOLERO 2Dos contenedores de ingredientes Modelo compacto, para elaboración de café y cappuccino o chocolate caliente.BOLERO 21PVP €5400046Bolero 2 230/50-60/1 1.978· Dos contenedores para ingredientes solubles.· Jarra cristal Equipamiento incluidoCAFETERÍA-BUFFET DISPENSADOR DE DESAYUNOS BOLERO XL-323Tres contenedores de ingredientes Modelo medio, posibilidad de obtener 9 variedades de bebidas.BOLERO XL-323PVP €5400044Bolero XL-323 230/50-60/1 3.234· Tres contenedores para ingredientes solubles.· Jarra de cristal.Equipamiento incluidoDISPENSADOR DE DESAYUNOS BOLERO TURBO 403Cuatro contenedores de ingredientesGran producción, posibilidad de obtener café, chocolate, cappuccino, café con leche o agua a termos o tazas.`Salida única o doble (simultánea pero independiente).`Producción a termos o tazas: se suministra con estante intermedio para la producción directa a tazas.BOLERO TURBO 403PVP €5400048Bolero Turbo 403 230/50-60/1 3.939· Cuatro contenedores para ingredientessolubles.· Estante intermedio para producción directaa tazas.· Jarra de cristal.Equipamiento incluidoDISPENSADOR DE DESAYUNOS BOLERO TURBO XL 403Cuatro contenedores de ingredientes, dos de ellos de gran capacidad.Gran producción. Cuatro contenedores, dos de ellos con mas capacidad para mayor autonomía. Permite obtener café, chocolate, cappuccino, café con leche o agua a termos o tazas.`Salida única o doble (simultánea pero independiente).`Producción a termos o tazas: se suministra con estante intermedio para la producción directa a tazas.BOLERO TURBO XL 403PVP €5400049Bolero Turbo XL-403 230/50-60/1 4.333· Cuatro contenedores para ingredientessolubles· Estante intermedio para producción directaa tazasEquipamiento incluidoCAFETERÍA-BUFFETACCESORIOS。
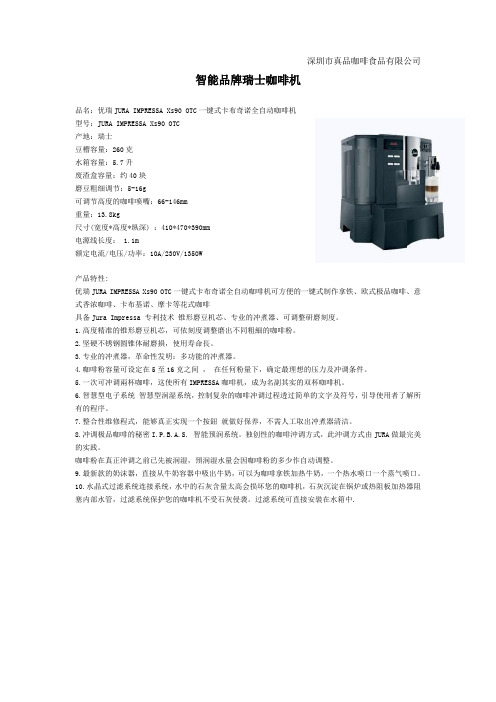
智能品牌瑞士咖啡机品名:优瑞JURA IMPRESSA Xs90 OTC一键式卡布奇诺全自动咖啡机型号:JURA IMPRESSA Xs90 OTC产地:瑞士豆槽容量:260克水箱容量:5.7升废渣盒容量:约40块磨豆粗细调节:5-16g可调节高度的咖啡喷嘴:66-146mm重量:13.8kg尺寸(宽度*高度*纵深) :410*470*390mm电源线长度: 1.1m额定电流/电压/功率:10A/230V/1350W产品特性:优瑞JURA IMPRESSA Xs90 OTC一键式卡布奇诺全自动咖啡机可方便的一键式制作拿铁、欧式极品咖啡、意式香浓咖啡、卡布基诺、摩卡等花式咖啡具备Jura Impressa 专利技术锥形磨豆机芯、专业的冲煮器、可调整研磨刻度。
1.高度精准的锥形磨豆机芯,可依刻度调整磨出不同粗細的咖啡粉。
2.坚硬不锈钢圆锥体耐磨損,使用寿命長。
3.专业的冲煮器,革命性发明:多功能的冲煮器。
4.咖啡粉容量可设定在5至16克之间,在任何粉量下,确定最理想的压力及冲调条件。
5.一次可冲调兩杯咖啡,这使所有IMPRESSA咖啡机,成为名副其实的双杯咖啡机。
6.智慧型电子系统智慧型润湿系统,控制复杂的咖啡冲调过程透过简单的文字及符号,引导使用者了解所有的程序。
7.整合性维修程式,能够真正实现一个按鈕就做好保养,不需人工取出冲煮器清洁。
8.冲调极品咖啡的秘密I.P.B.A.S. 智能预润系统。
独创性的咖啡沖调方式,此沖调方式由JURA做最完美的实践。
咖啡粉在真正沖调之前已先被润湿,預润湿水量会因咖啡粉的多少作自动调整。
9.最新款的奶沫器,直接从牛奶容器中吸出牛奶,可以为咖啡拿铁加热牛奶,一个热水喷口一个蒸气喷口。
10.水晶式过滤系统连接系统,水中的石灰含量太高会损坏您的咖啡机,石灰沉淀在锅炉或热阻板加热器阻塞内部水管,过滤系统保护您的咖啡机不受石灰侵袭。
过滤系统可直接安裝在水箱中.产品:优瑞JURA IMPRESSA X7-S商用全自动咖啡机型号:JURA IMPRESSA X7-S产地:瑞士规格尺寸:430*585*510mm产品重量:18.5 kg机器颜色:黑色电压/频率:220V/50Hz功率:2200W水箱容量:5L豆箱容量:650g*2(双磨豆器)咖啡喷嘴可调高度:66-146mm水泵压力:15bar*2磨豆器粗细调节:6档粉渣盒容量:40块电源线长度:1.8m每小时出杯数:Cappuccino 90杯Espresso 120杯Latte 90杯Americano 90杯Conpanna 90杯Macchiato 90杯产品特性优瑞JURA IMPRESSA X7-S全自动咖啡机具备人性化操作界面,七国语言供选择,配备简洁易懂的文字和图示,帮您轻而易举地完成系统设置及日常操作,可简单方便根据屏幕上的提示来进行咖啡机的润湿、清洗、除垢等保养工作。

MyMachineOVERVIEW/机器概览Tactile beverage buttons/ 触摸型饮料按钮13ON/OFF button/开/关按钮15Espresso 40 ml/浓缩咖啡(40 ml)16Cappuccino/卡布奇诺17Latte Macchiato/拿铁玛奇朵19Lungo 110 ml/大杯咖啡(110 ml)20 Creamy Latte/拿铁21Warm milk froth/热奶泡Rapid Cappuccino System (R.C.S.)/ 快速卡布奇诺 系统(R.C.S.)22Lid detach button/盖子分离按钮23Milk container Lid/牛奶容器盖24Milk froth density: MIN/奶泡密度:最小25 Position for milk froth regulator knob (insertion/removal)/奶泡调节旋钮的位置:(插入/移开)26M ilk froth regulator knob/奶泡调节旋钮27CLEAN : Rinsing button/清洁:清洗按钮28Milk froth density: MAX/奶泡密度:最大29Rapid Cappuccino System connector/快速卡布奇诺系统连接装置30Milk spout/牛奶喷嘴31Milk Spout Lever/牛奶喷嘴手柄32Milk aspiration tube/牛奶吸管33Milk container (0.35 L)/牛奶容器(0.35升)Overview of machine/机器概览Machine without Rapid Cappuccino System/未配备快速卡布奇诺 系统的装置Machine with Rapid Cappuccino System (for Cappuccino)/ 配备了快速卡布奇诺 系统的装置(用于冲泡卡布奇诺)Machine with Rapid Cappuccino System (for Latte Macchiato and Creamy Latte)/配备了快速卡布奇诺 系统的装置(用于冲泡拿铁玛奇朵 和拿铁)1Lever/手柄2Capsule compartment/胶囊放置口3Water tank (0.9 L)/水箱(0.9 升)4Coffee outlet/咖啡出口5Used capsule container/废弃粉囊储存盒6Drip tray (push inside for Latte Macchiato glass)/滴水盘(如需放置拿铁玛奇朵杯,需向内推动滴水盘)7Left grid/左格栅8Right grid/右格栅9Descaling pipe storage door (pull to open)/除垢管道储存区(拉开即可)10Descaling pipe/除垢管道11Steam connector door/蒸汽连接装置门12Steam connector/蒸汽连接头Alert/警报14 «Descaling» : descaling alert refer to section «Descaling»“除垢”:除垢警报,请参见“除垢”章节内容18 «Clean» : milk system cleaning alert refer to section «Preparing Cappuccino»“清洁”:牛奶系统清洁,请参见“冲泡 卡布奇诺 ”章节CONTENT/内容Nespresso is an exclusive system creating the ultimate Espresso, time after time. Our Nespresso machines are equipped with an extraction system that guarantees up to 19 bar pressure. Each parameter has been calculated with great precision to ensure that all the aromas from each capsule can be extracted, to give the coffee body and create an exceptionally thick and smooth crema.Nespresso 咖啡机拥有卓越的萃取系统,专为制作臻品浓缩咖啡。
![[新版]优瑞全主动咖啡机](https://img.taocdn.com/s1/m/a2862e2653ea551810a6f524ccbff121dd36c591.png)
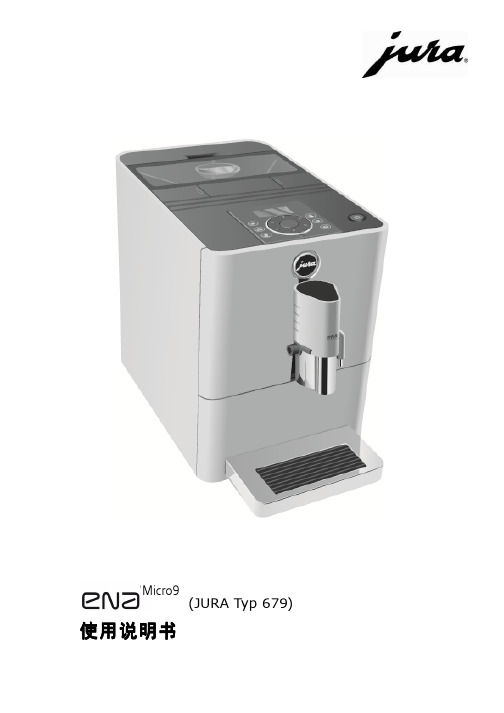
[新版]优瑞全主动咖啡机优瑞全自动咖啡机瑞士优瑞(JURA)公司始创于1931年,长期以来一直致力于高档家用电器的研发与制造。
自80年代中期,优瑞公司着力在家用全自动咖啡机器领域发展,并逐渐成为业内的一线品牌及制造商。
多年经验的累积和专利技术的创新,使优瑞公司的产品线从家用领域向商用领域延伸,时至今日,越来越多的企事业单位及餐饮服务场所也开始成为优瑞的客户及合作伙伴。
一、优瑞Jura F50C商务全自动咖啡机:型号:Jura F50C 产地:瑞士尺寸:280*345*435mm 重量:9.1千克电源:220V 功率:1450W豆箱容量:200g 水箱容量:1.9L水泵压力:15bar 粉渣盒容量:16块电压/频率 220/240V 50/60Hz产品特性:1.使用专业卡布基诺奶沫器能很方便的为您的卡布基诺、拿铁/玛琪雅朵咖啡制作出完美的奶沫与热牛奶;2.旋转式按钮可用于程序设置,有了它,操作变得十分便捷。
您可以使用此按钮轻松完成对水量及其它参数的设置,只需转动和轻按,即可达到您对咖啡的独特口感要求;3.咖啡杯照明系统;4.动力监测系统;5.红色字幕可选中文;6.Connector System 外接自动发泡系统,可以连接专业卡布基诺奶沫器、简易奶沫器、两段式奶沫器,及热水喷嘴;7.要使淬取的每一杯咖啡都品质完美,这即使对于专业咖啡师来说也不是件很容易的事情。
但优瑞的工程师们为此研发了I.P.B.A.S 智能预润系统,可以使得淬取过程中的咖啡油脂和芳香气味尽善尽美,无疑给真正的咖啡爱好者们带来了福音;8. 饮用水中可能会含有的某些杂质,比如氯化物、重金属、重元素等,这些物质不仅有害于健康,还会影响咖啡口味。
JURA的水质净化系统可以有效地解决以上问题。
CLARIS plus水质净化滤芯被直接安置在咖啡机水箱内,不需要再添加其它化学药剂,CLARIS plus就能吸附水中杂质,延缓咖啡机加热系统中水垢的形成,同时保留水中有益健康的矿物质成分。

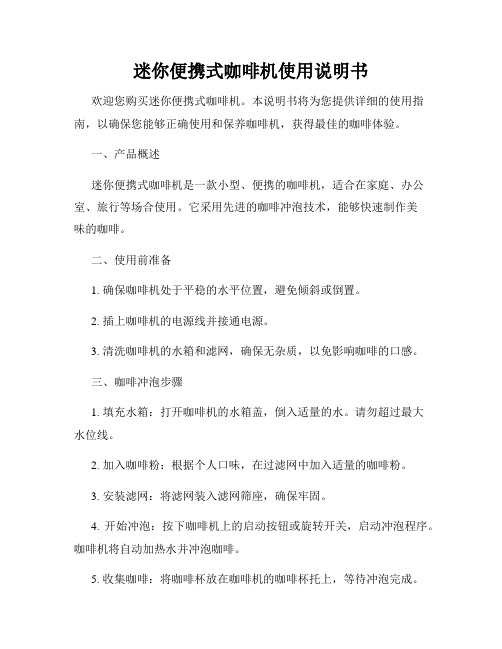
迷你便携式咖啡机使用说明书欢迎您购买迷你便携式咖啡机。
本说明书将为您提供详细的使用指南,以确保您能够正确使用和保养咖啡机,获得最佳的咖啡体验。
一、产品概述迷你便携式咖啡机是一款小型、便携的咖啡机,适合在家庭、办公室、旅行等场合使用。
它采用先进的咖啡冲泡技术,能够快速制作美味的咖啡。
二、使用前准备1. 确保咖啡机处于平稳的水平位置,避免倾斜或倒置。
2. 插上咖啡机的电源线并接通电源。
3. 清洗咖啡机的水箱和滤网,确保无杂质,以免影响咖啡的口感。
三、咖啡冲泡步骤1. 填充水箱:打开咖啡机的水箱盖,倒入适量的水。
请勿超过最大水位线。
2. 加入咖啡粉:根据个人口味,在过滤网中加入适量的咖啡粉。
3. 安装滤网:将滤网装入滤网筛座,确保牢固。
4. 开始冲泡:按下咖啡机上的启动按钮或旋转开关,启动冲泡程序。
咖啡机将自动加热水并冲泡咖啡。
5. 收集咖啡:将咖啡杯放在咖啡机的咖啡杯托上,等待冲泡完成。
6. 咖啡完成:当咖啡杯中的咖啡达到理想浓度时,咖啡机将自动停止工作。
四、清洁和保养1. 清洁滤网:在每次使用后,取出滤网并清洗残留的咖啡渣和沉淀物。
可以使用清水或温和的洗涤剂进行清洗,然后彻底冲洗干净并晾干。
2. 清洁水箱:定期清洗水箱,避免水垢的积聚。
可以使用柠檬汁或专用清洁剂进行清洗,然后彻底冲洗干净。
五、注意事项1. 在使用咖啡机之前,请仔细阅读本使用说明书,并按照说明进行操作。
2. 请勿在咖啡机无水情况下启动,以免损坏咖啡机。
3. 使用咖啡机时,请不要触摸热水和热咖啡,以免烫伤。
4. 当咖啡机长时间不使用时,请拔出电源插头,并保持咖啡机干燥。
5. 在清洁咖啡机时,务必断开电源并等待咖啡机完全冷却,以确保安全。
六、故障排除1. 咖啡冲泡速度慢:可能是滤网堵塞,请清洗滤网。
2. 咖啡温度不够高:可能是加热系统故障,请联系售后服务。
3. 咖啡机无法启动:可能是电源故障,请检查电源连接是否正常。
希望以上使用说明能够帮助您正确使用迷你便携式咖啡机,享受美味的咖啡。
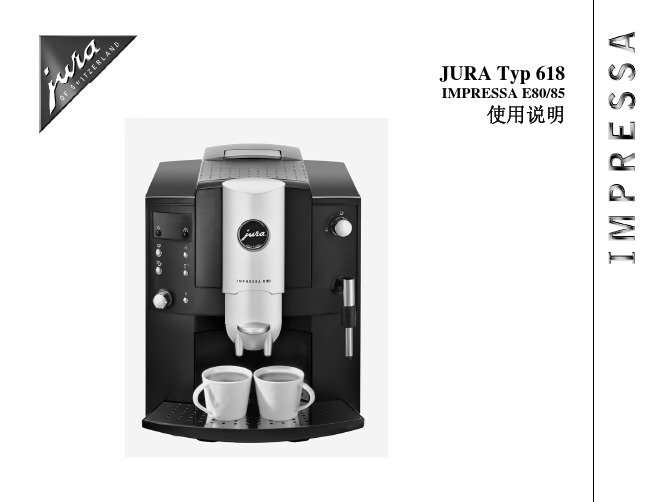

优瑞咖啡机说明书
篇一:咖啡机使用维护大全
正确的使用方法能尽大程度的延长你所用咖啡机的使用寿命
1.咖啡机豆仓注意事项(不要让水进到豆仓里也不要实用含杂物的咖啡豆以免损坏豆仓下的咖啡机研磨器)
2.咖啡机水箱注意事项(不要加温水热水冰水或矿物质水一定要用纯净水)
3.加粉注意事项(不要让粉仓内进入水)
4. 使用220V专用电源插座,有电流保护设施最佳;
关于长期使用中的过保修期的咖啡机有以下需要注意 : 咖啡机是食品机械,关乎食品安全的问题,长期使用要注意清洁保养,以提高咖啡机使用寿命及咖啡制作品质。
咖啡机长期使用会有以下问题需要注意:
1.长期使用,因为水质(自来水 / 过滤水 / 矿泉水)原因,或多或少会在咖啡机锅炉内结成水垢,造成热水不热,从而影响咖啡液萃取不充份,影响咖啡口感;
解决方式:定期用咖啡机专用除钙药片清洗锅炉除钙。
请注意使用全自动咖啡机一定要用纯净水。
2.咖啡机内部造啡器,长期冲洗,易造成其萃取机芯轨道上润滑油的流失,影响其正常冲泡咖啡,加大萃取器部件的摩擦力,从而加速零部件磨损。
其表像为冲泡咖啡明显感
觉吃力,时间变长,同时咖啡造啡声音明显变大。
解决方式:定期请专业的维修工程师清理冲泡机芯加涂食品级防水润滑油。
3.咖啡机长期使用,在机器内部管路会有咖啡渍附着管壁,就如茶杯长时间用来泡茶后,在杯子的内壁会有茶渍一样。
从而影响咖啡口感。
解决方式:用全自动咖啡机专用清洗药片清洗咖啡机水路
4.咖啡机在制作咖啡的过程中,内部或多或少会咖啡渣或粉洒落,长期使用易造成堆积。
由于咖啡渣或粉会散发香味,易招引蟑螂及滋生细菌,所以经常做内部彻底清洁也很重要。
解决方式:请专业人员做内部清洁与消毒
以上列出的只是咖啡机长期使用过程中易出现的常见问题,其它未列事宜,可以咨询我们公司。
5. 咖啡粉研磨粗细的简单判定
如果流出的咖啡液很淡,粉饼不成型松散且潮湿,此粉太粗如果流出的咖啡液很黑,成滴水状,不成直线,且很长时间流出的液体很少,此粉太细。
正常情况是,一开始咖啡液很浓,液体成直线,慢慢的变淡。
粉饼成型不松散且不潮湿
全自动咖啡机注意事项 ?
?
? 全自动咖啡机的安置环境 1、咖啡机要距离墙面10厘米以上,否则影响机器散热; 2、摆放咖啡机的台面尽量平坦,否则台面水平支撑不好,会造成机器噪音及运行不良现象(最好是比较厚重的大理石台面);
?
?
? 3、咖啡机最好安置在干燥、通风的室内;咖啡机使用前的准备工作 1、用干净的抹布,将产品内外擦拭干净(注意:咖啡机豆仓绝对不能用湿毛巾);
? 2、仔细检查咖啡机每个部位是否真正安装到位,然后再开启咖啡机电源(尤其是冲泡器注意到位);
?
? 3、一般开机后咖啡机加热等闪烁在2分钟内,时间太长可能有问题; 4、咖啡机水箱如果没有水或缺水对有些全自动咖啡机型来讲是相当危险的,尤其是意大利SAECO 咖啡机未带水位检查;
?
?
?
?
?
?
?
? 5、咖啡机未完全运行完毕,禁止移动咖啡机任何部位; 6、必须向咖啡机水箱中注入常
温纯净水。
咖啡机的日常养护 1、确保咖啡机安置在干燥、通风的室内; 2、避免频繁搬动,避免外力撞击; 3、保持机器内、外部清洁; 4、使用220V专用电源插座,有电流保护设施最佳; 5、长时间不用最好关闭机器电源,咖啡机豆仓内咖啡豆使用干净。
?
? 咖啡机的清洁方法 1、机内冲泡器定期清洁,确保咖啡机内无咖啡粉污、渣垢。
建议每月清
洁两次;
? 2、水箱清洗,咖啡豆仓清洗需完全干燥去除湿气后方可重新加入原料使
用。
建议每月清洁一次;
?
?
?
?
?
?
? 3、接水盘应每日清洁后放回原位;用干净的湿抹布
勤擦取杯品周围; 4、咖啡机身后面的应注意蟑螂等虫体进入; 5、定期用小刷子清理可以目测到的咖啡机各部位灰尘。
其他注意事项 1、请妥善保管好咖啡机说明书及销售商电话; 2、使用咖啡机专用清洗液,避免劣质产品对咖啡机引起的故障; 3、使用专用220V插座,避免电流不稳影响机器运行状况,最稳定的电
源配置应该是原装的原厂产品,一般国内都给更换过来电源,这样真的不好。
咖啡机维修故障排除
发布时间:XX-03-17 23:02:07
咖啡机型常见故障排除
瑞士优瑞咖啡机在使用过程中,面板红灯提示比其它品牌咖啡机要频繁很多;
由于咖啡机故障解除需要很专业的技术人员操作,在这里写的太多可能对您并没什么好处,有很多客户按网络上的步骤操作,不但解决不了咖啡机红灯告警提示,反而使咖啡机很小的问题更加严重,再说咖啡机深度故障处理都是很技术的,没有哪个咖啡机维修工程师会在网络上提供解决方法,建议您还是联系咖啡机售后工程师。
Jura 优瑞咖啡机常见屏幕告警排除
1.屏幕显示:FILL WATER
原因:1.水箱已空 2. 浮标故障。
解决办法:1.加水 2.润湿或将水箱除垢。
篇二:意大利。
德龙。
咖啡机。
EC410中文说明书篇三:德龙。