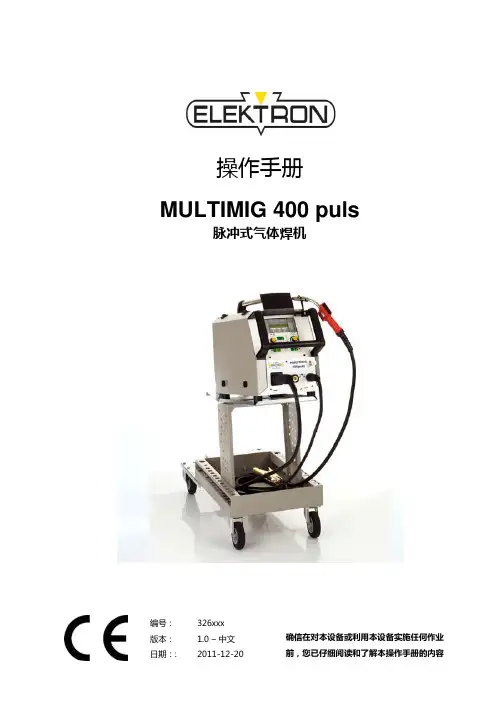
puls60中文操作说明书
- 格式:pdf
- 大小:2.40 MB
- 文档页数:85
PH60U s e r G u i d ePhono StageHafler is a division of Radial Engineering Ltd.1588 Kebet Way, Port Coquitlam BC, Canada V3C 5M5(604)***********************PH60 PHono sTageUseR gUIDeTable of Contents Page Features (1)Overview (2)Set the Load (3)Connect (4)Using (5)Warranty .................................................................Back Cover Thank you for purchasing the Hafler PH60 phono stage, one of the best sounding yet reasonably priced preamps ever made. The PH60 will boost the signal from your turntable to a man-ageable level and introduce the RIAA curve that is needed to properly play back a typical long play album.Before making any connections, make sure your audio system is turned off. This will help avoid loud turn-on and connection transients that can damage more sensitive components such as tweeters.The Hafler PH60 is designed to boost the ultra-low level signal from a turntable equipped with a moving coil cartridge so that it can be played using a typical -10dB line input such as an AUX IN or CD IN on a receiver or preamplifier. If your turntable is equipped with a dynamic cartridge, please consider purchas-ing the PH50 as this phono preamp is specifically designed for these types of cartridges.1. Low CUT:Activates the high-pass filter to control low frequencies2.PoweR:Turns on the PH603. CabLe CLamP: Secures the power supply cable4. 15 VDC: external power supply connection5. RUbbeR FeeT: Surface saving rubber feet to secure the PH606. oUTPUT: RCA output to feed the receiver or HIFI system7. gRoUnD LUg: For turntable to eliminate hum and buzz8. InPUT:RCA input to connect your turntable to the PH60The Hafler PH60 is a combination pre-preamp and RIAA preamp that both increases the level to accommodate the moving coil, adds in the RIAA equalization curve and then boosts the signal so that it can be used by a typical high fidelity receiver.aboUT THe RIaa eqUaLIzaTIon CURVeThe Recording Institute Association of America (RIAA) figured out that in order to reproduce the recording effectively, the high frequencies have to be exaggerated. Upon playback, the reverse filter must then be applied – resulting in a flat or natural sound.Moving coil cartridges produce a muchlower output than a moving magnet. Inorder to bring their gain up to a usablelevel, between 60 and 70dB of gainis required. This in fact is extremelydifficult to do without introducing noiseor artefact. This is why moving coilpreamps are more expensive.10 Hz Preamp Playback Record 100 Hz 1 kHz 10 kHz -20-10+10+20-60 db -10 dbReceiver Amp Moving Coil oVeRVIewseTTIng LoaD FoR YoUR CaRTRIDgeThe Hafler PH60 is set up to accommodate various types of moving coil cartridges. This is accomplished with a series of internal jumpers that can be set for 50Ω, 100Ω and 200Ω plus a custom setting should this be needed.The PH60 comes factory set at 100Ω as this will accommodate about 90% of the cartridges used today. Your phono cartridge manufacturer will suggest the appropriate load for its cartridge for optimal performance – which should be found in the cartridge’s manual or web site. If your cartridge requires a different load, simply take the cover off the PH60 using a standard Phillips screwdriver and a HEX 5/64", carefully pull the jumper from the 100Ω position and push it back on to the 50Ω or 200Ωposition to suit. Setting the load correctly will assure the most accurate frequency response.Some cartridge manufacturers may suggest a unique (specific) load to optimize their cartridge’s performance. To address this, a fourth ‘custom’ position in the jumper section of the PCB allows a resistor to be soldered in to suit. Simply have your dealer contact the Hafler service depart-ment with the required load and we will calculate the proper resistor. Your dealer’s service department can then insert the part at a nominal cost to accommodate your needs.ConneCTSimply connect the output from your turntable to your PH60 and the output from the PH60 to the phono input on your receiver. Make sure you use high quality coaxial cables with proper shielding to minimize noise. It is also very important that you ensure the ground connection from the turntable be properly and securely fastened to your Hafler PH60 to eliminate hum and buzz.Connect the included 15VDC power supply and secure the power con-nection into place using the cable clamp. Once all connections are made, turn the volume on your audio system down and then turn on the power. The power LED on the PH60 will illuminate to let you know the power is being received.UsIngThe PH60 is equipped with a switchable high-pass filter that can be activated to eliminate excessive low frequency rumble. This can occur when listening to music at higher levels. If you encounter rumble, simply G a i nYou are now ready to enjoy 50 years of tradition of building the veryTHREE YEAR TRANSFERABLE LIMITED WARRANTYHAFLER (A division of Radial Engineering Ltd.) (“Hafler”) warrants this product to be free from defects in material and workmanship and will remedy any such defects free of charge according to the terms of this warranty. Hafler will repair or replace (at its option) any defective component(s) of this product (excluding finish and wear and tear on components under normal use) for a period of three (3) years from the original date of purchase. In the event that a particular product is no longer available, Hafler reserves the right to replace the product with a similar product of equal or greater value. In the unlikely eventthatadefectisuncovered,********************************************************** number (Return Authorization number) before the 3 year warranty period expires. The product must be returned prepaid in the original shipping container (or equivalent) to Hafler or to an authorized Hafler repair centre and you must assume the risk of loss or damage. A copy of the original invoice showing date of purchase and the dealer name must accompany any request for work to be performed under this limited and transferable warranty. This warranty shall not apply if the product has been damaged due to abuse, misuse, misapplication, accident or as a result of service or modification by any other than an authorized Hafler repair center.THERE ARE NO EXPRESSED WARRANTIES OTHER THAN THOSE ON THE FACE HEREOF AND DESCRIBED ABOVE. NO WARRANTIES WHETHER EXPRESSED OR IMPLIED, INCLUDING BUT NOT LIMITED TO, ANY IMPLIED WARRANTIES OF MERCHANTABILITY OR FITNESS FOR A PARTICULAR PURPOSE SHALL EXTEND BEYOND THE RESPECTIVE WARRANTY PERIOD DESCRIBED ABOVE OF THREE YEARS. HAFLER SHALL NOT BE RESPONSIBLE OR LIABLE FOR ANY SPECIAL, INCIDENTAL OR CONSEQUENTIAL DAMAGES OR LOSS ARISING FROM THE USE OF THIS PRODUCT. THIS WARRANTY GIVES YOU SPECIFIC LEGAL RIGHTS, AND YOU MAY ALSO HAVE OTHER RIGHTS, WHICH MAY VARY DEPENDING ON WHERE YOU LIVE AND WHERE THE PRODUCT WAS PURCHASED.Hafler PH60™ User Guide - Part #: R870 1306 00Copyright 2015 Hafler All rights reserved.。
FLEX60特殊参数============================================================================================== 工作范围的设置Begin of operation range(m) 工作范围的始端0.3 Additional security at start of operating range 在工作范围的始端附加的安全性Yes Additional security at end of operating range(cm) 在工作范围的末端附加的安全性20工作范围是指表所能测量到的范围,它必须大于或等于量程范围。
同时工作范围还有一附加安全带,所以表所能测到的范围还必须加上工作范围的附加安全带。
工作范围的始端必须小于或等于量程的始端,其默认值为量程的始端(即100%量程)。
要注意,每次修改完100%量程时,工作范围的始端也相应改变。
工作范围始端附加的安全带为工作范围始端的15%。
当峰在工作范围始端的安全带内时,都显示工作范围始端的值。
工作范围的末端就是缆长,因此特殊参数里没有这一项。
通过改变缆长,就可以改变工作范围的末端。
工作范围末端附加安全带可以任意设定。
当峰在工作范围末端的安全带时,都显示工作范围末端的值,也就是显示缆长。
附:测量值不在量程范围时显示值和电流输出的情况由于工作范围比量程范围大,测量值有可能不在量程范围内,这时显示值和输出电流值要加以注意。
当设为距离和高度显示时,显示实际值(测量值在工作范围的安全带内除外)。
当设为百分比显示时,最大显示范围是-10%——110%,即量程始端和末端各延长10%,当实际百分比超过这个范围时,也只能显示-10%或110%;当设为输出电流时,显示最大电流值(20mA或20.5mA)或最小电流值(4mA或3.8mA),这时电流输出和物位没有线性对应关系。
PAS60使用手册一、设备简介PAS60是一款功能强大的自动化测试设备,主要用于电子产品的测试和测量。
它采用先进的测试技术,能够快速、准确地完成各种测试任务,并提供详细的数据分析结果。
PAS60具有高可靠性、易于操作和维护的特点,适用于各种规模的电子产品生产和测试。
二、安装与连接1.安装环境:请确保PAS60安装在平坦、稳定的工作台上,避免潮湿、灰尘和其他潜在干扰源。
2.电源连接:将PAS60的电源线连接到合适的电源插座,并确保电源电压符合设备要求。
3.通信接口:根据需要连接测试设备的通信接口,如GPIB、USB、Ethernet等,确保连接牢固可靠。
4.测试接口:根据被测设备的接口类型,连接适当的测试接口,如BNC、SMA等,确保接口匹配且连接稳定。
三、设备启动与关机1.启动:按下PAS60的电源开关,设备将自动启动并进入正常工作状态。
2.关机:按下PAS60的关机按钮,设备将依次关闭各模块并退出工作状态。
请注意在设备完全停止运行后再断开电源。
四、操作界面介绍1.显示屏:PAS60配备高清晰度显示屏,用于显示测试结果、设备状态等信息。
2.操作按钮:设备面板上设有多个操作按钮,用于控制测试流程、选择测试参数等。
3.接口面板:接口面板上排列着各种测试接口,用于连接被测设备和测试仪器。
五、菜单功能详解1.测试设置:在此菜单下,用户可根据测试需求设置测试参数、选择测试模板等。
2.设备校准:为确保测试结果的准确性,需定期进行设备校准,该菜单提供校准功能及相关设置。
3.数据管理:在此菜单下,用户可对测试数据进行查询、导出、分析等操作。
4.系统设置:该菜单用于设置设备参数、配置网络连接等。
5.帮助文档:提供有关PAS60的使用说明、操作技巧及常见问题解决方案。
六、常见问题与解决方案1.测试结果异常:检查测试接口是否连接良好、被测设备是否正常工作,如仍存在问题请联系技术支持。
2.显示屏无显示或显示异常:检查显示屏连接是否正常、显示器本身是否损坏,如问题无法解决请联系技术支持。
iRelay 60综合保护测控装置用户说明书危险和警告本设备只能由专业人士进行安装,对于因不遵守本手册的说明所引起的故障,厂家将不承担任何责任。
重要提示感谢您使用深圳市中电电力技术股份有限公司的产品。
为了安全、正确、高效地使用本装置,请您务必注意以下重要提示:1) 本说明书仅适用于iRelay 60综合保护测控装置。
2) 请仔细阅读本说明书,并按照说明书的说明设置、测试和操作。
如有随机资料,请以随机资料为准。
3) 为防止装置损坏,严禁带电插拔装置各插件、触摸印制电路板上的芯片和器件。
4) 请使用合格的测试仪器和设备对装置进行试验和检测。
5) 装置如出现异常,请及时与本公司售后技术服务(400-8860-418)联系。
6) 本装置的设置缺省密码是:0000。
本说明书版权属深圳市中电电力技术股份有限公司所有,未经书面许可,不得复制,传播或使用本文件及其内容,违犯者将要对损坏负责。
深圳市中电电力技术股份有限公司保留所有版权。
我们已经检查了本手册关于描述硬件和软件保持一致的内容。
由于不可能完全消除差错,所以我们不能保证完全的一致。
本手册中的数据将定期审核,并在新一版的文件中做必要的修改,欢迎提出修改建议。
以后版本中的变动不再另行通知。
目录1 装置简介 (1)1.1 概述 (1)1.2 产品特点 (1)1.3 基本功能 (2)2 技术指标 (3)2.1 工作环境条件 (3)2.2 额定参数 (3)2.3 准确度 (3)2.4 遥信分辨率 (4)2.5 过载能力 (4)2.6 继电器输出 (4)2.7 开关量输入 (4)2.8 电气绝缘性能 (4)2.9 机械性能 (5)2.10 电磁兼容性能 (5)3 功能说明 (6)3.1 保护功能 (6)3.1.1 辅助元件 (6)3.1.2 大电流闭锁保护 (9)3.1.3 相电流充电保护 (10)3.1.4 相电流加速保护 (10)3.1.5 开入加速相电流保护 (11)3.1.6 速断保护 (11)3.1.7 限时速断保护 (12)3.1.8 过流保护 (13)3.1.9 过负荷保护 (14)3.1.10 反时限过流保护 (14)3.1.11 电压速断保护 (15)3.1.12 电压限时速断保护 (16)3.1.13 IN充电保护 (17)3.1.14 IN加速保护 (17)3.1.15 IN过流保护 (18)3.1.16 IN反时限过流保护 (19)3.1.17 I0充电保护 (19)3.1.18 I0加速保护 (20)3.1.19 I0过流保护 (20)3.1.20 I0反时限过流保护 (21)3.1.21 负序过流保护 (21)3.1.22 负序反时限保护 (22)3.1.23 电流不平衡保护 (22)3.1.24 过电压保护 (22)3.1.25 低电压保护 (23)3.1.28 VX低压保护 (25)3.1.29 高周保护 (25)3.1.30 低周保护 (26)3.1.31 功率保护 (26)3.1.32 同期检查 (27)3.1.33 重合闸功能 (29)3.1.34 绝缘监视 (31)3.1.35 起动间隔保护 (31)3.1.36 TV断线监视 (32)3.1.37 TA监视 (32)3.1.38 控制回路监视 (32)3.1.39 有效值过压保护 (33)3.1.40 有效值过流保护 (33)3.1.41 电动机运行状态判断 (34)3.1.42 起动时间过长保护 (35)3.1.43 过热保护 (35)3.1.44 tE时间保护 (36)3.1.45 堵转保护 (36)3.1.46 负荷丢失保护 (37)3.1.47 再起动功能 (37)3.1.48 起动次数保护 (38)3.1.49 开关量保护 (39)3.2 测量功能 (39)3.2.1 一次值 (39)3.2.2 二次值 (39)3.2.3 计量数据 (40)3.3 遥信功能 (40)3.4 控制功能 (40)3.5 通信功能 (40)3.6 记录功能 (41)3.6.1 事件记录 (41)3.6.2 故障录波记录 (42)3.6.3 波形瞬态捕捉功能 (42)3.6.4 起动报告功能 (43)3.7 对时功能 (43)4 操作使用说明 (47)4.1 装置前面板 (47)4.2 按键操作 (47)4.3 信号指示灯 (48)4.4 装置上电 (48)4.5 默认显示界面 (48)4.6 事件报告显示 (49)4.7 菜单说明 (49)4.7.3 定值设置 (53)4.7.4 报告管理 (59)4.7.5 装置维护 (61)4.7.6 装置调试 (62)4.7.7 定值清单 (62)5 安装调试说明 (74)5.1 安装 (74)5.1.1 装置安装图 (74)5.1.2 背板端子布置 (75)5.2 时钟电池 (78)5.3 通电试验 (78)5.4 投运前调试 (78)5.5 装置故障分析 (80)6 接线原理图 (82)6.1 装置接线示意图 (82)7 售后服务承诺 (87)7.1 装置升级 (87)7.2 质保范围 (87)7.3 售后联系方式 (87)1 装置简介1.1 概述iRelay 60是深圳市中电电力技术股份有限公司(以下简称中电技术)精心开发的,适用于中高压电压等级的新一代智能化微机综合保护测控装置。

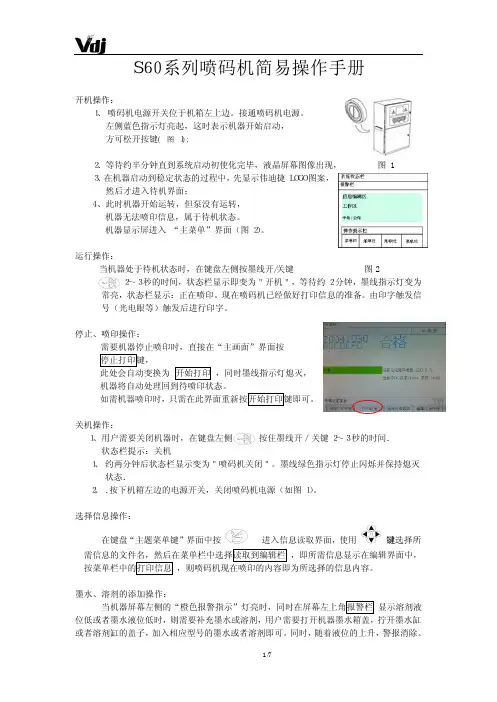
S60系列喷码机简易操作手册 开机操作:1、喷码机电源开关位于机箱左上边。
接通喷码机电源。
左侧蓝色指示灯亮起,这时表示机器开始启动, 方可松开按键(图1);2、等待约半分钟直到系统启动初使化完毕,液晶屏幕图像出现,图1 3、在机器启动到稳定状态的过程中,先显示伟迪捷LOGO图案, 然后才进入待机界面;4、此时机器开始运转,但泵没有运转, 机器无法喷印信息,属于待机状态。
机器显示屏进入 “主菜单”界面(图2)。
运行操作:当机器处于待机状态时,在键盘左侧按墨线开/关键图22~3秒的时间,状态栏显示即变为"开机",等待约2分钟,墨线指示灯变为常亮,状态栏显示:正在喷印。
现在喷码机已经做好打印信息的准备。
由印字触发信号(光电眼等)触发后进行印字。
停止、喷印操作:需要机器停止喷印时,直接在“主画面”界面按停止打印键,此处会自动变换为开始打印,同时墨线指示灯熄灭,机器将自动处理回到待喷印状态。
如需机器喷印时,只需在此界面重新按开始打印键即可。
关机操作:1、用户需要关闭机器时,在键盘左侧 按住墨线开/关键2~3秒的时间. 状态栏提示:关机 1、约两分钟后状态栏显示变为"喷码机关闭"。
墨线绿色指示灯停止闪烁并保持熄灭状态. 2、.按下机箱左边的电源开关,关闭喷码机电源(如图1)。
选择信息操作:在键盘“主题菜单键”界面中按进入信息读取界面,使用 键选择所需信息的文件名,然后在菜单栏中选择读取到编辑栏 ,即所需信息显示在编辑界面中,按菜单栏中的打印信息 ,则喷码机现在喷印的内容即为所选择的信息内容。
墨水、溶剂的添加操作: 当机器屏幕左侧的“橙色报警指示”灯亮时,同时在屏幕左上角报警栏 显示溶剂液位低或者墨水液位低时,则需要补充墨水或溶剂,用户需要打开机器墨水箱盖,拧开墨水缸或者溶剂缸的盖子,加入相应型号的墨水或者溶剂即可。
同时,随着液位的上升,警报消除。
注:如暂时未加入墨水和溶剂,按键暂时消除报警。
需尽快补充溶剂和墨水,如果液位继续下降,当达到一定低液位时,机器屏幕左侧的“红色报警指示”灯亮时,同时在屏幕左上角报警栏 显示溶剂液位空或者墨水液位空时,喷码机则不能正常启动。
pH60阐明书1介绍您选择的PH 计运用一块先进的微控制芯片做为仪器的控制核心。
它集成了模拟/数字转化功效,计算功效和微芯片显示。
这不仅增加了仪器的可靠性能,并且大幅度的减少了仪器的电消耗。
1.1特点低耗电量主机在“OFF”或者“自动锁定”模式下只需要很低的电量。
使用方便当读数稳定之后自动被锁定。
此特点也能被取消进行持续的读数显示。
自动关机主机在最后一次键盘操作5 分钟后会自动关机。
当在持续读数模式下的时候此功效被取消一键校准PH60 的一键自动校准程序仅用一种键去激活校准模式。
仪器还提供偏移量和坡度点的校准1.2技术特点range resolution accuracypH 0.00 to 14.00 0.01pH ±0.01pHmV -999 to +999 1mV ±1mVTemp 0 to 99.9℃0.1℃0.5℃自动温度赔偿:0 to 99.9℃原则液识别:pH7,pH4 or pH10原则液温度范畴:0 to 60℃电极坡度识别:±20%(25℃,pH4 或pH10)电极偏移识别;±60 mV(25℃,pH7)电源:9V 碱性电池电池寿命:300 小时持续工作尺寸:163*83*82mm重量:约350g2.操作面板描述2.1显示符号等待批示AUTOLOCK 稳定读数批示MANUAL 手动温度赔偿模式批示ATC 自动温度赔偿模式批示OFFSET 偏移校准模式批示SLOPE 坡度校准模式批示电池电量低批示2.2按键ON/OFF这个键控制仪器的开和关。
当为ON 的时候,屏幕显示现在锁定的读数MODE这个键在PH 和mV 读数间进行选择。
注意,校准时,MODE 的选择功效临时取消READ/AUTO这个键能够激活输入PH 和mV 的数值,并在读数稳定后将其锁定。
如果需要得到持续的读数,长按此键3秒即可。
再次回到自动锁定状态,则只需按此键一次(注意:在持续读数模式下,自动关闭功效临时取消)CAL这个键激活校准模式,按一次之后显示屏幕将提供校准的环节。
GLOSS METER PCE-GM 60 PlusOPERATION MANUAL PCE Americas Inc. 1201 Commerce Way Suite 8 Jupiter FL-33458USAFrom outside US: +1 Tel: (561) 320-9162 Fax: (561) 320-9176 *********************/englishPCE Instruments UK Ltd.Unit 11Southpoint Business ParkEnsign wayHampshire / Southampton United Kingdom, SO31 4RFFrom outside UK: +44 Tel: (0) 2380 98703 0 Fax: (0) 2380 98703 9 info@Content IntroductionCautions1 External Structure Description2 Operating Instruction2.1 Turning On/Off2.2 Calibration2.3 Measurement2.4 Data Save2.5 Connecting to PC2.6 Print3 Function Description of QC Software4 Routine Maintenance5 Technical ParametersSafety InstructionsThe instrument is a safe device. Before operating, please read the safety instructions and strictly comply with the following terms to avoid unexpected damages. We shall not be liable for any losses by incorrect operation. Battery The device configures a built-in battery.Please use the original one. Do not useother batteries to prevent unnecessarydamages.Do not disassemble, extrude or heat thebattery.When fully charged, please cut off theexternal power supply in time.Please charge the battery biweekly if longtime not use. Otherwise, it may cause thedamage of the battery.For the first three times, please run out thepower and charge full to ensure thebattery reach the optimal state.External Power Source Please use the original power adapter when charging. Otherwise, it will shorten the battery life or cause explosion. Please cut off the external power source if you don't use it for a long time.Gloss Meter Do not use the device in inflammable andexplosive environment.Do not disassemble the device which willcause damage explosion.Please stop using the machine when yousmell something burning and send it backto repair center.IntroductionThe gloss meter is in accordance with IS0 2813(International Standard) and GB/T 9754(China National Standard). It has the characters of easy to use, stable performance and precise measurement.Advantagesrge Screen (3.5inch), high resolution (480*320), full-view display.ply with ISO 2813、GB/T 9754、ASTM D 523、ASTM D 2457 standards.c.Aesthetic design perfectly combined with ergonomics structure.d.Three measurement angles 60°,can measure simultaneously(exceptthe single-angle gloss meter).e.QC software with powerful extending function (except certain models).f.Flexible choice of auto-calibrating when power on, easy to operate.g.Display multiple sets of data, easy to compare.h.High hardware configuration with multiple innovative technologies.i.Built-in rechargeable battery, economical and environmental protection. j.Auto power-off function to save electricity consumption.Cautions1)The gloss meter is a precise measuring instrument. Please avoid dramaticchange of external environment when measuring. Those changes including the flicker of surrounding light, the rapid change of temperature and humidity will affect the measuring accuracy.2)Keep the instrument balanceable. Make sure the measuring aperture clingto the test sample, and no shaking or shifting when measuring. Please prevent the gloss meter from fierce collision or crash. This device is not water-proof. Do not use it in the environment of high humidity or in the mist.3)Keep the device clean. Avoid dust, powder or solid particles entering themeasuring aperture and the devices.4)After using, please turn it off. Keep the instrument and calibration board inthe instrument case.5)Keep the instrument in a cool, dry environment.6)Users can not do any changes on the device without permission. Since itmay affect measuring accuracy or even damage the device.1.External ConstructionsFigure 1 External ConstructionsButton Function InstructionLCD Screen: Display measuring data and instrument operation navigation. Switch/Measure button: Long-press the button 3 seconds to turn on or turn off the gloss meter. Short press the button is to measure.Indicator Light: When turning on, it will show green light. After startup, the light is off. Low power and charging status will show red light. Fully charged will show green light.RS-232/USB interface: This interface is a common interface. The instrument automatically judges the connection status. USB interface is used to connect transfer data to PC. RS-232 interface is used to connect to the printer. USB cable can connect power adapter and computer for charging the gloss meter (specification for external adapter is: 5V=2A).Protective Cover (Calibration plate): It is to protective the measuring aperture. Built-in calibration plate is used for instrument calibrating.Attention: The method to separate the protective cover from the instrument is shown in figure 2. Hold the instrument with one hand, the other hand hold the protective cover, and then separate it according to the “Open” mark. You only need to separate it from one side. Do not separate it from two sides.Figure 2 Separation Method2. Operating Instruction2.1 Turn on/offLong-press the switch button 3 seconds to turn on the instrument. The LCD screen will display boot logo. After a few seconds, it will enter into the measurement interface automatically, as shown in figure 3. Long-press the switch button 3 seconds again, it will be turn off.The instrument will enter the standby mode if without operation within five minutes. And it will turn off atomically if without operation within one minute in standby mode.Figure 3 Single Angle Measurement2.2 CalibrationAuto-Calibrating DescriptionThe instrument has auto-calibrating function. But for flexible use, it has optional designation to judge whether it will auto-calibrate at startup. If the lastpower-off is manually, it will calibrate automatically when turn on next time. If the last power-off is automatic after 5 minutes backlight off, then it will not calibrate automatically when turn on next time.When operating environment change (such as the rapid change of temperature, altitude and humidity), it must do calibration. In order to ensure the accuracy, please use the original standard plate for calibration. The dust on the standard plate will affect calibration accuracy. Please clean the standard plate and ensure it’s clean when calibrating.The Standard plate is a precise optical component. Please avoid it from strong sunlight. Due to environment factors, the gloss value of standard plate will change over time. Therefore, it’s better to send it back to the factory or qualified local National Institute of Metrology for the calibration. (Once a year)Attention:a) Each instrument has the only calibration plate. If use other calibration plateto pass the calibration, the measurement is also not accurate. Therefore, before calibrating, please check whether the serial number of the instrument is the same with that on the calibration plate.b) Before calibrating, please make sure the instrument and calibration plate istightened. Otherwise, the calibration maybe failed and the measurement results may not accurate.Change Calibration ValuesUsers can change instrument calibration value through QC software.Attention: Modify calibration value is better operated by manufacturer or qualified metrological institutes. The calibration value needs to be modified only when it is different from the actual calibration plate value. Before modifying the standard value, please backup the original standard value.2.3 MeasurementThe measuring mode is basic mode (Figure 4).Basic mode is a basic sample test mode which will display the glossiness value directly. It belongs to single measurement. The results will be saved automatically each time (except for certain models). It can display multiple sets of test data simultaneously.Figure 4 Multi-angle Measurement“T005” at the upper left means the record number of the last measurement. “16:12” and “2015.10.23” are time and date.“T001-T005” is the record number of five measurements. (Some models only display three records.)“T102316” is a default name of measuring record. It is making up of “T”+”month”+”day”, “T” means basic record, “102316” means the measuring record at16:00 pm on 23th October.The last record will show in yellow.2.4 Data SaveIt defaults to save data automatically. Users can set not-save function through QC software.The instrument can save 1000 data. When it’s full, it will prompt. If continue to measure, the new record will cover the last one. Users can delete data or manage other operations through QC software. (Remarks: some models don’t have this function.)2.5 Connecting to PCTurn on the instrument, connect USB to PC. Then the instrument is charging and it will connect the software automatically. Users can control the measurements through QC software.Remarks: Some models don’t have this function.2.6 PrintIf the gloss meter connects miniature printer, it will print the testing data when measuring.3. Function Description of QC SoftwareWhen connecting to QC software, users can manage following operations:a) Check Status (Instrument basic information, such as model, serial number)b) Calibratec) Change Calibration Value (It’s better to handle by manufacturer of qualifiedmetrological institutes.)d) Data Management (Check record, delete record, export record, print report)e) Set Time and Dataf) Set Languageg) Select Angles (only for tri-angle gloss meter)h) Set Auto Save or Not-save Function.4 Routine Maintenance1) The gloss meter is a precise instrument. Please operate and store it instandard laboratory environment (Temperature: 20℃,Standard atmospheric pressure, Humidity: 50~70%RH). Please avoid using it in humid environment, strong electromagnetic interface environment, high light intensity environment and dusty environment.2) Standard plate is a precise optical component. Avoid being damaged bysharp object, avoid dirtying the board and avoid exposing it to sun.Regularly clean the standard plate by using soft cloth with alcohol in one direction. Ensure there are no tiny particles or sundries on the soft cloth.Before calibrating, clean the standard plate to make accurate calibration.Attention:Forbid to use acetone solvent!3) In order to ensure the accuracy of the instrument, it is better send it back tothe factory or qualified Local National Institute of Metrology for calibration.(Once a year)4) It needs to modify calibration value when the calibration value is differentfrom practical measurement value. View chapter 2.2 for details.5) The gloss meter is powered by built-in battery. When long time not usingthis instrument, please charge it biweekly in order to protect the battery and extend the battery life.6) The internal clean work of the instrument should be finished bymanufacturer (suggest once a year). Do not use cleaning tools to clean the internal instrument. Otherwise it will cause irreversible damage.5. Technical SpecificationsMeasurement Angle 20°/60°/85°/20°60°85°Standard ISO 2813, GB/T 9754, ASTM D 523, ASTM D 2457Measuring Area(mm) 20°: 10x10, 60°: 9x15, 85°: 5x36Measuring Range Multi-angle Models Single Models Some Single Models20°: 0-1000GU60°: 0~1000GU85°: 0~160GU60°: 0~300GU 60°: 0~200GUDivision Value Some Models: 0.1 GUSome Models: 1 GURangeMulti-angle Models Single Models Some Single Models 0-10GU 10-100GU 100-1000GU 0-10GU 10-100GU 100-300GU 0-200GURepeatability ±0.1GU ±0.2GU ±0.2GU% ±0.1GU ±0.2GU ±0.2GU% ±1GU Reproducibility ±0.2GU ±0.5GU ±0.5%GU ±0.2GU ±0.5GU ±0.5%GU ±1GU Deviation ±1.5, ±1.5%Accuracy Conform with JJG696 first class gloss meter working requirements.Chromaticity Corresponding Corresponding with CIE 1931(2°) under CIE C light source.Measuring Time 0.5sDimension L*W*H : 160mm*75mm*90mmWeight 350gBattery 3200mAh Li-ion Battery, >5000 times (within 8 hours)Display TFT 3.5inch, resolution: 320*480Interface USB/RS-232Storage 1000Software GQC6 Quality Control Software with QC report printing function and more extendedfunctions (except certain models).Operation Temperature 0~40℃ (32~104°F)Storage Temperature -20~50℃ (-4~122°F)Humidity <85% relative humidity, no condensationStandard Accessories: Power Adapter, USB cable, User Manual, GQC6 software (except certain models), Wiping Cloth, Calibration PlateOptional Accessories: Miniature PrinterNote The specifications are subject to change without notice.。
1 安全提示1.1 被授权的仪表操作人员处于安全考虑,在这本说明书中所介绍的各种操作,需要经过培训和授权的技术人员来完成。
1.2 应用VEGAPULS60系列超声波传感器用于连续物位测量。
1.3 使用错误的警示如果应用不正确或不符合规定,从应用角度讲,由于安装或调试错误,容器会溢出介质或损坏设备。
1.4 安全介绍在安装和操作仪表的时候,需要注意有关的安全规定(比如:在德国需要符合VDE-规定)。
1.5 CE – 认证VEGAPULS60系列经过CE认证,满足NAMUR-要求NE21。
CE-认证根据以下标准:• EMVG:-Emission EN 61326:1997(A级)61326:1997/A1:1998EN- Immission• NSR: EN 61010-1: 20011.6 仪表兼容性符合NAMUR NE53VEGAPULS60系列传感器符合NAMUR要求NE53。
VEGA的仪表一般都是向上、向下兼容的。
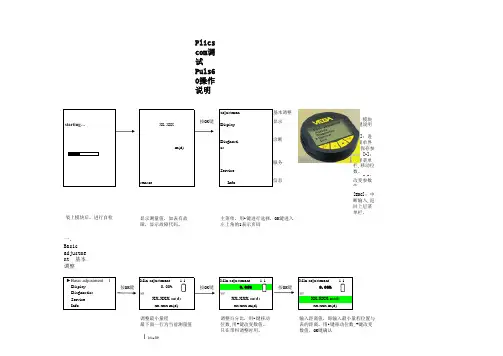
• 传感器-软件到VEGAPULS-HART、PA或FF的DTM文件• VEGAPULS的DTM文件到调试软件PACTware• 调整模块PLICSCOM到传感器软件传感器的基本功能的参数调整可以不依赖于软件版本。
功能的范围取决于每个组件的软件。
VEGAPULS60系列的软件版本可以通过以下方式知道:• 通过软件PACTware TM• 电子部件的铭牌• 通过调整模块PLICSCOM1.7 防爆应用的注意事项对于防爆应用,要注意防爆安全规定。
每个防爆仪表都会随附防爆合格证,要注意防爆参数。
1.8 环保事项环境保护现在已经成为最为紧要的任务。
因此VEGA公司也建立了完善的环保管理体系,且获得EN ISO14001认证。
请您帮助我们,完成环保的使命,见以下两章:• “仓储和运输”• “清除废料TIANJIN VEGA CO.,LTD.2 测量原理及产品简介2.1 测量原理能量很低的极短的微波脉冲通过天线系统发射并接收。
雷达波以光速运行。
运行时间可以通过电子部件背转换成物位信号。
一种特殊的时间延伸方法可以确保极短时间内稳定和精确的测量。
即使在存在虚假反射的时候,最新的微处理技术和独一无二的ECHOFOX-软件也可以准确地分析出物位回波。
通过输入容器尺寸,可以将上空距离值转换成与物位成正比的信号。
仪表可以空仓调试。
2.2 产品介绍VEGAPULS60系列雷达式物位仪表包括以下几个部分:z过程连接及天线z外壳及电子部件z外壳罩盖,可选带调整及显示模块PLICSCOMVEGAPULS611 外壳罩盖(可选带PLICSCOM)2 外壳及电子部件3 过程连接及塑封的天线系统TIANJIN VEGA CO.,LTD.1 外壳罩盖(可选带PLICSCOM)2 外壳及电子部件3 过程连接及天线系统VEGAPULS 631 外壳罩盖(可选带PLICSCOM)2 外壳及电子部件3 过程连接及塑封的天线系统TIANJIN VEGA CO.,LTD.1 外壳罩盖(可选带PLICSCOM)2 外壳及电子部件3 过程连接及天线系统VEGAPULS 66TIANJIN VEGA CO.,LTD.1 外壳罩盖(可选带PLICSCOM)2 外壳及电子部件3 过程连接及天线系统3.1 普通天线的雷达式物位计3.1.1 一般介绍安装 选择安装位置选择一个易于安装接线的位置,而且还要方便以后拆装显示/调试模块PLICSCOM。
不使用任何工具,可以将外壳旋转330°。
您可以将PLICSCOM旋转角度安装(每次旋转90°)。
潮湿为了防潮必须使电缆入口前面的连接电缆向下。
这样雨水和冷凝水就可以顺着垂下的电缆滴下来。
这一点对于露天安装或安装在潮湿的地方(比如:用水清洗、加热或冷却)很重要。
采用横截面为圆形的电缆,并拧紧电缆入口。
对于总线输出的仪表必须使用推荐的连接电缆(见“连接供电电压”)测量范围测量的基准面是螺纹或法兰的密封面。
注:如果被测介质接触天线,在天线上会造成粘附,从而影响测量.注意天线和介质表面保持距离至少50mm。
1 满程2 空仓(最大测量距离)3 测量范围TIANJIN VEGA CO.,LTD.压力/真空对于带表压或低压的容器,应该在螺纹的过程连接上加密封。
要检查密封材料对于被测介质是否稳定。
传感器的最大允许压力见传感器上面的铭牌。
3.1.2 安装指南喇叭口天线安装准备以下是一些特殊应用的信息:(用于PULS62)当喇叭口天线比过程连接的尺寸大时,安装前必须将喇叭口天线拆下来:1 用一个内六角螺丝刀将天线接管上的内六角螺钉拆下(3)2 取下天线(2)3 将天线从容器的过程连接下面向上插入到过程连接里面,注意天线不要掉进容器里2 固定六角螺钉,扭距最大10Nm注:如果VEGAPULS68带吹扫空气或天线延长,在天线接管处会有一个刻槽。
这个刻槽必须与过程连接的六角上的标志一致。
1 标志2 刻槽3 天线接管上的内六角螺母4 天线抛物线天线安装准备以下是一些特殊应用的信息:(用于PULS62)当喇叭口天线比过程连接的尺寸大时,安装前必须将喇叭口天线拆下来:1 VEGAPULS628通过法兰紧固,比如:通过虎钳2 用螺丝刀SW22将固定连接件(3)3 通过SW36松开锁紧螺帽(2)4 通过螺丝刀SW41松开锁紧螺母(1)TIANJIN VEGA CO.,LTD.5 轴向将抛物线式天线(4)拔出来6 将传感器法兰安装到配接法兰上,并固定好7 检查适配器上是否有O型密封环,密封环是否完好无损。
如果需要,必须更换密封环。
8 重新插上抛物线天线(1)9 通过螺丝刀SW41拧上锁紧螺母(1),最大起动力矩50Nm10 通过螺丝刀SW36拧上锁紧螺帽(2),最大起动力矩40Nm1 锁紧螺母2 锁紧螺帽3 连接件4 抛物线天线安装位置VEGAPULS61、62(非导波管天线)、63和容器壁距离最少200mm。
以VEGAPULS62为例1)准面2) 容器中央或对称轴线TIANJIN VEGA CO.,LTD.VEGAPULS65和66(非导波管天线)和容器壁的距离至少500mm。
如果传感器被安装在球形或拱形罐顶中央,会产生多重虚假回波。
所以应该尽量将传感器安装在罐顶半径的1/2处。
如果不能保持传感器与罐壁的距离,罐壁上的介质粘附会造成虚假回波。
在调试仪表的时候应该进行虚假回波存储。
以VEGAPULS66为例1)准面2)容器中央或对称轴线如果容器的底部是锥形的,传感器的最佳安装位置是容器顶部中央,这样才能对准容器底部的最低点。
测量液体介质TIANJIN VEGA CO.,LTD.入料料流不要将仪表安装在料流内或料流上面。
容器接管VEGAPULS61、62在设计的时候,最好可以使得天线下端末端伸出容器接管至少10mm。
以VEGAPULS 62为例如果被测介质的反射特性好,容器接管可以略长于天线长度。
容器接管的标准长度见下表。
在这种情况下,接管末端要磨平,绝对不能有毛刺。
如果可能,要磨圆。
此后一定要进行虚假回波存储。
以VEGAPULS 62为例TIANJIN VEGA CO.,LTD.容器接管末端应该磨平,无毛刺。
如果可能要磨圆。
安装仪表的最好的方法,特别是考虑到便于安装和清洗,安装在锁紧法兰或卫生连接上,比如:Neumo Biocontrol。
如果接管尺寸有偏差,在仪表调试的时候必须进行虚假回波存储。
在下表中有接管直径和高度的对照表。
如果介质的反射条件好,您也可以将VEGAPULS63安装在尺寸有偏差的接管上。
VEGAPULS63的法兰螺钉必须以扭距大约60Nm拧紧,以保证PTFE垫片的密封。
VEGAPULS65天线的有效部分,即锥形天线部分,必须从容器接管内完全露出来。
为了适应各种应用,提供适用于容器接管长度50、100和250mm的传感器。
如果容器接管的直径特别大,天线的有效部分可以稍微缩进在接管内。
对于标准选型的VEGAPULS65来讲,应用公式:容器接管的直径等于接管的最大长度。
喇叭口天线伸出容器接管至少10mm。
如果接管很高,需要使用延长天线,延长天线可以防止容器接管对测量的干扰。
传感器方向测量液体时,传感器应该垂直对准介质表面。
容器内的其他装置必须选择一个没有其他装置阻挡雷达信号的安装位置来安装传感器。
容器内装置,比如:梯子、限位开关、加热管或容器内的突出物,都会造成虚假回波附加在有效回波上面。
在设计的时候,必须确认在传感器和被测介质之间没有其他容器装置。
如果采用现有的容器,在调试时,必须进行虚假回波存储。
如果容器内的突出物或支撑物会造成虚假回波,可以通过采取措施来避免。
可以在这些装置上安装斜的折射板,将雷达信号折射走,避免造成虚假反射。
搅拌器 如果容器内有搅拌器,一旦搅拌器被启动,需要进行虚假回波存储。
应该确认,来自搅拌器各个方向的虚假反射都被存储。
泡沫由于入料的方式、搅拌器或容器内其他过程处理,会产生泡沫,泡沫会衰减到达被测介质表面的发射信号。
如果泡沫会造成测量误差,需要使用尽可能大的雷达天线。
3.2 通过导波管安装的雷达式物位计安装在导波管内的传感器的测量完全不受容器内装置和涡流的影响。
被测介质的介电常数可以更低(大于1.6)。
导波管和旁通管必须延到所需要的最小物位处。
1 极向的标志2 通气孔直径最大5mm传感器天线直径应该与导波管内径相符。
VEGAPULS61:天线直径大约40mm,导波管直径40…80mm。
VEGAPULS62:天线直径大约40mm,导波管直径40…80mm。
VEGAPULS63:天线直径大约50mm,导波管直径50…80mm。
VEGAPULS66:天线直径大于50mm,导波管直径50…250mm。
此外,还要注意导波管上方通气孔的方向。
它必须与仪表的极向标志成90°。
除了可以使用容器内的导波管外,还可以使用容器外的旁通管。
在仪表调试的时候,选择功能“旁通管”。
在安装的时候注意,传感器的极向标志和旁通管上的通气孔成90°。
1 极向标志(VEGAPULS61)1 极向标志(VEGAPULS62)1 极向标志(VEGAPULS66)1 极向标志(VEGAPULS63)粘附性介质不能通过导波管测量粘附性介质。
压力/真空对于带表压或低压的容器,应该在螺纹的过程连接上加密封。
要检查密封材料对于被测介质是否稳定。
传感器的最大允许压力见传感器上面的铭牌。
4 接电4.1 供电电压4…20mA/HART 两线制供电电压和电流信号共用一根两芯线缆。
具体供电电压范围请见技术数据。
根据DIN VDE 0106 Teil 101供电电路和外部电源电路要安全隔离。
VEGA的VEGATRENN149AEx、VEGASTAB690、VEGADIS371和VEGAMET都可以满足这个要求。