USB20驱动程序的安装
- 格式:doc
- 大小:90.00 KB
- 文档页数:3
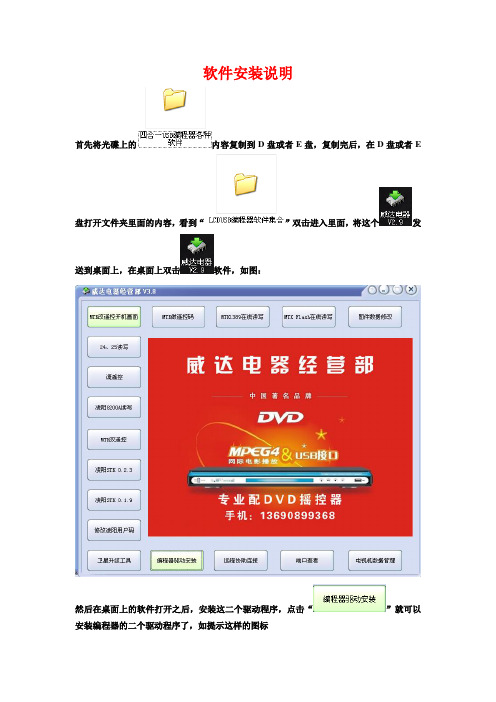
软件安装说明首先将光碟上的内容复制到D盘或者E盘,复制完后,在D盘或者E 盘打开文件夹里面的内容,看到“”双击进入里面,将这个发送到桌面上,在桌面上双击软件,如图:然后在桌面上的软件打开之后,安装这二个驱动程序,点击“”就可以安装编程器的二个驱动程序了,如提示这样的图标“四合一USB编程器驱动程序安装说明为了能更清楚的了解四合一USB编程器的关键部件位置,方便下面的叙述,请看一下上面的图片,上图中标注了各部分的功能。
注意:在开始安装驱动时,请不要将编程器与电脑连接,在下面提到需要插入编程器的时候再连接编程器,否则您的安装可能与本说明不符而使安装变复杂。
01:点击桌面上软件的“”。
会看到下图所示的窗口界面。
02、鼠标单击上图所示的“”按钮,稍等片刻会看到下图所示的窗口界面,表示正在安装驱动文件。
03、在上图所示的复制进程结束后,会出现下图所示的窗口界面,表示驱动的安装前期工作完成。
04、在上图所示的界面中点“确定”按钮,上图所示的界面消失,表示“编程器在线读写状态”的驱动预安装完毕。
05、接下来我们安装“在线读写状态”的驱动,鼠标点击驱动软件的“”的向下的小箭头,将鼠标向下移动到“”选择“24-25编程驱动.INF”,会看到下图所示的窗口界面。
06、鼠标单击上图所示的“”按钮,稍等片刻会看到下图所示的窗口界面,表示正在安装驱动文件。
07、在上图所示的复制进程结束后,会出现下图所示的窗口界面,表示驱动的安装前期工作完成。
08、下面我们以先安装“在线读写状态”的硬件驱动识别为例,当然也可以先安装“编程器状态”,但是如果您对电脑操作不是很熟练的话,建议按照我们的顺序进行。
将四合一USB编程器的此跳线帽放在左边位置,中间的跳线帽处于此右边位置,编程器插入电脑的USB插孔内,绿灯指示灯亮稍后桌面的右下角会出现下图所示的提示界面,表示电脑检测到工作在“在线读写状态”的编程器已经插入电脑上了。
09、出现上图所示的提示后,请耐心等待,直到出现下图所示的界面。

5001 USB2.0转百兆以太网 XP系统安装教程注意:如果在装有XP系统的电脑使用该产品出现没反应或者驱动安装不了,并在“设备管理器”中看到“其他设备-USB 10/100 LAN”前面是“问号”(如图1所示)时,则可以通过以下步骤完成安装。
图1一.将产品插入装有XP系统电脑的USB接口,识别后,右击“我的电脑”—“属性”,选择“硬件”,再点击“设备管理器”如图2所示图2二.打开“设备管理器”找到“其他设备-USB 10/100 LAN”,如图3所示图3三.右击“USB 10/100 LAN”点“属性”,出现属性对话框,选择“常规”,再点击“重新安装驱动程序”,如图4所示图4四.点击“重新安装驱动程序”,会提示如下(如图5示):图5五.选择第二个,然后点击“下一步”如图6所示图6六.选择第二个,然后点击“下一步”如图7所示图7七.选择第二个,然后点击“下一步”如图8所示图8八.跳出“硬件更新向导”,通过滚动条往下拉,如图9所示图9九.选择“网络适配器”,点击下一步,如图10所示图10十.选择想要安装的网卡“USB mass Storage Device”,点下一步,如图11示图11十一.出现完成更新向导,只需要点击“完成”即可,如图12所示图12十二.完成之后,回到“设备管理器”查看“网络适配器”,即可查看到该USB 网卡,如图13所示图13十三.右击“网上邻居”,点击“属性”,可查看到在原来的基础上多了一个“本地连接”,就是我们在设备管理器-网络适配器中可查看到的那个USB网卡,如图14所示图14十四.完成之后,重启电脑,拔掉重插该产品,然后接上以太网就可成功实现上网,赶快体验吧。
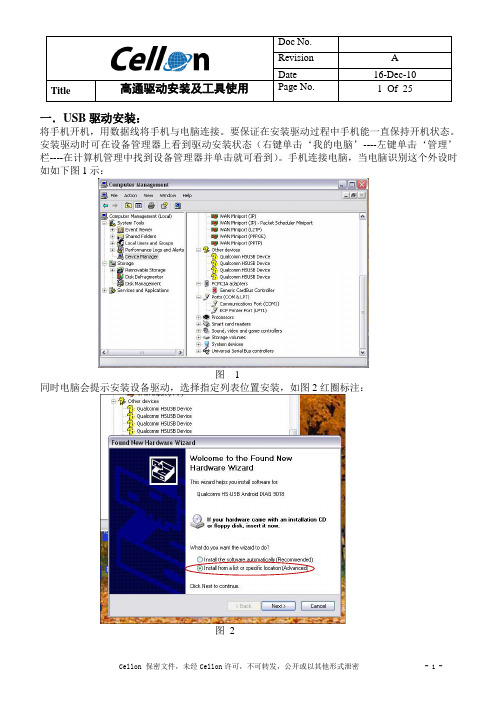
Title 高通驱动安装及工具使用Page No. 1 Of 25一.USB驱动安装:将手机开机,用数据线将手机与电脑连接。
要保证在安装驱动过程中手机能一直保持开机状态。
安装驱动时可在设备管理器上看到驱动安装状态(右键单击‘我的电脑’----左键单击‘管理’栏----在计算机管理中找到设备管理器并单击就可看到)。
手机连接电脑,当电脑识别这个外设时如如下图1示:图 1同时电脑会提示安装设备驱动,选择指定列表位置安装,如图2红圈标注:图2Title 高通驱动安装及工具使用Page No. 2 Of 25图2中单击下一步后会弹出图3提示框,选择指定位置寻找(红圈所示),然后点击‘Browse’指定驱动位置如图4所示。
目前高通USB驱动文件夹默认是【30_USB_Driver----WinXP---checked】图3图4选择好驱动地址后点击OK就开始安装驱动了,如图5所示:Title 高通驱动安装及工具使用Page No. 3 Of 25图5当出现图6所示提示框,点击continue Anyway继续安装:图6Title 高通驱动安装及工具使用Page No. 4 Of 25安装驱动时会连续提示安装3次,每次都点击continue Anyway图7图8当驱动安装完成后,在设备管理器里找到端口和调制解调器就表示安装成功了,如图9所示:Title 高通驱动安装及工具使用Page No. 5 Of 25图9二.QPST安装安装了USB驱动只是手机与PC间能通讯,要使手机能与高通工具实现连接还需要安装QPST并加入端口才行。
找到QPST安装文件QPST.2.7.362,如图10双击setup开始安装:图 10开始安装如图11,点击install:Title 高通驱动安装及工具使用Page No. 6 Of 25图 11图 12安装到如图13所示,点击‘Next>’:图 13Title 高通驱动安装及工具使用Page No. 7 Of 25 到图14选择‘I Agree’并点击‘Next>’:图 14然后会弹出图15界面,选择‘Everyone’再点击‘Next>’:图 15进行到图16继续点击‘Next>’:Title 高通驱动安装及工具使用Page No. 8 Of 25图 16安装继续进行中:图 17安装完成,如图18:Title 高通驱动安装及工具使用Page No. 9 Of 25图 18安装完成后,点击快捷方式图标,并在‘ports’栏中找到识别的USB端口,这样就能用高通工具对手机进行控制了。

USB2.0驱动程序的安装
1、在安装驱动程序前,请务必先安装芯片组驱动程序。
2、进入操作系统之后,用鼠标右键点击“我的电脑”图标,选择下拉菜单“属性”。
出现“系统特性”窗
口,点击“硬件”标签。
参见图1。
图1
3、在上述对话框中,点击“设备管理器”,出现“设备管理器”窗口。
参见图2。
图2
4、将其中出现的打问号的未知设备“通用串行总线(USB)控制器”选中,再点击快捷菜单中的“卸载图标”。
参见图3。
图3
5、这时出现删除警告对话框,点击“确定”。
再点击快捷菜单中的“扫描硬件改动”。
参见图4。
图4
6、系统将搜索新的设备并自动安装USB2.0的驱动程序。
至此,USB2.0驱动安装完成。

CTS7 191-USB20 Driver 安装说明:一、安装驱动1、先将您的驱动光盘放入电脑,打开“setup ”文件夹,安装文件为“setup ”图12、双击“setup ”文件,出现下面对话框,如图2 所示;图23、点击“安装”,稍等数秒时间,出现如图3所示;图34、出现图3情况点击确定,则表明191-USB20驱动已经安装成功了(如果电脑提示需“重启电脑”,那么请您重启电脑),此时插上191-USB20电缆,则会在电脑的右下角看见提示“新硬件已可使用”。
安装驱动安装文件 卸载驱动二、在“ MicroWIN ”软件中选择驱动1、双击打开“STEP 7 MicroWIN”,在软件中点击“设置PG/PC接口”,出现如图4所示;图42、在图4中选择“PC/PPI cable(PPI)”驱动,并点击“属性”,在“PPI”的对话框能点击“默认”,出现图5所示;图5已安装的驱动文件属性3、在“本地连接”的对话框中选择191-USB20的COM口(具体COM查找在“三、如何改变COM口”—“1、如何找到找到端口位置”)如图6所示,然后点击“确定”即可;图6三、如何改变COM口有些早期的应用软件支持的串口数量是有限的,如某PLC编程软件支持的串口号为COM1~COM8,由于安装USB编程电缆之前已安装了其它的USB转换设备,安装USB编程电缆驱动程序后在设备管理器中显示该电缆地址为COM9,这样一来编程软件就无法访问该COM9口。
这时候就需改变编程电缆的COM口,方法如下:1、如何找到端口位置1、在Windows2000/XP系统中可直接更改COM口号,首先安装好以上驱动后,点击桌面“我的电脑”右键属性→“硬件”→“设备管理器”→即可看到“端口”。
2如果修改端口这里以COM2为例:找到端口后,点“COM2口”→右键属性→“端口设置或Parametres du port”→“高级或Avance”即可看到,选择对应的空闲COM口即可。
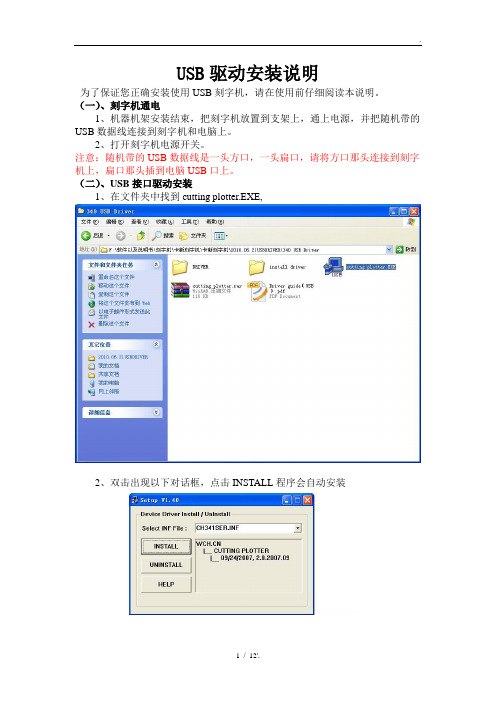
USB驱动安装说明为了保证您正确安装使用USB刻字机,请在使用前仔细阅读本说明。
(一)、刻字机通电1、机器机架安装结束,把刻字机放置到支架上,通上电源,并把随机带的USB数据线连接到刻字机和电脑上。
2、打开刻字机电源开关。
注意:随机带的USB数据线是一头方口,一头扁口,请将方口那头连接到刻字机上,扁口那头插到电脑USB口上。
(二)、USB接口驱动安装1、在文件夹中找到cutting plotter.EXE,2、双击出现以下对话框,点击INSTALL程序会自动安装3、如果安装过程请出现其他对话框时请点击“仍然继续”,如下图:4、如果没有出现上面情况,就直接等到出现“驱动安装成功”字样。
USB 接口驱动安装完毕。
虚拟串口设置1、USB驱动安装完毕后,请用鼠标右键点击桌面“我的电脑”——“属性”,如下图:2、点击上方菜单栏中的“硬件”——“设备管理器”,如下图:3、用鼠标右键点击“端口”——“USB-SERIAL CH34(COM1)——“属性”如下图:4、点击“端口设置”,如下图:注意:每秒位数(就是软件中的输出波特率)设置成9600。
5、用鼠标点击“高级”,出现以下对话框:选择COM3,然后点击“确定”,虚拟端口设置完成。
文泰2009版本或更高版本支持虚拟COM3或COM4,用户在设置本虚拟端口时请根据计算机实际闲置的端口来设置。
不一定非要设置在COM1或COM2端口。
注意:请将“接收缓冲区”“传输缓冲区”调到最低那头。
6、如果USB端口显示的不是“COM3”, 右键选择“扫描检测硬件改动”,则自动变为“COM3”,如下图:文泰刻绘软件输出设置1、打开文泰软件,编辑好文本,点击“文件——刻绘输出”或点击菜单栏中的出现以下对话框:2、点击对话框左上角的“刻绘设备”,出现一下对话框:3、选择“其他”——支持HPGL指令刻字机,然后点击“添加”,如下图;4、输出端口设置:点击“端口设置”如下图:“端口类型”选择“串口”,在“已安装端口”那里选择“COM3”,如果没有就在“端口号”选择“3”,点击“增加”即设置好COM3端口。
usb万能驱动安装包「usb万能驱动怎么安装」
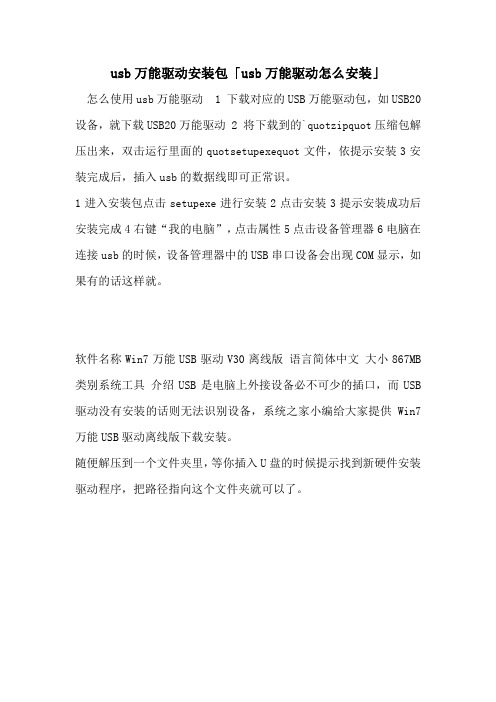
怎么使用usb万能驱动 1 下载对应的USB万能驱动包,如USB20设备,就下载USB20万能驱动 2 将下载到的`quotzipquot压缩包解压出来,双击运行里面的quotsetupexequot文件,依提示安装3安装完成后,插入usb的数据线即可正常识。
1进入安装包点击setupexe进行安装2点击安装3提示安装成功后安装完成4右键“我的电脑”,点击属性5点击设备管理器6电脑在连接usb的时候,设备管理器中的USB串口设备会出现COM显示,如果有的话这样就。
软件名称Win7万能USB驱动V30离线版语言简体中文大小867MB 类别系统工具介绍USB是电脑上外接设备必不可少的插口,而USB 驱动没有安装的话则无法识别设备,系统之家小编给大家提供Win7万能USB驱动离线版下载安装。
随便解压到一个文件夹里,等你插入U盘的时候提示找到新硬件安装驱动程序,把路径指向这个文件夹就可以了。
1如需要,可在网上下载“usb万能驱动包”或者“万能驱动助理XP 版WanDrv”2解压后插入u盘,出现“找到新硬件提示”提示后,将驱动文件指向“usb万能驱动所解压的文件夹”,安装即可。

USB驱动程序编写和安装导入10分钟完成一个USB驱动程序很多写Windows Device Driver的开发人员基本上都是使用Windows DDK进行开发的。
但是,现在也有不少人都开始借助一些辅助工具。
笔者去年开始接触到riverStudio,发现它真的是一个不错的开发工具,不仅写代码的时候思路清晰,而且和DDK的结合很好。
当然,也有很多人觉得用DriverStudio不够正宗,或者说不能很好的理解Windows Device Driver的架构。
我感觉这就有点像MFC 和SDK的关系,关于这个问题在很多地方都有争论,比如在万千新闻组上,就讨论了将近2个月。
每个人都有自己的最爱,都有自己的习惯,只要你能把事情做好,我想用什么方法应该都是一样的。
如果你已经习惯了用DDK开发,那完全还可以继续用下去;如果你觉得DriverStudio不错,那尝试用一个可以给你按照OOP概念来编程的工具有什么不好呢?在驱动开发网上,经常看到有人询问一些关于DriverStudio的使用的问题。
我正好很有幸用它作了几个驱动程序,包括VXD, KMD和WDM,稍微有点心得,因此想写下来给大家作一个小小的参考。
如果其中有错误,欢迎大家给我指出,谢谢。
下面我就介绍一下用DriverStudio开发一个USB驱动程序的过程。
这个USB设备有3个双向端点,每个端点的配置如下:EP 类型地址buffer(Bytes)0 IN/OUT Control 0x80/0x00 16/161 IN/OUT Bulk 0x81/0x01 16/162 IN/OUT Bulk 0x82/0x02 64/64我们的驱动程序需要实现的功能就是控制设备上的LED灯的亮和灭,以及通过Endpoint 2对设备进行读写。
由于DriveStudio由几个部分组成,我们写这个驱动程序只要用到DriverWorks,因此下面我们就简称它为DW。
在这里,我们假定读者已经正确的安装了DW,并且已经编译好了各个库文件。

1.机器开启后,连接usb线,桌面会弹出找到新的硬件向导。
点击取消,手动安装。
2.打开设备管理器,如下图所示,我们可以找到新的Qualcomm HSUSB设备。
3.双击Qualcomm HSUSB设备,(或者右键点击Qualcomm HSUSB设备,选择属性),4.选择详细信息,得到设备ID:VID_050C&PID_9025&MI_01.5.选择驱动程序选项卡,点击“更新驱动程序”,选择“从列表或指定位置安装(高级)”6.单击下一步,选择“不要搜索。
我要自己选择要安装的驱动程序”7.单击下一步,选择“从磁盘安装”8.点击浏览,选择USB_ANDROID2.2 所在的文件夹。
这里要用到我们前面获取的设备ID. VID_050C&PID_9025&MI_00: DIAG驱动,位于USB_ANDROID2.2\ usb_func2.2\qcser.inf VID_050C&PID_9025&MI_01: MODEM驱动,位于USB_ANDROID2.2\ usb_func2.2\qcmdm.inf VID_050C&PID_9025&MI_02: GPS驱动,位于USB_ANDROID2.2\ usb_func2.2\ qcser.infVID_050C&PID_9025&MI_04: ADB驱动,位于USB_ANDROID2.2\ adb\ android_usb.inf根据相应的设备id,选择相应的inf文件。
9.点击确定,选择下一步:10.此时弹出硬件安装对话框,点击仍然继续。
11.11.点击完成,该设备安装完成。
12.重复以上步骤,逐步安装各个设备驱动。

USB下载线驱动安装方法
1.把USB下载线接到电脑上会自动弹出如下的窗口,选择“从列表或指定位置安装(高级)”项。
2.然后点击“下一步”,出现如下窗口。
选择“在搜索中包括这个位置”。
3.点击“浏览”,出现如下窗口,选择驱动所在的目录。
4.选择之后返回到如下窗口,点击“下一步”。
5.然后出现如下窗口,点击“浏览”。
6.选择驱动文件所在的位置。
7.完成安装。
USB下载线驱动使用方法
PROGISP软件界面如上图所示。
1.在“编程器及接口”栏选择“USBASP”选项。
2.在“选择芯片”栏选择你所使用的芯片类型。
3.点击“芯片识别”栏的“RD”来测试是否检测的到芯片。
如果检测不到会出现如下窗口。
(出现这种情况请找出原因)
4.然后点击“调入flash”,选择你所要烧写的程序。
5.最后点击“自动”。
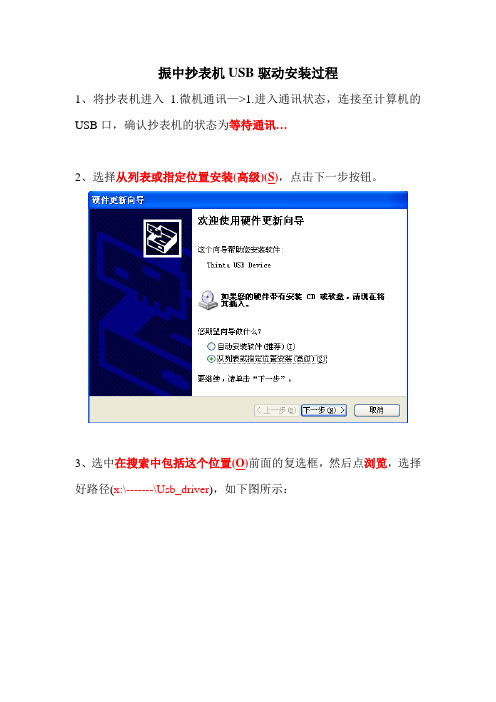
振中抄表机USB驱动安装过程
1、将抄表机进入1.微机通讯—>1.进入通讯状态,连接至计算机的USB口,确认抄表机的状态为等待通讯…
2、选择从列表或指定位置安装(高级)(S),点击下一步按钮。
3、选中在搜索中包括这个位置(O)前面的复选框,然后点浏览,选择好路径(x:\-------\Usb_driver),如下图所示:
5、点下一步,出现如下画面:
6、稍等片刻,再点击下一步按钮,出现如下画面:
7、如上选项,点击按‘仍然继续’按钮。
出现如下画面:
8、按完成按钮,就完成了USB驱动接口抄表机的安装。
9、确认在设备管理器中能够看到‘ThinPad 800 Data Collection Terminal’设备。
如下图;或者在任务栏(微机右下角)出现‘安全删除Thinpad 800 Data Collection T erminal’或‘安全删除Thinta USB Device’。

USB编程电缆驱动程序安装说明概述USB编程电缆是通过将电脑的USB接口模拟成传统的串行口(通常为COM3),从而使用现有的编程软件或通信软件,通过编程电缆与PLC等设备的传统接口进行通信。
功能●支持的操作系统Windows2000/Windows XP●完全兼容USB V1.1和USB CDC V1.1规范●USB总线供电(非隔离电缆)、或USB总线供电与PLC的编程口同时供电(隔离型电缆)●波特率:300bps~1Mbps自动适应●每台PC只支持一根USB编程电缆系统要求请在使用USB编程电缆之前确认你的电脑是IBM PC兼容型并具备以下最低系统要求:●Intel兼容586DX4-100MHz中央处理器或更高●一个标准的USB接口(4-pin A型插座)●运行操作系统为Windows2000或Windows XP驱动程序的安装驱动程序的安装非常简单,只需按提示进行即可,以Windows XP为例,按以下步骤进行:1、打开将要连接USB编程电缆的电脑电源,并确认电脑的USB口已经启动并正常工作。
2、将USB编程电缆插入电脑的USB接口,Windows将检测到设备并运行添加新硬件向导帮助你设置新设备,插入驱动程序光盘并单击下一步继续。
如果Windows没有提示找到新硬件,那么在设备管理器的硬件列表中,展开“通用串行总线控制器”,选择带问号的USB设备,单击鼠标右键并运行更新驱动程序。
3、Windows将检测到安装信息,显示“ USB High Speed Serial Converter ”设备,并出现如下没有通过Windows徽标测试的信息框,单击“仍然继续”。
4、继续安装,让Windows拷贝驱动程序文件到你的硬盘。
5、当Windows显示完成找到新硬件向导,单击“完成”结束安装。
6、安装完成后,请确认在Windows的“开始\设置\控制面板\系统\硬件\设备管理器”菜单的“端口(COM和LPT)”展开条目中出现“ USB Serial Port(COMx)”,这个COMx就是USB编程电缆使用的COM口号。

SCU-20 PC Connection CableDriver Insta llation Manual Installing the SCU-20 PC Connection Cable driver software on a computer makes possible data transmission and updating the transceiver firmware.Please read this entire manual carefully. If you agree to the content of this manual, download and install the SCU-20 PC Connection Cable driver.Operating EnvironmentSupported Operating Systems・Microsoft® Windows® 8・Microsoft® Windows® 7(Service Pack 1 or later)・Microsoft® Windows Vista® (Service Pack 2 or later)・Microsoft® Windows® XP (Service Pack 3 or later)Installing the SCU-20 DriverCaution: Do not connect the transceiver to the computer via the SCU-20 PC Connection Cable until the driver installation process has been completed. Connecting theSCU-20 to the computer before installation has been completed may result inthe wrong driver being installed, preventing proper operation.Install the driver, which matches to the operating system in use.Windows® 8 (2)Windows® 7 (4)Windows Vista® (6)Windows® XP (8)D river i nstallation(F or W inDoWs® 8)Before installing the driver, make sure that the SCU-20 PC Connection Cable is disconnected from the computer.Installation1. Start up the computer as an “Administrator”user.2. Double check and ensure the SCU-20 PCConnection Cable is not connected to the computer.3. Unzip the downloaded (SCU-20_PC_Connection_Cable_Driver.zip) file.4. Double click the left mouse button on[PL2303_Prolific_DriverInstaller_ v1.8.0.exe].5. When the [User Account Control] dialogbox opens, click the left mouse button on [Yes].6. The dialog box, which is shown below, willopen. Click the left mouse button on [Next], to initiate the installation of the driver.7. When the installation is finished, the dialogbox shown below will open. Click the left mouse button on [Finish], to complete the installation of the driver.8. Connect the SCU-20 PC Connection Ca-ble to the USB jack on the computer. The SCU-20 PC Connection Cable will be rec-ognized automatically.Confirmation1. Move the mouse cursor to the top right ofthe screen.2. Click the left mouse button on [Settings]on the charm bar.3. Click the left mouse button on the [ControlPanel].4. Click the left mouse button on [System &Security], then click the left mouse button on [Device Manager].5. When the [User Account Control] dialogbox opens, click the left mouse button on [Yes].6. Open the [Device Manager]dialog box,then double click the left mouse button on [Ports (COM&LPT)].7. When the “Prolific USB-to-Serial CommPort (COM X)” (X: Comm Port Number) is displayed, the SCU-20 PC ConnectionCable is functioning normally.àD river i nstallation(F or W inDoWs® 7)Before installing the driver, make sure that the SCU-20 PC Connection Cable is disconnected from the computer.Installation1. Start up the computer as an “Administrator”user.2. Double check and ensure the SCU-20 PCConnection Cable is not connected to the computer.3. Unzip the downloaded (SCU-20_PC_Connection_Cable_Driver.zip) file.4. Double click the left mouse button on[PL2303_Prolific_DriverInstaller_ v1.8.0.exe].5. When the [User Account Control] dialogbox opens, click the left mouse button on [Yes].6. The dialog box, which is shown below, willopen. Click the left mouse button on [Next], to initiate the installation of the driver.7. When the installation is finished, the dialogbox shown below will open. Click the left mouse button on [Finish], to complete the installation of the driver.8. Connect the SCU-20 PC Connection Ca-ble to the USB jack on the computer. The SCU-20 PC Connection Cable will be rec-ognized automatically.Confirmation1. Click the left mouse button on the [Start] button in the tool bar, then click the right mouse but-ton on the [Computer].2. Click the left mouse button on the [Property], then click the left mouse button on [DeviceManager].3. When the [User Account Control] dialog box opens, click the left mouse button on [Yes].4. Open the [Device Manager]dialog box, then double click the left mouse button on [Ports(COM&LPT)].5. When the “Prolific USB-to-Serial Comm Port (COM X)” (X: Comm Port Number) is displayed,the SCU-20 PC Connection Cable is functioning normally.D river i nstallation(F or W inDoWs® v ista®)Before installing the driver, make sure that the SCU-20 PC Connection Cable is disconnected from the computer.Installation1. Start up the computer as an “Administrator”user.2. Double check and ensure the SCU-20 PCConnection Cable is not connected to the computer.3. Unzip the downloaded (SCU-20_PC_Connection_Cable_Driver.zip) file.4. Double click the left mouse button on[PL2303_Prolific_DriverInstaller_ v1.8.0.exe].5. When the [User Account Control] dialogbox opens, click the left mouse button on [Allow].6. The dialog box, which is shown below, willopen. Click the left mouse button on [Next], to initiate the installation of the driver.7. When the installation is finished, the dialogbox shown below will open. Click the left mouse button on [Finish], to complete the installation of the driver.8. Connect the SCU-20 PC Connection Ca-ble to the USB jack on the computer. The SCU-20 PC Connection Cable will be rec-ognized automatically.Confirmation1. Click the left mouse button on the [Start] button in the tool bar, then click the right mouse but-ton on the [Computer].2. Click the left mouse button on [Property], then click the left mouse button on [Device Manag-er].3. When the [User Account Control] dialog box opens, click the left mouse button on [Yes].4. Click the left mouse button on [Device Manager], to open the [Device Manager] dialog box,then double click the left mouse button on [Ports (COM&LPT)].5. When the “Prolific USB-to-Serial Comm Port (COM X)” (X: Comm Port Number) is displayed,the SCU-20 PC Connection Cable is functioning normally.D river i nstallation(F or W inDoWs® XP)Before installing the driver, make sure that the SCU-20 PC Connection Cable is disconnected from the computer.Installation1. Start up the computer as an “Administrator”user.2. Double check and ensure the SCU-20 PCConnection Cable is not connected to the computer.3. Unzip the downloaded (SCU-20_PC_Connection_Cable_Driver.zip) file.4. Double click the left mouse button on[PL2303_Prolific_DriverInstaller_ v1.8.0.exe].5. The dialog box, which is shown below, willopen. Click the left mouse button on [Next], to initiate the installation of the driver.6. When the installation is finished, the dialogbox shown below will open. Click the left mouse button on [Finish].7. Connect the SCU-20 PC Connection Ca-ble to the USB jack on the computer. The SCU-20 PC Connection Cable will be rec-ognized automatically.Confirmation1. Click the left mouse button on the [Start] button in the tool bar, then click the right mouse but-ton on the [My Computer].2. Click the left mouse button on [Properties], to open the [System Property] dialog box. Click theleft mouse button on the [Hardware] tab, and then click the left mouse button on the [Device Manager] box to open the [Device Manager] dialog box.3. Double click the left mouse button on [Ports (COM&LPT)].4. When the “Prolific USB-to-Serial Comm Port (COM X)” (X: Comm Port Number) is displayed,the SCU-20 PC Connection Cable is functioning normally.When the Driver Installation FailsThe driver installation may fail when:The installation wizard is canceled during the installation.The SCU-20 PC Connection Cable is connected to the computer before installing the driver.When the installation of the driver fails:1. Open the [Device Manager] dialog box, as described in the “Confirmation” instruction section ofeach Operating System.2. Click the left mouse button on the “device” which is appended to the “!” or “?” icon, then clickthe right mouse button on [Uninstall], to uninstall the driver.3. Retry the installation of the driver.- 11 -How to Uninstall the PC-Connection Cable DriverIf you wish to uninstall the SCU-20 PC Connection Cable driver, perform the following procedures (The illustration is a Windows ® 8 screen):1. Disconnect the SCU-20 PC Connection Cable from the computer.2. Click the left mouse button in one of the sequences shown below:Windows ® 8:Charm bar → [Settings ] →→ [Control Panel ] →→ [Uninstall a program ]Windows ® 7 and Windows ® Vista ®:[Start ] → [Control Panel ] →→ [Uninstall a program ]Windows ® XP:[Start ] → [Control Panel ] →→ [Add or Remove Programs ]3. The dialog box shown to the right will open. Click the left mouse button on “PL-2303 USB-to-Serial”, then click the left mouse button on [Uninstall ].4. The dialog box shown to the right will open. Click the left mouse button on [Yes ] to uninstall the SCU-20 PC Connection Ca-ble driver.5. When uninstall is finished, the dialog box shown to the right will open. Click the left mouse button on [Finish ] to complete the removal of the SCU-20 PC Connection Ca-ble driver.- 12 -Copyright 2013YAESU MUSEN CO., LTD.All rights reserved.No portion of this manual may be reproduced without the permission of YAESU MUSEN CO., LTD.YAESU MUSEN CO., LTD.Tennozu Parkside Building 2-5-8 Higashi-Shinagawa, Shinagawa-ku, Tokyo 140-0002 Japan YAESU USA 6125 Phyllis Drive, Cypress, CA 90630, U.S.A.YAESU UK Unit 12, Sun Valley Business Park, Winnall Close Winchester, Hampshire, SO23 0LB, U.K.YAESU HK Unit 2002, 20/F, 9 Chong Yip Street,Kwun Tong, Kowloon, Hong Kong。

USB2.0 转2 x RS232驱动安装说明驱动安装方式有两种
一、exe安装式
1. 点击产品对应驱动目录中即可自动实现驱动安装
2. 弹出安全警告点击运行
3. 点击Extract按钮进行安装
4. 点击下一步按钮
5. 单击完成按钮,插入USB转串口产品,即可正常使用
二、inf式驱动式安装
1. 插入产品,点击我的电脑图标右键选择管理
2. 打开电脑设备管理器
3. 在黄色设备上点击右键更新驱动程序
4. 浏览计算机安装驱动
5. 浏览到光碟里对应的inf驱动包目录即可,点击下一步
6. 完成驱动安装
7. 其他1个黄色未知设备同上的方法一样进行驱动安装,安装完成后如下图。
USB2.0驱动程序的安装
1、在安装驱动程序前,请务必先安装芯片组驱动程序。
2、进入操作系统之后,用鼠标右键点击“我的电脑”图标,选择下拉菜单“属性”。
出现“系统特性”窗
口,点击“硬件”标签。
参见图1。
图1
3、在上述对话框中,点击“设备管理器”,出现“设备管理器”窗口。
参见图2。
图2
4、将其中出现的打问号的未知设备“通用串行总线(USB)控制器”选中,再点击快捷菜单中的“卸载图标”。
参见图3。
图3
5、这时出现删除警告对话框,点击“确定”。
再点击快捷菜单中的“扫描硬件改动”。
参见图4。
图4
6、系统将搜索新的设备并自动安装USB2.0的驱动程序。
至此,USB2.0驱动安装完成。