C#结合串口通信类实现串口通信源代码
- 格式:docx
- 大小:17.89 KB
- 文档页数:11
维⽣素C有左旋、右旋之分吗?功效有差别吗?维⽣素C ⼜称抗坏⾎酸,英⽂名是VitaminC,是⼀个含有6个碳原⼦的酸性多羟基化合物。
在⾃然界中植物能从葡萄糖和果糖中合成维⽣素C;多数动物也可利⽤葡萄糖的碳链经过四步酶的催化⽣成维⽣素C;但是⼈类及其他灵长类哺乳动物及某些鸟类编码最后⼀个催化酶的基因发⽣了突变,导致体内缺乏葡萄糖酸内脂酶⽽不能⾃⾝合成,必须由外界⾷物供给来满⾜机体需要。
纵观历史,我们知道维⽣素C的缺乏曾经严重威胁着⼈类的健康,特别是远航⼈员尤为严重,但是⼈类这个有创造⼒的物种终于在1933年成功合成了维⽣素C,也解决了因维⽣素C缺乏导致的相关疾病。
但是围绕维⽣素C所引发的争议则远远没有结束,⽐如我们今天将要谈论的左旋维⽣素C与右旋维⽣素C。
为了让⼤家看的更明⽩些,我们先来了解⼀些概念:旋光性、左旋、右旋、对应异构及D-L标记法我们⽇常见到的太阳光或电灯泡的光可以看作是由⼀些微⼩的波构成的,这些波可以在任何⼀个平⾯上振动,它们的振动⽅向可能均匀地分布在所有各个⽅向上,这些光通过尼可尔棱镜后,其振动平⾯就只有⼀个和镜轴平⾏的平⾯。
这种仅在某⼀平⾯上振动的光,叫平⾯偏振光,简称偏振光。
能使偏振光发⽣偏转的性质称之为旋光性,那么具有这种旋光性的物质,称为旋光性物质。
使偏振光振动平⾯向右旋转(顺时针⽅向)的叫右旋,⽤“d”表⽰,向左旋转(反时针⽅向)的叫左旋,⽤“l”表⽰。
“d”与“l”分别是 dextro 和 levo 的缩写,意思就是右和左。
那么为什么会出现这种差异呢?经过研究发现是由于构成旋光物质的分⼦结构的不对称性引起的。
有⼀些化合物组成他们的元素相同,但其空间结构排列⽅式可能不同,彼此互为镜像,不能重叠,⽴体化学上称为⼿性。
但凡为⼿性分⼦就⼀定有互为镜像的两种构型,其中的任何⼀种形态是另⼀种形态的镜像,互为镜像的两种构型的异构体叫做对映体,此异构称为对映异构。
异构的产⽣是⼿性碳原⼦所连接的原⼦或原⼦团在空间的分布不同产⽣的。
维生素c_百度百科我的百科我的贡献草稿箱百度首页| 登录新闻网页贴吧知道MP3 图片视频百科帮助设置首页自然文化地理历史生活社会艺术人物经济科学体育春节维他命C在百度百科中为本词条的同义词,已为您做自动跳转。
编辑词条维生素c百科名片维生素C图片维生素C(Vita min C,Asc orbicAci d)又叫L-抗坏血酸,是一种水溶性维生素。
食物中的维生素C被人体小肠上段吸收。
一旦吸收,就分布到体内所有的水溶性结构中,正常成人体内的维生素C代谢活性池中约有1500mg维生素C,最高储存峰值为3000mg维生素C。
正常情况下,维生素C绝大部分在体内经代谢分解成草酸或与硫酸结合生成抗坏血酸-2-硫酸由尿排出;另一部分可直接由尿排出体外。
目录[隐藏]基本性质物理性质化学性质发展历程功效适宜人群富含食物正常需求生理功能防病作用药物作用吸收代谢缺乏表现过量表现注意人工合成维生素C片说明书基本性质物理性质化学性质发展历程功效适宜人群富含食物正常需求生理功能防病作用药物作用吸收代谢缺乏表现过量表现注意人工合成维生素C片说明书[编辑本段]基本性质物理性质外观:无色晶体熔点:190 -192℃沸点:(无)紫外吸收最大值:245nm荧光光谱:激发波长-无nm,荧光波长-无nm;溶解性:水溶性维生素化学性质分子式:C6H8O6分子量:176.12uCAS号:50-81-7酸性,具有较强的还原性,加热或在溶液中易氧化分解,在碱性条件下更易被氧化。
构成:一个维生素分子由六个碳原子、八个氢原子和六个氧原子构成。
C开头的单词发音[K]carn.汽车,小汽车,轿车case n.情况;事实;病例cas e n.箱(子),盒(子),套casu ala.偶然的;随便的cancern.癌,癌症,肿瘤card n.卡,卡片,名片carevi.关心,介意n.小心cas h n.现金,现款can aux.v.能,会,可能can n.罐头,听头;容器c ab le n.缆,索;电缆;电报cal l vt.把…叫做;叫,喊caken.饼,糕,蛋糕ca fe n.咖啡馆;小餐厅cal cula tor n.计算器,计算者calend arn.日历,历书;历法calm a.静的,平静的Ca nada n.加拿大camera n.照相机,摄影机ca ncel vt.取消,撤消;删去can didat e n.候选人;投考者car gon.船货,货物c atalog n.目录,目录册ca tch vt.捉住;赶上;领会carr y vt.携带;运载;传送cap aci ty n.容量;能力;能量c apita l n.资本,资金;首都carpent er n.木工,木匠carpet n.地毯,毡毯,毛毯c arriage n.客车厢;四轮马车c arriern.运输工具;运载工具c arrot n.胡罗卜ca rt n.二轮运货马车carv evt.刻,雕刻;切开cassett e n.盒式录音带;盒子cast vt.投,扔,抛;浇铸castlen.城堡;巨大建筑物ca t n.猫,猫科,猫皮c abbagen.洋白菜,卷心菜c abin n.小屋;船舱,机舱cab inet n.橱,柜;内阁came ln.骆驼ca fet eria n.自助食堂cag e n.笼;鸟笼,囚笼cal cul ate vt.计算;估计;计划ca lculation n.计算,计算结果camp n.野营,营地,兵营ca mpaignn.战役;运动c ampu s n.校园,学校场地Ca nadian a.加拿大的ca na l n.运河;沟渠;管candle n.蜡烛;烛形物;烛光candyn.糖果;砂糖结晶c annon n.大炮,火炮;榴弹炮ca noe n.独木舟,皮艇,划子cant een n.小卖部;临时餐室canvas n.粗帆布;一块油画布cap n.帽子,便帽;帽状物capablea.有能力的,有才能的captai n n.陆军上尉;队长ca ptiv e n.俘虏,被监禁的人cap tu re vt.捕获,俘获;夺得car bon n.碳ca reer n.生涯,职业,经历ca re ful a.仔细的;细致的ca rele ss a.粗心的,漫不经心的cathe dra l n.总教堂;大教堂cattle n.牛;牲口,家畜cause n.原因,理由;事业c ave n.山洞,洞穴,窑洞[K]co ffeen.咖啡,咖啡茶c olo r n.颜色,彩色;颜料comevi.来,来到;出现computer n.计算机,电脑cook vt.烹调,煮vt.烧菜c ool a.凉的,冷静的co ld a.冷的;冷淡的n.冷co py n.抄件v t.抄写,复制c oncert n.音乐会,演奏会co at n.外套,上衣;表皮coden.准则;法典;代码coin n.硬币;铸造(硬币)col leag ue n.同事,同僚comfor ta ble a.舒适的,安慰的comm on a.普通的;共同的competevi.比赛;竞争;对抗compl ain t n.抱怨;怨言;控告co mplet e a.完整的;完成的co ncern n.关心,挂念;关系co nfidencen.信任;信赖;信心confirm vt.证实,肯定;批准c ongratu lat ion n.祝贺;祝贺词con nectvt.连接,连结;联系c ontactvt.使接触;与…联系containe r n.容器;集装箱contentn.内容,目录;容量contrac t n.契约,合同;婚约c ontro lvt.控制,克制n.控制co nvenien ta.便利的;近便的conventi on n.习俗,惯例;公约costn.价格,代价;成本costlya.昂贵的;价值高的co rrect a.正确的vt.纠正co rre ction n.改正,纠正,修改c otton n.棉;棉线;棉布cou gh vi.咳,咳嗽n.咳嗽co un t vt.计算vi.数,计数cou n ter n .柜台;计数器 c ountr y n .国家,国土;农村 court n .法院,法庭;庭院 c over vt.盖,包括 n.盖子 c o nsider v t .认为;考虑;关心c onsid e rab l e a.相当大的;重要的 c onsid e ra t e a.考虑周到的;体谅的 co n s ideratio n n.考虑,思考;体 coach n .长途公共汽车 c o a l n.煤,煤块 c o arse a .粗的,粗糙的 c oast n.海岸,海滨(地区) c ock n.公鸡;雄禽;旋塞 c o i l n.(一)卷;线圈 vt.卷 c o llapse v i .倒坍;崩溃,瓦解 c ollar n .衣领,项圈 c o lle c t vt .收集 v i .收款 colle c ti o n n.搜集,收集;收藏品 co l l ective a .集体的;集合性的 c ollege n .学院;大学 co l l i sion n .碰撞;冲突 co l one l n.陆军上校;中校 co l ony n .殖民地;侨居地 c o l u mn n.柱,支柱,圆柱 comb n.梳子 vt.梳理 combina t i on n.结合,联合;化合 co m bi n e vt.使结合;兼有 co m fort n.舒适;安慰 v t .安慰 comma n d vt.命令,指挥;控制 comma n der n.司令官,指挥员 comm e n t n.评论,意见;注释 com m er c e n.商业,贸易;社交 c o mmer c ial a.商业的;商品化的 comm i s s ion n.委任状;委员会 com m it vt.犯(错误);干(坏事) c o mmittee n .委员会;全体委员 c ommon l y a d .普通地,一般地c omm u nicat e v i .通讯;传达;传播 commun i c ation n.通讯;传达;交通c o mmunism n .Communi s t 主义 comm u ni s t n.C o mmu n istp a rty 员 com m unity n.社区;社会;公社 c ompanio n n.同伴;共事者;伴侣 compan y n.公司,商号;同伴 compa r a t ive a.比较的,相对的c o mpa r e vt .比较,对照;比作 compa r is o n n.比较,对照;比似 com p a ss n.罗盘,指南针;圆规 com p el vt.强迫,迫使屈服贴co m p e tent a .有能力的;应该做的 co m peti t ion n .竞争,比赛 co m pi l e vt.编辑,编制,搜集 co m p lain vi.抱怨,拆苦;控告 c o mpletely a d.十分,完全地 c omplex a.结合的;复杂的 co m plic a te v t .使复杂;使陷入 c om p licate d a .复杂的,难懂的 componen t n.组成部分;分;组件 compo s e vt.组成,构成;创作 com p os i tion n .构成;作品;写作 com p oun d n.化合物;复合词comp r e h ension n .理解,理解力;领悟comprehe n sive a.广泛的;理解的 co m p r ess vt .压紧,压缩 co m pri s e vt .包含,包括;构成 compr o mi s e n.妥协,和解 comput e vt.计算,估计,估算 comrad e n.同志,亲密的同伴 conce a l vt.把…隐藏起来conce n tra t e vt .集中;聚集;浓缩 conce n tr a tion n .集中;专注;浓缩 c o ncept n.概念,观念,设想 c o ncerning p rep.关于 c o n clude v t.推断出;结束 con c lusi o n n.结论,推论;结尾 c o nc r ete n.混凝土;具体物 co n d emn vt.谴责,指责;判刑co n dense vt .压缩,使缩短 c o n d ition n .状况,状态;环境 co n duct n.举止,行为;指导con d uc t or n.售票员;(乐队)指挥 c o nference n.会议,讨论会 c onfess v t .供认,承认;坦白 c onfide n t n .确信的,自信的c onfi n e vt .限制;禁闭 con f li c t n.争论;冲突;斗争 con f u se vt.使混乱,混淆 confu s ion n.混乱;骚乱;混淆 co n g r atulat e v t .祝贺,向…道喜 c ongr e ss n .大会;国会,议会c on j unctio n n .接合,连接;连接词 connec t ion n.连接,联系;连贯性co n q uer vt.征服,战胜;破除 c on q uest n .攻取,征服;克服 con s cie n ce n.良心,道德心con s c i ous a.意识到的;有意的 co n sciousnes s n.意识,觉悟;知觉 conse n t n.同意,赞成 v i .同意 c o nse q uenc e n.结果,后果 conse q ue n tly ad .因此,因而,所以 c o nservati o n n.保存,保护;守恒 conse r v ative a .保守的 n.保守的人 c onsis t vi .由…组成;在于 c o nsi s tent a .坚持的,一贯的 c o n stant a .经常的;永恒的 c o nstitutio n n.章程;体质;构造 const r u c t vt.建造;建设;构筑 c o nst r ucti o n n.建造;建筑;建筑物 c on s ult vt .请教,查阅 con s u me vt.消耗,消费;消灭 con s umption n .消耗量;消耗 c o n tain v t .包含,容纳;等于 co n temp o rary a.当代的,同时代的 c o ntempt n .轻蔑;藐视;受辱 convenie n ce n.便利,方便;厕所cont e n t a.满意的,满足的cont e st vt.争夺,争取;辩驳 co n tine n t n .大陆;陆地;洲 c ontinu a l a.不断的;连续的 continu e vt.继续,连续;延伸 conti n u ous a.连续不断的,持续的 c on t radic t ion n.矛盾,不一致;否认c o ntrar y a .相反的 n.相反 contras t n.对比,对照,悬殊 contrib u te vt.捐献,捐助;投稿 co n v e ntiona l a .普通的;习惯的c o nver s atio n n.会话,非正式会谈 c onvers e l y ad.相反地c onversio n n.转变,转化;改变 conver t vt.使转变;使改变 conve y v t .传送;运送;传播 conv i nce v t.使确信,使信服 co o perate v i .合作,协作;配合 coordin a te vt.使协调,调节cope v i .对付,应付c o p per n.铜;铜币,铜制器 c ord n.细绳,粗线,索 cor d ial a .真诚的,诚恳的 c o r e n.果实的心,核心 corn n .谷物;(英)小麦 c orner n.角;犄角;边远地区 c o rporat i on n.公司,企业;社团 cor r espo n d v i .相符合;相当c orresp o n d ent n.通信者;通讯员 cor r esponding a.相应的;符合的 corrido r n .走廊,回廊,通路 could aux .v.(c a n 的过去式) c o usin n .堂(或表)兄弟(姐妹)council n .理事会,委员会 cottage n .村舍,小屋 co u n tryside n .乡下,农村 c ou n ty n.英国的郡,美国的县 coup l e n .夫妇;(一)对;几个 cour a g e n.勇气,胆量,胆识 cours e n.课程;过程;一道菜 cow n .母牛,奶牛;母兽 c o ward n .懦夫;胆怯者 [K]cut v t.切,割,剪;减少 cup n.杯子;(一)杯;奖杯 cultur e n.文化,文明;教养 custom n .习惯,风俗;海关 custome r n .顾客,主顾 cu b e n.立方形;立方 cub i c a.立方形的;立方的 c u cu m ber n.黄瓜cultiva t e vt.耕;种植;培养 cunnin g a.狡猾的,狡诈的 cupboa r d n.碗柜,碗碟橱;食橱 cur e vt .医治;消除 n.治愈 cu r iosit y n .好奇,好奇心;珍品 curiou s a.好奇的;稀奇古怪的 curl n .卷毛;螺旋 vi .卷曲 curre n t a.当前的;通用的 curse n.诅咒,咒骂;天谴 cu r tai n n.帘,窗帘;幕(布) cu r v e n.曲线;弯 v t.弄弯 cus h ion n.垫子,坐垫,靠垫 [S ]cent n.分;分币;百cer t ainl y ad.一定,必定;当然 c e nt r e (cent e r ) n.中心;中枢 vt.集中ce n tury n.世纪,百年celeb r a te vt.庆祝;歌颂,赞美 c e ll n.细胞;小房间c erem o ny n .典礼,仪式;礼节 c er t ificat e n .证书,证件,执 cease vi .&vi.&n.停止,停息 ceili n g n.天花板,顶蓬 cellar n.地窑,地下室 cem e nt n .水泥;胶泥 vt .粘结 ce n ti g rade a .百分度的 cent i m etre n.公分,厘米 centr a l a.中心的;主要的照 cert a i n a.确实的;肯定的 cert a int y n.必然;肯定 [S]c ity n.城市,都市cigare t te n.香烟,纸烟,卷烟cin e m a n.电影院;电影,影片 ci r cle n.圆,圆周;圈子 cit i zen n .公民;市民,居民 c i r cuit n.电路;环行;巡行 c i rcular a.圆的;循环的 ci r c ulate v t .使循环 vi.循环 c ircum f ere n ce n .圆周,周长,圆周线circ u ms t ance n .情况,条件;境遇 c ivil a.公民的;文职的civ i lization n .文明,文化;开化 civili z e v t.使文明;教育 [S]c ycle n 自行车,循环 [ t ʃ ]China n .中国 china n .瓷器,瓷料 C h i nese a .中国的 n.中国人 ch e ck v t .检查;制止 n .检查 ch o co l ate n.巧克力;巧克力糖 c h i cken n.小鸡,小鸟;鸡肉 ch e ap a.廉价的;劣质的 chee r v t.使振作;欢呼 (cheer s :干杯)che a t vt .骗取;哄 vi.行骗 c h oice n .选择,抉择 cho o s e vt.选择,挑选;情愿 chai r man n.主席;议长,会长cha l l e nge n.挑战;要求,需要 c ham p ion n .冠军,得胜者 c hance n.机会,机遇;可能性 change n .改变,变化;零钱 charity n .施舍;慈善事业 c h art n.图,图表;海图 ch e qu e n.支票chi l d n.小孩,儿童;儿子 c hief a .主要的;首席的 c h a in n.链,链条,项圈 char m ing a.迷人的,可爱的chair n .椅子;主席c h a lk n.白垩;粉笔cham b er n .会议室;房间;腔 cha n nel n .海峡;渠道;频道 c h a pter n.章,回,篇 char g e vt.索价;控告 n.费用 ch a s e n.追逐,追赶,追求 che e k n .面颊,脸蛋 ch e erfu l a.快乐的,愉快的 che e se n.乳酪,干酪 c herry n .樱桃;樱桃树 ch e ss n.棋;国际象棋 chest n .胸腔,胸膛;箱子 c hew vt .咀嚼,嚼碎ch i ldh o od n .童年,幼年;早期 childi s h a.孩子的;幼稚的 chill v t .使变冷 n.寒冷chimney n .烟囱,烟筒;玻璃罩 chin n .颏,下巴 cho k e v t .使窒息;塞满 c h op v t.砍,劈;切细v i.砍 ch u r c h n.教堂,礼拜堂;教会[K] Christ m as n.圣诞节 C hristia n n .基督教徒;信徒 c harac t er n .性格;特性;角色 cha r acter i st i c a.特有的 n .特性 che m i cal a.化学的 n.化学制品 c h emist n.化学家;药剂师 c h e m istry n .化学[ʃ]c h ef n .厨师长;大师傅 C hicag o n .芝加哥 [K ]cl u b n.俱乐部,夜总会 c l ass n .班,班级;阶级 c l e a n a.清洁的;纯洁的 clock n.钟,仪表 cl o se vt.关,闭;结束 clot h e s n.衣服,服装;被褥 cle v er a .聪明的;机敏的 c lou d n.云;云状物;阴影 clo u d y a.多云的;云一般的 cloth i ng n.衣服,被褥claim v t .声称,主张;索取 c lassic a l a .古典的;经典的 c lear a.清晰的 vt .清除 cl e ar l y ad.明白地,清晰地 cle r k n.店员;办事员,职员clap v i .拍手 vt.拍,轻拍 clari f y vt.澄清,阐明 c lasp n .扣子,钩子;别针cl a ssi f icati o n n .分类;分级;分类法 class i f y vt.把…分类 classmat e n.同班同学c l assroom n .教室,课堂 c la w n.爪,脚爪,螯 clay n.粘土,泥土;肉体cl i ff n.悬崖,峭壁c limate n .气候;风土,地带 climb vi.攀登,爬 vt.爬 c loak n.斗篷;覆盖(物) c lo s ely a d .紧密地,接近地 clot h n.布;衣料;桌布 c l othe v t .给…穿衣服 cl u e n.线索,暗示,提示 clumsy a.笨拙的;愚笨的 [K]c r y v i.哭,哭泣;叫喊 crea m n.奶油,乳脂;奶油色 c r az y a.疯狂的,荒唐的 credi t n.信用贷款;信用 create v t .创造;引起,产生 crisis n .危机;存亡之际 cr i me n.罪,罪行;犯罪 c r oss v t.穿过;使交叉 c ry s tal n.水晶,结晶体;晶粒c r i tic n.批评家,爱挑剔的人 cr i tical a.决定性的;批评的 c r i ticism n.批评;批判;评论 c r ack n .裂缝,裂纹 v i .爆裂c r af t n.工艺;手艺,行业 cran e n.起重机,摄影升降机 无效 vi.碰撞,坠落 n.碰撞crawl v i .爬,爬行cre a ti v e a.创造性的,创作的c r eatu r e n .生物,动物,家畜 creep v i .爬行;缓慢地行进crew n.全体船员 cricke t n.板球;蟋蟀c riminal n .犯人,罪犯,刑事犯 cripp l e n .跛子;残废的人 c r iti c ize v t .批评;评论;非难 c r op n.农作物,庄稼;一熟 cr o w n.鸦,乌鸦 v i.啼 crow d n.群;大众;一伙人 crown n.王冠,冕;花冠cr u de a .简陋的;天然的c ruel a .残忍的,残酷的 c r u sh vt.压碎,碾碎;镇压 cr u st n.面包皮;硬外皮 字母y是一个非常特殊的字母。
carbon的化学符号
碳元素是一种非金属元素,在化学元素周期表中位于第6位。
碳元素的化学符号为C,是一种常见且重要的元素之一。
碳元素在自然界以多种形式存在,包括金刚石、石墨、无定形碳(如煤和木炭)以及富勒烯和碳纳米管等碳纳米材料。
碳元素在
工业和科技领域中也有广泛的应用,例如作为燃料、催化剂、塑料、橡胶、电子元件等的原料。
碳元素的化学性质非常稳定,可以形成多种键型,如单键、双键、叁键等。
这些化学性质使得碳元素在各种化学反应中起到关键
作用,例如有机化学反应、高分子合成、自由基反应等。
此外,碳元素也是生物体内一种重要的元素,在生物体内以多种形式存在,如蛋白质、核酸、碳水化合物等。
碳元素在生命活动
中也起着重要的作用,例如作为生物分子结构的组成部分、能量传
递等。
总之,碳元素是一种非常重要的元素,在化学、工业、科技和生命科学等领域中有着广泛的应用和重要性。
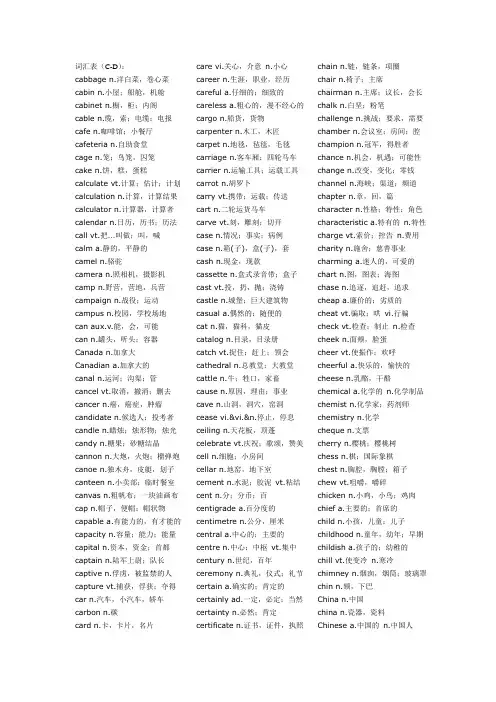
词汇表(C-D):cabbage n.洋白菜,卷心菜cabin n.小屋;船舱,机舱cabinet n.橱,柜;内阁cable n.缆,索;电缆;电报cafe n.咖啡馆;小餐厅cafeteria n.自助食堂cage n.笼;鸟笼,囚笼cake n.饼,糕,蛋糕calculate vt.计算;估计;计划calculation n.计算,计算结果calculator n.计算器,计算者calendar n.日历,历书;历法call vt.把…叫做;叫,喊calm a.静的,平静的camel n.骆驼camera n.照相机,摄影机camp n.野营,营地,兵营campaign n.战役;运动campus n.校园,学校场地can aux.v.能,会,可能can n.罐头,听头;容器Canada n.加拿大Canadian a.加拿大的canal n.运河;沟渠;管cancel vt.取消,撤消;删去cancer n.癌,癌症,肿瘤candidate n.候选人;投考者candle n.蜡烛;烛形物;烛光candy n.糖果;砂糖结晶cannon n.大炮,火炮;榴弹炮canoe n.独木舟,皮艇,划子canteen n.小卖部;临时餐室canvas n.粗帆布;一块油画布cap n.帽子,便帽;帽状物capable a.有能力的,有才能的capacity n.容量;能力;能量capital n.资本,资金;首都captain n.陆军上尉;队长captive n.俘虏,被监禁的人capture vt.捕获,俘获;夺得car n.汽车,小汽车,轿车carbon n.碳card n.卡,卡片,名片care vi.关心,介意n.小心career n.生涯,职业,经历careful a.仔细的;细致的careless a.粗心的,漫不经心的cargo n.船货,货物carpenter n.木工,木匠carpet n.地毯,毡毯,毛毯carriage n.客车厢;四轮马车carrier n.运输工具;运载工具carrot n.胡罗卜carry vt.携带;运载;传送cart n.二轮运货马车carve vt.刻,雕刻;切开case n.情况;事实;病例case n.箱(子),盒(子),套cash n.现金,现款cassette n.盒式录音带;盒子cast vt.投,扔,抛;浇铸castle n.城堡;巨大建筑物casual a.偶然的;随便的cat n.猫,猫科,猫皮catalog n.目录,目录册catch vt.捉住;赶上;领会cathedral n.总教堂;大教堂cattle n.牛;牲口,家畜cause n.原因,理由;事业cave n.山洞,洞穴,窑洞cease vi.&vi.&n.停止,停息ceiling n.天花板,顶蓬celebrate vt.庆祝;歌颂,赞美cell n.细胞;小房间cellar n.地窑,地下室cement n.水泥;胶泥vt.粘结cent n.分;分币;百centigrade a.百分度的centimetre n.公分,厘米central a.中心的;主要的centre n.中心;中枢vt.集中century n.世纪,百年ceremony n.典礼,仪式;礼节certain a.确实的;肯定的certainly ad.一定,必定;当然certainty n.必然;肯定certificate n.证书,证件,执照chain n.链,链条,项圈chair n.椅子;主席chairman n.主席;议长,会长chalk n.白垩;粉笔challenge n.挑战;要求,需要chamber n.会议室;房间;腔champion n.冠军,得胜者chance n.机会,机遇;可能性change n.改变,变化;零钱channel n.海峡;渠道;频道chapter n.章,回,篇character n.性格;特性;角色characteristic a.特有的n.特性charge vt.索价;控告n.费用charity n.施舍;慈善事业charming a.迷人的,可爱的chart n.图,图表;海图chase n.追逐,追赶,追求cheap a.廉价的;劣质的cheat vt.骗取;哄vi.行骗check vt.检查;制止n.检查cheek n.面颊,脸蛋cheer vt.使振作;欢呼cheerful a.快乐的,愉快的cheese n.乳酪,干酪chemical a.化学的n.化学制品chemist n.化学家;药剂师chemistry n.化学cheque n.支票cherry n.樱桃;樱桃树chess n.棋;国际象棋chest n.胸腔,胸膛;箱子chew vt.咀嚼,嚼碎chicken n.小鸡,小鸟;鸡肉chief a.主要的;首席的child n.小孩,儿童;儿子childhood n.童年,幼年;早期childish a.孩子的;幼稚的chill vt.使变冷n.寒冷chimney n.烟囱,烟筒;玻璃罩chin n.颏,下巴China n.中国china n.瓷器,瓷料Chinese a.中国的n.中国人chocolate n.巧克力;巧克力糖 choice n.选择,抉择 choke vt.使窒息;塞满 choose vt.选择,挑选;情愿 chop vt.砍,劈;切细vi.砍 Christian n.基督教徒;信徒 Christmas n.圣诞节church n.教堂,礼拜堂;教会 cigarette n.香烟,纸烟,卷烟 cinema n.电影院;电影,影片 circle n.圆,圆周;圈子 circuit n.电路;环行;巡行 circular a.圆的;循环的 circulate vt.使循环 vi.循环 circumference n.圆周,周长,圆周线circumstance n.情况,条件;境遇 citizen n.公民;市民,居民 city n.城市,都市 civil a.公民的;文职的civilization n.文明,文化;开化 civilize vt.使文明;教育 claim vt.声称,主张;索取 clap vi.拍手 vt.拍,轻拍 clarify vt.澄清,阐明 clasp n.扣子,钩子;别针 class n.班,班级;阶级 classical a.古典的;经典的 classification n.分类;分级;分类法 classify vt.把…分类 classmate n.同班同学 classroom n.教室,课堂 claw n.爪,脚爪,螯 clay n.粘土,泥土;肉体 clean a.清洁的;纯洁的 clear a.清晰的 vt.清除 clearly ad.明白地,清晰地 clerk n.店员;办事员,职员 clever a.聪明的;机敏的 cliff n.悬崖,峭壁climate n.气候;风土,地带 climb vi.攀登,爬 vt.爬 cloak n.斗篷;覆盖(物) clock n.钟,仪表close vt.关,闭;结束 closely ad.紧密地,接近地 cloth n.布;衣料;桌布 clothe vt.给…穿衣服 clothes n.衣服,服装;被褥 clothing n.衣服,被褥 cloud n.云;云状物;阴影 cloudy a.多云的;云一般的 club n.俱乐部,夜总会 clue n.线索,暗示,提示 clumsy a.笨拙的;愚笨的 coach n.长途公共汽车 coal n.煤,煤块 coarse a.粗的,粗糙的 coast n.海岸,海滨(地区) coat n.外套,上衣;表皮 cock n.公鸡;雄禽;旋塞code n.准则;法典;代码 coffee n.咖啡,咖啡茶 coil n.(一)卷;线圈 vt.卷 coin n.硬币;铸造(硬币) cold a.冷的;冷淡的 n.冷 collapse vi.倒坍;崩溃,瓦解 collar n.衣领,项圈 colleague n.同事,同僚 collect vt.收集 vi.收款 collection n.搜集,收集;收藏品 collective a.集体的;集合性的 college n.学院;大学collision n.碰撞;冲突 colonel n.陆军上校;中校 colony n.殖民地;侨居地 color n.颜色,彩色;颜料 column n.柱,支柱,圆柱 comb n.梳子 vt.梳理 combination n.结合,联合;化合 combine vt.使结合;兼有 come vi.来,来到;出现 comfort n.舒适;安慰 vt.安慰 comfortable a.舒适的,安慰的 command vt.命令,指挥;控制 commander n.司令官,指挥员 comment n.评论,意见;注释 commerce n.商业,贸易;社交commercial a.商业的;商品化的 commission n.委任状;委员会 commit vt.犯(错误);干(坏事) committee n.委员会;全体委员 common a.普通的;共同的 commonly ad.普通地,一般地 communicate vi.通讯;传达;传播 communication n.通讯;传达;交通communism munist 主义 communist munistparty 员 community n.社区;社会;公社 companion n.同伴;共事者;伴侣 company n.公司,商号;同伴 comparative a.比较的,相对的 compare vt.比较,对照;比作 comparison n.比较,对照;比似 compass n.罗盘,指南针;圆规 compel vt.强迫,迫使屈服 compete vi.比赛;竞争;对抗 competent a.有能力的;应该做的 competition n.竞争,比赛 compile vt.编辑,编制,搜集 complain vi.抱怨,拆苦;控告 complaint n.抱怨;怨言;控告 complete a.完整的;完成的 completely ad.十分,完全地complex a.结合的;复杂的 complicate vt.使复杂;使陷入 complicated a.复杂的,难懂的 component n.组成部分;分;组件 compose vt.组成,构成;创作 composition n.构成;作品;写作 compound n.化合物;复合词 comprehension n.理解,理解力;领悟comprehensive a.广泛的;理解的 compress vt.压紧,压缩 comprise vt.包含,包括;构成 compromise n.妥协,和解 compute vt.计算,估计,估算 computer n.计算机,电脑 comrade n.同志,亲密的同伴 conceal vt.把…隐藏起来concentrate vt.集中;聚集;浓缩 concentration n.集中;专注;浓缩 concept n.概念,观念,设想 concern n.关心,挂念;关系 concerning prep.关于 concert n.音乐会,演奏会 conclude vt.推断出;结束 conclusion n.结论,推论;结尾 concrete n.混凝土;具体物 condemn vt.谴责,指责;判刑 condense vt.压缩,使缩短 condition n.状况,状态;环境 conduct n.举止,行为;指导 conductor n.售票员;(乐队)指挥 conference n.会议,讨论会 confess vt.供认,承认;坦白 confidence n.信任;信赖;信心 confident n.确信的,自信的 confine vt.限制;禁闭 confirm vt.证实,肯定;批准 conflict n.争论;冲突;斗争 confuse vt.使混乱,混淆 confusion n.混乱;骚乱;混淆 congratulate vt.祝贺,向…道喜 congratulation n.祝贺;祝贺词 congress n.大会;国会,议会 conjunction n.接合,连接;连接词 connect vt.连接,连结;联系 connection n.连接,联系;连贯性 conquer vt.征服,战胜;破除 conquest n.攻取,征服;克服 conscience n.良心,道德心 conscious a.意识到的;有意的 consciousness n.意识,觉悟;知觉 consent n.同意,赞成 vi.同意 consequence n.结果,后果consequently ad.因此,因而,所以 conservation n.保存,保护;守恒 conservative a.保守的 n.保守的人 consider vt.认为;考虑;关心considerable a.相当大的;重要的 considerate a.考虑周到的;体谅的 consideration n.考虑,思考;体贴 consist vi.由…组成;在于consistent a.坚持的,一贯的 constant a.经常的;永恒的 constitution n.章程;体质;构造 construct vt.建造;建设;构筑 construction n.建造;建筑;建筑物 consult vt.请教,查阅 consume vt.消耗,消费;消灭 consumption n.消耗量;消耗 contact vt.使接触;与…联系 contain vt.包含,容纳;等于 container n.容器;集装箱 contemporary a.当代的,同时代的 contempt n.轻蔑;藐视;受辱 content n.内容,目录;容量content a.满意的,满足的 contest vt.争夺,争取;辩驳 continent n.大陆;陆地;洲 continual a.不断的;连续的 continue vt.继续,连续;延伸 continuous a.连续不断的,持续的 contract n.契约,合同;婚约 contradiction n.矛盾,不一致;否认contrary a.相反的 n.相反contrast n.对比,对照,悬殊 contribute vt.捐献,捐助;投稿control vt.控制,克制 n.控制 convenience n.便利,方便;厕所 convenient a.便利的;近便的convention n.习俗,惯例;公约 conventional a.普通的;习惯的 conversation n.会话,非正式会谈 conversely ad.相反地 conversion n.转变,转化;改变convert vt.使转变;使改变 convey vt.传送;运送;传播convince vt.使确信,使信服 cook vt.烹调,煮 vt.烧菜 cool a.凉的,冷静的 cooperate vi.合作,协作;配合coordinate vt.使协调,调节 cope vi.对付,应付 copper n.铜;铜币,铜制器 copy n.抄件 vt.抄写,复制cord n.细绳,粗线,索 cordial a.真诚的,诚恳的 core n.果实的心,核心 corn n.谷物;(英)小麦corner n.角;犄角;边远地区corporation n.公司,企业;社团 correct a.正确的 vt.纠正 correction n.改正,纠正,修改 correspond vi.相符合;相当 correspondent n.通信者;通讯员 corresponding a.相应的;符合的 corridor n.走廊,回廊,通路cost n.价格,代价;成本 costly a.昂贵的;价值高的 cottage n.村舍,小屋 cotton n.棉;棉线;棉布 cough vi.咳,咳嗽 n.咳嗽 could aux.v.(can 的过去式) council n.理事会,委员会 count vt.计算 vi.数,计数 counter n.柜台;计数器 country n.国家,国土;农村countryside n.乡下,农村 county n.英国的郡,美国的县 couple n.夫妇;(一)对;几个 courage n.勇气,胆量,胆识 course n.课程;过程;一道菜 court n.法院,法庭;庭院 cousin n.堂(或表)兄弟(姐妹) cover vt.盖,包括 n.盖子 cow n.母牛,奶牛;母兽 coward n.懦夫;胆怯者crack n.裂缝,裂纹 vi.爆裂 craft n.工艺;手艺,行业 crane n.起重机,摄影升降机 无效 vi.碰撞,坠落 n.碰撞 crawl vi.爬,爬行 crazy a.疯狂的,荒唐的 cream n.奶油,乳脂;奶油色 create vt.创造;引起,产生 creative a.创造性的,创作的 creature n.生物,动物,家畜 credit n.信用贷款;信用 creep vi.爬行;缓慢地行进crew n.全体船员cricket n.板球;蟋蟀crime n.罪,罪行;犯罪criminal n.犯人,罪犯,刑事犯cripple n.跛子;残废的人crisis n.危机;存亡之际critic n.批评家,爱挑剔的人critical a.决定性的;批评的criticism n.批评;批判;评论criticize vt.批评;评论;非难crop n.农作物,庄稼;一熟cross vt.穿过;使交叉crow n.鸦,乌鸦vi.啼crowd n.群;大众;一伙人crown n.王冠,冕;花冠crude a.简陋的;天然的cruel a.残忍的,残酷的crush vt.压碎,碾碎;镇压crust n.面包皮;硬外皮cry vi.哭,哭泣;叫喊crystal n.水晶,结晶体;晶粒cube n.立方形;立方cubic a.立方形的;立方的cucumber n.黄瓜cultivate vt.耕;种植;培养culture n.文化,文明;教养cunning a.狡猾的,狡诈的cup n.杯子;(一)杯;奖杯cupboard n.碗柜,碗碟橱;食橱cure vt.医治;消除n.治愈curiosity n.好奇,好奇心;珍品curious a.好奇的;稀奇古怪的curl n.卷毛;螺旋vi.卷曲current a.当前的;通用的curse n.诅咒,咒骂;天谴curtain n.帘,窗帘;幕(布) curve n.曲线;弯vt.弄弯cushion n.垫子,坐垫,靠垫custom n.习惯,风俗;海关customer n.顾客,主顾cut vt.切,割,剪;减少cycle n自行车,循环。
c字母开头的单词
C字母开头的单词有很多,比如:cat(猫)、camel(骆驼)、car(汽车)、cow(牛)、cake(蛋糕)、city(城市)、cloud(云)、cup(杯子)、computer(电脑)、clock (钟)、cry(哭)、candy(糖果)等等。
C字母开头的单词不仅有动物,还有交通工具、食物、家具、用具等等,它们的出现让我
们的生活更加丰富多彩。
比如说,car不仅可以让我们出行更加便捷,还可以带来快乐的
旅行体验;computer让我们的工作效率更高,也可以为我们提供更多的娱乐方式;cake是一种美味可口的食物,也可以成为欢庆的象征。
C字母开头的单词丰富了我们的生活,让我们的生活更加精彩。
高考英语必背C字母开头的单词高考英语必背C字母开头的单词引导语:准备好英语高考少不了对英语单词的积累,下面店铺为大家整理了高考英语必备的C字母开头的英语单词,方便大家每天记忆,带▲的单词是要重点熟练拼写的,欢迎阅读!1.cab (美)出租车2.cabbage 卷心菜,洋白菜3.café 咖啡馆;餐馆4.cafeteria 自助餐厅5.cage 笼;鸟笼6.calculate 计算,预测7.cake 蛋糕,糕点;饼8.call 喊,叫;电话,通话称呼;呼唤;喊,叫9.calm 镇静的;沉着的镇静;沉着10.camel 骆驼11.▲camera 照相机;摄像机12.camp (夏令)营野营;宿营13.campaign 战役14.can 1 可能;能够15.can 2 容器,罐头16.canal 运河;水道17.▲cancel 取消18.cancer 癌19.▲candidate 候选人20.candle 蜡烛21.candy 糖果22.canteen 餐厅;食堂23.cap (无檐的或仅在前面有檐的)帽子;(瓶子的)盖;(钢笔等的)笔套24.▲capital 首都,省会;大写;资本25.capsule 容器,胶囊26.captain (海军)上校;船长,舰长;队长27.caption 标题,解说词28.car 汽车,小卧车29.carbon 碳30.card 卡片;名片;纸牌31.care 照料,保护;小心介意……,在乎;关心32.careful 小心的,仔细的,谨慎的33.careless 粗心的,漫不经心的34.carpenter 木工,工匠35.carpet 地毯36.carriage 四轮马车;(火车)客车厢37.carrier 搬运者;媒介;(车的)货架38.carrot 胡萝卜39.carry 拿,搬,带,提,抬,背,抱,运等40.▲cartoon 动画片,卡通;漫画41.carve 刻;雕刻42.case 情况;病例;案件;真相;箱;盒;容器43.▲cash 现金,现钞兑现44.cassette 盒子,盒式磁带45.cast 扔,抛,撒46.castle 城堡47.casual 偶然的,碰巧的48.cat 猫49.catalogue 目录50.catastrophe 大灾难51.catch 接住;捉住;赶上;染上(疾病)52.category 种类,范畴53.cater 迎合,投合54.Catholic 天主教的55.cattle 牛(总称),家畜56.cause 原因,起因促使,引起,使发生57.caution 小心,谨慎58.cautious 小心的,谨慎的59.cave 洞,穴;地窖60.CD 光盘61.ceiling 天花板,顶棚62.▲celebrate 庆祝63.▲celebration 庆祝;庆祝会64.cell (监狱的)单人牢房;(修道院等的)单人小室;(蜂巢的)小蜂窝,蜂房;[生物]细胞65.cent 美分66.centigrade 摄氏的67.centimetre 公分,厘米68.central 中心的,中央的;主要的69.▲centre 中心,中央70.▲century 世纪,百年71.▲ceremony 典礼,仪式72.certain (未指明真实名称的)某……;确定的,无疑的;一定会……73.▲certificate 证明,证明书74.chain 链;链条75.chair 椅子76.chairman 主席,会长;议长77.chairwoman 女主席,女会长;女议长78.chalk 笔79.▲challenge 挑战(性)80.▲challenging 具有挑战性的81.▲82.champion 冠军,优胜者83.▲chance 机会,可能性84.▲change 改变85.▲changeable 易变的,变化无常的86.channel 频道;通道;水渠87.chant 圣歌诵经;反复地说或唱88.chaos 混乱,无秩序89.character 字,字体;品格90.characteristic 特有的,独特的91.▲charge 要求收费;索价;将(电池)充电费用;价钱92.chart 图表;航海图93.chat 聊天,闲谈94.cheap 便宜的95.cheat 骗取,哄骗;作弊96.check 检查;批改校对,核对;检查;批改97.cheek 面颊,脸蛋98.cheer 欢呼;喝彩99.cheerful 兴高采烈的,快活的100.cheers (举杯敬酒之用语)干杯101.cheese 奶酪102.chef 厨师103.chemical 化学的化学品104.chemist 药剂师;化学家105.▲chemistry 化学106.▲cheque 支票107.chess 棋108.chest 箱子;盒子;胸部109.chew 咀嚼110.chicken 鸡;鸡肉111.chief 主要的;首要的领导,头112.child 孩子,儿童113.childhood 幼年时代,童年114.chocolate 巧克力115.▲choice 选择;抉择116.choir 唱诗班117.choke 窒息118.choose 选择119.chopsticks 筷子120.chorus 合唱,合唱队121.Christian 基督教徒基督教徒的122.Christmas 圣诞节123.church 教堂;教会124.cigar 雪茄烟125.cigarette 纸烟,香烟126.▲cinema 电影院;电影127.circle 圆圈将……圈起来128.circuit 环行,范围129.circulate 流通130.circumatance 情况,环境131.circus 马戏团132.▲citizen 公民;居民133.city 市,城市,都市134.civil 国内的,平民(非军人)的;民用的135.civilian 平民,老百姓136.civilization 文明137.clap 拍手,鼓掌138.clarify 澄清,阐明139.class (学校里的)班;年级;课140.classic 第一流的,古典的141.classify 把……分类142.classmate 同班同学143.classroom 教室144.claw 爪145.clay 粘土,泥土;肉体,人体146.clean 弄干净,擦干净清洁的,干净的147.cleaner 清洁工;清洁器;清洁剂148.clear 清晰的,明亮的,清楚的149.clerk 书记员;办事员;职员150.clever 聪明的,伶俐的151.click 点击(计算机用语)152.▲climate 气候153.climb 爬,攀登154.clinic 诊所155.clock 钟156.clone 克隆(无性繁殖出有机体群) 157.close 亲密的;近,靠近近,靠近158.cloth 布159.clothes 衣服;各种衣物160.clothing (总称)衣服161.cloud 云;云状物;阴影162.▲cloudy 多云的,阴天的163.▲club 俱乐部;纸牌中的梅花164.clumsy 笨拙的165.coach 教练;马车;长途车166.coal 煤;煤块167.coast 海岸;海滨168.coat 外套;涂层;表皮;皮毛169.cocoa 可可粉170.coffee 咖啡171.coin 硬币172.coincidence 符合,一致,巧合173.coke 可口可乐174.cold 冷的,寒的寒冷;感冒,伤风175.collar 衣领;硬领176.colleague 同事177.▲collect 收集,搜集178.collection 收藏品,收集物179.▲college 学院;专科学校180.collision 碰撞,冲突181.colour 颜色给……着色,涂色b 梳子梳bine 使联合;使结合e 来,来到edy 喜剧fort 安慰;慰问187.▲comfortable 舒服的,安逸的;舒188.服自在的mand 命令ment 评论mercial 商业的mit 犯(错误);把……交托给mitment 承担义务,交托mittee 委员会mon 普通的,一般的,共有的196.▲communicate 交际;传达(感情,信息等) 197.▲communication 交际;交往;通讯munism 共产主义munist 共产主义者共产党的;共产主义的panion 同伴;同事201.▲company 公司202.▲compare 比较,对照pass 罗盘,指南针pensate 补偿205.▲compete 比赛,竞赛petence 能力,胜利207.▲competition 比赛,竞赛plete 完成的完成,结束plex 复杂的ponent 组成部分,成分,元件,部位position 作文;作曲prehension 理解promise 妥协,让步pulsory 强迫的,义务的215.▲computer 电子计算机216.concentrate 集中;浓缩217.concept 理念,观念218.concern 关心;关系涉及219.▲concert 音乐会;演奏会220.conclude 完成,结束221.conclusion 结论;结束222.concrete 有形的,具体的223.condition 条件,状况224.condemm 判刑225.conduct 引导,带领226.conductor 管理人;指导者;(车上的)售票员,列车员;乐队指挥227.▲conference (正式的)会议;讨论228.▲confident 自信的229.confidential 秘密的230.confirm 确定确认231.conflict 斗争,冲突232.confuse 搞乱,使糊涂233.▲congratulate 祝贺234.▲congratulation 祝贺,庆贺235.connect 连接,把……联系起来236.connection 连接物;接触,联系,保存237.conscience 良心238.consensus 一致同意239.consequence 结果240.conservation (自然资源的)保护,管理241.conservative 保守的,守旧的;保守主义的242.consider 考虑243.considerate 体贴的244.▲consideration 考虑;关心245.consist 包含,组成,构成246.consistent 一致的,调和的247.constant 经常的,不断的248.constitution 宪法;构造249.construct 构筑;建造,建设250.▲construction 建造,建设;建筑物251.consult 商量,请教252.consultant 顾问,咨询者253.consume 消耗,消灭254.contain 包含;包括;能容纳255.container 容器256.contemporary 当代的257.content 1 内容258.content 2 甘愿的,满意的`259.continent 大陆,大洲;陆地260.continue 继续261.contradict 反对262.contradictory 反驳的,反对的263.contrary 相反相反的264.▲contribute 捐助,捐献265.▲contribution 贡献266.control 控制267.controversial 争论的,争议的268.▲convenience 便利269.▲convenient 便利的,方便的270.conventional 惯例的271.▲conversation 谈话,交谈272.convey 搬运,传达273.convince 使确信274.cook 炊事员,厨师烹调,做饭275.cooker 炊具(锅、炉灶、烤炉等)276.cookie 小甜饼277.cool 凉的,凉爽的;酷278.copy 抄本,副本;一本(份,册……) 抄写;复印;(计算机用语)拷贝(备份盘)279.corn 玉米,谷物280.corner 角;角落;拐角281.corporation 社团,法人,公司282.correct 改正;纠正正确,对的;恰当的283.corre284.ction 改正285.correspond 一致;与……相当;与人通信,有书信往来286.corrupt 腐化的,贪w的贿赂,收买287.▲cost 价格花费288.cosy/cozy 舒适的289.cottage 郊外的小屋,村舍;别墅290.cotton 棉花棉花的291.cough 咳嗽292.could (can的过去式)可以……;(表示许可或请求)可以……;行293.count 数,点数294.counter 柜台,结账处295.country 国家;农村,乡下296.▲countryside 乡下,农村297.▲couple 夫妇,一对298.▲courage 勇气;胆略299.course 过程;经过;课程300.court 法庭;法院301.courtyard 庭院,院子302.▲cousin 堂(表)兄弟,堂(表)姐妹303.cover 盖子;罩覆盖,遮盖;掩盖304.cow 母牛,奶牛305.crash 碰撞,坠落306.crayon 蜡笔;蜡笔画307.crazy 疯狂的308.cream 奶油,乳脂309.▲create 创造;造成310.creature 人;动物;创造物311.credit 信用;信赖;信誉312.crew 全体船员313.crime (法律上的)罪,犯罪314.criminal 罪犯315.criterion 标准,规范316.crop 庄稼;收成317.cross 十字形的东西越过;穿过318.▲crossing 十字路口,人行横道319.crossroads 交叉路口320.▲crowd 人群拥护,群聚321.cruel 残忍的,残酷的;无情的322.cry 叫喊;哭声喊叫;哭323.cube 立方体324.cubic 立方体的,立方形的325.cuisine 烹饪326.▲culture 文化327.cup 茶杯328.cupboard 碗柜;橱柜329.cure 治疗;治愈330.curious 好奇的;奇异的331.currency 货币;现金332.▲curriculum 课程333.curtain 窗帘334.cushion 垫子335.▲custom 习惯,习俗,风俗习惯336.customer (商店等的)顾客,主顾337.customs 海关,关税338.cut 切,剪,削,割;伤口339.cycle 骑自行车;循环340.cyclist 骑自行车的人拓展:高考英语作文必背词组、句型01百搭词组1.努力做某事try one's best to do sth →spare no effort to do sthmake joint / combined efforts to do sth共同努力做某事go to great lengths to do sthdevote / commit / dedicate oneself to doing sth2.尝试做某事try to do sth →attempt to do sth = make an attempt to dosthhave a go at doing sth3.采取有效/立即/具体/相关/强有力的行动(措施)做某事take effective / immediate / concrete / relevant / forceful action / measures / steps to do sth被动也不错:Immediate measures should be taken to address the problem.Measures should be taken to address the problem without delay.4.某事很重要play an important / vital / essential role (in sth)be of vital importance to sb / sth类似be of great value / benefit to sb / sth双重否定表强调:Nothing is of more importance than sth.5.重视某事attach (much)importance / significance to sthlay emphasis / stress on sthstress the importance of sth双重否定:We can never lay too much emphasis on sth6.(不能)忽视某事turn a blind eye to sth; turn a deaf ear to sthBy no means should we ignore / neglect / overlook the importance of sth7.倾向于做某事tend to do sth →have a tendency to do sthThere is a tendency for sb to do sth8.可能做某事;某事可能发生be likely to do sthIt is likely that sb / sth will do sth.There is a high possibility that… = Chances are that…9.一定会做某事,某事一定会发生be bound / sure to do sth10.不得不做某事have no choice / alternative but to do sth = can't choose but do sth11.将某事考虑进去take sth into consideration / accounttake it into consideration / account that从句12.将某事牢记在心keep sth in mind / keep it in mind that从句13.认为某事理所当然take sth for granted / take it for granted that从句14.产生积极/消极/深远影响/副作用have positive / negative / far-reaching / side effects on sth do / cause (great) harm / damage to sth15.有做某事的权利/自由/机会/动力/渴望/魔力have the right / freedom / opportunity / motivation / desire / magic to do sth16.做某事有困难have (great) trouble / difficulty (in) doing sth17.给某人树立榜样set a good example to sbact / serve as a role model to sb18.向某人学习,效仿某人follow the example of sbfollow in the footsteps of sb19.呼吁某人做某事call on sb to do sthappeal to sb to do sth = make an appeal to sb to do sth20.提高某人对某事的意识raise one's awareness of sth = make sb aware of sthmake sb have a better understanding of sth21.做某事前三思think twice before doing sth22.设身处地为某人着想put oneself in sb's shoes23.从另一个角度看待某事see sth from another angle / a different angle24.某事使某人想起sth remind sb of sth25.某事使人深思sth set sb thinking26.在一定/很大程度上to a certain / a large degree / extent27.短/长期看来in / over the short / long term28.变得越来越流行become more and more popular →become increasingly popular = gain increasing popularitysth has become a hit已经变成风靡一时的流行/成功29.问题变得日益严重The problem is becoming increasingly serious →sth is becoming more of a problemsth has become a headache成为令人头疼的问题30.随着某物的发展with the rapid development of the Internet / people's living standardsas the internet is developing at a fast rate31.在一个信息爆炸的世界in a world of information explosionin the era of globalization在全球化时代32.发自内心地from the bottom of one's heart33.全心全意地wholeheartedly = heart and soul34.毫无疑问/毫不犹豫/毫不耽搁/毫无保留地without doubt / hesitation / delay / reservation35.不管是什么情况/理由whatever the situation / circumstances / reasonregardless of any possible difficulties不顾任何困难36.关于个人发展broaden one's horizons and expand one's scope of knowledge开阔视野,拓展知识面boost one's confidence and inspire one's motivation增强信心,激发动力enhance one's willpower and contribute to one's future success增加意志力,促进未来成功form correct values and morals形成正确的价值观与道德观37.关于该做什么overcome difficulties and conquer obstacles / challenges克服困难,征服阻碍/挑战resist the temptation and stick to our principles抵制诱惑,坚持原则share our sorrows and double our joys分担悲伤,分享喜悦drive away our loneliness and get rid of our tiredness驱走孤独,摆脱劳累cherish what we already possess and pursue what we truly need珍惜我们已经拥有的,追求我们真正需要的reflect on our mistakes and give thought to ways to correct them反思错误,思考改正方法02百搭句型01丨定语从句,尤其是非限制定语从句e.g. Without goals, we would be like ships with no destination, in which case we might end up getting nowhere.02丨强调句e.g. It is our heart-warming gestures towards people in need thatcan make a difference to the world we live in.03丨倒装句5大类型1)否定放句首倒装Not only should we …,but also we ought to do …表“既要做,又要做”,“既可以,又可以”Under no circumstances / By no means / On no account / In no case should we …我们绝不能...2)Only +状语放句首倒装Only in this way/by doing sth / when … can we…3)So / Such放句首倒装,表“如此…以至于…”e.g. So shameful are these behaviors that they stain the reputation of China.Such a meaningful event is the street store program that I am willing to participate in it.4)让步状从的倒装,表“尽管”e.g. Convenient as/though digital reading is, it will not replace traditional reading in a million years.5)if虚拟语气从句中的倒装e.g. Were I a participant of this event, I would appeal to my friends to get involved in it.04丨祈使句,+and / or +完整句子e.g. Smile at our life, and we are sure to get a smile in return.05丨固定句型1) There is no doubt that …毫无疑问的是2) There is no denying that…不容否认的是3) There is no need to do sth做某事没有必要4) There is no point / sense in doing sth做某事没有意义5) It doesn’t make (much) sense to do sth做某事没道理/意义6) It is no good/use doing sth做某事没好处/没用7) It is high / about time that sb did / should do sth是时候做某事了8) It is high on the agenda that sb should do sth做某事是当务之急9) The time is ripe for sb to do sth做某事的时机已经成熟了10) It goes without saying that …某事是不言而喻的11) It is likely that … = There is a high possibility that… = (The) chances are that …很有可能12) It is not uncommon for sb to do sth; It is not uncommonthat sb do sth某事很常见13) It is a must for sb to do sth做某事是必须的14) What impresses me most is that …使我印象最深刻的是…15) It is not A but B that really counts.不是A而是B才是真正重要的16) It is A rather than B that make a difference.产生影响、发挥作用的不是B而是A17) It is important / necessary for sb either to do A or do B某人要么做..要么做..是很重要/必要(等)的18) This is especially true when it comes to …当提到…这一点也很适用19) (Doing) sth is the key to doing sth(做)某事是…的关键,很重要20) Doing sth is also a good choice / a wise option.…也是一个不错的选择/英明的抉择06丨主题句、承上启下句1) When it comes to ..., I hold the view that …当提到…,我认为…2) I applaud / am in favor of / stand up for / can’t agree more with one's viewpoint that …我赞同某人…的观点3) Every coin has two sides, and sth is no exception.凡事有利有弊,…也不例外4) Just like a double-edged sword, sth has both advantages and disadvantages.就像一把双刃剑,…既有利也有弊5) The reasons why … can be listed as fo llows.某事的原因可以罗列如下6) There are many factors that can account for sth有很多因素可以解释某事07丨有文采的词句表达(恰当的习/谚语,常用的比喻等)1) sb / sth has become a household name家喻户晓2) a blessing in disguise伪装成坏事的好事,祸中有福3) stop eating for fear of chocking因噎废食4) look on the bright side (of sth)(对坏情况),看到光明的一面,持乐观态度5) Every cloud has a silver lining.黑暗中总有一线光明,困境中也有积极面6) a stepping stone towards success通向成功的垫脚石7) climb the ladder of success攀登成功的阶梯8) keep the sacred lamp of friendship burning all our life使神圣的友谊之灯长明9) Where others see failure, they see possibility. Where others see a closed door they see an open window.10) When one door of opportunity closes, another will open.11) Every failure is a stepping stone towards success, and we keep learning along the way.12) A proper goal is like a lighthouse, guiding us in the darkness towards the right direction.13) We can find in real books the peace which has almost disappeared in a chaotic and fast-paced world.14) Life is like a winding path surrounded by flowers,butterflies and delicious fruits, but many of us blindly spend much time looking for happiness around the next corner.15) Only when we make good use of the precious time can we win the race against time.【高考英语必背C字母开头的单词】。

互联网的英文缩写为C
互联网在当今社会中扮演着极其重要的角色,已经成为人们日常生活中不可或缺的一部分。
而互联网这个词汇的英文缩写即为C。
C代表着连接,沟通和共享信息的方便与迅速。
在互联网时代,信息的传播速度达到了前所未有的高度。
借助互联网,人们之间的信息传递不再受地域和时空的限制。
在这个无处不在的网络中,人们可以交流想法、分享知识、开展合作,从而极大地促进了人类社会的发展和进步。
互联网的C同时也代表着沟通。
通过互联网,人们可以随时随地与全球各地的人们进行交流,建立起一种全新的沟通方式。
无论是文字、图片、音频还是视频,都能通过互联网快速传递,拉近了人与人之间的距离。
共享是互联网C的另一重要含义。
在互联网上,人们可以轻松地分享自己的观点、经验、技能甚至是经济资源。
共享经济的兴起,更是推动了互联网共享文化的发展,让人们能够更加方便地共享各种资源,实现资源的优化配置。
然而,互联网的C也存在着一些问题。
信息传播的速度过快,导致了信息真假难辨,甚至可能给人们的思想观念带来负面影响。
而在互联网沟通中,面对屏幕,人们的交流也可能变得更加冷冰冰,缺乏真实的情感体验。
同时,在共享文化的背景下,个人隐私和数据安全也面临着严峻的挑战。
无论是连接、沟通还是共享,互联网的C都深刻影响着我们的生活。
对于这个世界来说,C代表着一种连接全球的力量,促进人类社会的不断发展。
然而同时也需要我们认识到互联网所带来的挑战和问题,并寻找解决之道,以保证互联网的C 能够更好地造福人类。
c的原子相对原子质量C的原子相对原子质量C是化学元素周期表中的第6个元素,其原子序数为6,原子量为12.01。
在化学中,原子相对原子质量是指一个元素的原子质量与碳-12同位素的原子质量之比。
因此,C的原子相对原子质量为12.01。
物理类原子相对原子质量是一个物理量,它是由原子的质量和质子数决定的。
在C的原子中,有6个质子和6个中子,因此其质量为12。
但是,由于同位素的存在,C的原子相对原子质量并不等于12。
同位素是指原子核中质子数相同,但中子数不同的原子。
C的同位素有两种,分别是碳-12和碳-13。
碳-12的原子质量为12,而碳-13的原子质量为13.003。
化学类C是化学中非常重要的元素之一,它在有机化学和生物化学中都有广泛的应用。
在有机化学中,C是构成有机物的基本元素之一。
有机物是指含有C和H元素的化合物,如烷烃、烯烃、芳香烃等。
在生物化学中,C是构成生命体的基本元素之一。
生命体中的有机物包括蛋白质、核酸、多糖等,它们都含有C元素。
历史类C的原子相对原子质量的确定是一个历史悠久的过程。
早在18世纪,化学家就开始研究元素的相对原子质量。
当时,他们使用化学反应的质量变化来确定元素的相对原子质量。
但是,这种方法存在很大的误差,因为化学反应的质量变化受到很多因素的影响。
直到20世纪初,科学家才开始使用质谱仪来测量元素的原子质量,从而确定元素的相对原子质量。
质谱仪是一种能够测量原子和分子的质量的仪器,它通过将原子或分子加速到高速后,利用磁场将它们分离出来,从而测量它们的质量。
总结C的原子相对原子质量是一个重要的物理量,它是由原子的质量和质子数决定的。
在化学中,C是一个非常重要的元素,它在有机化学和生物化学中都有广泛的应用。
C的原子相对原子质量的确定是一个历史悠久的过程,科学家们通过不断的研究和探索,最终确定了C的原子相对原子质量为12.01。

化学c是什么意思
C在化学中有两种含义:1、表示浓度,单位为mol/L,计算式为:C=n/V.C=1000ρω/M。
2、表示碳元素。
碳是一种非金属元素,位于元素周期表的第二周期IVA族。
是一种很常见的元素,它以多种形式广泛存在于大气和地壳和生物之中。
1、表示浓度,单位为mol/L,计算式为:
C=n/V.C=1000ρω/M。
含义:用1升溶液中所含溶质的摩尔数表示的浓度。
用单位体积内溶质的量(摩尔数)表示的溶液组成的物理量称为溶质的摩尔浓度,也称为溶质的量浓度。
溶质含量越多,浓度越大。
浓度可以通过一定溶液中溶质的克数、分子数或当量数来计算。
一般用单位溶液中所含溶质的重量百分比来表示。
2、表示碳元素。
碳是一种非金属元素,位于元素周期表的第二周期IVA族。
拉丁语为Carbonium,意为“煤,木炭”。
碳是一种很常见的元素,它以多种形式广泛存在于大气和地壳和生物之中。
碳单质很早就被人认识和利用,碳的一系列化合物——有机物更是生命的根本。
碳是生铁、熟铁和钢的成分之一。
碳能在化学上自我结合而形成大量化合物,在生物上和商业上是重要的分子。
生物体内绝大多数分子都含有碳元素。
组合c的计算方法组合C的计算方法组合C是组合数学中的一个重要概念,用于计算从n个元素中取出k个元素的组合数。
在实际应用中,组合C的计算方法有多种,下面将介绍几种常见的计算方法。
1. 公式法:组合C的计算可以使用数学公式来实现。
组合C的公式为C(n, k) = n! / (k! * (n-k)!),其中n!表示n的阶乘,即n! = n * (n-1) * (n-2) * ... * 2 * 1。
通过计算n的阶乘和k的阶乘以及(n-k)的阶乘,然后将它们相除,即可得到组合C的值。
这种方法适用于小规模的计算,但对于大规模的计算会出现溢出问题。
2. 递归法:递归法是一种常用的计算组合C的方法。
递归法的思想是将组合C的计算问题分解为更小规模的子问题。
具体而言,可以将问题分为两种情况:一种是选择第一个元素作为组合中的元素,然后从剩余的n-1个元素中选择k-1个元素;另一种情况是不选择第一个元素,然后从剩余的n-1个元素中选择k个元素。
通过递归调用这两种情况,最终可以得到组合C的值。
3. 动态规划法:动态规划法是一种更高效的计算组合C的方法。
动态规划法的基本思想是将问题分解为多个子问题,并缓存子问题的解,以避免重复计算。
具体而言,可以使用一个二维数组dp来存储组合C的值,其中dp[i][j]表示从i个元素中选择j个元素的组合C的值。
根据组合C的递推关系C(n, k) = C(n-1, k-1) + C(n-1, k),可以通过动态规划的方式计算出组合C的值。
4. Lucas定理:Lucas定理是一种利用数论思想来计算组合C的方法。
Lucas定理的基本思想是将组合C的计算转化为模素数的运算。
具体而言,可以将n和k分别表示为p进制数,并计算它们对p的模。
然后使用Lucas定理的公式C(n, k) = C(n mod p, k mod p) * C(n div p, k div p) mod p,其中div表示整除运算。
c开头的单词大全集以内cacography(书写错误)、cacophony(嘈杂之声)、calamity (灾祸)、caliphate(哈里发)、calligraphy(书法)、callow(幼稚)、calumniate(诽谤)、calumny(诽谤)、calvary(十字军)、calvary(十字架)、camaraderie(友谊)、canard(谣言)、candescent(发白的)、candid(坦白的)、canker(溃疡)、cantata(管弦乐)、canticle(圣诗)、canto(诗篇)、capacious(宽敞的)、capitulate(投降)、caricature (漫画)、carnage(大屠杀)、carousal(狂欢)、cartographer(制图者)、castigation(惩罚)、castigate(惩罚)、casualty(受害者)、casuistry(诡辩)、cataclysm(灾变)、catalyze(催化)、catamaran(双体船)、catastrophe(灾难)、catechism(信条)、cautionary(警告性的)、cavil(苛求)、celestial(天体)、censor(审查人)、censure(谴责)、centurion(百夫长)、ceremony(仪式)、chimera(幻想)、choleric(怒火中烧的)、chronic(长期的)、circumlocution(回绕)、cipher(凯弗)、circumscribe(限定)、circumspect(谨慎的)、circumvent(谋避)、clairvoyance(透视)、clamor(叫嚣)、clarity(清晰)、classic(经典)、coercion(强制)、cogent(有力的)、commemorate(纪念)、commendable(值得称赞的)、commodious(宽敞的)、commute (改变)、compendium(汇编)、complacency(满足)、concession(让步)、concoct (捏造)、concord(调和)、condescension(屈尊)、condign(应有的)、confederacy(联盟)、conflagration(烈火)、conquest(征服)、consensus(共识)、contempt(蔑视)、contiguous(相邻的)、contingent(不确定的)、contiguity(接近)、contrite(悔悟的)、controversy(争论)、conundrum(谜语)、convenient(便利的)、convivial(快乐的)、convoluted(曲折的)、convolvulus(绑草)、copious(浩繁的)、corporeal(肉体的)、correlate(相关的)、correspondence(相似)、cosmopolitan(国际性的)、coterie(私密伙伴)、courtier(宰相)、covenant(公约)、covert(秘密的)、credence(信任)、credulous(易受骗的)、crescendo(增强)、criterion(标准)、crucible(考验)、crystallize(结晶)、culpable(有罪的)、cupidity(贪心)、curmudgeon(讨厌鬼)、curriculum(课程)、cynicism(愤世嫉俗态度)。
数学中c代表什么
数学中c代表复数集合,C还表示周长,组合会以C表示,在对称元素中,C表示旋转轴等一些数学符号。
数学是研究数量、结构、变化、空间以及信息等概念的一门学科,从某种角度看属于形式科学的一种。
数学透过抽象化和逻辑推理的使用,由计数、计算、量度和对物体形状及运动的观察而产生。
数学已成为许多国家及地区的教育范畴中的一部分。
它应用于不同领域中,包括科学、工程、医学、经济学和金融学等。
数学家也研究纯数学,就是数学本身的实质性内容,而不以任何实际应用为目标。
c开头的汉字C开头的汉字,是指拼音中以“c”为声母的汉字。
在汉语中,以“c”为声母的汉字并不多,但每一个字都有着独特的含义和用法。
在本文中,我们将会介绍一些常见的C开头的汉字,以及它们的用法和意义。
一、草草,是一种植物,也是汉字中常用的字。
草在汉语中有着丰富的含义和用法。
在汉字中,草的意义非常广泛,可以用来表示草地、植物、草稿等等。
同时,草也是汉字中的一个部首,常用于组成一些与植物有关的汉字,例如花、茶、苗等等。
二、城城,是指城市或城墙。
城在汉语中也有着丰富的含义和用法。
城可以用来表示一个城市或城镇的名称,也可以用来表示城市的建筑物或城墙。
在中国的历史中,城是一个非常重要的概念,它代表了一个国家或地区的文化和政治中心。
三、春春,是一年四季之一,也是汉字中常用的字。
春在汉语中有着丰富的含义和用法。
春可以用来表示一个季节,也可以用来表示新的开始和希望。
在中国文化中,春是一个非常重要的概念,它代表了新的开始和希望,同时也是一个重要的节日——春节的主题。
四、厕厕,是指厕所或公共厕所。
厕在汉语中也有着丰富的含义和用法。
厕可以用来表示一个厕所或公共厕所的名称,也可以用来表示厕所的建筑物或设施。
在现代社会中,厕所是一个非常重要的设施,它代表了卫生和公共卫生的重要性。
五、猫猫,是一种哺乳动物,也是汉字中常用的字。
猫在汉语中有着丰富的含义和用法。
猫可以用来表示一种动物,也可以用来表示一种态度或行为。
在中国文化中,猫是一个非常重要的动物,它代表了灵性和自由,同时也是一个非常受欢迎的宠物。
六、菜菜,是指食品中的蔬菜,也是汉字中常用的字。
菜在汉语中有着丰富的含义和用法。
菜可以用来表示一种食品,也可以用来表示一种文化或生活方式。
在中国文化中,菜是一个重要的元素,它代表了饮食文化和生活方式的重要性。
七、车车,是指交通工具中的车辆,也是汉字中常用的字。
车在汉语中有着丰富的含义和用法。
车可以用来表示一种交通工具,也可以用来表示一种文化或生活方式。
字母c的发音规则
字母c有两种发音规则,一种是清音/k/,一种是浊音/s/。
以下是具体解释:
1. 发/k/音的规则:
在英语单词中,当字母c紧接着字母a、o、u、或者在词首时,通常发音为清音/k/,例如:
- cat(猫咪):/kæt/
- coat(外衣):/koʊt/
- cup(杯子):/kʌp/
- car(汽车):/kɑr/
2. 发/s/音的规则:
在以下情况下,字母c通常发音为浊音/s/:
- 当字母c紧接着字母e、i、y、或者在某些词的结尾时,例如:
- face(脸):/feɪs/
- city(城市):/ˈsɪti/
- spicy(辛辣的):/ˈspaɪsi/
- force(力量):/fɔrs/
- 当字母c跟着字母h时,例如:
- cheese(奶酪):/tʃiz/
- church(教堂):/tʃɜːrtʃ/
- match(比赛):/mætʃ/
需要注意的是,这些发音规则并不是绝对的,有些单词的发音可能会有所不同,需要具体情况具体分析。
希望这些解释能够帮助你理解字母c的发音规则。
c在不同位置的发音在词尾,当c位于-ce、-ci、-cy、-ge、-gi、-gy尾的字中时,c通常是/s/的音。
例如:face(脸)、 nice(好)、cycle(自行车)、change(改变)、dance(跳舞)、magic(魔法)等。
在词首,当c首次出现在单词里时,c通常发/k/的音。
例如:car(汽车)、come(来)、cup(杯子)等。
在中间,如果c处于一对辅音字母之间,通常发/s/的音。
例如:accident(事故)、science(科学)、electric(电的)等。
要注意的是,尽管c以/s/的音发出,但这并不意味着它强调了‘s’的发音。
例如,说science时,‘s’仍然发/s/,而‘c’则发/k/。
尽管c在不同位置的发音大致是一致的,但也有一些例外,即在词首时可能会发/s/的音的情况。
特别是-sc-st头的字,c的发音会颇为特殊://。
例如:scene(场景)、science(科学)、stack(堆)、street(街道)等。
此外,c也可以在句子中发/t/的音,表示一种双元音的发音。
/t/通常用于拼写字母“ch”,但也有一些例外,即在-tch、-fic、-tic 尾的字中,c也可以发/t/的音。
例如:latch(门闩)、panic(恐慌)、public(公共)等。
总之,大家要特别注意c在不同位置的发音,以加深对字码的认知和理解。
通常情况是,在词尾、词首和中间位置时c发/s/、/k//t/的音;但有时c也会发出特殊的发音,例如在词首时发//,即在-sc-st开头的字中。
准确地掌握c在不同位置的发音,有助于正确发音,提升语言交流效率和质量。
mycom是串口通信类,在本blog前一篇中有完整代码。
(C#串口通信编程类(修改版)) 下面是串口通讯测试程序的源代码,将mycom类放在此项目中可以实现简单的串口通信,希望读者能通过这个程序对串口通信过程有一个初步的了解:usingSystem;usingSystem.Drawing;usingSystem.Collections;ponentModel;usingSystem.Windows.Forms;usingSystem.Data;usingSystem.Threading;namespaceBusApp{///<summary>///Form1的摘要说明。
///</summary>publicclassForm1:System.Windows.Forms.Form{bellabel1;bellabel2;privateSystem.Windows.Forms.Buttonbutton1;privateSystem.Windows.Forms.GroupBoxgroupBox1;bellabel3;bellabel4;bellabel5;bellabel6;privateSystem.Windows.Forms.Buttonbutton2;privateSystem.Windows.Forms.Buttonbutton3;privateSystem.Windows.Forms.Buttonbutton4;privateSystem.Windows.Forms.TextBoxtextBox8;bellabel7;publicintiPort=1;//1,2,3,4publicintiRate=9600;//1200,2400,4800,9600publicbytebSize=8;//8bitspublicbytebParity=0;//0-4=no,odd,even,mark,spacepublicbytebStopBits=1;//0,1,2=1,1.5,2publicintiTimeout=1000;publicmycommycom1=newmycom();publicbyte[]recb;privateSystem.Windows.Forms.TextBoxmsg;privateSystem.Windows.Forms.TextBoxt_port;privateSystem.Windows.Forms.TextBoxt_rate;privateSystem.Windows.Forms.TextBoxt_bytesize;privateSystem.Windows.Forms.TextBoxt_stopbyte;privateSystem.Windows.Forms.TextBoxt_parity; privateSystem.Windows.Forms.TextBoxt_send; privateSystem.Windows.Forms.Buttonbutton5;//readTimeOut ///<summary>///必需的设计器变量。
///</summary>ponentModel.Containercomponents=null; publicForm1(){InitializeComponent();}///<summary>///清理所有正在使用的资源。
///</summary>protectedoverridevoidDispose(booldisposing){if(disposing){if(components!=null){components.Dispose();}}base.Dispose(disposing);}#regionWindows窗体设计器生成的代码///<summary>///设计器支持所需的方法-不要使用代码编辑器修改///此方法的内容。
///</summary>privatevoidInitializeComponent(){this.msg=newSystem.Windows.Forms.TextBox();bel1=bel();bel2=bel();this.t_send=newSystem.Windows.Forms.TextBox();this.button1=newSystem.Windows.Forms.Button();this.groupBox1=newSystem.Windows.Forms.GroupBox(); this.button2=newSystem.Windows.Forms.Button();this.t_port=newSystem.Windows.Forms.TextBox();bel3=bel();this.t_rate=newSystem.Windows.Forms.TextBox();bel4=bel();this.t_bytesize=newSystem.Windows.Forms.TextBox();bel5=bel();this.t_stopbyte=newSystem.Windows.Forms.TextBox();bel6=bel();this.t_parity=newSystem.Windows.Forms.TextBox();this.button3=newSystem.Windows.Forms.Button();this.button4=newSystem.Windows.Forms.Button();this.textBox8=newSystem.Windows.Forms.TextBox();bel7=bel();this.button5=newSystem.Windows.Forms.Button();this.groupBox1.SuspendLayout();this.SuspendLayout();////msg//this.msg.ForeColor=System.Drawing.Color.Green;this.msg.Location=newSystem.Drawing.Point(0,0);this.msg.Multiline=true;="msg";this.msg.ScrollBars=System.Windows.Forms.ScrollBars.Vertical;this.msg.Size=newSystem.Drawing.Size(512,264);this.msg.TabIndex=0;this.msg.Text="";////label1//bel1.Location=newSystem.Drawing.Point(16,24);="label1";bel1.Size=newSystem.Drawing.Size(56,16);bel1.TabIndex=1;bel1.Text="串口号:";////label2//bel2.ForeColor=System.Drawing.Color.FromArgb(((System.Byte)(192)),((S ystem.Byte)(64)),((System.Byte)(0)));bel2.Location=newSystem.Drawing.Point(8,280);="label2";bel2.Size=newSystem.Drawing.Size(80,16);bel2.TabIndex=1;bel2.Text="设置数据包:";////t_send//this.t_send.BorderStyle=System.Windows.Forms.BorderStyle.FixedSingle;this.t_send.ForeColor=System.Drawing.Color.FromArgb(((System.Byte)(255)),(( System.Byte)(128)),((System.Byte)(0)));this.t_send.Location=newSystem.Drawing.Point(80,272);this.t_="t_send";this.t_send.Size=newSystem.Drawing.Size(344,21);this.t_send.TabIndex=2;this.t_send.Text="";////button1//this.button1.Location=newSystem.Drawing.Point(432,272);="button1";this.button1.Size=newSystem.Drawing.Size(40,23);this.button1.TabIndex=3;this.button1.Text="发送";this.button1.Click+=newSystem.EventHandler(this.button1_Click);////groupBox1//this.groupBox1.Controls.Add(this.button2);this.groupBox1.Controls.Add(this.t_port);this.groupBox1.Controls.Add(bel1);this.groupBox1.Controls.Add(bel3);this.groupBox1.Controls.Add(this.t_rate);this.groupBox1.Controls.Add(bel4);this.groupBox1.Controls.Add(this.t_bytesize);this.groupBox1.Controls.Add(bel5);this.groupBox1.Controls.Add(this.t_stopbyte);this.groupBox1.Controls.Add(bel6);this.groupBox1.Controls.Add(this.t_parity);this.groupBox1.ForeColor=System.Drawing.Color.FromArgb(((System.Byte)(192) ),((System.Byte)(64)),((System.Byte)(0)));this.groupBox1.Location=newSystem.Drawing.Point(8,304);="groupBox1";this.groupBox1.Size=newSystem.Drawing.Size(176,216);this.groupBox1.TabIndex=4;this.groupBox1.TabStop=false;this.groupBox1.Text="参数设置";////button2//this.button2.FlatStyle=System.Windows.Forms.FlatStyle.Popup;this.button2.Location=newSystem.Drawing.Point(80,184);="button2";this.button2.Text="应用设置";this.button2.Click+=newSystem.EventHandler(this.button2_Click);////t_port//this.t_port.BorderStyle=System.Windows.Forms.BorderStyle.FixedSingle; this.t_port.Location=newSystem.Drawing.Point(80,16);this.t_="t_port";this.t_port.Size=newSystem.Drawing.Size(80,21);this.t_port.TabIndex=2;this.t_port.Text="1";////label3//bel3.Location=newSystem.Drawing.Point(16,58);="label3";bel3.Size=newSystem.Drawing.Size(56,16);bel3.TabIndex=1;bel3.Text="波特率:";////t_rate//this.t_rate.BorderStyle=System.Windows.Forms.BorderStyle.FixedSingle; this.t_rate.Location=newSystem.Drawing.Point(80,50);this.t_="t_rate";this.t_rate.Size=newSystem.Drawing.Size(80,21);this.t_rate.TabIndex=2;this.t_rate.Text="9600";////label4//bel4.Location=newSystem.Drawing.Point(16,92);="label4";bel4.Size=newSystem.Drawing.Size(56,16);bel4.TabIndex=1;bel4.Text="数据位:";////t_bytesize//this.t_bytesize.BorderStyle=System.Windows.Forms.BorderStyle.FixedSingle; this.t_bytesize.Location=newSystem.Drawing.Point(80,84);this.t_="t_bytesize";this.t_bytesize.Size=newSystem.Drawing.Size(80,21);this.t_bytesize.Text="8";////label5//bel5.Location=newSystem.Drawing.Point(16,126);="label5";bel5.Size=newSystem.Drawing.Size(56,16);bel5.TabIndex=1;bel5.Text="停止位:";////t_stopbyte//this.t_stopbyte.BorderStyle=System.Windows.Forms.BorderStyle.FixedSingle; this.t_stopbyte.Location=newSystem.Drawing.Point(80,118);this.t_="t_stopbyte";this.t_stopbyte.Size=newSystem.Drawing.Size(80,21);this.t_stopbyte.TabIndex=2;this.t_stopbyte.Text="1";////label6//bel6.Location=newSystem.Drawing.Point(16,160);="label6";bel6.Size=newSystem.Drawing.Size(56,16);bel6.TabIndex=1;bel6.Text="校验位:";////t_parity//this.t_parity.BorderStyle=System.Windows.Forms.BorderStyle.FixedSingle; this.t_parity.Enabled=false;this.t_parity.Location=newSystem.Drawing.Point(80,152);this.t_="t_parity";this.t_parity.Size=newSystem.Drawing.Size(80,21);this.t_parity.TabIndex=2;this.t_parity.Text="0";////button3//this.button3.Location=newSystem.Drawing.Point(472,272);="button3";this.button3.Size=newSystem.Drawing.Size(40,23);this.button3.TabIndex=3;this.button3.Text="清空";this.button3.Click+=newSystem.EventHandler(this.button3_Click);////button4//this.button4.FlatStyle=System.Windows.Forms.FlatStyle.Popup;this.button4.Location=newSystem.Drawing.Point(432,312);="button4";this.button4.Size=newSystem.Drawing.Size(72,23);this.button4.TabIndex=6;this.button4.Text="初始化";////textBox8//this.textBox8.BorderStyle=System.Windows.Forms.BorderStyle.FixedSingle; this.textBox8.ForeColor=System.Drawing.Color.FromArgb(((System.Byte)(255)),( (System.Byte)(128)),((System.Byte)(0)));this.textBox8.Location=newSystem.Drawing.Point(288,312);="textBox8";this.textBox8.Size=newSystem.Drawing.Size(136,21);this.textBox8.TabIndex=7;this.textBox8.Text="";////label7//bel7.Location=newSystem.Drawing.Point(200,320);="label7";bel7.Size=newSystem.Drawing.Size(100,16);bel7.TabIndex=8;bel7.Text="设置本机地址:";////button5//this.button5.FlatStyle=System.Windows.Forms.FlatStyle.Popup;this.button5.Location=newSystem.Drawing.Point(440,504);="button5";this.button5.Size=newSystem.Drawing.Size(64,23);this.button5.TabIndex=9;this.button5.Text="关闭串口";this.button5.Click+=newSystem.EventHandler(this.button5_Click);////Form1//this.AutoScaleBaseSize=newSystem.Drawing.Size(6,14);this.ClientSize=newSystem.Drawing.Size(512,533);this.Controls.Add(this.button5);this.Controls.Add(this.textBox8);this.Controls.Add(bel7);this.Controls.Add(this.button4);this.Controls.Add(this.groupBox1);this.Controls.Add(this.button1);this.Controls.Add(this.t_send);this.Controls.Add(this.msg);this.Controls.Add(bel2);this.Controls.Add(this.button3);="Form1";this.Text="串口通讯(小y设计)";this.Closing+=ponentModel.CancelEventHandler(this.Form1_Clos ing);this.Load+=newSystem.EventHandler(this.Form1_Load);this.groupBox1.ResumeLayout(false);this.ResumeLayout(false);}#endregion///<summary>///应用程序的主入口点。