Bloomberg cheat-sheet - Insead
- 格式:pdf
- 大小:246.53 KB
- 文档页数:2
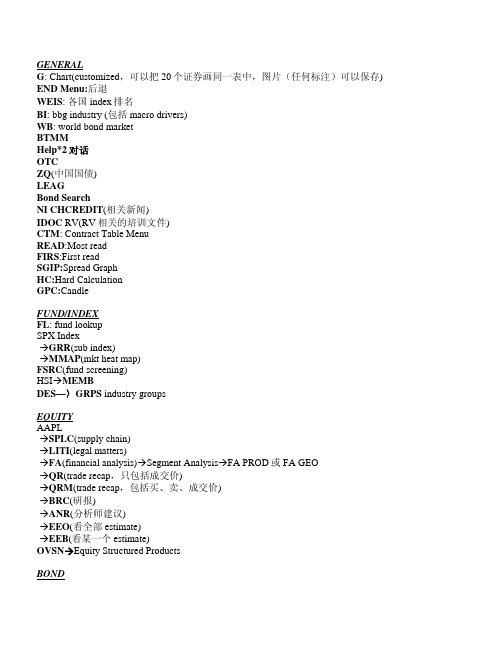
GENERALG: Chart(customized,可以把20个证券画同一表中,图片(任何标注)可以保存) END Menu:后退WEIS: 各国index排名BI: bbg industry (包括macro drivers)WB: world bond marketBTMMHelp*2对话OTCZQ(中国国债)LEAGBond SearchNI CHCREDIT(相关新闻)IDOC RV(RV相关的培训文件)CTM: Contract Table MenuREAD:Most readFIRS:First readSGIP:Spread GraphHC:Hard CalculationGPC:CandleFUND/INDEXFL: fund lookupSPX IndexÆGRR(sub index)ÆMMAP(mkt heat map)FSRC(fund screening)HSIÆMEMBDES—〉GRPS industry groupsEQUITYAAPLÆSPLC(supply chain)ÆLITI(legal matters)ÆFA(financial analysis)ÆSegment AnalysisÆFA PROD或FA GEOÆQR(trade recap,只包括成交价)ÆQRM(trade recap,包括买、卖、成交价)ÆBRC(研报)ÆANR(分析师建议)ÆEEO(看全部estimate)ÆEEB(看某一个estimate)OVSNÆEquity Structured ProductsBONDAAPLÆCPRP(rating)ÆCAST(capital structure)ÆWACCSHANPU CorpÆ选择某个bondÆYAS(yield & spread analysis)BTMMÆ选择某个UST拖到上面ÆGPÆHS(historical spread)CG(curve graph)MMAPRELS(related securities)COMMODITYCTM: Contract Table MenuGCA: Gold 主力合约GC1: 合成ÆHS: Sell Silver Active; Buy GC1MMST: Metal StatÆGFMS:S&DÆUSMEGLCO:Global Commo Price and RateÆWITÆCLA <Cmdty> CTÆChart on CCRVÆ第二条年份改成2010年Æ第三条年份改成2008/06/13MTL: Precious Metal Price and RateCTMÆIMAT industrial meterialCLA <Cmdty> CT: Crude Oil Contract TableCmdtyÆCOSY cmdty studiesÆCopper vs InventoryLMEIÆ库存CPFCÆcmdty forecastingCTOPÆcmdty top newsBMAP:EXCEL下载数据的4种方式1) 600000 CH Equity ÆRV(竞争对手)ÆOutput2) 600000 CH Equity ÆGPÆ右击ÆCopy Data to Clipboard3) 直接把数拉过来,但需要设置:“option”—〉enable drag & drop打勾连接蓬勃终端的数据:1)BBG的Ribbon介绍Æwhat’s newÆexcel add-inÆretrivingÆfunction reference2)如何放入BBG add-inofficeÆexcel optionÆAdd-InÆBLPÆAPIÆoffice toolÆBLPUI.xla3)Real time/historical(注意如果要search中文的话必须把excel语言全改才可以1)不带时间概念2)历史数据(DPDF(dividend-adjusted))3)日内数据 bars 我选时间间隔4)日内数据 ticks 所有数据都导出4)Scenario builder—e.g. VWAP5)Template Library也可以用XLTP在BBG里看到也可以用DAPIÆsample spreadsheet在BBG里看到6)公式(写公式时注意,美金用USD,用USd的话就表示美分了)(所有optional argument写在最后,有两种方式:“DIR=H”或“DIR”, “H”) a.BDP--Point 点数据(包括描述,但不可以是块数据)=BDP(“600000 CH Equity”,……) 记得用双引号b.BDH--Historical可以一串,也可以下载成点数据要rolling的数据的话,end date用“”代替=BDH(…………“dats=h”) hide datesc.BDS—Set=BDS(………………..“cols=1;rows=3”)Ticker Shsz300 indexField Indx_mweight_px7)如何找代码AAPLÆFLDS(find fields,记得在“选项”里把field description勾上)点击某个代码后,如果有ovrd勾选框,就表明可以直接在里面改性质白色Æreal time如果value里面显示“show bulk data”,就说明是块数据,需要用BDS公式。
量化投资必备!10分钟学会Windows下定期自动运行任务获取股票数据在量化投资的过程中,我们经常会遇到定期执行某个任务的需求。
例如在每天股市收盘后,需要定期收集今天的个股数据。
例如币圈中BTC在场外交易的最新价格,我希望每隔1小时能监测并记录一次。
再例如我希望程序每隔5分钟能监测下某个资产的价格,若达到了我的止盈条件就自动卖出。
以上都是定期执行任务的需求场景,如果是每次都手动去运行程序,不仅繁琐,而且会经常忘记。
本篇文章演示在交易时间,每隔1小时自动获取万科这个股票的最新价格,并保存到指定文件中。
希望通过这个案例,让大家学会如何在windows下自动定期运行任务。
使用python获取股票数据首先我们需要想办法获取当前时刻股票的价格,这个在我们的课程中有提过。
现在简单的分享其中部分代码,具体见下方截图:抓取万科股票当前时间价格的代码截图可以看到,只需要6行代码就可以实现这个功能。
我们将上面的代码保存在“获取股票当前时刻数据.py”文件中。
运行一下脚本,会发现在python脚本的文件夹中会出现一个“sz000002.txt”文件。
输出结果为下面的截图。
“sz000002.txt” 文件内容截图另外值得一提的是,这部分代码都是可以分享给大家的。
现在我们已经有办法获取最新的价格了,那么接下来要做的就是在每天股票交易时间里,每隔一小时自动运行一次该函数。
自己每天定期手工运行程序肯定比较麻烦,接下来会介绍如何让程序每天定时自动运行。
使用任务计划程序完成自动化在Windows 10 系统中都有一个自带的应用程序叫做“任务计划程序” (Task Scheduler)。
通过这个程序就可以实现每日定时运行特定程序的功能。
任务计划程序截图1 如何打开任务计划程序首先我们来看看如何打开任务计划程序。
敲击键盘的windows键,然后输入“任务计划程序”。
可以看到出现了下面第二张截图的样子。
键盘上面的windows键输入“任务计划程序”之后的屏幕截图这个时候我们再敲击回车键就可以打开这个程序。
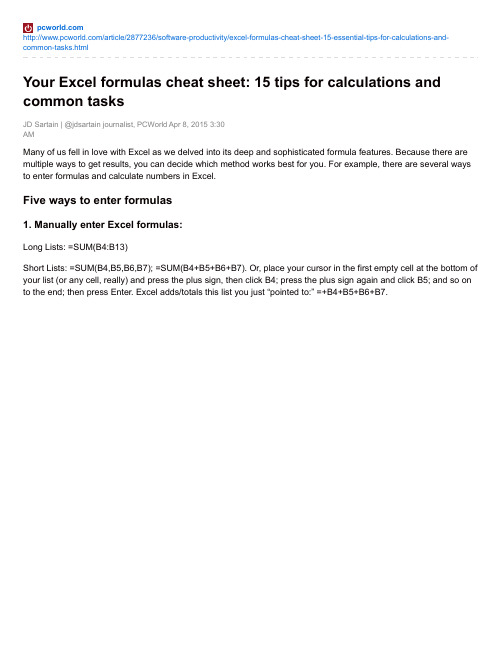
/article/2877236/software-productivity/excel-formulas-cheat-sheet-15-essential-tips-for-calculations-and-2. Click the Insert Function buttonUse the Insert Function button under the Formulas tab to select a function from Excel’s menu list:=COUNT(B4:B13) Counts the numbers in a range (ignores blank/empty cells).=COUNTA(B3:B13) Counts all characters in a range (also ignores blank/empty cells).3. Select a function from a group (Formulas tab)Narrow your search a bit and choose a formula subset for Financial, Logical, or Date/Time, for example.=TODAY() Inserts today’s date.4. The Recently Used buttonClick the Recently Used button to show functions you've used recently. It's a welcome timesaver, especially when wrestling with an extra-hairy spreadsheet.=AVERAGE(B4:B13) adds the list, divides by the number of values, then provides the average.5. Auto functions under the AutoSum buttonAuto functions are my editor's personal favorite, because they're so fast. Select a cell range and a function, and your result appears with no muss or fuss. Here are a few examples:=MAX(B4:B13) returns the highest value in the list.=MIN(B4:B13) returns the lowest value in the list.JD SartainUse the AutoSum button to calculate basic formulas such as SUM, AVERAGE, COUNT, etc.Note: If your cursor is positioned in the empty cell just below your range of numbers, Excel determines that this is the range you want to calculate and automatically highlights the range, or enters the range cell addresses in the corresponding dialog boxes.Bonus tip: With basic formulas, the AutoSum button is the top choice. It’s faster to click AutoSum>SUM (notice that Excel highlights the range for you) and press Enter.Another bonus tip: The quickest way to add/total a list of numbers is to position your cursor at the bottom of the list and press Alt+ = (press the Alt key and hold, press the equal sign, release both keys), then press Enter. Excel highlights the range and totals the column.Five handy formulas for common tasksThe five formulas below may have somewhat inscrutable names, but their functions save time and data entry on a daily basis.Note: Some formulas require you to input the single cell or range address of the values or text you want calculated. When Excel displays the various cell/range dialog boxes, you can either manually enter the cell/range address, or cursor and point to it. Pointing means you click the field box first, then click the corresponding cell over in the worksheet. Repeat this process for formulas that calculate a range of cells (e.g., beginning date, ending date, etc.)1. =DAYSThis is a handy formula to calculate the number of days between two dates (so there’s no worries about how many days are in each month of the range).Example: End Date October 12, 2015 minus Start Date March 31, 2015 = 195 daysFormula: =DAYS(A30,A29)2. =NETWORKDAYSThis similar formula calculates the number of workdays (i.e., a five-day workweek) within a specified timeframe. It also includes an option to subtract the holidays from the total, but this must be entered as a range of dates.Example: Start Date March 31, 2015 minus End Date October 12, 2015 = 140 daysFormula: =NETWORKDAYS(A33,A34)3. =TRIMTRIM is a lifesaver if you’re always importing or pasting text into Excel (such as from a database, website, word processing software, or other text-based program). So often, the imported text is filled with extra spaces scattered throughout the list. TRIM removes the extra spaces in seconds. In this case, just enter the formula once, then copy it down to the end of the list.Example: =TRIM plus the cell address inside parenthesis.Formula: =TRIM(A39)4. =CONCATENATEThis is another keeper if you import a lot of data into Excel. This formula joins (or merges) the contents of two or more fields/cells into one. For example: In databases; dates, times, phone numbers, and other multiple data records are often entered in separate fields, which is a real inconvenience. T o add spaces between words or punctuation between fields, just surround this data with quotation marks.Example: =CONCATENATE plus (month,”space”,day,”comma space”,year) where month, day, and year are cell addresses and the info inside the quotation marks is actually a space and a comma.Formula: For dates enter: =CONCATENATE(E33,” “,F33,”, “,G33)Formula: For phone numbers enter: =CONCATENATE(E37,”-“,F37,”-“,G37)5. =DATEVALUEDATEVALUE converts the above formula into an Excel date, which is necessary if you plan to use this date for calculations. This one is easy: Select DATEVALUE from the formula list. Click the Date_T ext field in the dialog box, click the corresponding cell on the spreadsheet, then click OK, and copy down. The results are Excel serial numbers, so you must choose Format>Format Cells>Number>Date, and then select a format from the list.Formula: =DATEVALUE(H33)Three more formula tipsAs you work with formulas more, keep these bonus tips in mind to avoid confusion:Tip 1: You don’t need another formula to convert formulas to text or numbers. Just copy the range of formulas and then paste as Special>Values. Why bother to convert the formulas to values? Because you can’t move or manipulate the data until it’s converted. Those cells may look like phone numbers, but they’re actually formulas, which cannot be edited as numbers or text.Tip 2: If you use Copy and Paste>Special>Values for dates, the result will be text and cannot be converted to a real date. Dates require the DATEVALUE formula to function as actual dates.Tip 3: Formulas are always displayed in uppercase; however, if you type them in lowercase, Excel converts them to uppercase. Also notice there are no spaces in formulas. If your formula fails, check for spaces and remove them.。

User GuideCopyright and License© 2016 Copyright HP Development Company, L.P.All rights reserved. Reproduction, adaptation, or translation of this material is prohibited without prior written permission of HP, except as allowed under copyright laws.The information contained in this document is subject to change without notice.The only warranties for HP products and services are set forth in the express warranty statements accompanying such products and services. Nothing herein should be construed as constituting an additional warranty. HP shall not be liable for technical or editorial errors or omissions contained herein.Edition 1, 2/2016Trademark CreditsAdobe®, Acrobat®, and PostScript® are trademarks of Adobe Systems Incorporated. Intel® Core™ is a trademark of Intel Corporation in the U.S. and other countries.Java™ is a US trademark of Sun Microsystems, Inc.Microsoft®, Windows®, Windows® XP, and Windows Vista® are U.S. registered trademarks of Microsoft Corporation.UNIX® is a registered trademark of The Open Group.ENERGY STAR and the ENERGY STAR mark are registered trademarks owned by the U.S. Environmental Protection Agency.Table of contents1 Product basics (1)Product features (2)Environmental features (3)Accessibility features (3)Product views (4)Front left view (4)Front right view (5)Back view (5)Cartridge door view (6)Power on and off (7)Turn the product on (7)Manage power (7)Turn the product off (8)Use the control panel (9)Control panel buttons (9)Control panel home screen (10)Control panel dashboard (11)Control panel application folders (11)Control panel shortcuts (12)Help features (12)Printer information (13)Help animations (13)Quiet Mode (14)To turn Quiet Mode on or off from the control panel (14)To turn Quiet Mode on or off from the EWS (14)2 Connect the product (15)Connect the product to a computer or a network (16)To connect the product using a USB cable (16)To connect the product to a network (17)Supported network protocols (17)Connect the product using a wired network (17)ENWW iiiConnect the product using a wireless network (wireless models only) (17)To connect the product to a wireless network using the Wireless SetupWizard (18)To connect the product to a wireless network using WPS (18)To connect the product to a wireless network manually (19)Use Wi-Fi Direct to connect a computer or device to the product (20)To turn on Wi-Fi Direct (20)To print from a wireless-capable mobile device (20)To print from a wireless-capable computer (Windows) (20)To print from a wireless-capable computer (OS X) (20)Install HP printer software for a wireless product already on the network (22)Open the printer software (Windows) (22)Manage network settings (22)View or change network settings (22)Set or change the product password (23)Manually configure TCP/IP parameters from the control panel (23)Link speed and duplex settings (23)3 Printer management and services (25)HP Embedded Web Server (26)About the EWS (26)About cookies (26)Open the EWS (27)Features (27)Home tab (27)Scan tab (28)Fax tab (29)Web Services tab (29)Network tab (29)Tools tab (29)Settings tab (30)Web Services (31)What are Web Services? (31)HP ePrint (31)Print apps (31)Set Up Web Services (31)Use Web Services (32)HP ePrint (32)Print apps (33)Remove Web Services (34)HP Web Jetadmin software (34)iv ENWWProduct security features (34)Security statements (35)Firewall (35)Security settings (36)Firmware updates (36)HP Printer Assistant in the printer software (Windows) (36)Open the HP Printer Assistant (36)Features (36)Connected tab (37)Print, Scan & Fax tab (37)Shop tab (37)Help tab (38)Tools tab (38)Estimated Levels tab (38)HP Utility (OS X) (38)AirPrint™ (OS X) (38)4 Paper and print media (39)Understand paper use (40)Supported media sizes (41)Supported paper and print media sizes (41)Supported envelope sizes (42)Supported card and label sizes (42)Supported photo media sizes (42)Supported paper types and tray capacity (43)Tray 1 (multipurpose) on left side of the product (43)Tray 2 (default tray) and Tray 3 (accessory tray) (44)Configure trays (44)Load media (45)Load Tray 1 (45)Load Tray 2 (46)Load optional Tray 3 (48)Load envelopes (49)Load letterhead or preprinted forms (51)Load the automatic document feeder (52)Load the scanner (53)Tips for selecting and using paper (55)5 Cartridges (56)HP PageWide cartridges (57)HP policy on non-HP cartridges (57)ENWW vManage cartridges (57)Store cartridges (58)Print with General Office mode (58)Print when a cartridge is at estimated end of life (58)Check the estimated cartridge levels (58)Order cartridges (59)Recycle cartridges (60)Replace cartridges (60)Tips for working with cartridges (62)6 Print (63)Print from a computer (64)To print from a computer (Windows) (64)To print from a computer (OS X) (65)To set up printing shortcuts (Windows) (66)To set up printing presets (OS X) (66)To adjust or manage colors (67)Choose a preset color theme for a print job (67)Adjust the color options for a print job manually (67)Match colors to your computer screen (68)Control access to color printing (69)Print from the control panel (69)Print using job storage (69)To enable job storage (69)Disable or enable job storage (Windows) (69)Disable or enable job storage (OS X) (69)To apply job storage to one or all print jobs (70)Apply job storage to one or all print jobs (Windows) (70)Apply job storage to one or all print jobs (OS X) (71)To print a job stored on the printer (71)To delete a job stored on the printer (71)Print from a USB device (72)Print with NFC (72)Print with HP ePrint (72)Print off site by sending an email with the HP ePrint app (32)Print from an on-site computer or mobile device (73)Print with AirPrint (OS X) (73)Tips for print success (74)Cartridge tips (74)Paper loading tips (74)vi ENWW7 Copy and scan (76)Copy (77)Copy settings (77)Adjust lightness or darkness for copies (77)Select a paper tray and paper size for copies (77)Reduce or enlarge a copy (77)Load and copy identification cards (78)Copy photos (79)Load and copy mixed-size originals (80)Copy on both sides automatically (80)Cancel a copy job (80)Scan (81)Scan to a USB drive (81)Scan to a computer (81)To set up scan to computer (81)Set up scanning to a computer (Windows) (82)Set up scanning to a computer (OS X) (82)To scan to a computer from the control panel (82)Scan to email (82)To set up scan to email (82)To scan a document or photo to email (83)Scan a document or photo to email from the control panel (83)Scan a document or photo to email from the printer software (83)To change account settings (83)Scan to a network folder (83)To set up scan to a network folder (84)Set up scan to a network folder in the EWS (84)Set up scan to a network folder in the HP Printer Assistant (84)To scan to a network folder (84)Scan to a network folder from the control panel (84)Scan to a network folder from the printer software (84)Scan to SharePoint (85)To set up scan to SharePoint (85)To scan to SharePoint (85)Scan using HP scanning software (85)Scan using other software (86)To scan from a TWAIN-compliant program (86)To scan from a WIA-compliant program (86)ENWW viiGuidelines for scanning documents as editable text (87)To scan a document to editable text (Windows) (88)To scan documents as editable text (OS X) (89)Tips for copy and scan success (90)8 Fax (91)Set up fax (92)Connect fax to a telephone line (92)Configure fax settings (92)To configure fax settings from the control panel (92)To configure fax settings using the HP Digital Fax Setup Wizard (Windows) (93)Set up HP Digital Fax (93)HP Digital Fax requirements (93)To set up HP Digital Fax (94)Set up HP Digital Fax (Windows) (94)Set up HP Digital Fax (OS X) (94)Set up HP Digital Fax in the EWS (94)To modify HP Digital Fax settings (94)Modify HP Digital Fax settings (Windows) (94)Modify HP Digital Fax settings (OS X) (94)Modify HP Digital Fax settings in the EWS (94)To turn off HP Digital Fax (95)Fax programs, systems, and software (95)Supported fax programs (95)Supported phone services - analog (95)Alternate phone services - digital (95)DSL (95)PBX (95)ISDN (96)VoIP (96)Set fax settings (96)Send-fax settings (96)Set pauses or flash hooks (96)Set a dialing prefix (97)Set tone-dialing or pulse-dialing (97)Set autoredial and the time between redials (97)Set the light/dark setting (98)Set the default resolution (98)Use cover-page templates (99)viii ENWWSet fax forwarding (99)Block or unblock fax numbers (100)Set the number of rings-to-answer (100)Set distinctive ring (101)Use autoreduction for incoming faxes (102)Set the fax sounds volume (102)Set stamp-received faxes (102)Send a fax (102)Send a fax from the control panel (103)Use speed dials and group-dial entries (103)Send a standard fax from the computer (103)Send a fax from the software (104)Send a fax using monitor dialing (105)Send a fax using printer memory (105)Receive a fax (106)Receive a fax manually (106)Fax memory (107)Reprint a fax (107)Delete faxes from memory (107)Use the phone book (107)Create and edit individual speed-dial entries (108)Create and edit group-dial entries (108)Delete speed-dial entries (108)Use reports (108)Print fax confirmation reports (109)Print fax error reports (110)Print and view the fax log (110)Clear the fax log (110)Print the details of the last fax transaction (111)Print a Caller ID Report (111)View the Call History (111)9 Solve problems (112)Problem-solving checklist (113)Check that the product power is on (113)Check the control panel for error messages (113)Test print functionality (113)Test copy functionality (114)Test the fax-sending functionality (114)Test the fax-receiving functionality (114)ENWW ixTry sending a print job from a computer (114)Test the plug-and-print USB functionality (114)Factors that affect product performance (114)Information pages (115)Factory-set defaults (116)Cleaning routines (116)Clean the printhead (117)Clean the scanner glass strip and platen (117)Clean the document feeder pick rollers and separation pad (118)Clean the touch screen (118)Jams and paper-feed issues (119)The product does not pick up paper (119)The product picks up multiple sheets of paper (119)Prevent paper jams (119)Clear jams (120)Jam locations (120)Clear jams from the document feeder (121)Clear jams in Tray 1 (multipurpose tray) (122)Clear jams in Tray 2 (122)Clear jams in optional Tray 3 (123)Clear jams in the left door (124)Clear jams in the output bin (125)Clear jams in the duplexer (126)Cartridge issues (127)Refilled or remanufactured cartridges (127)Interpret control panel messages for cartridges (127)Cartridge Depleted (127)Cartridge Low (128)Cartridge Very Low (128)Counterfeit or used [color] cartridge installed (128)Do not use SETUP cartridges (128)Genuine HP cartridge installed (128)Incompatible [color] (129)Incompatible cartridges (129)Install [color] cartridge (129)Non-HP cartridges installed (129)Printer Failure (130)Problem with Print System (130)Problem with Printer Preparation (130)Problem with SETUP cartridges (130)Use SETUP cartridges (130)x ENWWUsed [color] installed (131)Printing issues (131)The product does not print (131)The product prints slowly (132)Plug-and-print USB issues (132)The Memory Device Options menu does not open when you insert the USBaccessory (132)The file does not print from the USB storage device (132)The file that you want to print is not listed in the Memory Device Options menu (133)Improve print quality (133)Check for genuine HP cartridges (133)Use paper that meets HP specifications (133)Use the correct paper type setting in the printer driver (134)Change the paper type and size setting (Windows) (134)Change the paper type and size setting (OS X) (134)Use the printer driver that best meets your printing needs (134)Align the printhead (135)Print a print-quality report (135)Scan issues (135)Fax issues (136)Fax troubleshooting checklist (136)Change error correction and fax speed (137)Set the fax-error-correction mode (137)Change the fax speed (137)Fax logs and reports (137)Print individual fax reports (137)Set the fax error report (138)Fax error messages (138)Communication error. (138)Document feeder door is open. Canceled fax. (139)Fax is busy. Canceled send. (139)Fax is busy. Redial pending. (139)Fax receive error. (140)Fax Send error. (140)Fax storage is full. Canceling the fax receive. (141)Fax storage is full. Canceling the fax send. (141)No dial tone. (141)No fax answer. Canceled send. (142)No fax answer. Redial pending. (142)No fax detected. (142)Solve problems sending faxes (143)ENWW xiAn error message displays on the control panel (143)Document feeder paper jam (143)Scanner error (143)The control panel displays a Ready message with no attempt to send the fax. (143)The control panel displays the message "Receiving Page 1" and does not progressbeyond that message (144)Faxes can be received, but not sent (144)Unable to use fax functions from the control panel (144)Unable to use speed dials (144)Unable to use group dials (144)Receive a recorded error message from the phone company when trying to senda fax (145)Unable to send a fax when a phone is connected to the product (145)Solve problems receiving faxes (145)An error message displays on the control panel (145)The fax does not respond (145)Voice mail is available on the fax line (145)The product is connected to a DSL phone service (146)The product uses a fax over IP or VoIP phone service (146)Sender receives a busy signal (146)A handset is connected to the product (146)A phone line splitter is being used (146)Cannot send or receive a fax on a PBX line (146)Solve general fax problems (146)Faxes are sending slowly (146)Fax quality is poor (147)Fax cuts off or prints on two pages (147)Connectivity issues (147)Solve USB direct-connect problems (147)Solve network problems (148)Poor physical connection (148)The computer is using the incorrect IP address for the product (148)The computer is unable to communicate with the product (148)The product is using incorrect link and duplex settings for the network (149)New software programs might be causing compatibility problems (149)The computer or workstation might be set up incorrectly (149)The product is disabled, or other network settings are incorrect (149)Wireless network issues (149)Wireless connectivity checklist (149)The product does not print, and the computer has a third-party firewall installed (150)The wireless connection does not work after moving the wireless router or product (150)xii ENWWCannot connect more computers to the wireless product (150)The wireless product loses communication when connected to a VPN (151)The network does not appear in the wireless networks list (151)The wireless network is not functioning (151)Product software issues (Windows) (151)Product software issues (OS X) (153)The printer driver is not listed in the Print & Scan list (153)The product name does not appear in the product list in the Print & Scan list (153)The printer driver does not automatically set up the selected product in the Print & Scan list (153)A print job was not sent to the product that you wanted (153)When connected with a USB cable, the product does not appear in the Print & Scan list afterthe driver is selected. (153)You are using a generic printer driver when using a USB connection (154)10 Service and support (155)Customer support (156)HP limited warranty statement (157)UK, Ireland, and Malta (158)Austria, Belgium, Germany, and Luxemburg (158)Belgium, France, and Luxemburg (159)Italy (160)Spain (160)Denmark (161)Norway (161)Sweden (161)Portugal (162)Greece and Cyprus (162)Hungary (162)Czech Republic (163)Slovakia (163)Poland (163)Bulgaria (164)Romania (164)Belgium and the Netherlands (164)Finland (165)Slovenia (165)Croatia (165)Latvia (165)Lithuania (166)Estonia (166)Russia (166)ENWW xiiiAppendix A Technical information (167)Product specifications (168)Print specifications (168)Physical specifications (168)Power consumption and electrical specifications (168)Acoustic emission specifications (168)Environmental specifications (168)Environmental product stewardship program (170)Protecting the environment (171)Ozone production (171)Power consumption (171)European Union Commission Regulation 1275/2008 (171)Paper (171)HP PageWide printing supplies (171)Plastics (171)Electronic hardware recycling (172)Material restrictions (172)General battery information (172)Battery disposal in Taiwan (172)California Perchlorate Material Notice (172)EU Battery Directive (172)Battery notice for Brazil (173)Chemical substances (173)EPEAT (173)Disposal of waste equipment by users (173)Toxic and hazardous substance table (China) (174)Restriction on hazardous substances statement (Turkey) (174)Restriction on hazardous substances statement (Ukraine) (174)Restriction of hazardous substance statement (India) (174)China energy label for printer, fax, and copier (175)China SEPA Eco Label user information (175)Regulatory information (176)Regulatory notices (176)Regulatory model identification number (176)FCC statement (176)VCCI statement (Japan) (177)Power cord instructions (177)Power cord statement (Japan) (177)EMC statement (Korea) (177)Visual display workplaces statement for Germany (177)European Union Regulatory Notice (178)xiv ENWWEuropean Union Regulatory Notice (178)Wireless models only (178)Models with fax capability only (178)Additional statements for telecom (fax) products (179)New Zealand telecom statements (179)Additional FCC statement for telecom products (US) (179)Industry Canada CS-03 requirements (180)Notice to users of the Canadian telephone network (181)Australia wired fax statement (181)Notice to users of the German telephone network (181)Additional statements for wireless products (182)Exposure to radio frequency radiation (182)Notice to users in Brazil (182)Canadian statements (182)Japan statement (183)Notice to users in Korea (183)Taiwan statement (183)Mexico statement (183)Index (184)ENWW xvxvi ENWW1Product basics●Product features●Product views●Power on and off●Use the control panel●Quiet ModeENWW1Product featuresPageWide Pro MFP 477dnD3Q19A, D3Q19B, D3Q19C,D3Q19D Tray capacity (75 GSM or 20–lb Bond paper)●Tray 1: 50 sheets ●Tray 2: 500 sheets ●Optional Tray 3: 500 sheets ●Automatic Document Feeder(ADF): 50 sheets●Standard output bin: 300sheetsPrint ●Simplex speeds up to 40 pagesper minute (ppm) for both color and black with Professional quality●Duplex speeds up to 21 ppmfor both color and black with Professional quality●Up to 55 ppm in General Officemode●Walkup Plug-and-Print USBDevice port●Walkup printing of MS Officedocuments Copy ●Simplex speeds up to 40 ppm in black and color ●Single-pass, two-sided copying for speeds up to 26 ppm in black and color ●50-sheet ADF supports page sizes up to 356 mm (14.0 in) in length and 216 mm (8.5 in) in width Scan●Duplex speeds up to 26 ppm for both color and black ●Scan to walkup USB device, email address, network folder, or SharePoint site ●Glass supports page sizes up to 356 mm (14.0 in) in length and up to 216 mm (8.5 in) in width ●HP software enables scanning a document to a file that can be edited ●Compatible with TWAIN, WIA, and WS-Scan programs Fax●Fax to email address ornetwork folder●Fax from walkup control panelor from program on connected computer●Fax archive, fax log, junk-faxblocking, non-volatile fax memory, fax redirect featureConnectivity ●802.3 LAN (10/100) Ethernet port ●Host USB Type A and Type B ports (back)●USB 2.0 Device port (front)PageWide Pro MFP 477dw D3Q20A, D3Q20B, D3Q20C, D3Q20D Has the same features as the PageWide Pro MFP 477dn, and includes the following:●Embedded wireless capability ●802.11n 5GHz dual bandsupport●HP ePrint—send documents tothe product email address for printing●HP Wireless Direct support ●NFC-enabled (Near FieldCommunications); walkup printing from smart phones and tablets●Scan to smart phone 2Chapter 1 Product basics ENWWEnvironmental featuresFeature Environmental benefitDuplex printing Automatic duplex printing is available on all models of HP PageWide Pro MFP477dn/dw series. Duplex printing saves the environment and saves you money.Print multiple pages per sheet Save paper by printing two or more pages of a document side-by-side on onesheet of paper. Access this feature through the printer driver.Copies multiple pages per sheet Save paper by copying two pages of an original document side-by-side on onesheet of paper.Recycling Reduce waste by using recycled paper.Recycle cartridges by using the HP Planet Partners return process.Energy savings Sleep modes and timer options enable this product to quickly go into reducedpower states when not printing, thus saving energy. Accessibility featuresThe product includes several features that aid users with limited vision, hearing, dexterity or strength.●Online user guide that is compatible with text screen-readers.●Cartridges can be installed and removed using one hand.●All doors and covers can be opened using one hand.ENWW Product features3Product views●Front left view●Front right view●Back view●Cartridge door viewFront left viewLabel Description1USB device connection port2Cartridge door3Tray 1 extension4Tray 15Power button6Tray 2–main paper tray7Control panel8Scanner glass4Chapter 1 Product basics ENWWFront right viewLabel Description1Automatic document feeder (ADF) cover2Main output door3ADF paper guides4ADF loading area5ADF output bin6ADF output bin stop7Main output bin stop8Main output binBack viewLabel Description1Ethernet connection port2Fax connection ports3USB Type A and USB Type B ports4Power cord connectionENWW Product views5Label Description5Left door6DuplexerCartridge door viewLabel Description1Cartridge slots2Product serial number and product number3Cartridge part numbers6Chapter 1 Product basics ENWWPower on and offNOTICE:To prevent damage to the product, use only the power cord that is provided with the product.●Turn the product on●Manage power●Turn the product offTurn the product on1.Connect the power cord that is provided with the product to the connection port on the back of theproduct.2.Connect the power cord to a wall outlet with an adequate voltage rating.NOTE:Make sure that your power source is adequate for the product voltage rating. The product useseither 100-240 Vac or 200-240 Vac and 50/60 Hz.3.Press and release the power button on the front of the product.Manage powerHP PageWide Pro MFP 477dn/dw series printers include power-management features that can help reducepower consumption and save energy.●Sleep Mode puts the product in a reduced power-consumption state if it has been idle for a specificlength of time. You can set the length of time before the product enters Sleep Mode from the controlpanel.●Schedule On/Off enables you to turn the product on or off automatically at days and time that you setfrom the control panel. For example, you can set the product to turn off at 6 p.m. on Monday throughFriday.Set the Sleep Mode time1.Open the control panel dashboard (swipe the dashboard tab at the top of any screen downward, ortouch the dashboard area on the home screen).2.On the control panel dashboard, touch .ENWW Power on and off73.Touch Power Management, and then touch Sleep Mode.4.Select one of the time-interval options.The product switches into a reduced power-consumption state when it has been idle for the amount of timethat you select.Schedule the product to turn on or off1.Open the control panel dashboard (swipe the dashboard tab at the top of any screen downward, ortouch the dashboard area on the home screen).2.On the control panel dashboard, touch .3.Touch Power Management, and then touch Schedule Printer On/Off.4.Turn the Schedule On or Schedule Off option on.5.Select the Schedule On or Schedule Off options at the bottom of the screen, and then select the day andtime that you want to schedule.The product switches on or off at the time you select on the day you select.NOTE:The product cannot receive faxes when it is turned off. Faxes sent during a scheduled off interval willprint when the product is turned on.Turn the product offNOTICE:Do not turn off the product if a cartridge is missing. Damage to the product can result.▲Press and release the power button on the front of the product to turn off your HP PageWide Pro MFP 477dn/dw series printer.A warning message appears on the control panel if you attempt to turn the product off when one ormore cartridges are missing.NOTICE:To prevent print-quality problems, turn off the product by using the power button on the frontonly. Do not unplug the product, turn off the powerstrip, or use any other method.8Chapter 1 Product basics ENWWUse the control panel●Control panel buttons●Control panel home screen●Control panel dashboard●Control panel application folders●Control panel shortcuts●Help featuresNOTE:The small text on the control panel is not designed for prolonged viewing.Control panel buttonsButtons and indicator lights on the control panel of HP PageWide Pro MFP 477dn/dw series printers appear litwhen their function is available, and are darkened if their function is not available.1Home button.Touch to view the control panel home screen.2Wireless network indicator.Solid blue when the product is connected to a wireless network. Blinks when the product is searching for awireless connection. Off when the product is connected to a wired network or by a USB cable.3NFC (Near Field Communications) indicator.The product can be enabled for walkup printing from tablets and smart phones.4Back or Cancel button.Touch to return to the previous screen, or to cancel the current process.5Help button.Touch to view the Help menu options.ENWW Use the control panel9。

利驰报价ExWinner软件使用说明书——版本概述利驰报价ExWinner软件是一款专业的电气报价软件,是利驰软件基于excel平台,采用云计算技术开发的一款免费的电气成套设备报价软件。
利驰报价ExWinner软件易安装、上手快。
拥有1000多万条元件数据,软件及元件库持续更新,永久免费。
名词解释1.报价工程结构报价工程结构:包含工程、分类、屏柜三级类别,依次为包含关系,如下图所示。
2.工程文件的组成工程文件以标准excel格式存储。
分为:工程信息、分类两个类型的sheet(工作表)。
1)工程信息sheet包含:工程的详细信息及分类汇总表。
2)分类sheet包含:屏柜汇总表及屏柜分项表。
分类汇总表:本报价工程(项目)中所有分类的集合。
在“工程信息sheet”下方,如图所示:屏柜汇总表:本分类所有屏柜、箱体及其他费用的集合。
在“分类sheet”顶部,如图所示:屏柜分项表:本屏柜所有元件材料及其他费用等的集合。
在“分类sheet”的“屏柜汇总”下方,如图所示:安装1.系统要求(1)硬件:1) CPU:500MHz或更快的处理器;2) 内存:256MB及以上;3) 硬盘空间:1GB及以上(Office安装及程序使用产生数据等需占用,本程序≤120MB);4) 显示器:1024x768 或更高分辨率的显示器;5) 百兆网卡。
(2)操作系统:1) Windows All/(XP,Win7/8,…;Server2003/2008,…);2) Office 2007及以上 + .NET Framework 。
2.安装步骤1.在windows系统电脑中安装.NET 、Office2007(或以上版本);2.执行,根据提示按步骤执行,完成安装。
1. 启动双击桌面快捷或直接打开 excel界面,选择“ExWinner成套报价软件”模块。
如图所示:2. 登录点击,弹出界面:1)“快速体验”登录:一键进入浏览、试用,适用于无利驰账号用户;2)“注册账户”登录(推荐):注册账户拥有自己的私有物料库,私有云。

登录行情系统根据您的网络情况,选择合适的行情服务器(电信或网通),输入用户名及密码,点击“联机”按钮。
注意:此处应填入行情用户名及密码,而不是交易客户号及交易密码。
二、登录交易系统请确认博易大师上部工具栏中的“闪电状”按钮为按下状态,如上图所示。
如未处于该状态,请将其按下。
此时,交易登录界面应该出现在博易大师的底部。
输入交易客户号及交易密码,并点击“登录”按钮。
您还可以根据您的网络情况选择合适的交易服务器(电信或网通)。
注意:<1> 输入交易密码时,为防止恶意软件盗取密码,请使用右侧的随机数字按钮;<2> 如果您点击了“登录”按钮,表明您已了解并接受“免责条款”。
点击“登录”按钮后,将陆续出现“客户信息”确认、“结算单”确认等提示窗口,请一律按“确认”按钮。
三、开仓登录成功后,将出现如下的交易界面:开仓步骤如下:1.在博易大师的报价、走势图或技术分析图中,切换到您所关注的品种;2.交易界面的“合约”将自动变为您当前关注的品种,“买入”和“卖出”按钮顶部将出现对应的下单价格;3.点击“买入”或“卖出”按钮即可下单;4.如有确认下单的提示框出现,请点击“是”。
提示:1.下单前,您可以修改“报价方式”、“价格”及“数量”。
报价方式分“限价”和“市价”;2.“限价”委托且价格为“当前价”时,如果买入则使用卖一价下单,如果卖出则使用买一价下单;3.“限价”委托时如需指定价格,请删除“当前价”字样并填入价格;如需恢复“当前价”,删除填入的价格即可;4.如不希望出现确认下单的提示框,请勾选“一键下单”选项。
5.点击“复位”按钮,交易界面将恢复为“开仓”,数量恢复为该合约的默认手数,价格恢复为“限价”、“当前价”。
平仓步骤如下:1.点选交易界面左侧列表的“交易”项;2.在持仓列表中,以鼠标左键双击需要平仓的合约;3.此时交易界面将自动填入“合约”、“平仓”(或“平今”)以及“数量”。
并且鼠标将自动定位至“买入”或“卖出”按钮上;4.鼠标自动定位至相应按钮后,直接点击鼠标左键下单;5.如有确认下单的提示框出现,请点击“是”。

Real Python:Python3Cheat SheetContents1Introduction22Primitives3 Numbers (3)Strings (5)Booleans (7)3Collections9 Lists (9)Dictionaries (11)4Control Statements12 IF Statements (12)Loops (14)5Functions151Chapter1IntroductionPython is a beautiful language.It’s easy to learn and fun,and its syntax is simple yet ele-gant.Python is a popular choice for beginners,yet still powerful enough to back some of the world’s most popular products and applications from companies like NASA,Google,Mozilla, Cisco,Microsoft,and Instagram,among others.Whatever the goal,Python’s design makes the programming experience feel almost as natural as writing in English.Check out Real Python to learn more about Python and web development.Email your ques-tions or feedback to*******************.2Chapter2PrimitivesNumbersPython has integers and floats.Integers are simply whole numbers,like314,500,and716. Floats,meanwhile,are fractional numbers like3.14,2.867,76.88887.You can use the type method to check the value of an object.1>>>type(3)2<class'int'>3>>>type(3.14)4<class'float'>5>>>pi=3.146>>>type(pi)7<class'float'>In the last example,pi is the variable name,while3.14is the value.You can use the basic mathematical operators:1>>>3+3263>>>3-3405>>>3/361.07>>>3/2381.59>>>3*310911>>>3**3122713>>>num=314>>>num=num-115>>>print(num)16217>>>num=num+1018>>>print(num)191220>>>num+=1021>>>print(num)222223>>>num-=1224>>>print(num)251026>>>num*=1027>>>num28100There’s also a special operator called modulus,%,that returns the remainder after integer division.1>>>10%321One common use of modulus is determining if a number is divisible by another number.For example,we know that a number is even if it’s divided by2and the remainder is0.1>>>10%2203>>>12%240Finally,make sure to use parentheses to enforce precedence.1>>>(2+3)*52253>>>2+3*54174StringsStrings are used quite often in Python.Strings,are just that,a string of characters-which s anything you can type on the keyboard in one keystroke,like a letter,a number,or a back-slash.Python recognizes single and double quotes as the same thing,the beginning and end of the strings.1>>>"string list"2'string list'3>>>'string list'4'string list'What if you have a quote in the middle of the string?Python needs help to recognize quotes as part of the English language and not as part of the Python language.1>>>"I’cant do that"2'I’cant do that'3>>>"He said\"no\"to me"4'He said"no"to me'Now you can also join(concatenate)strings with use of variables as well.1>>>a="first"2>>>b="last"3>>>a+b4'firstlast'If you want a space in between,you can change a to the word with a space after.1>>>a="first"2>>>a+b3'first last'There are different string methods for you to choose from as well-like upper(),lower(), replace(),and count().upper()does just what it sounds like-changes your string to all uppercase letters.1>>>str='woah!'2>>>str.upper()3'WOAH!'Can you guess what lower()does?51>>>str='WOAH!'2>>>str.lower()3'woah!'replace()allows you to replace any character with another character.1>>>str='rule'2>>>str.replace('r','m')3'mule'Finally,count()lets you know how many times a certain character appears in the string.1>>>number_list=['one','two','one','two','two']2>>>number_list.count('two')33You can also format/create strings with the format()method.1>>>"{0}is a lot of{1}".format("Python","fun!")2'Python is a lot of fun!'6BooleansBoolean values are simply True or False.Check to see if a value is equal to another value with two equal signs.1>>>10==102True3>>>10==114False5>>>"jack"=="jack"6True7>>>"jack"=="jake"8FalseTo check for inequality use!=.1>>>10!=102False3>>>10!=114True5>>>"jack"!="jack"6False7>>>"jack"!="jake"8TrueYou can also test for>,<,>=,and<=.1>>>10>102False3>>>10<114True5>>>10>=106True7>>>10<=118True9>>>10<=10<010False11>>>10<=10<1112True13>>>"jack">"jack"14False715>>>"jack">="jack"16True8Chapter3CollectionsListsLists are containers for holding values.1>>>fruits=['apple','lemon','orange','grape']2>>>fruits3['apple','lemon','orange','grape']To access the elements in the list you can use their associated index value.Just remember that the list starts with0,not1.1>>>fruits[2]‘’2orangeIf the list is long and you need to count from the end you can do that as well.1>>>fruits[-2]‘’2orangeNow,sometimes lists can get long and you want to keep track of how many elements you have in your list.To find this,use the len()function.1>>>len(fruits)24Use append()to add a new element to the end of the list and pop()to remove an element from the end.91>>>fruits.append('blueberry')2>>>fruits3['apple','lemon','orange','grape','blueberry']4>>>fruits.append('tomato')5>>>fruits6['apple','lemon','orange','grape','blueberry','tomato']7>>>fruits.pop()8'tomato'9>>>fruits10['apple','lemon','orange','grape','blueberry']Check to see if a value exists using in the list.1>>>'apple'in fruits2True3>>>'tomato'in fruits4False10DictionariesA dictionary optimizes element lookups.It uses key/value pairs,instead of numbers as place-holders.Each key must have a value,and you can use a key to look up a value.1>>>words={'apple':'red','lemon':'yellow'}2>>>words3{'apple':'red','lemon':'yellow'}4>>>words['apple']5'red'6>>>words['lemon']7'yellow'This will also work with numbers.1>>>dict={'one':1,'two':2}2>>>dict3{'one':1,'two':2}Output all the keys with keys()and all the values with values().1>>>words.keys()2dict_keys(['apple','lemon'])3>>>words.values()4dict_values(['red','yellow'])11Chapter4Control StatementsIF StatementsThe IF statement is used to check if a condition is true.Essentially,if the condition is true,the Python interpreter runs a block of statements called the if-block.If the statement is false,the interpreter skips the if block and processes another block of statements called the else-block.The else clause is optional.Let’s look at two quick examples.1>>>num=202>>>if num==20:3...print('the number is20')4...else:5...print('the number is not20')6...7the number is208>>>num=219>>>if num==20:10...print('the number is20')11...else:12...print('the number is not20')13...14the number is not20You can also add an elif clause to add another condition to check for.1>>>num=21122>>>if num==20:3...print('the number is20')4...elif num>20:5...print('the number is greater than20')6...else:7...print('the number is less than20')8...9the number is greater than2013LoopsThere are2kinds of loops used in Python-the for loop and the while loop.for loops are traditionally used when you have a piece of code which you want to repeat n number of times. They are also commonly used to loop or iterate over lists.1>>>colors=['red','green','blue']2>>>colors3['red','green','blue']4>>>for color in colors:5...print('I love'+color)6...7I love red8I love green9I love bluewhile loops,like the for Loop,are used for repeating sections of code-but unlike a for loop,the while loop continues until a defined condition is met.1>>>num=12>>>num314>>>while num<=5:5...print(num)6...num+=17...819210311412514Chapter5FunctionsFunctions are blocks of reusable code that perform a single task.You use def to define(or create)a new function then you call a function by adding parameters to the function name.1>>def multiply(num1,num2):2...return num1*num23...4>>>multiply(2,2)54You can also set default values for parameters.1>>>def multiply(num1,num2=10):2...return num1*num23...4>>>multiply(2)520Ready to learn more?Visit Real Python to learn Python and web development.Cheers!15。

MONSU SARAH Cheat SheetThe following is a guide to assist with the completion of Event Risk Management Plans through the Monash SARAH Portal. Event Risk Management Plans are designed to help you minimise the risks associated with your events and create a safe environment for all of your members.A SARAH submission is required for every event that you plan to hold. SARAH’s should be submitted at least t wo weeks prior to your event in order to be reviewed and amended if necessary. SARAH’s m ust be approved for an event to run.Accessing SARAHYou can access SARAH by clicking h ere. You must sign in with your student email. If you do not have access, contact the Clubs Coordinator for assistance. Once in SARAH, click on the right most backpack icon titled “Request an Event Risk Management Plan”.This will open the Event Risk Management Plan Register. In this page you can see all of your submitted plans, their reference number, and their status. To create an Event Risk Management Plan, click the New icon at the top of the page.Request an Event Risk Management PlanEvent Risk Management Plan NameThe name of your event. Ensure that you include your club acronym.Event Risk Management Plan DescriptionA detailed description of what will be occurring at your event. Please include:●Number of attendees●Food or drink being served●On or off campus event○If on-campus, list the room number or name●External party involvementEvent Risk Management Plan TypeThis section assists in identifying the scale of your event and therefore the risk that is associated with it. The categories are self-explanatory and no club should ever submit a SARAH with “Research Project” ticked.Revent Risk Management Plan DatesThe dates of your event. If the event will only run on a single day, select the same date for both sections.Event Risk Management Plan ApproverWho will be approving your SARAH submission. Currently this is:Lynette Nye - 0421730732Communications PersonWho will be assisting you with your SARAH submission. Currently this is:Sanjiv Gopal - 0434290129Please RespondYou must tick the box in this section to proceed. By ticking the box, you are agreeing to communicate with both the communications person and your LIRT leader should anything occur and you need assistance.Activity IdentificationIn this section, you will identify the activities taking place at your events and be provided with the minimum requirements for the provision of these activities. In other words, you will indicate what you wish to occur at your event and Monash will provide you with a broad set of controls to minimise the risks associated with this activity.As you select activities that are relevant to your event, you will see them added to the Risk Assessment section. Two activities you m ust add are:●Emergency Preparedness●First aid at urban locationsThese are two activities that you should be aware of no matter what type of event you are organising. To access the risk assessment, click the magnifying glass next to the relevant assessment. P lease note- you will need to have pop ups enabled for this section.Another window will open with a general admin page. If you click Next, you will proceed to the risk assessment. In the first column on the left hand side are the risks associated with the activity. In the second column are the suggested controls to minimise risk.As club leaders, you are required to read and understand all the risks and controls provided in the assessment. Not every control will be possible for you to enact at your event, however it is vital you have the knowledge provided by the risk assessments to help you make decisions during your events.Once you have read the risk assessments, exit out of the window and return to the Identification page. Tick the box next to each risk assessment as you read them. Once you have read and ticked them all, scroll to the bottom of the page to the “Please Respond” section.In order to continue, you must agree to the following: “The Event Risk Management Plan Leader has read and understood each Risk Assessment and will ensure control measures are in place and all participants are aware of the risk.” By ticking this box, you are accepting the responsibility to minimise risk at your event using the information provided by Monash.Person’s Undertaking Event Risk Management PlanEvent Risk Management Plan LeaderThese are your details. Some are auto-populated from your Monash login, however you need to input your Phone Number and Emergency Contact details.First AiderPlease list anyone who will be assisting you in running the event who has a valid First Aid qualification. This is not compulsory, however is beneficial for larger high risk events.ParticipantsHere you must include the details of all the people who will assist you in running the event. This can be other executive committee members or external contacts such as caterers or venue contacts. It is important that you list anyone assisting in the running of the event because you will be able to designate activities that you identified in the previous section to specific participants. This shows that you have thought about the activities occurring at your event and designated someone to be in charge of that area.Event Risk Management Plan Itinerary/Comms PlanEvent Risk Management Plan DetailsThe date and time of your event. If your event is on campus, list the building that your event is being held in.Reporting DetailsThis is if you wish to report to the communications person during your event. You may wish to do this during a camp or excursion, however it is not necessary and most events will not require a Reporting Method.ItineraryOnce you have filled in the details you must click Add to add the stop. If you have an event with multiple destinations, it is important to include all locations in the SARAH as multiple stops throughout the night. This will generate an itinerary for your event that you can follow or pass on to relevant parties.Furthermore, if you have a recurring event you can include the date and time of each recurrence. This way, you only need to submit a single SARAH for multiple events of a similar nature (eg. BBQs, art jams, dance classes, etc).Vehicles & AttachmentsVehiclesAdd the details of any vehicles you may need to utilise during your events (eg. a bus to a campsite).AttachmentsUpload any documentation you feel is necessary and relevant to your event. For example:●Food handling certificate●Responsible service of alcohol●First aid certificate●External venue agreementNotesIn every SARAH, you must include a note that specifies controls that you will be following for each of the activities that you have identified earlier in the SARAH. You should write specifics and include the names of members that will be assisting you in minimising these risks during the event. You should have at least one control for each activity that you have identified.This is the section that provides the most information to the Approver as to how you will be minimising the risk associated with your event. If you do not include enough detail, your event will n ot be approved.Before you submit, make sure you have:●Included your club acronym in the Event Risk Management Plan Name●Listed all activities for your event●Added all stops in your itinerary●Uploaded all relevant documentation●Added a note with relevant controls。

Bloomberg基本使用指南一、Bloomberg终端屏和键盘1. 屏幕标准的Bloomberg终端共有两个外界屏幕,软件有4个操作界面。
我公司上海办公室使用的Bloomberg终端有一个外界屏幕,软件操作界面相同。
2. 键盘Bloomberg目前有传统键盘和新型键盘两种,上海办公室终端的键盘属于新型键盘,除了普通计算机键盘的按键之外,还设置了功能键。
这些功能键分为三种,以色彩区分:红色键是系统功能键,绿色键是行动功能键,黄色键是市场分类键。
下面简要介绍三类功能键的主要用途:(1)红色键——系统功能键Bloomberg键盘上只有两个红色的功能键,分别是<Cancel>和<Default>。
<Cancel>的作用和普通计算机键盘的<Esc>相仿。
<Default>则是Bloomberg特有的功能键,主要作用是登陆账户。
在已经登录到其他账户的Bloomberg界面下,直接单击<Default>,可到达登陆界面,从而登录自己的账户。
登陆上海办公室Bloomberg终端:用户名密码Windows系统 Administrator(默认) 1qaz2wsx Bloomberg系统 CCITICSSH CCITICSSH 关于设定个人账户,有两点需要说明:首先,每人均可以免费申请自己的登陆账号。
个人账户的申请方法很简单,单击<Default>后,选择申请新的个人账户,然后根据系统的提示完成五个申请步骤即可。
其次,申请个人账户的好处主要体现在对Bloomberg软件的个性化的设置上面。
如果个人有特别的使用需要,可以通过个人账户进行设置,这样操作起来更加便捷有效。
(2)绿色键——行动功能键绿色键数量较多,这里介绍几个经常使用的行动功能键:A.<GO>:功能类似于传统键盘<Enter>键。
举例:查找某只股票或软件功能时候,需要在操作屏幕左上角输入字母或数字,输入完成后,则需要单击<GO>从而确认所需要查找的信息。
Bloomberg主要针对股票市场。
启动Bloomberg有四独立的个窗口,每个窗口都可进行独立的工作,但关闭其中一个将导致同时关闭所有窗口。
每台BBT都可以免费申请多个账号,申请时将账号设置为“为他人申请”。
BBT上不同颜色说明:➢黄色框:修改参数➢红色框:工具栏➢白色框:菜单栏,点击后可查看详细信息。
股票市场新闻咨询新闻资讯功能可以直接使用,也可以进入具体公司后,查看该公司的新闻资讯,适合行业分析和基本面分析。
➢公司新闻(CN, company news): 搜索与公司相关的新闻。
进入检索页面后,在选项>高级检索功能下面,可以指定检索的公司,指定的时间段等信息。
公司可以是手动录入的证券代码,也可以是按照一定条件筛选出来的,比如市值,地区等。
➢新闻(N或者NEWS):搜索更加宽泛的新闻,类似于Google/百度的搜索界面,指定关键词后进行搜索。
➢公司申报(CF, company fillings):公司在各个证券市场发布的公告内容。
进入CF后,在高级菜单下面,可以指定检索的公司列表,检索的主题(如年报,季度报告,财报,股东大会信息等等),检索设定好以后,在选项>批量下载中可以将这些公告打包下载,便于后面查阅。
将检索的条件设定好以后,如果以后需要重复使用该条件,可以在已保存的检索功能下,选择保存,下次使用时,利用已保存的检索>加载检索,即可加载保存过的检索。
➢研究报告(BRC或RES):用于查找研究机构的研究报告。
进入研究报告页面后,在高级检索下面,可以指定检索的公司、行业、地区,研究报告的来源;在选项功能下面,可以讲这些研究报告下载,也可以将报告列表下载至excel,便于后面查阅。
保存检索:选项>保存检索,下次使用时可以在自设检索功能里面调取。
公司基本面公司基本在对公司层面进行相似分析很有用。
公司概览➢公司介绍(DES):公司的简介面➢所有权分析(OWN或HDS):查看公司的股东情况。

Bloomberg常用方法使用教程王志民、韩玉锦、孙晓新基本知识1、彭博指令以及代码不区分大小写,查找使用的是联想输入法,最好关键字使用英文检索2、彭博输入栏共分为三种,蓝色是指令功能,黄色是检索功能,红色是设置3、设置方法:ALT + D ——设定——下载设定、程序设定等(公司电脑需要更改设置才能下载文件,注意不要设置到C盘下载,因为没有权限)。
4、证券查找方法:命令框里面输入所要查找的公司,单击回车后,再输入SECF(或者直接点击SECF 证券查找),单击回车后就可以看到所有的报告了。
5、查看分析师报告:命令框里面输入RES 回车后可以看到所有的分析师报告,在105)选项里面选择设立高级检索可以设定筛选的条件,看到自己想看的分析师报告。
6、行业信息数据检索:包括两种方法:A、命令框里面输入BI后再输入想要查找的行业的英文名称,然后点下空格键,可以看到下拉框里面联想到的相关行业数据。
B、命令框里面输入BI后直接回车,再选择你所需要的行业即可。
7、下载公司年报、三季报、招股说明书等各种报告:命令框里面输入所要查找的公司回车后,再输入CF(或者直接点击CF 公司申报)回车后就可以看到所有的报告了。
8、公司财务数据下载:命令框里面输入所要查找的公司回车后,再输入FA(或者直接点击FA 财务分析)回车后就可以看到所有的财务数据了。
9、彭博一打开就是四个屏幕,点击关闭任何一个屏,彭博的其他屏都会关闭,慎点。
10、彭博的股票数据查找一定要把股票的信息写全,比如中国的中信证券的股票,一定要写“600030 CH EQUITY“即包含股票代码、国家、种类三步11、如果Bloomberg机子上开着WIND终端,一定要把它彻底关掉才能使用Bloomberg终端的excel插件。
12、日期格式采用欧美日期格式:mm/dd/yyyyy三大常用使用函数详解:可以直接在excel上批量导出数据。
1、BDH应用上面的公式可以批量导出各种财务数据,非常简单。
This cheat-sheet provides basic instructions on how to successfully navigate anduse the BLOOMBERG PROFESSIONAL ® service.We recommend the essential function codes listed below. Simply type any of these commands, followed by the <Enter> / key to activate the function.GETTING STARTED Navigation from the Bloomberg KeyboardIf you are using your own keyboard and Bloombergprovided keyboard stickers: Press the <Alt> and K buttons simultaneously to display a keyboard image.Press once to log onPress once to log off using your name/pwordEnter any word/phrase & press <HELP> to search our entire database for matches.E.g. A person, company, currency,Press <Menu> once to return to previous screen(equivalent to a ‘back’ key)Press <Page Fwd/Back> to scroll through a multiple page screen. Press <Panel> to rotate among the Bloomberg windows Press <Print> to print 1 page 5 <Print> for 5 page screen. 10 <print> etcMain MenusIn addition to the yellow market sector keys that appear on your keyboard – these function codes will lead you to the main menus of other important market sectorsNRG Bloomberg Energy Service IRSM Interest Rate Swap Menu HYM High YieldCBMU Convertible Bonds MA Mergers & Acquisitions FUND Funds & HoldingsLOAN Syndicated Bank Loan Menu EMKT Emerging Markets ET Electronic Trading LTP OMS Order Management Systems DATA Data Services BLAW Bloomberg LawBINS Bloomberg InsuranceNewsN Main NEWS menuTOP Today’s TOP headlinesTOP DEALToday’s top M&A headlines ** over 40 different TOP categories to choose from!READ Most Popular News NI News Category Search TNI Dual News Category SearchSuggestionsNI READ Weekly summary, most read stories NI US U.S NewsNI HOT Global Hot NewsNI WNEWS Who’s who people newsAV Audio Visual / Multimedia Menu LIVE LIVE Broadcasts & InterviewsNRCSearch for other News wires by name or languageBroad Market Monitors & CalendarsA selection of global market monitors that provide a broad market overview. Many of these screens are customizable to a specific countryWEI Display World Equity Indices WB Display World Govt Bonds WS Display World Swap Rates WCV World Currency ValuesCBQ / IBQ Country / Industry Overviews IM Treasury & Money Market Rates ECST Economist StatisticsWECO Economic Calendars – by country ACDR Earnings Announcement CalendarCommunication ToolsStart to communicate with other Bloomberg customers and send to traditional internet e-mail addresses! Simply type the person’s name (or address) and press <MSG>MSGMMessage System Main MenuSPDL Create an address book of your contacts IB Instant Bloomberg. Real-time chatGRABType GRAB from any screen to send it s a msg attachmentANY BLOOMBERG ANYWHERE SM BERRY Bloomberg for BlackBerry BBFO Voice & Video calls BBSQBloomberg Squawk.Finding InformationEnter any word(s) or phrase & press to search the entire Bloomberg system for matching information. E.g. A person: Alan GreenspanA company: Microsoft A currency: Euro ,Security Analysis EquityE.g. T US <Equity>Once you have found and entered the ticker for the Equity you wish to analyze – now enter any of these basic function codesDES Company DescriptionCN Company News and ResearchMCN Most Popular News for this company MGMT Management Structure & Profiles GPO Price Graph (incl Open, High, Low data) GIP Intraday Price GraphPHDC Institutional and Insider Holders ANR Analyst RecommendationsEM Earnings Matrix (multiple templates)RV Relative Value – Peer Group Analysis FA Financial Analysis TemplatesCustomization & ShortcutsPDFQ Personal defaults – quick set up PDF Personal Defaults – full set up EASY Essential Tips & ShortcutsCustomizable MonitorsCreate a full screen display that will allow you to track aportfolio of securities and drag/drop any of your selectedsecurities into charts, news and analytical windows for further analysisBLP Bloomberg LaunchpadFrom the Launchpad Toolbar click on ‘Tools’ and select ‘Sample Views’ to see ready-made displaysSecurity Analysis BondE.g. BUD 09 <Corp>Once you have found and entered the ticker for the Bond you wish to analyze – now enter any of these basic function codesDES Bond Description GP / GY Price Graph / Yield Graph YAS Yield and Spread CalculatorALLQ Pricing Sources – Transparency of quotes ISSD Issuer/Debt InformationDDIS Debt Distribution Chart & DataCRPR Current and Historical Credit Profile RV Relative Value CRVD Credit Relative ValueCustomer Service & Training Supports24hr Global Help in real-time from the Bloomberg Help Desk. At any time press the <HELP> key twice on your keyboard to make contact with a Help desk representativeTRAIN Links to training materials, Ev ents, Seminars, CERT Enroll in Product CertificationDOCSSearch & print any documentationE.g. DOCS CONVERTIBLESDOCS LATEST DOCS CHEATSHEET。